
There are multiple ways to upload files to B2 Cloud Storage.
 Web Interface:
Please note: The maximum file size you can upload through the B2 Web Interface is 500 MB. If you need to upload larger files, you'll have to use an alternate upload method like the other ones listed below.
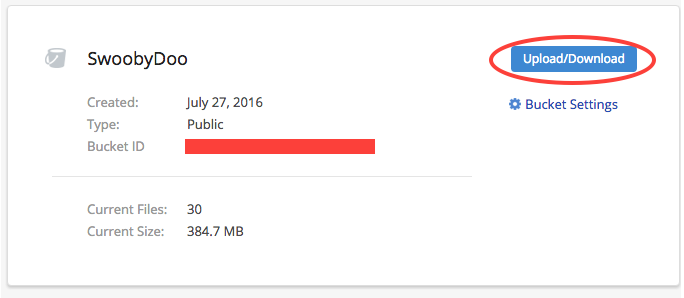
To upload files through the B2 Web Interface, first sign into your account. Then, navigate to the Buckets page and take note of the bucket you wish to upload files to. Click the Upload/Download button for the bucket you wish to upload files to.
Next navigate to the location you'd like to upload files to within the bucket. If you want to upload files to a specific folder, make sure to click on the folder name to access the folder. Next, click the Upload button.

You'll then be prompted with the window below:
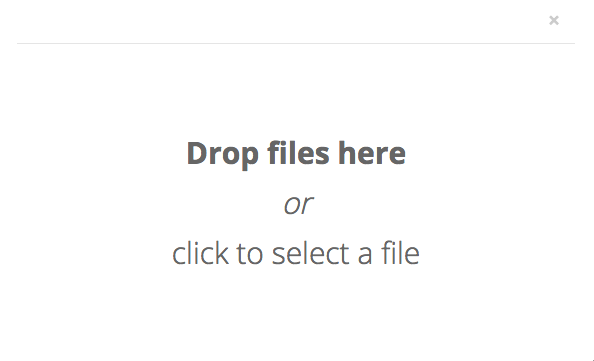
Here, simply drag and drop the files you need to upload, or click to select the files.
 CyberDuck:
Please Note: If you need help with installing Cyberduck, please refer to this article.
Before uploading a file, you will need to create a bucket to place the file in.
Click File, then choose New Folder from the menu.
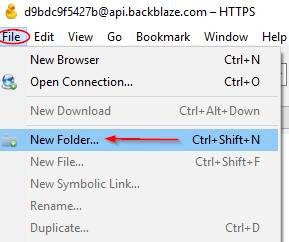
Choose a bucket name and choose whether you would like the bucket to be private or public. Public allows for viewing or downloading the data via a link.
Note: Bucket names are globally unique, so if at first it fails please alter the name and try once more.
Once the bucket has been created it will show in the Cyberduck window.
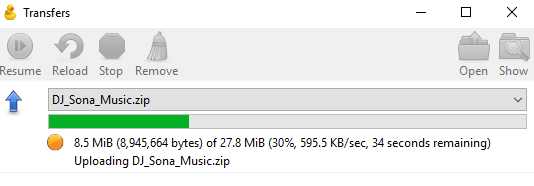
Now just drag a file to the bucket name and it will be uploaded.

Once you drag the file to the folder and release it the upload windows will pop up and tell you the rate and give you a progress bar.
 CloudBerry Explorer:
You can install CloudBerry Explorer from here.
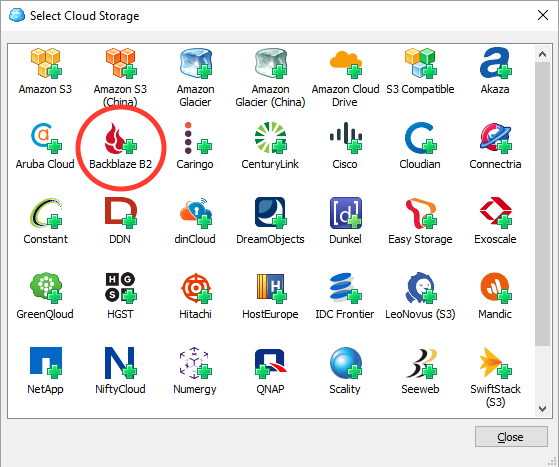
When you launch CloudBerry, you will be prompted to select your Cloud Storage platform. Select 'Backblaze B2' from the list.
Then, assign a name to this back up and enter your Application Key and Account ID. If you need help with finding your Application Key and Account ID, please refer to this help article.
Once you've done this, you will see a screen like the one below:
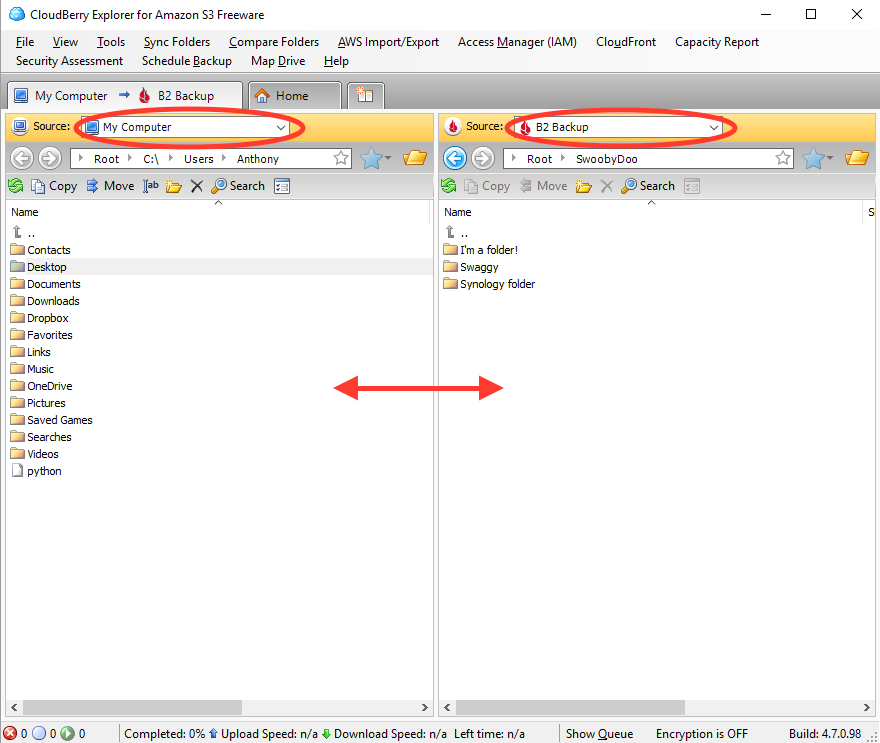
For one 'Source' set this to your computer that you wish to files to B2. On the other 'Source' select the name of the back up you just created. Now, you can simply drag and drop files from one side to the other. If you want to add files from your computer to a specific bucket/folder, simply drag from the computer source into that location for B2 Cloud Storage. You can also take files from your buckets in B2 and place those on your computer.
 DropShare:
You can download/install Dropshare from here.
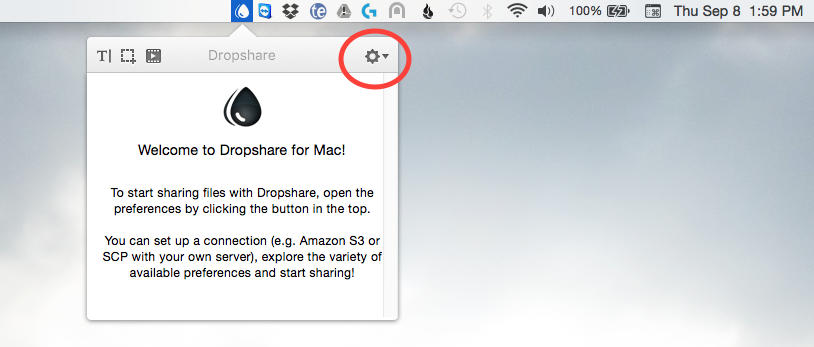
Once you install Dropshare, the Dropshare icon will appear in your menu bar at the top of your screen. To set up B2 Cloud Storage with Dropshare, click on that icon, then the little Settings cog icon and select Preferences.
In Preferences, navigate to the Connections tab. On the right side of the window, click on Backblaze. You will then be prompted to enter your Account ID, Application Key, Bucket Name, and Bucket ID.
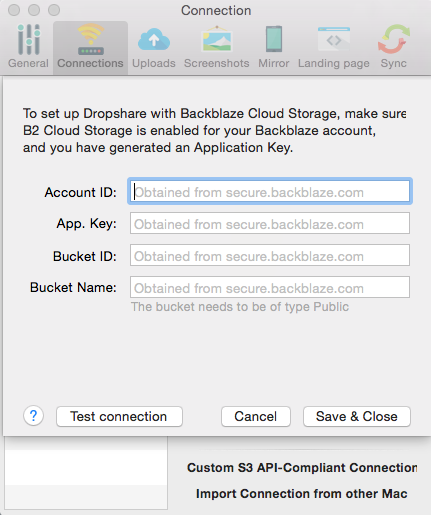
All of this information can be found when you sign into your account and navigate to the Buckets page. Click to 'Show Account ID and Application Key' for the Account ID and Application Key, and look at the listing for the Bucket that you wish to integrate with Dropshare.
Then, click on the icon once more, the Settings cog, and under Active Connection, makes sure that your B2 Cloud Storage set up is selected.

Now, your integration with Dropshare for B2 Cloud Storage is set up! You can simply drag and drop files you wish to upload to your B2 bucket onto the Dropshare icon. For a more in depth look at how to use Dropshare and its many capabilities, check out there User Guide.
Articles in this section
- How to Upload Files to B2 Using Fireball
- How to find Unfinished Large Files in your account
- B2 Mobile App Overview - iOS
- B2 Mobile App Overview - Android
- Getting Started with Instant Recovery in Any Cloud - DR Planning with Veeam and phoenixNAP
- How to setup Vultr Compute with Backblaze B2
- B2 & AWS CLI User Guide
- Guide to using Backblaze Fireball with Iconik Internet Storage Gateway (ISG)
- How to order a Snapshot Drive
- Why do I need to verify my email address to create a public bucket?