The Backblaze Fireball program consists of a Synology NAS with 10GigE add-in card, and hard drives shipped to the customer. The customer sets up the NAS, moves the data to it, and after configuring and testing the configuration for validity, returns the NAS to Backblaze. When Backblaze receives the NAS, the data is moved to B2 storage, verified, and then the data is cleared from the NAS.
Please Take Note:
- Seeding data for use with a third-party backup or archiving tool may require additional steps or preparation.
- In many cases, the data must be loaded onto the Fireball with the integration partner’s tools.
- Some software may have additional requirements. Please check with our integration partner if there is any uncertainty.
- In many cases, the data must be loaded onto the Fireball with the integration partner’s tools.
- Please note the filename restrictions when copying data.
Quick Step Reference
- Unpack and set up the Synology NAS
- Connect the NAS to the network
- Obtain Fireball password and encryption key
- Enter Fireball configuration information
- FOR WINDOWS: Find the listing for Fireball on the local network
- FOR MACINTOSH: Find the listing for Fireball on your local network in Finder
- Mount the share DataForB2
- Copy the data to the Fireball NAS
- Return NAS settings to default, and shut down the NAS
- Uninstall the hard drives, repack and return the Fireball to Backblaze
1. Unpack and set up the Synology NAS
Backblaze ships the Synology NAS without the drives trays installed to better protect both NAS and drives. The disks are installed in trays, and the trays need to be placed into the NAS. The disks can be installed in any order.
Please note: Although the illustration shows only two drive bays, all eight of the included drives must be inserted into the Synology NAS.

2. Connect the NAS to the network
The Fireball NAS must be connected directly to the network. At a small office, this might be a network switch or router. For best results, use a wired connection via ethernet cable.
- The NAS cannot be directly connected to a computer. The NAS supports only a direct network connection via either the 1GigE or 10GigE ports.
- The NAS should be connected to the data source over a wired connection. Wireless (Wi-Fi) connections have limited bandwidth, and data transfer will take much longer than with a direct connection. Also, network traffic to other devices on the wireless network can suffer performance loss when competing for bandwidth with the NAS.
- Connect the power cable to the NAS, plug the NAS in, and then turn it on with the power button.
3. Get your Fireball's password and encryption key
- The username for all Fireballs is always “backblaze”. To obtain this particular Fireball’s password and encryption key:
- Sign into the B2 account to which the data is to be transferred.
- Navigate to Fireball.
- Click the blue ‘i’ icon associated with this Fireball order.

4. Enter your Fireball's password and encryption key on your Fireball
To protect customer data, all data sent to Backblaze on the NAS is encrypted.
- Visit find.synology.com to scan your local network for all Synology devices.
- Double click the Fireball in the list, and your browser should connect directly to the Fireball's web page
- If no Fireballs are detected, double check your network connection with the Fireball, ensuring it's on the same subnet as your computer
- Log in using 'backblaze' as the username and the password you obtained from your B2 account
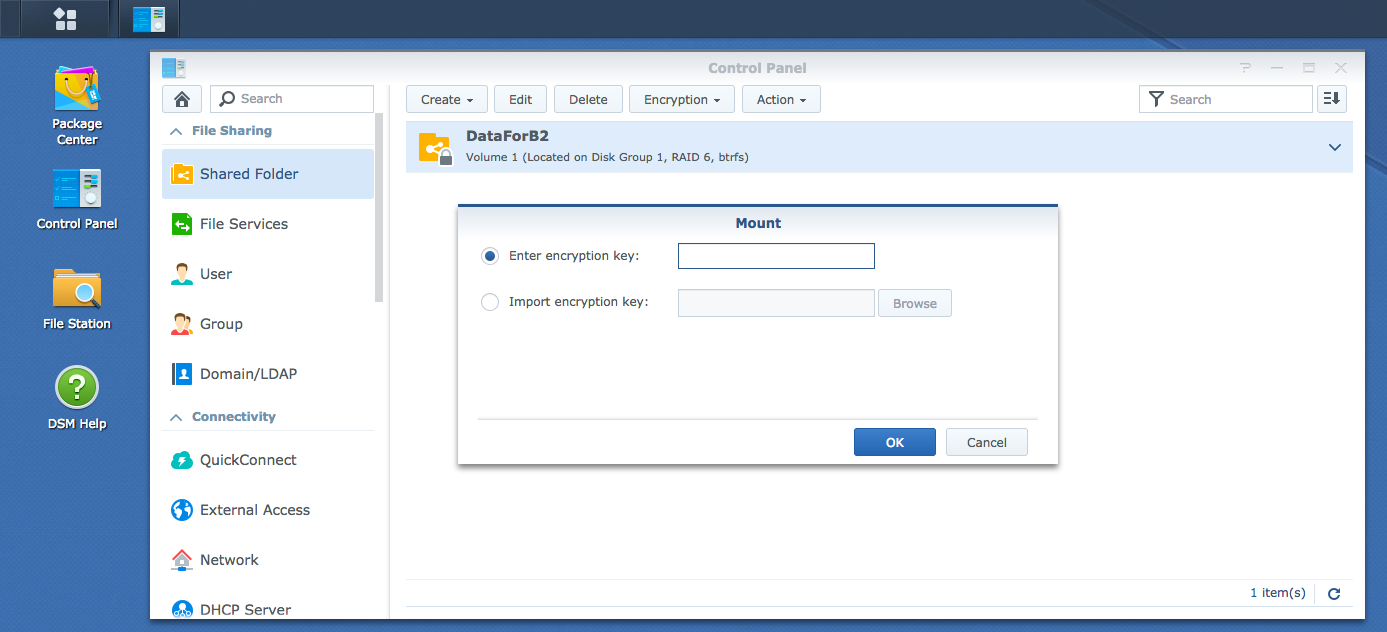
- In the browser window, navigate to ‘Control Panel’
- Navigate to ‘Shared Folder’
- Click once on ‘DataForB2’to select it
- Click on ‘Encryption’
- Choose ‘Mount’
- Enter the encryption key you obtained from your B2 account to mount the encrypted Shared Folder.
- This concludes the browser configuration of the Fireball, so you can close the window
Please Note: The encryption key is kept only in volatile storage (in memory) on the Fireball. Every time the NAS is powered down or reset, this configuration information (the encryption key) must be re-entered.

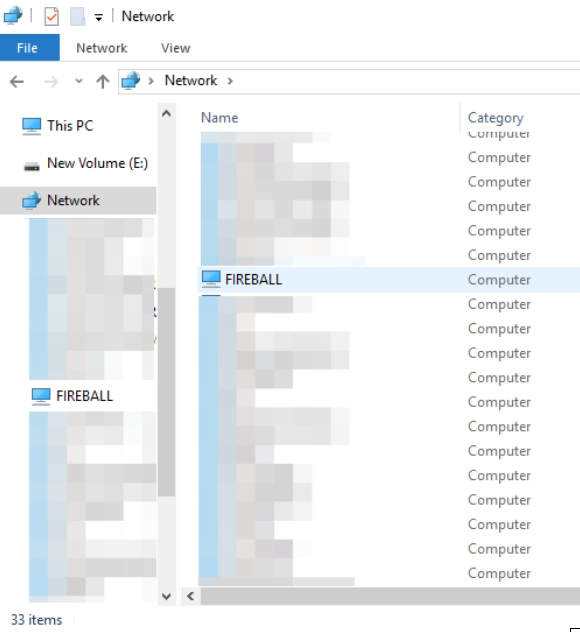
5. FOR WINDOWS: Find the listing for Fireball on the local network
The Fireball should be in the network listing.

If the device is missing from this list, open Windows Explorer and type “\\fireball” into your local network area. This will open a prompt for the Fireball’s name and password.

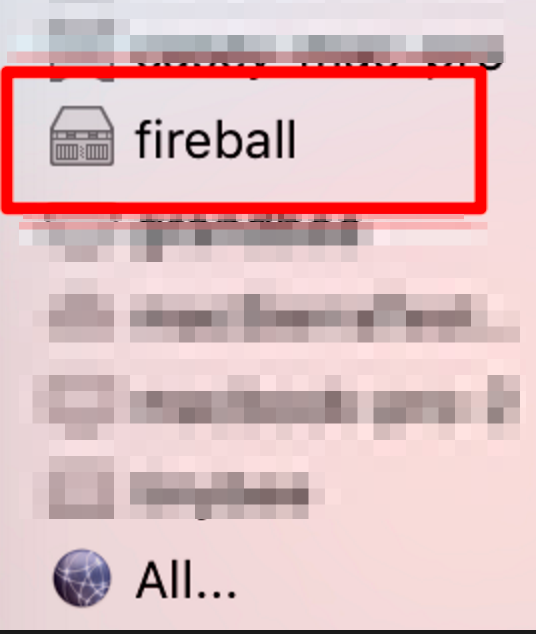
6. FOR MACINTOSH: Find the listing for Fireball on your local network in Finder.
If no such listing appears, add it manually. In finder, click “Go→ Connect to Server” and input ‘fireball’.

Mount the share DataForB2 and enter the username and password provided by Backblaze (Please see the Download and Install Synology Assistant instructions).
8. Copy the data to the Fireball NAS
Copy all the data to the Fireball. Please note there are some restrictions on files sent to B2 storage via Fireball.
- The folder or filepath must not contain any of the following characters:
Character
Name
ASCII
Unicode
*
Asterisk
43
U+002A
:
Colon
58
U+003A
?
Question Mark
63
U+003F
\
Backslash
92
U+005C
/
Slash (Solidus)
47
U+002F
<
Less-than sign
60
U+002C
"
Quotation Mark
34
U+0022
>
Greater-than sign
62
U+003E
|
Vertical Bar
124
U+007C
- The file name starts with any of the following:
Character Sequence
Description
.~
Full stop followed by tilde (squiggle)
._
Full stop followed by low line (underscore)
~
Tilde (squiggle)
Reserved Synology filename
- The file or folder name is or contains any of the following:
Name Description .DS_Store
Icon\rmacOS special files and folders desktop.ini
Desktop.ini
Thumbs.dbWindows special files and folders .SynologyWorkingDirectory
#recycle
sharebin
SynologyCloudSync
cloudsync_encrypt.info
SynoEAStream
SynoResource@eaDir
.synoppsdb
Synology special files and folders .gdoc
.gsheet
.gdraw
.gslidesGoogle docs special files and folders - The folder or file path is longer than 1000 (one thousand) characters
- The file name is longer than 143 (one hundred and forty three) characters
- Folder names must not end with a period or full stop ( . )
- The file is a symlink
- macOS extended attributes like Finder metadata, and Resource Forks will not be synced to B2
- Files that point to online resources may not upload as expected. For example, when Google Docs syncs a file to the desktop, the file created locally is not a working copy of the document but a symbolic link (symlink) to the cloud version. Copying this kind of file does not create a backup of the actual file, just a copy of the link.
9. Return NAS settings to default, and shut down the NAS
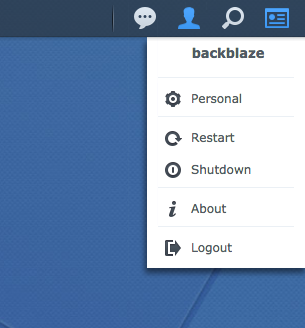
If you have made any changes to the NAS device specific to your environment, such as network settings, set them back to the defaults. This makes uploading the data easier when Backblaze receives the unit. Shut down the NAS from the Synology web interface.

10. Uninstall the hard drives, repack and return the Fireball to Backblaze
To ensure the integrity of the NAS and the hard drives, uninstall the hard drives from the NAS trays, repack the drives and NAS, and send them back to Backblaze. Once received, Backblaze will connect the NAS to an internal network, and complete the file upload at network traffic speeds.
Return the Fireball unit to:
500 Ben Franklin Court
San Mateo, CA 94401
For Integration Partners :
- To simplify and enable testing for our integration partners, Backblaze has configured a virtual Fireball in a VMWare image. Instructions, including a link to the approximately 4GB image, are available here.
Articles in this section
- How to Upload Files to B2 Using Fireball
- How to find Unfinished Large Files in your account
- B2 Mobile App Overview - iOS
- B2 Mobile App Overview - Android
- Getting Started with Instant Recovery in Any Cloud - DR Planning with Veeam and phoenixNAP
- How to setup Vultr Compute with Backblaze B2
- B2 & AWS CLI User Guide
- Guide to using Backblaze Fireball with Iconik Internet Storage Gateway (ISG)
- How to order a Snapshot Drive
- Why do I need to verify my email address to create a public bucket?
