
Introduction
DataIntell is an advanced analytics tool that provides useful insight into your storage. This guide will show you how to connect your B2 Cloud Storage to DataIntell.
Prerequisites
Before beginning this guide, you will need a licensed or trial version of DataIntell running on CentOS 7.
Guide
Add B2 Cloud Storage as a data source
- From the Dashboard, go to the Settings (gear icon) and select Data

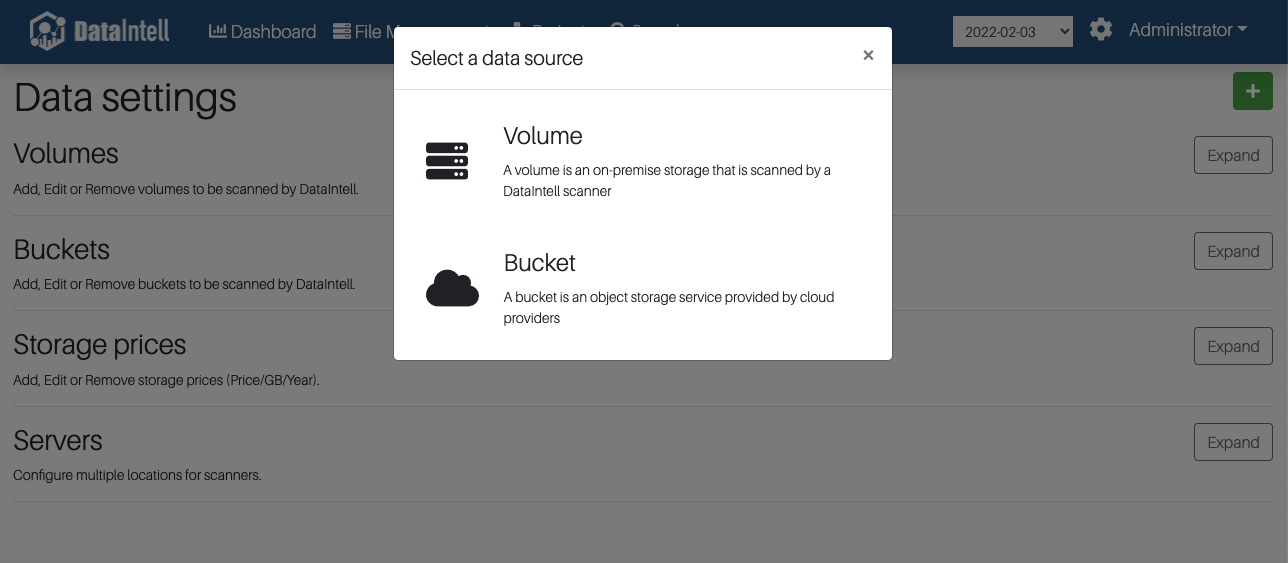
- On the Data settings page, click the green + icon to add a new data source

- Choose Bucket
- Set the Type to Backblaze B2

- Choose Add new credentials

- Enter a friendly name, and your App Key and Key ID
Don’t have these yet? Follow this guide
- Add your region endpoint. This can be found on your Buckets page under endpoint.
Possible regions include us-west-000, us-west-001, us-west-002, us-west-004, and eu-central-003

- Add your bucket and give it a friendly name

- Configure Pricing. You will need to set up your own custom storage price for Backblaze B2. Since DataIntell goes off Yearly $/ GB, use the value $0.06/GB to represent the cost of a single GB / year in B2 Cloud Storage. Finish the setup by clicking Next.

- Click Scan, then you are done

Extra Features
Add B2 Pricing to DataIntell Storage prices
From the Data Settings page: Expand Storage Prices, then add a custom row for B2 Cloud Storage, currency symbol $, Price 0.06. Click the green + to finish. You can now use this custom price at the bucket level.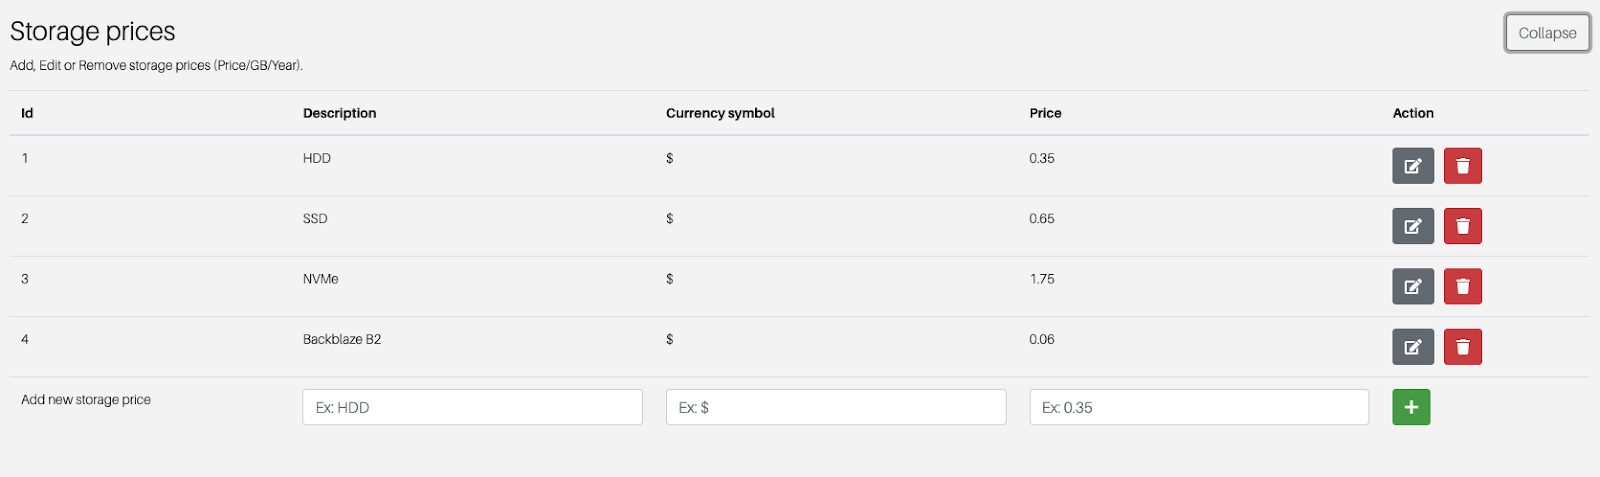
Add a Scan Schedule
The default option will require manual scanning of your bucket. The following steps will show you an example of a generic "All Buckets" scan that runs once per day at noon.
- Click the gear, then select Schedules

- Click the green + to add a new schedule

- Name your schedule, set your Cron values, select your task to scan all buckets

Articles in this section
- Quickstart Guide for Veeam 12 Direct-to-Cloud Backups to Backblaze B2 with Immutability
- Quickstart Guide for Acronis CyberProtect and Backblaze B2 Cloud Storage
- Quickstart guide for SFTPCloud
- Quickstart Guide for Veritas NetBackup and Backblaze B2 Cloud Storage
- Quickstart Guide for Offshoot and Backblaze B2
- Quickstart Guide for Files.com and Backblaze B2 Cloud Storage
- Quickstart Guide for Encoding.com and Backblaze B2 Cloud Storage
- Quickstart Guide for Mountain Duck and B2 Cloud Storage
- Quickstart Guide for Microsoft 365 Backup with MSP360 and Backblaze B2 (Multiple Instances)
- Quickstart Guide for Microsoft 365 Backup with MSP360 and Backblaze B2 (Single Instance)