You have just signed up for our Cloud to Cloud Migration service that allows you to migrate your data from Amazon S3 to Backblaze B2 via our cloud migration partner, Flexify.IO.
Flexify.IO allows you to easily transfer data from your Amazon S3 buckets to Backblaze B2 at cloud native speeds.
Since you signed up using our Data Transfer Migration signup form, we have taken the liberty of creating both a Backblaze B2 account for you as well as a Flexify.IO account.
This guide will walk you through how to get started with a migration.
Step 1: Log into your Backblaze B2 account using the credentials you used when signing up.
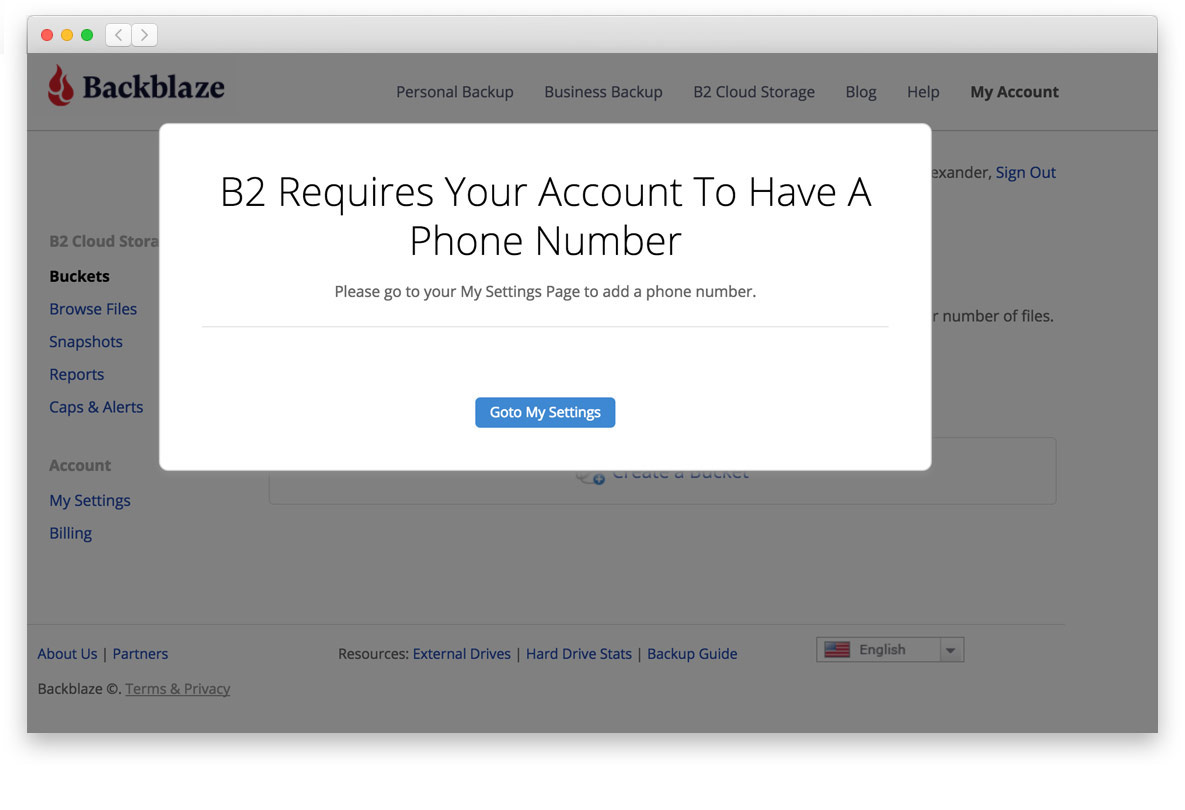
Upon logging into your account, you’ll automatically be prompted to go to My Settings to set up a phone number for your account. The mobile phone number you enter MUST be able to receive SMS messages.
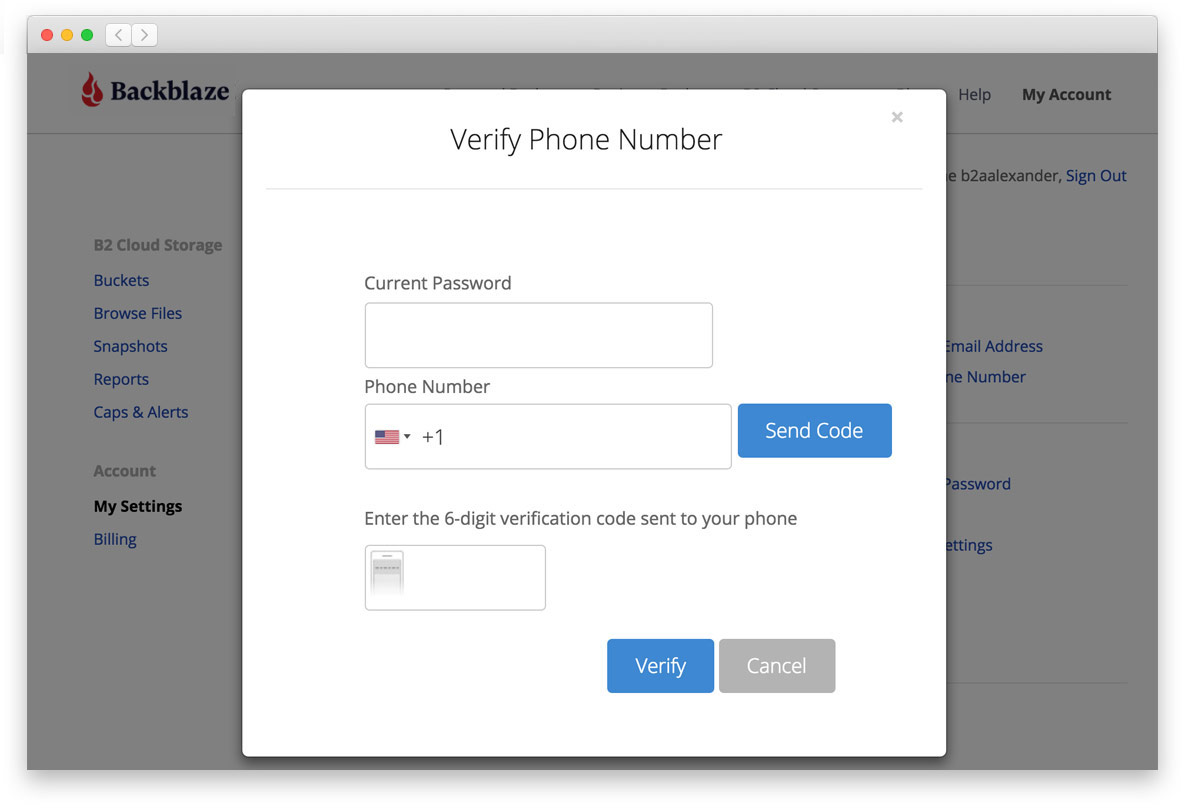
2. Once in the My Settings area, you’ll need to enter your Backblaze account password and the mobile phone number (remember - it must support SMS messages!). Then, click Send Code. Once you receive the 6 digit code on your mobile phone, type it into the verification field and click to Verify.
You can now create your Application Key and Key ID that you will use in your Flexify.IO account.
3. Click on App Keys and then click on the link that reads 'Add A New Application Key’.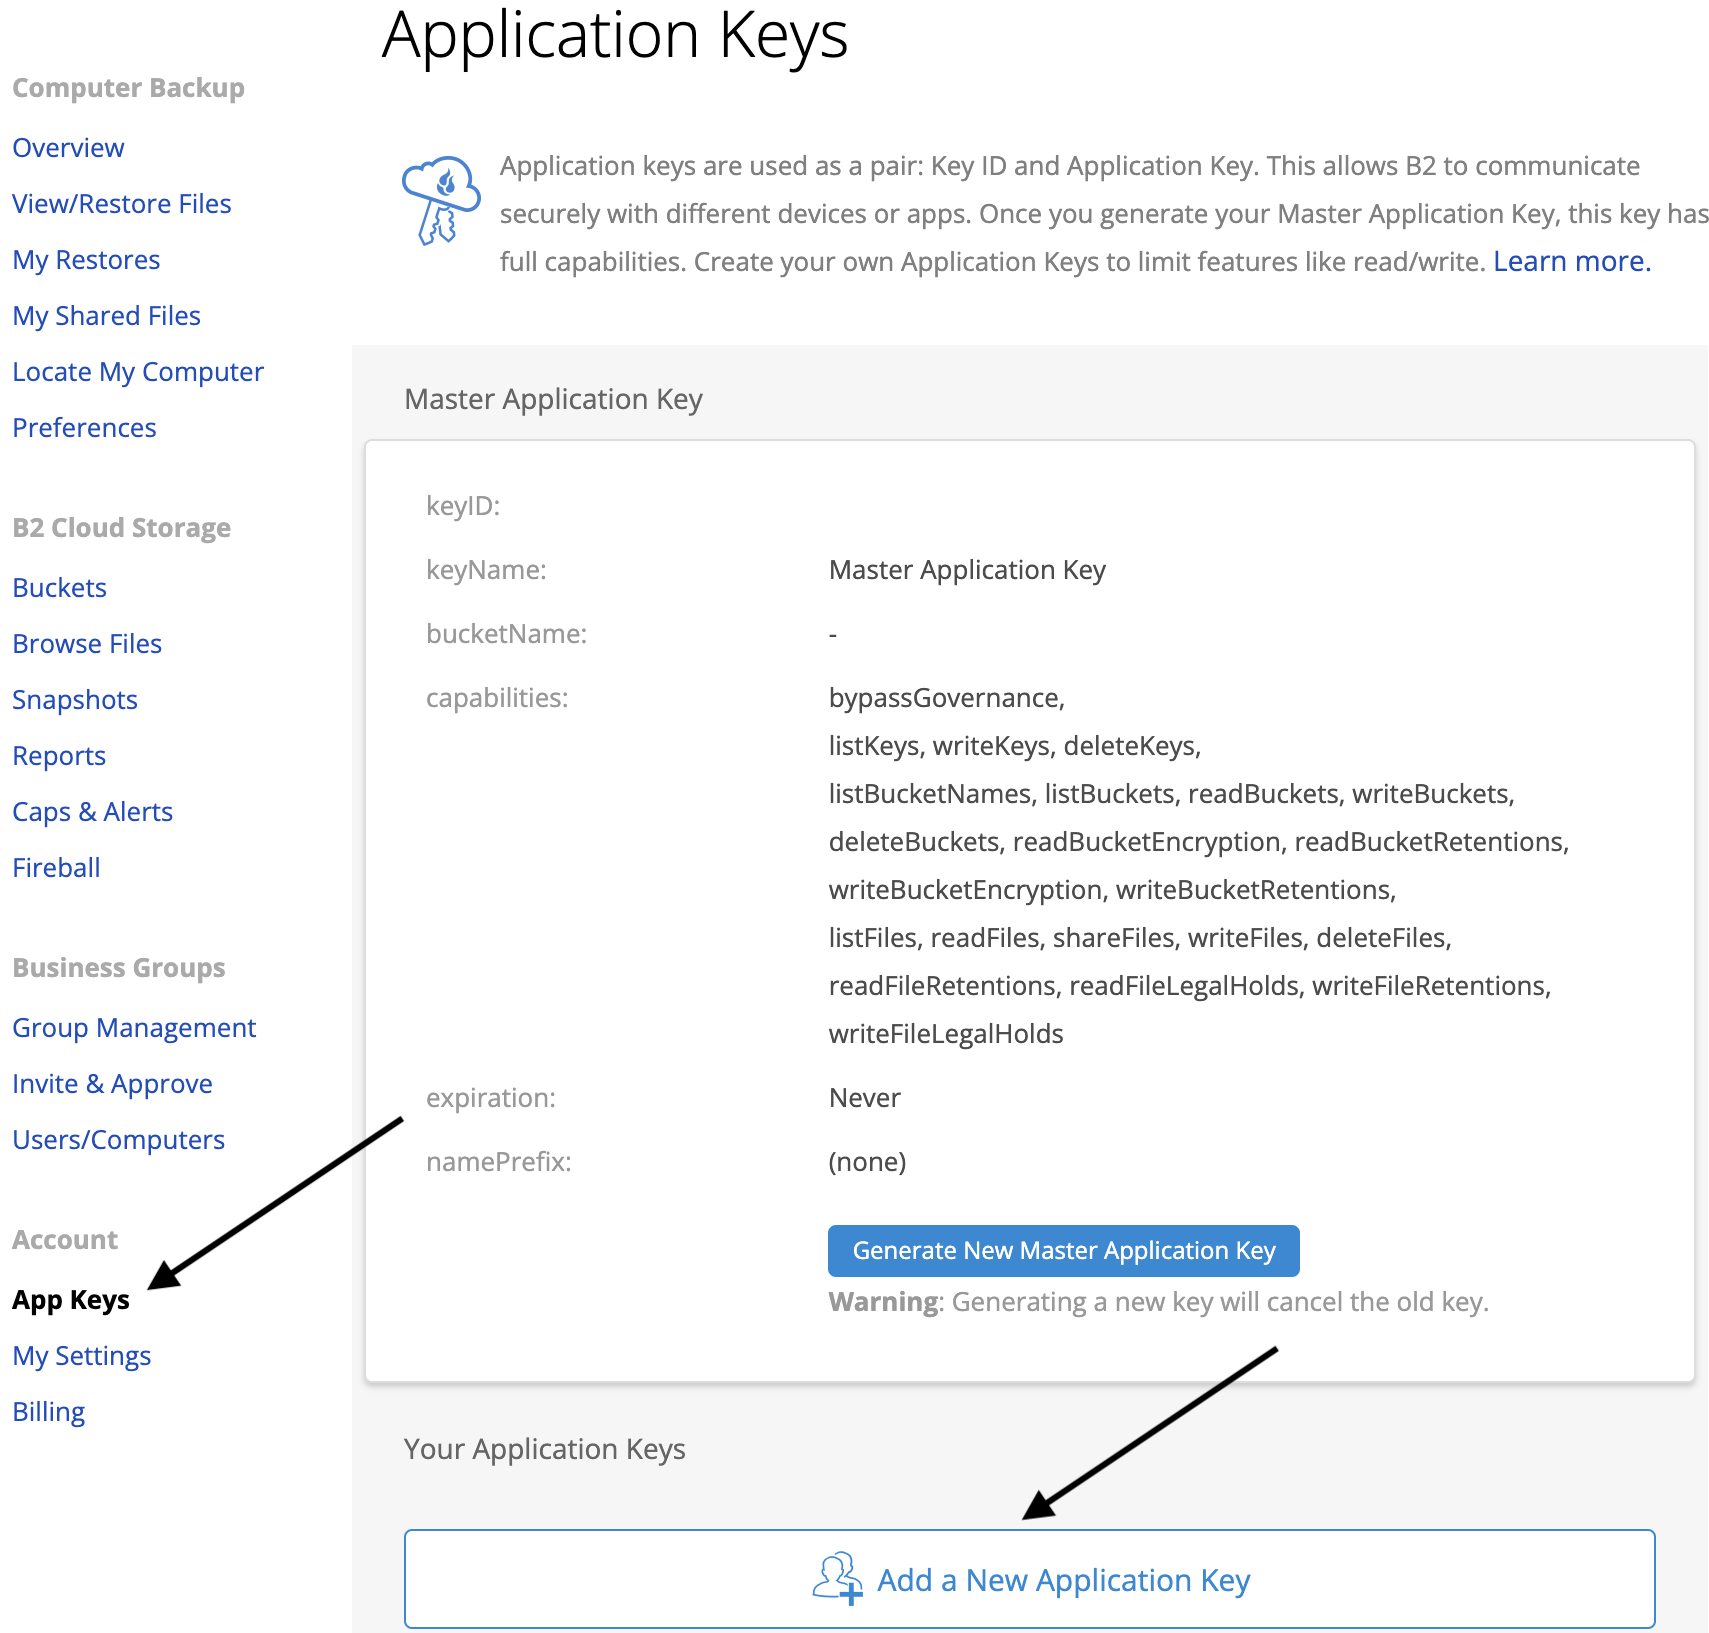
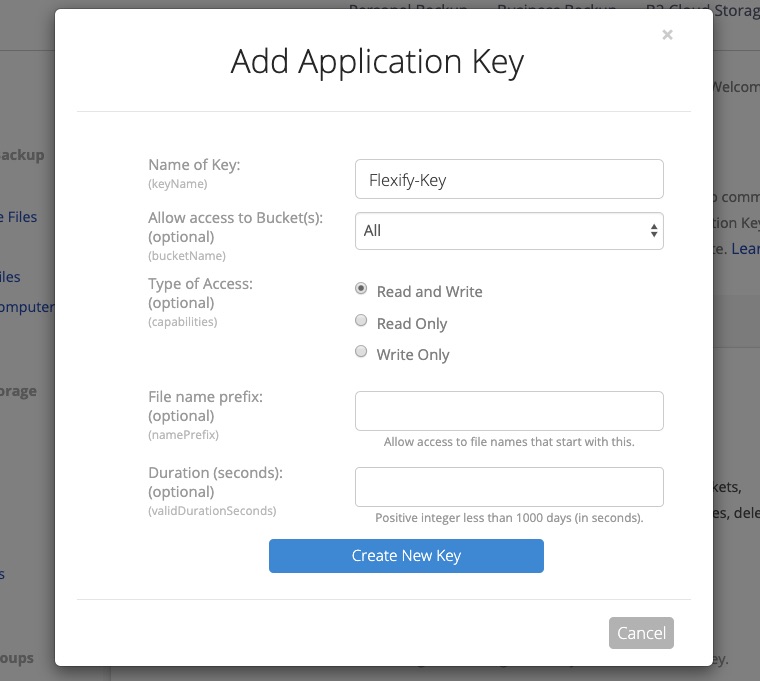
4. You can then enter a Name for the key and click on the button that says “Add a New Application Key”.
5. When you have the keyID and the applicationKey, be sure to copy them and keep both of these in a safe location. It is recommended to store these in notepad or any text editor as you will need them later on in this document.

Once you close this window, the current Application Key will not display again and you will need both of these numbers to connect your Flexify.IO account.
IMPORTANT: If you lose the ApplicationKey, you will need to create a new ApplicationKey. You will need to update all the applications that used the old key to use the new key. You can then safely delete the old key.
6. (Optional) If you wish to use Backblaze to create your Bucket, you can do so from the Buckets menu below, else you have the option of specifying a Bucket name when you start the migration within Flexify.IO and they will create the Bucket for you.
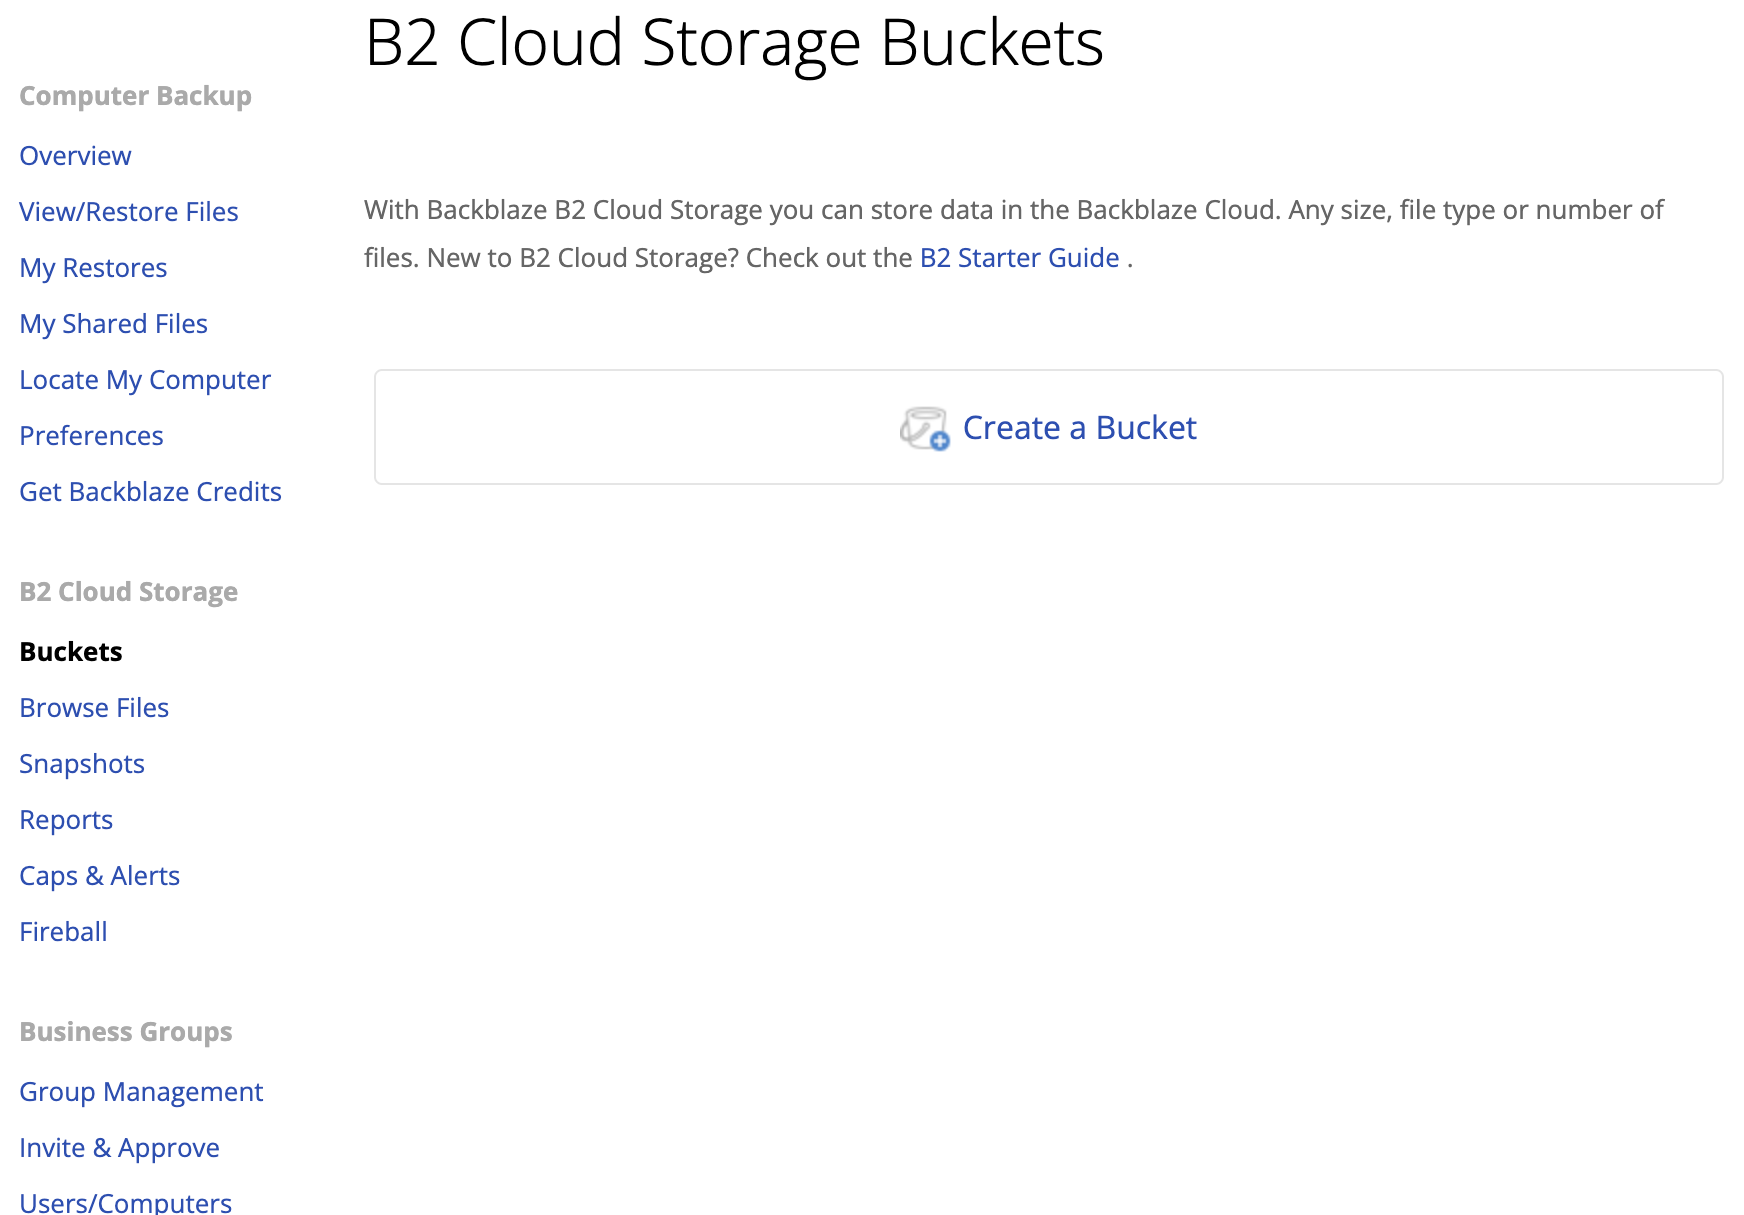
Give your bucket a globally unique name and select Private or Public (Note: Files in a Private bucket require authentication to perform an action on them like download, and Public buckets do not so you can share files more easily. You can always switch the bucket type later on if you change your mind!)
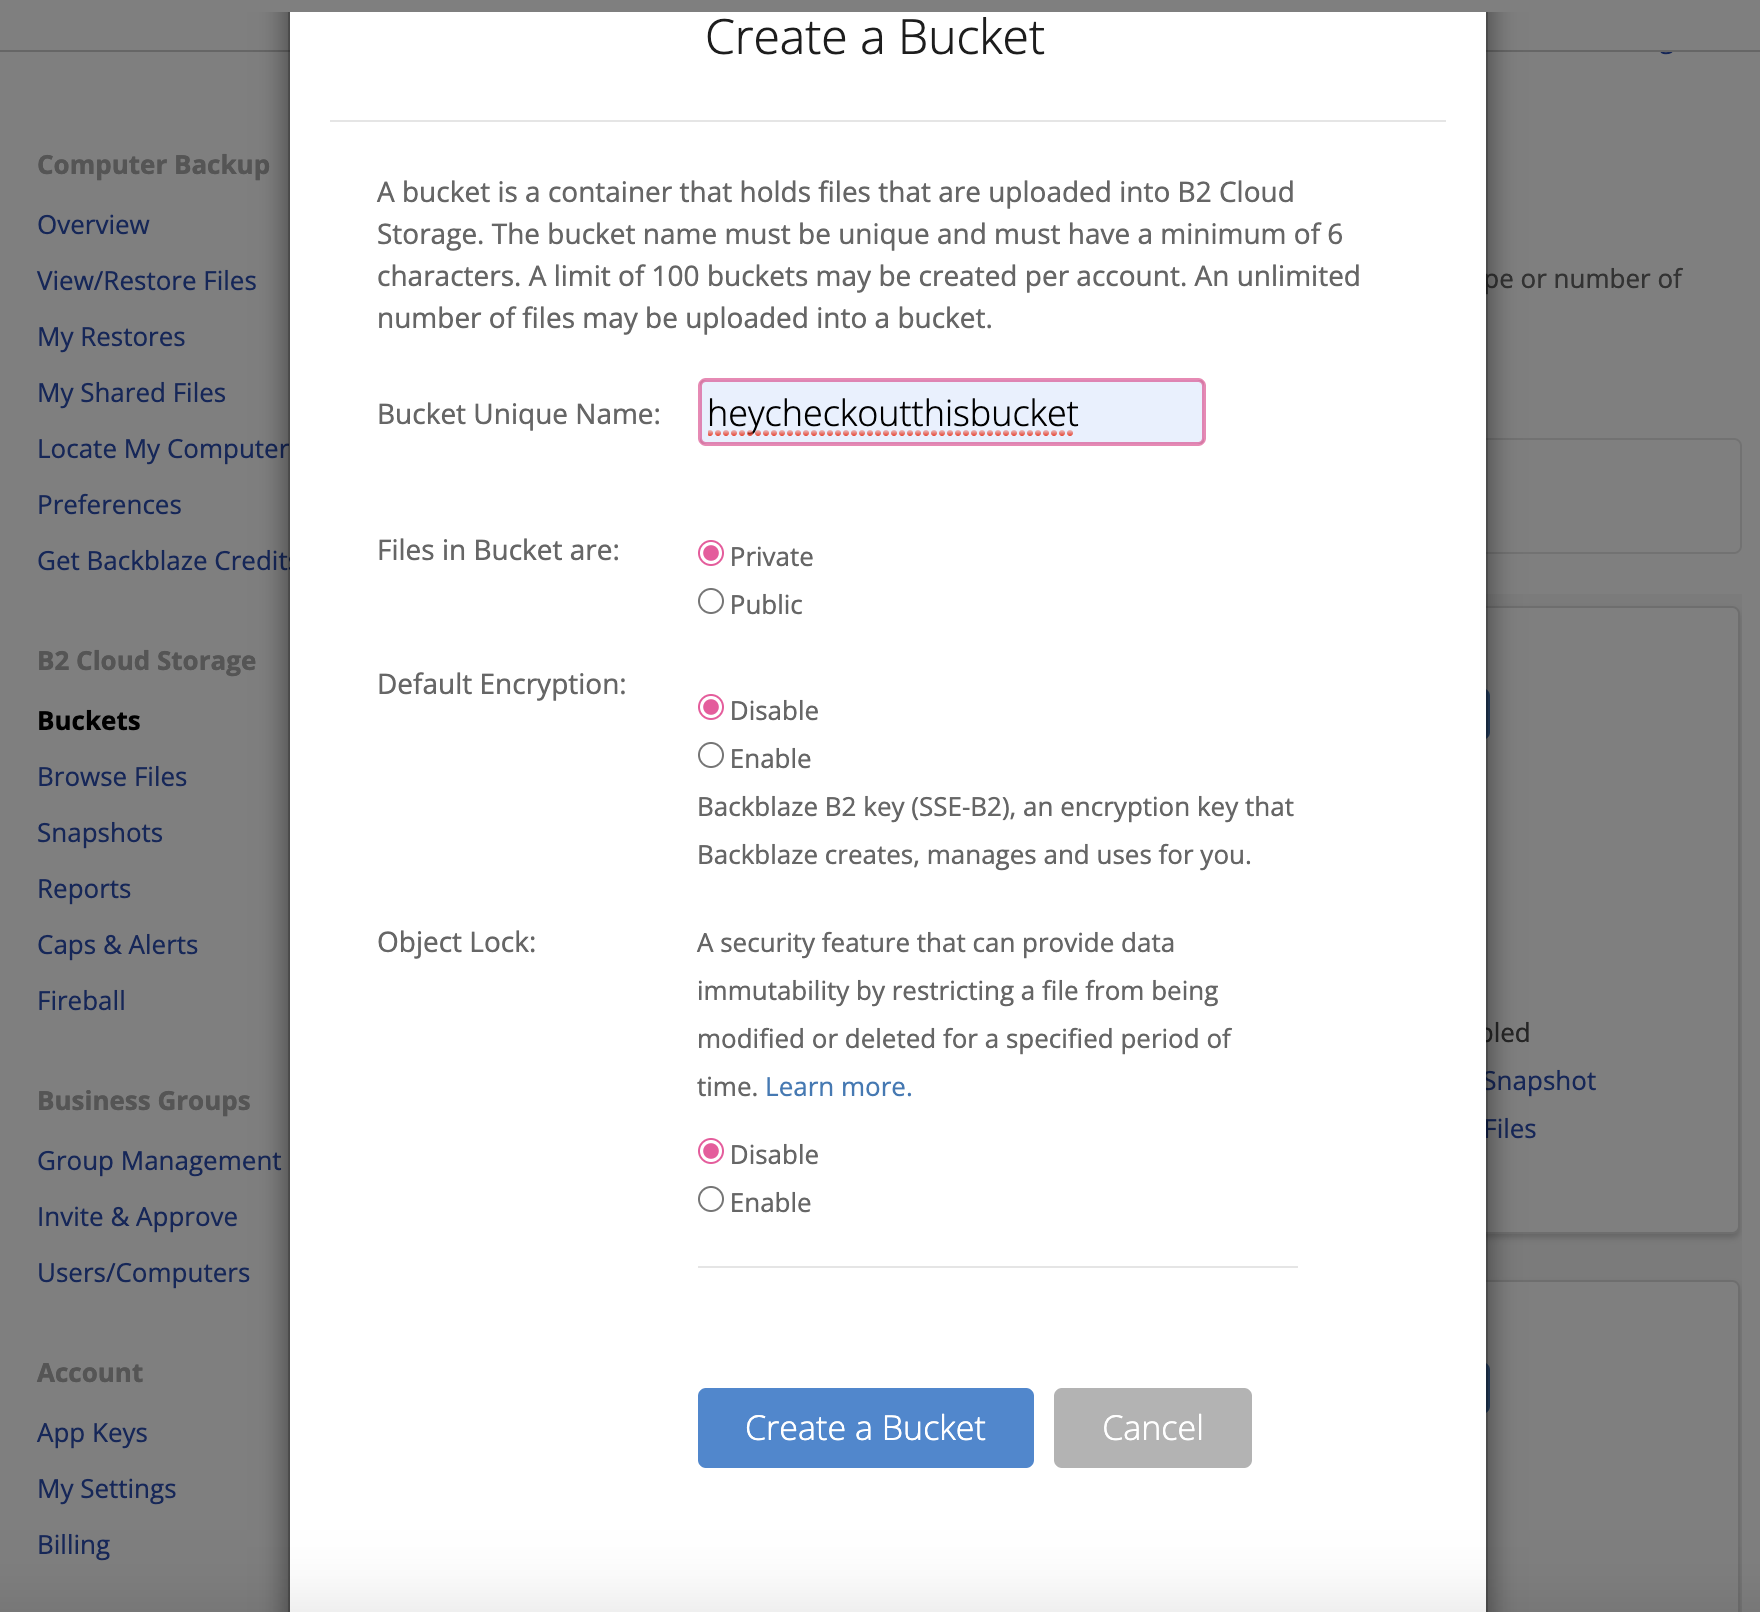
You should then see your bucket on the Buckets page like this:
Now you're ready to create your Flexify.IO account.
Step 2: Setup your Flexify.IO account and link your accounts
1. You should have gotten an email with a link to set your Flexify.IO account password. Clicking on the link will give you the following screen

Upon settings your new password, you will be automatically be logged into your account and see the Welcome screen like this:

2. Click the Data button in the left-hand column and then click the ADD STORAGE link

3. You can add your Amazon S3 account by entering your Access Key ID and Secret Access Key then clicking Add Storage. (If you don't know what your Access Key ID and Secret Access Key are, you can see Amazon's guide here)

4. Now you'll need to add your B2 account. Click Add Storage again and in the Storage Provider dropdown, select Backblaze B2. You'll then see the 2 field names change to Key ID and Key. Enter the Application Key ID in the Key ID field and the Application Key in the Key field and click Add Storage.

Once both B2 and your Amazon S3 account have been added, it's time to move to the final step of starting the transfer.
Step 3: Add Payment (ONLY For under 10TB Migrations)
Note: The following steps are for migrations that are under 10 TB. If a Backblaze Account Executive created your account for you, you can skip this step and proceed further down the page.
If you created your account using the "Under 10TB" route, you will need to purchase some transfer credits before you can start the migration. If you skip this step, account will be suspended as soon as the migration starts.
To add transfer credits, follow the following steps:
1. Click on your name on the top right and select "My Account:
2. Under the Billing Section, click Pay

3. To estimate the amount – multiply the storage size in GB by $0.04/GB. For example, migrating 10 TB would cost 10 * 1024 * 0.04 = $409.60. Enter this amount in the Amount field and click Pay.
4. Select your location and enter your Zip Code
5. Choose your payment method
5. If using a credit card, enter your credit card details
Proceed below.
For customers migrating over 10TB, do the following:
Step 4. Start your Migration
To begin a migration, you can either click on the Transfer Data link after you add your cloud storages or by clicking on Migrations tab on the left.
1. To get started, select the From Bucket and the To Bucket.

2. For the To Bucket, if you choose "Backblaze B2 Native", a Bucket with the same name as the From Bucket will be created in Backblaze.

You can also select a specific Bucket from the list by clicking on the arrow and expanding the accordion.

3. If you have multiple Buckets to migrate, you can click on the "+" icon to configure additional migrations

Now it's time to configure the transfer.
4. Click the Advanced Settings link to reveal additional settings.

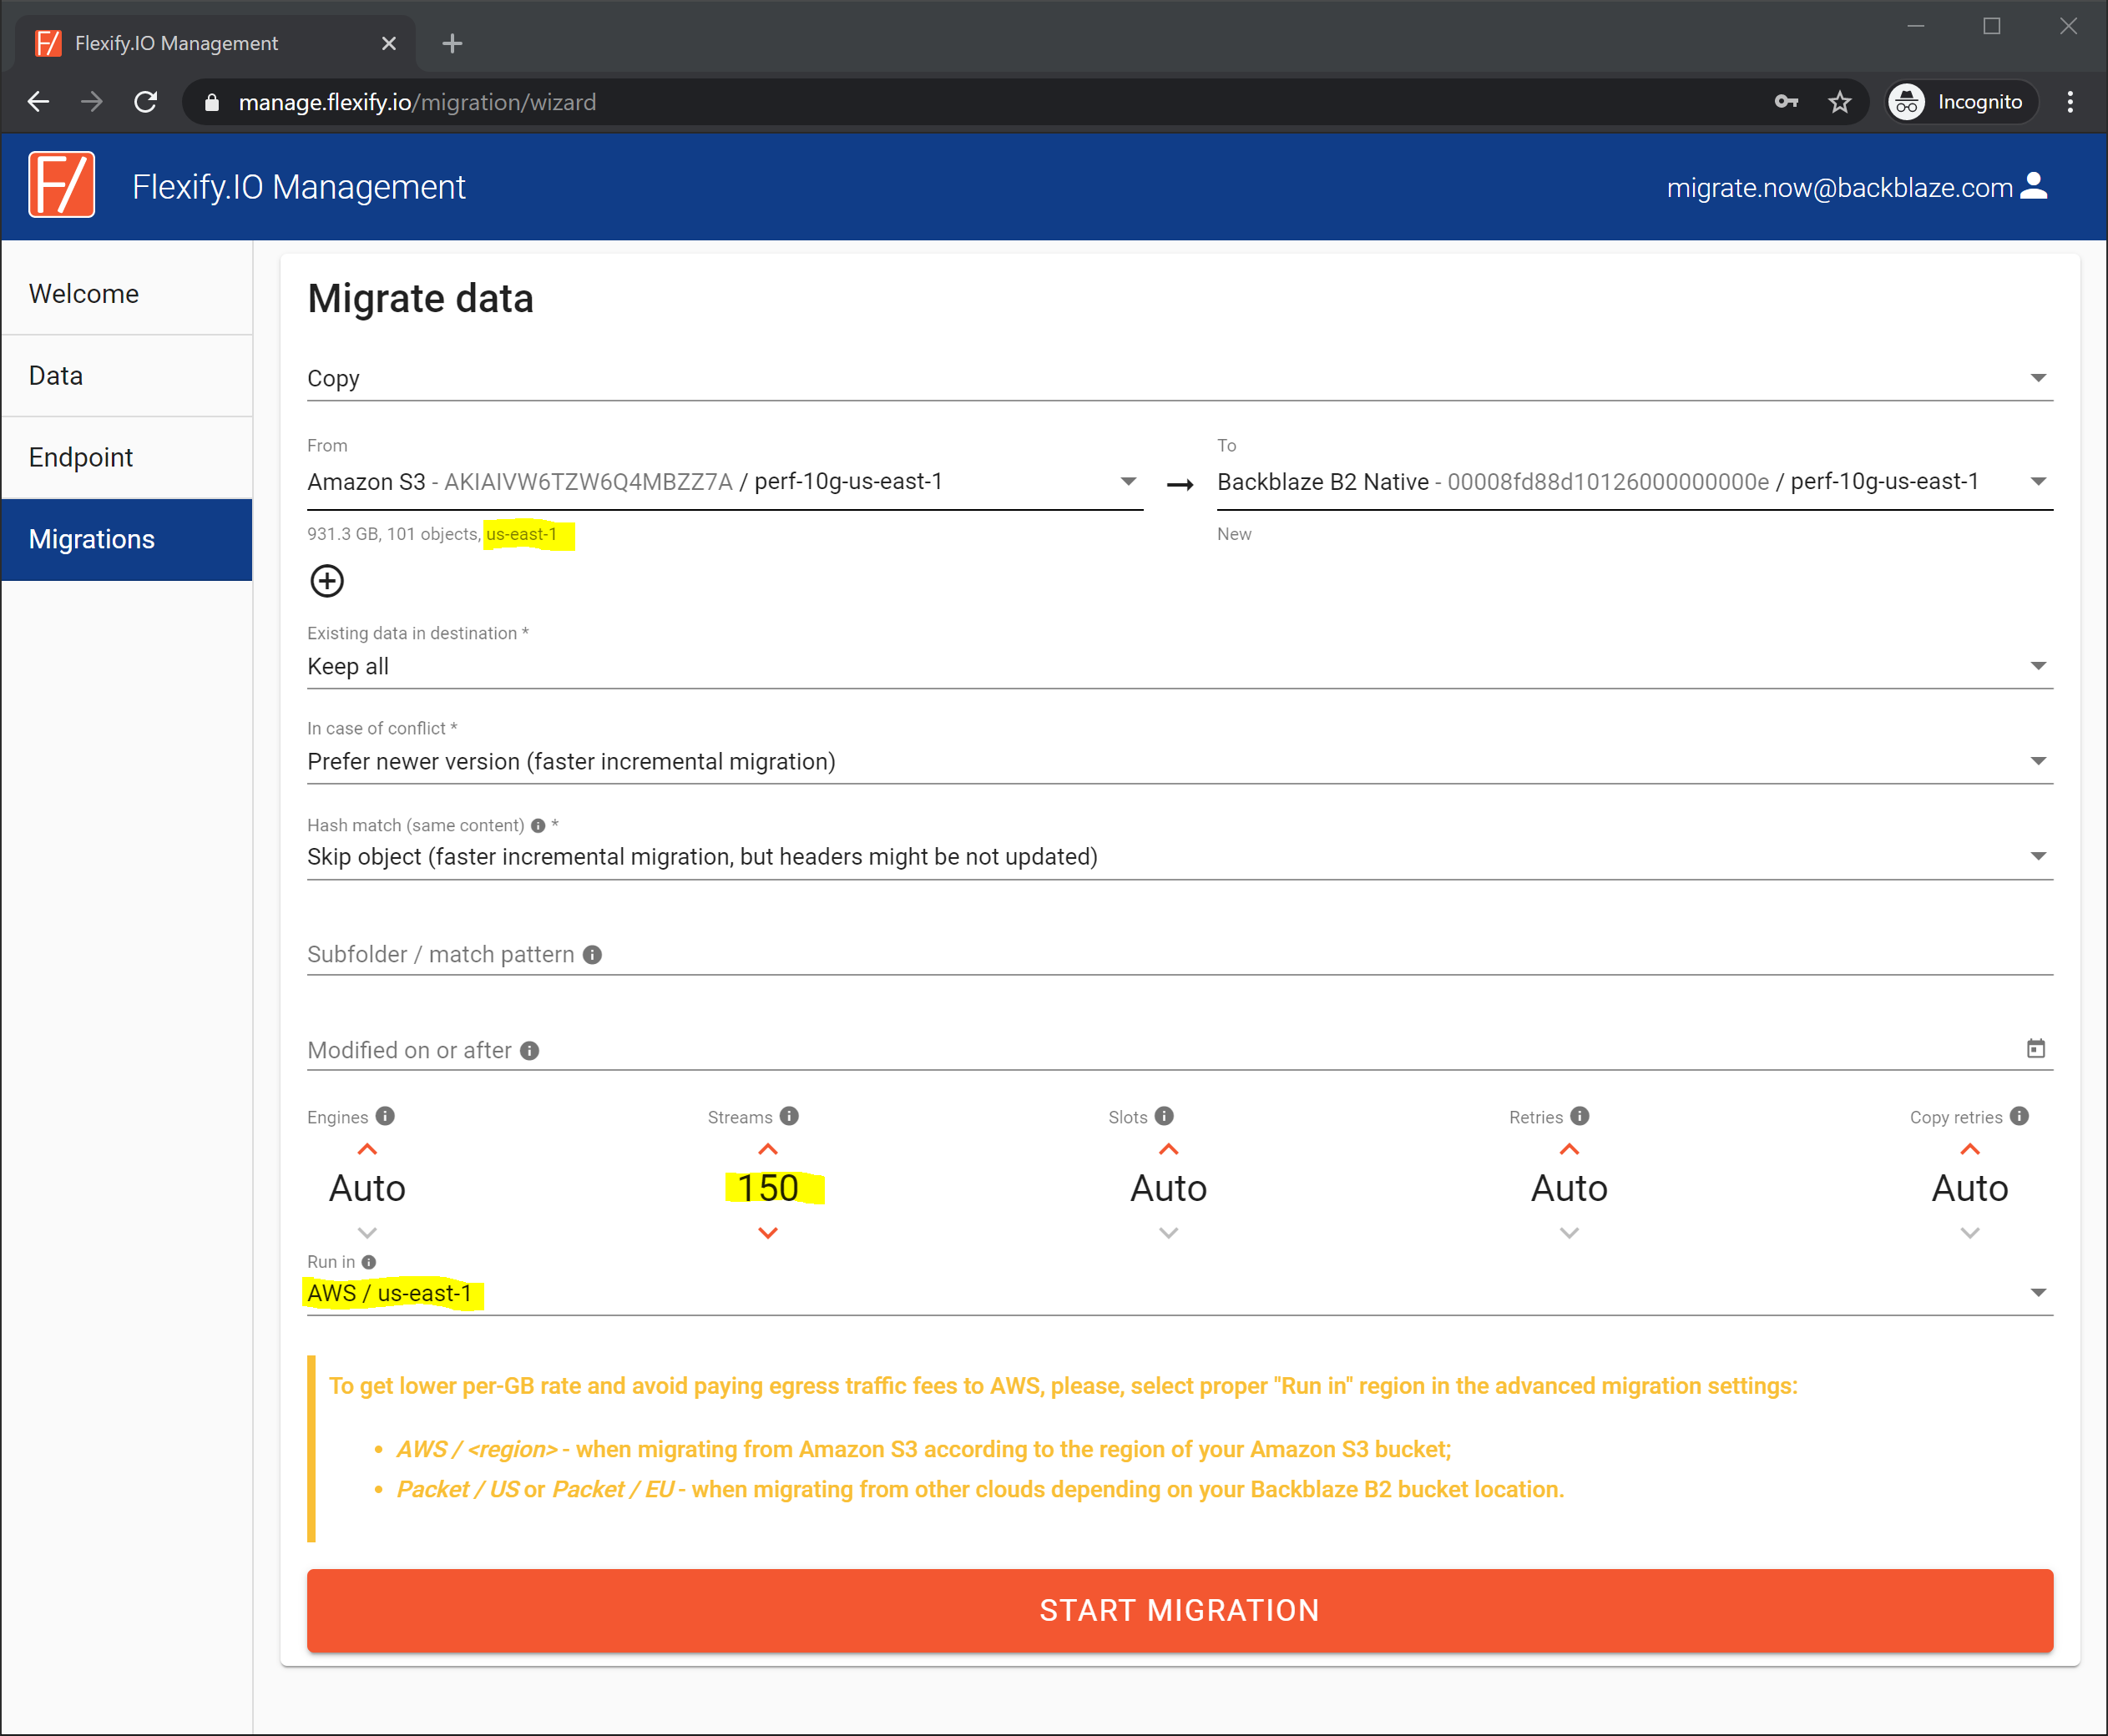
5. To ensure the migration happens successfully, it is recommended to make the following changes.
- Change "Run in" to be the same region as your From Bucket
- Change Streams to 150 (you can type this value by clicking on "Auto")
The end result should look like this:
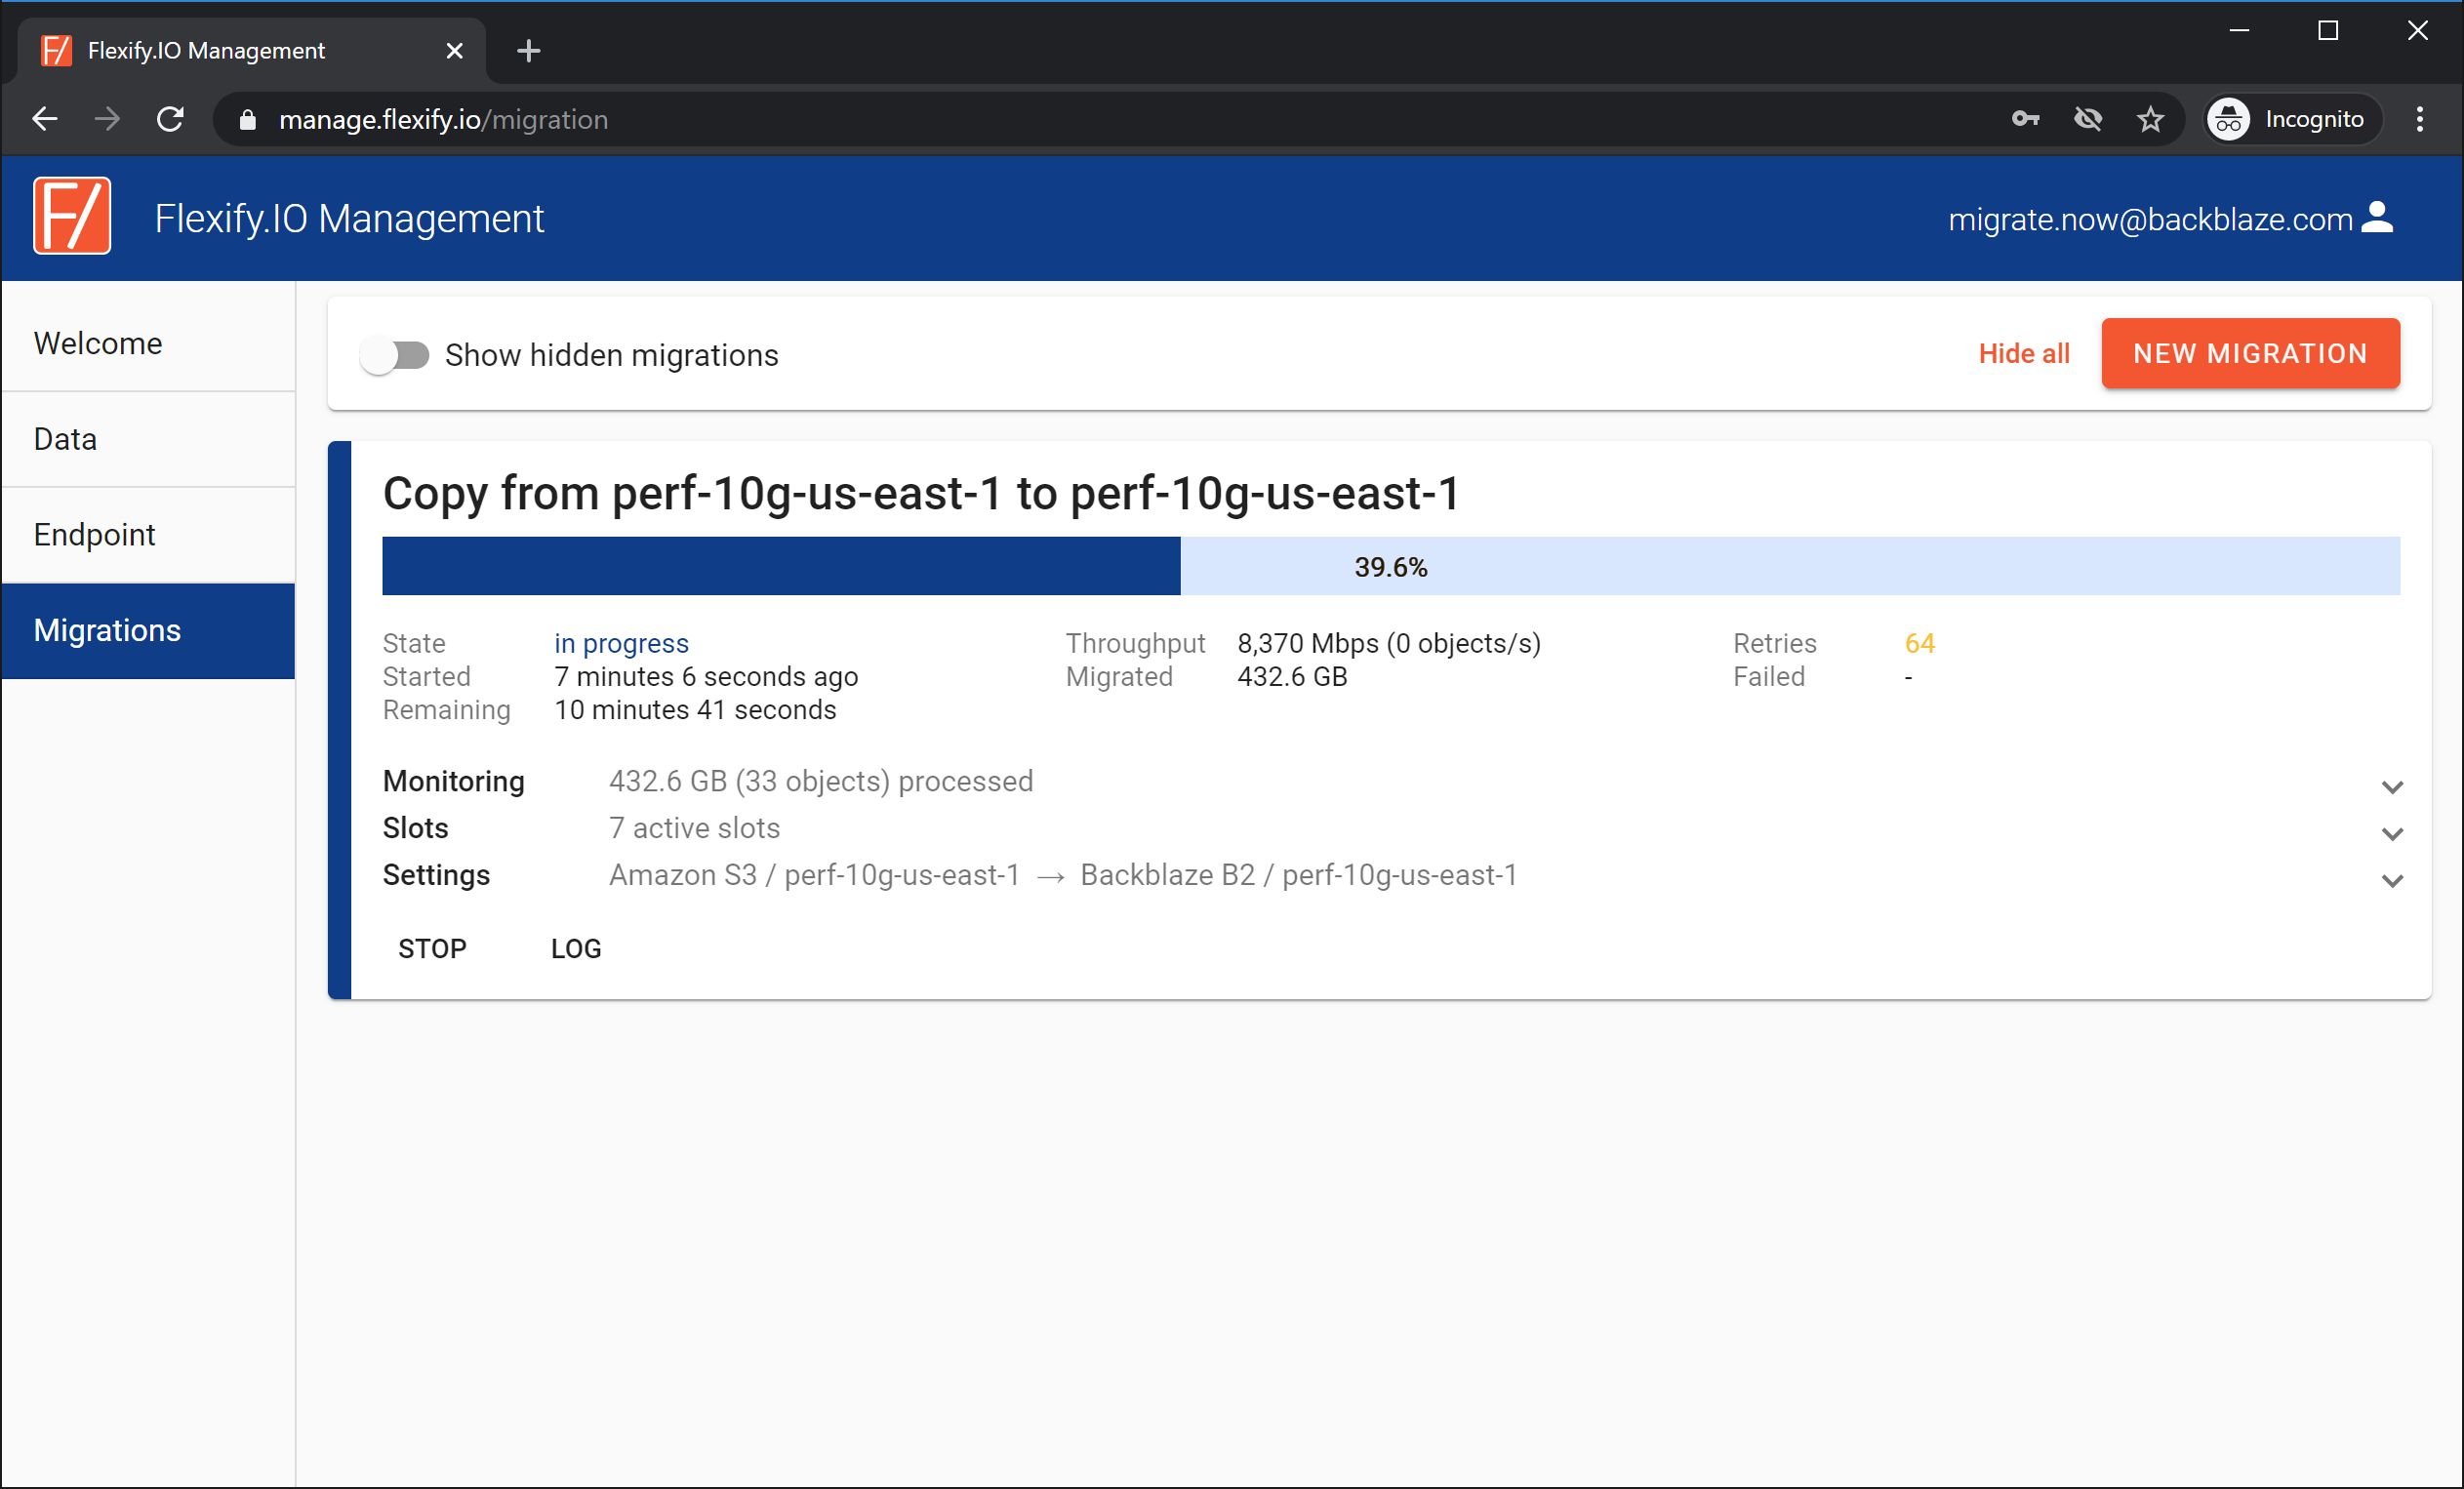
6. You can now start by clicking the START MIGRATION button! Once the transfer is complete you'll receive an email letting you know. You can also monitor the transfer right on the web page here to see when it's complete.

Articles in this section
- How to Upload Files to B2 Using Fireball
- How to find Unfinished Large Files in your account
- B2 Mobile App Overview - iOS
- B2 Mobile App Overview - Android
- Getting Started with Instant Recovery in Any Cloud - DR Planning with Veeam and phoenixNAP
- How to setup Vultr Compute with Backblaze B2
- B2 & AWS CLI User Guide
- Guide to using Backblaze Fireball with Iconik Internet Storage Gateway (ISG)
- How to order a Snapshot Drive
- Why do I need to verify my email address to create a public bucket?
