
Existing users of Backblaze B2 Cloud Storage may want to take advantage of the Backblaze B2 S3 Compatible API with existing data stored in B2 Cloud Storage from before this feature was offered. There are two main ways you can transfer data from an existing bucket to a newer S3 compatible bucket. Please note that this article assumes both buckets are on the same Backblaze account. We will go over each of the options in this article.
Method 1: Using a file transfer application.
Any robust file transfer application should include support to transfer files between buckets quickly and easily. In this case, we will be using Panic Transmit 5.
Transmit 5 can be configured with B2 by following the steps below.
Step 1:
Create your new bucket which will automatically be S3 compatible. You can tell which are compatible with the appearance of its S3 URL endpoint.
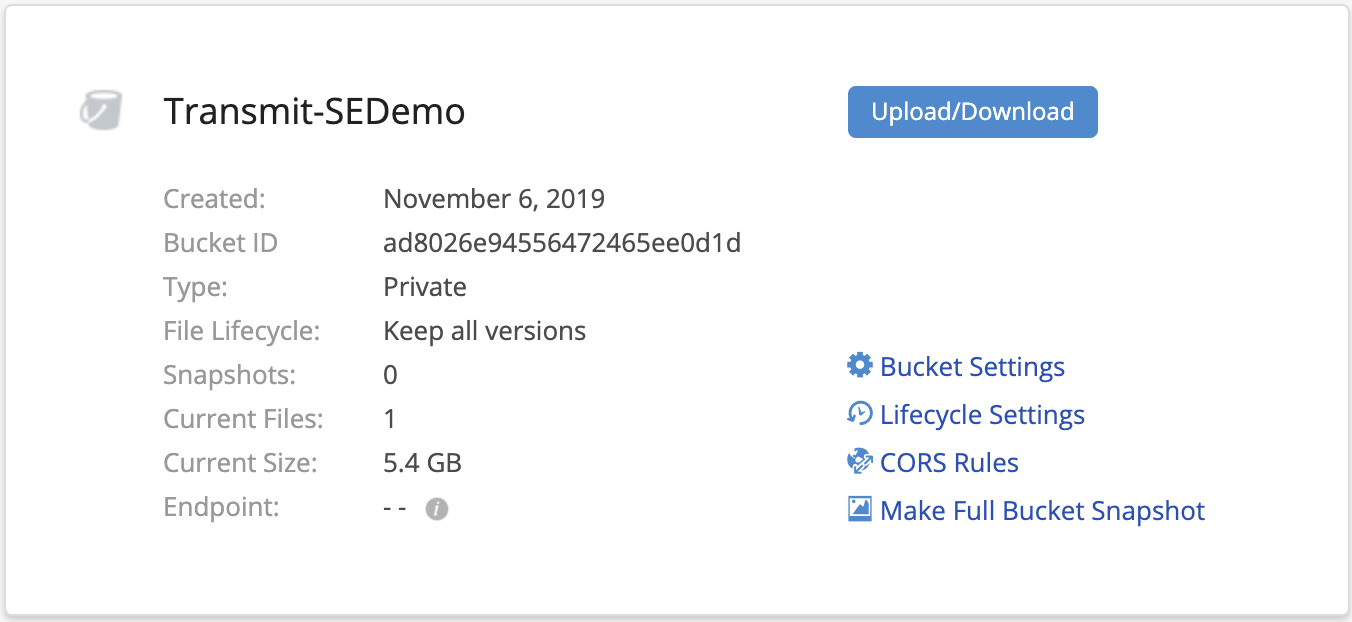
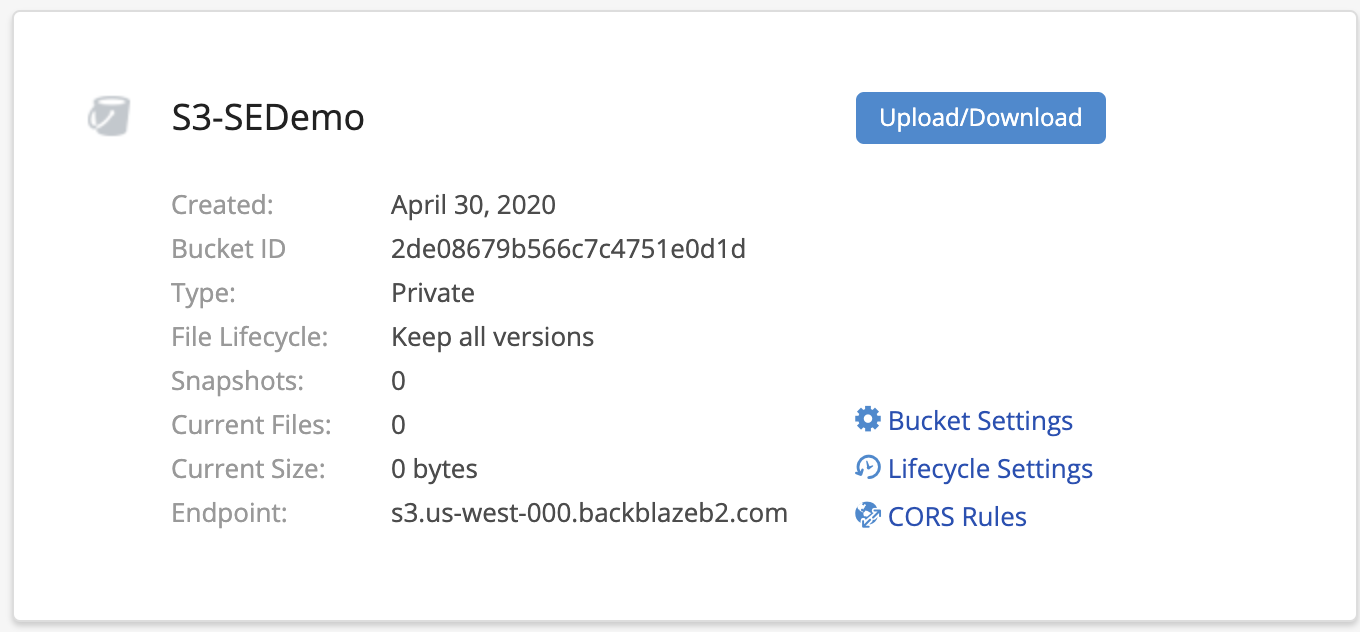
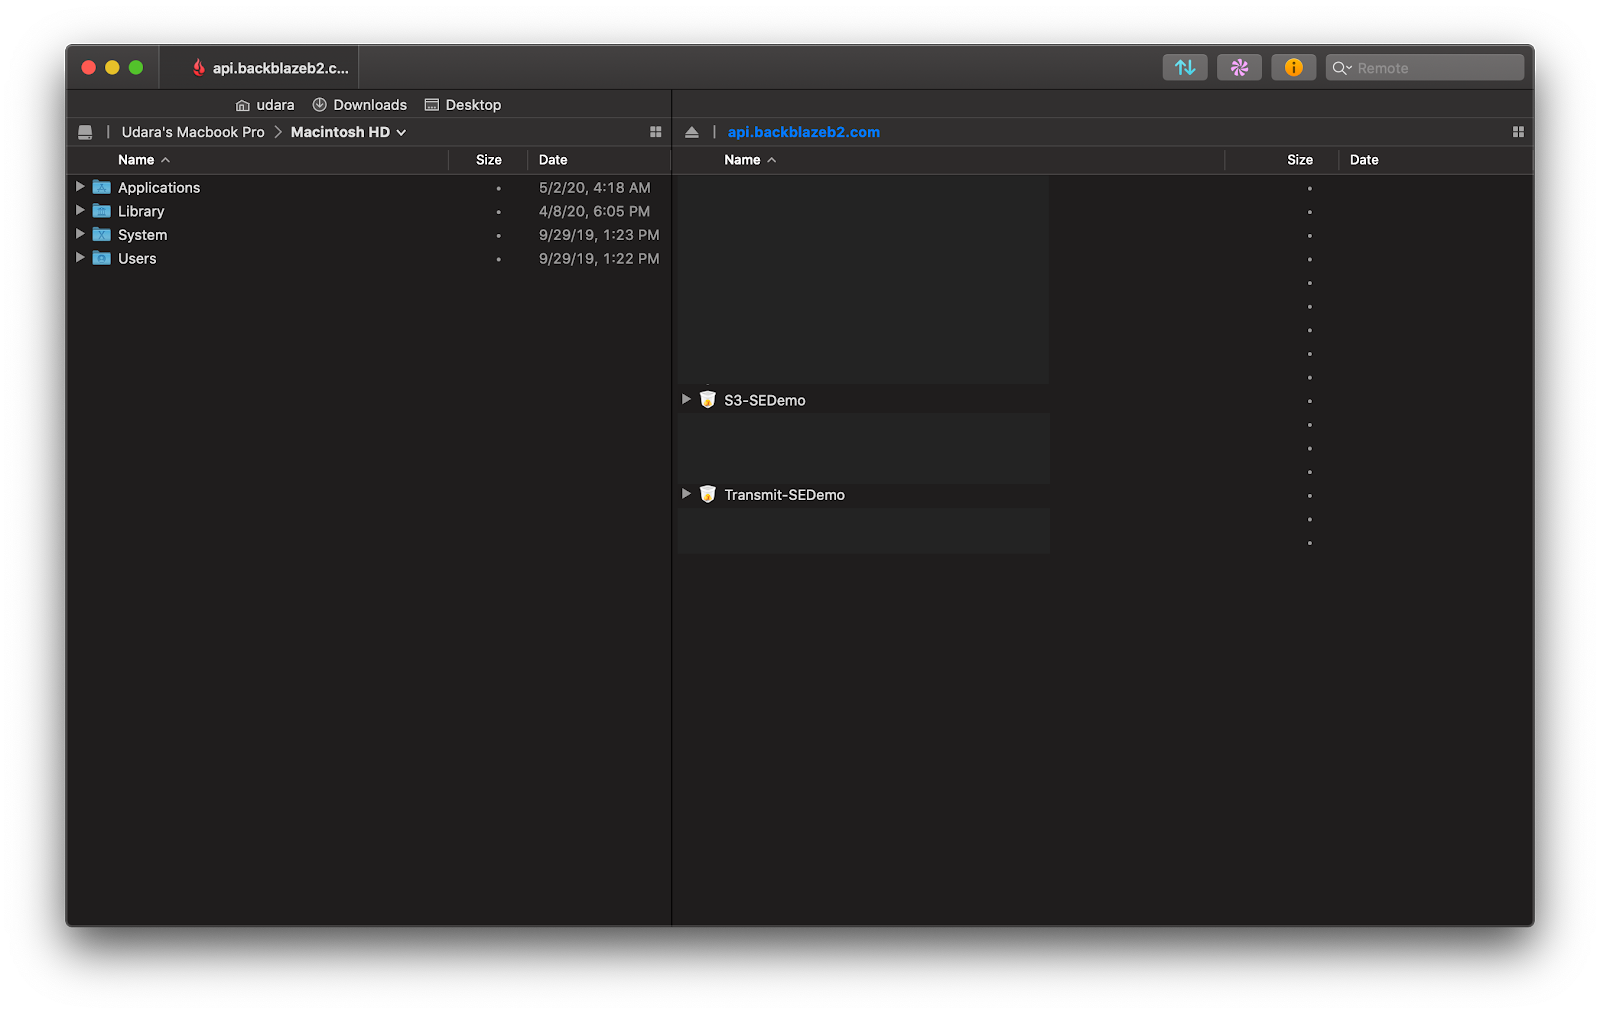
In this demo, we will be moving data from an old (non-S3 bucket) named “Transmit-SEDemo” to one that is S3 enabled called “S3-SEDemo”
Step 2:
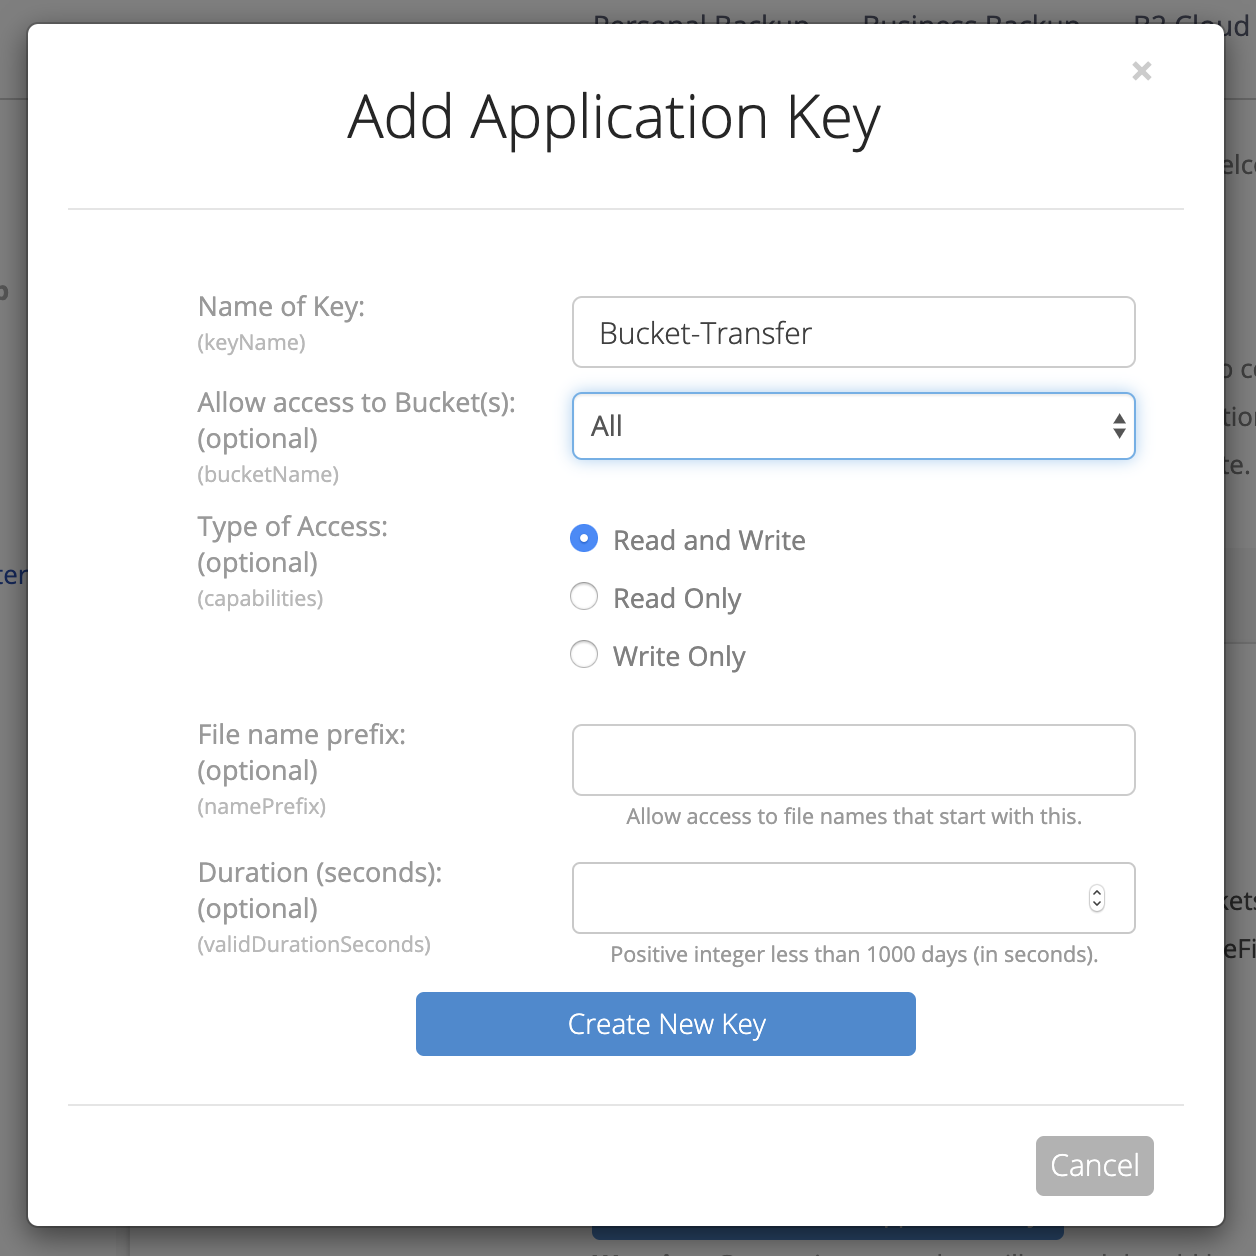
Create an application key that is enabled to access all buckets on your account and has Read and Write access.
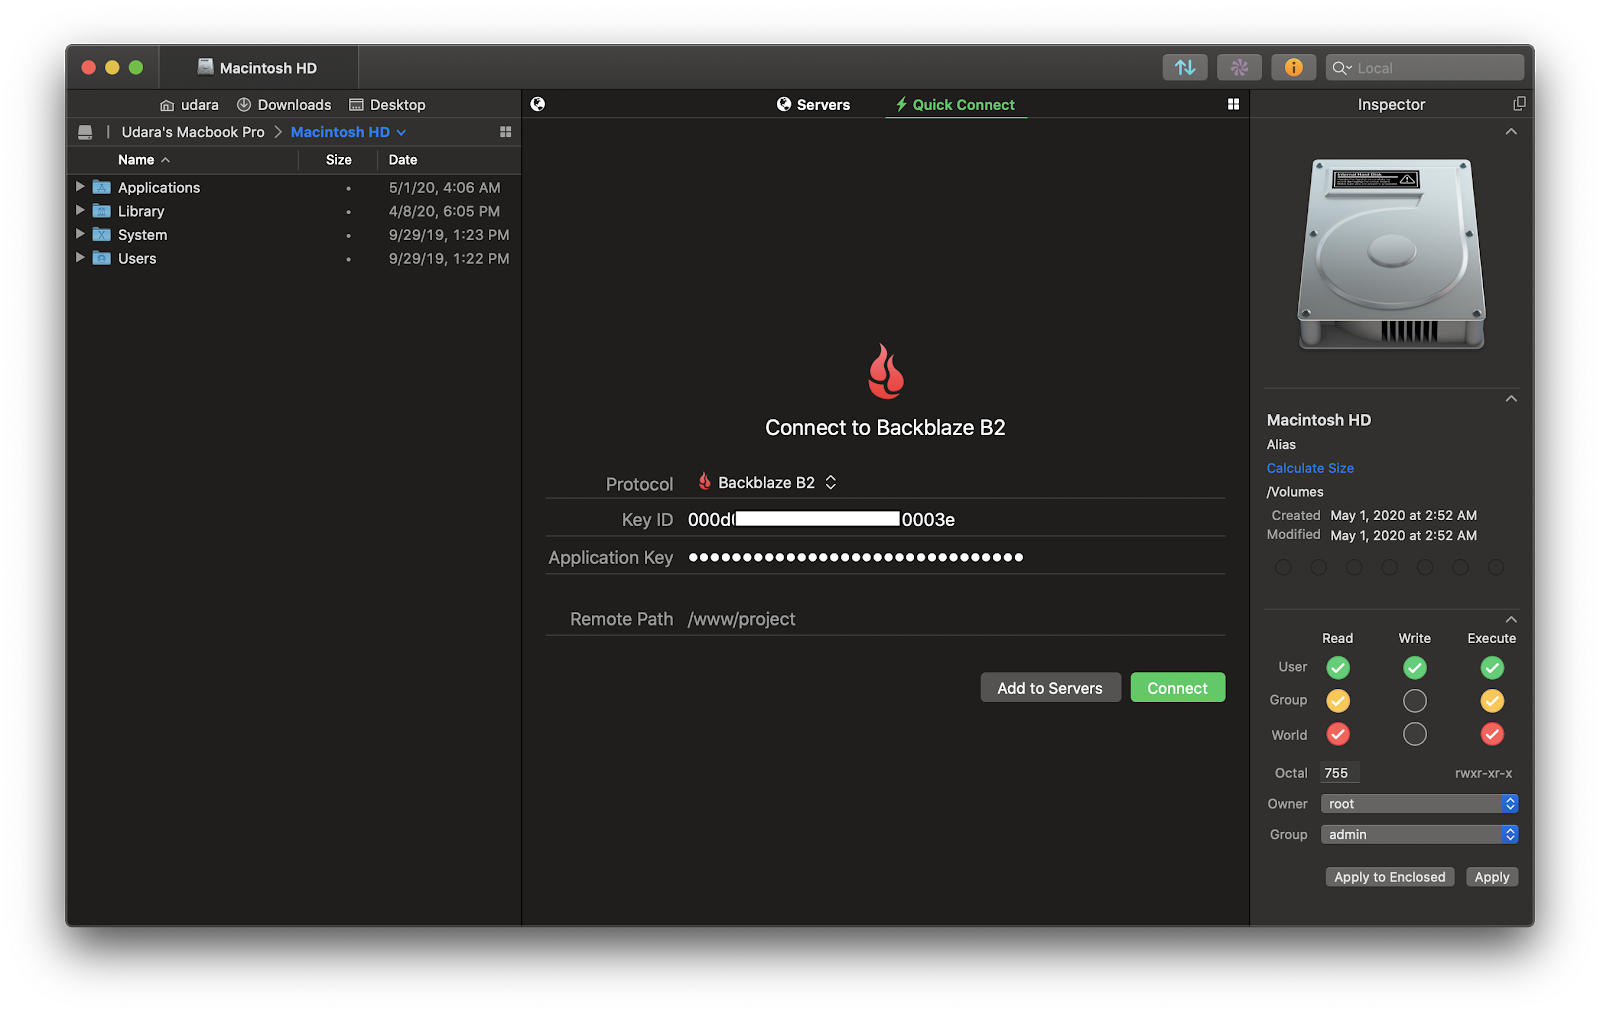
Step 3:
Pass your key ID and Application Key into Transmit. In this case, I am using Quick Connect to do so.
Transmit will populate a list of all the buckets in your account. In this case, we are focusing on “Transmit-SEDemo” and “S3-SEDemo”
Step 4:
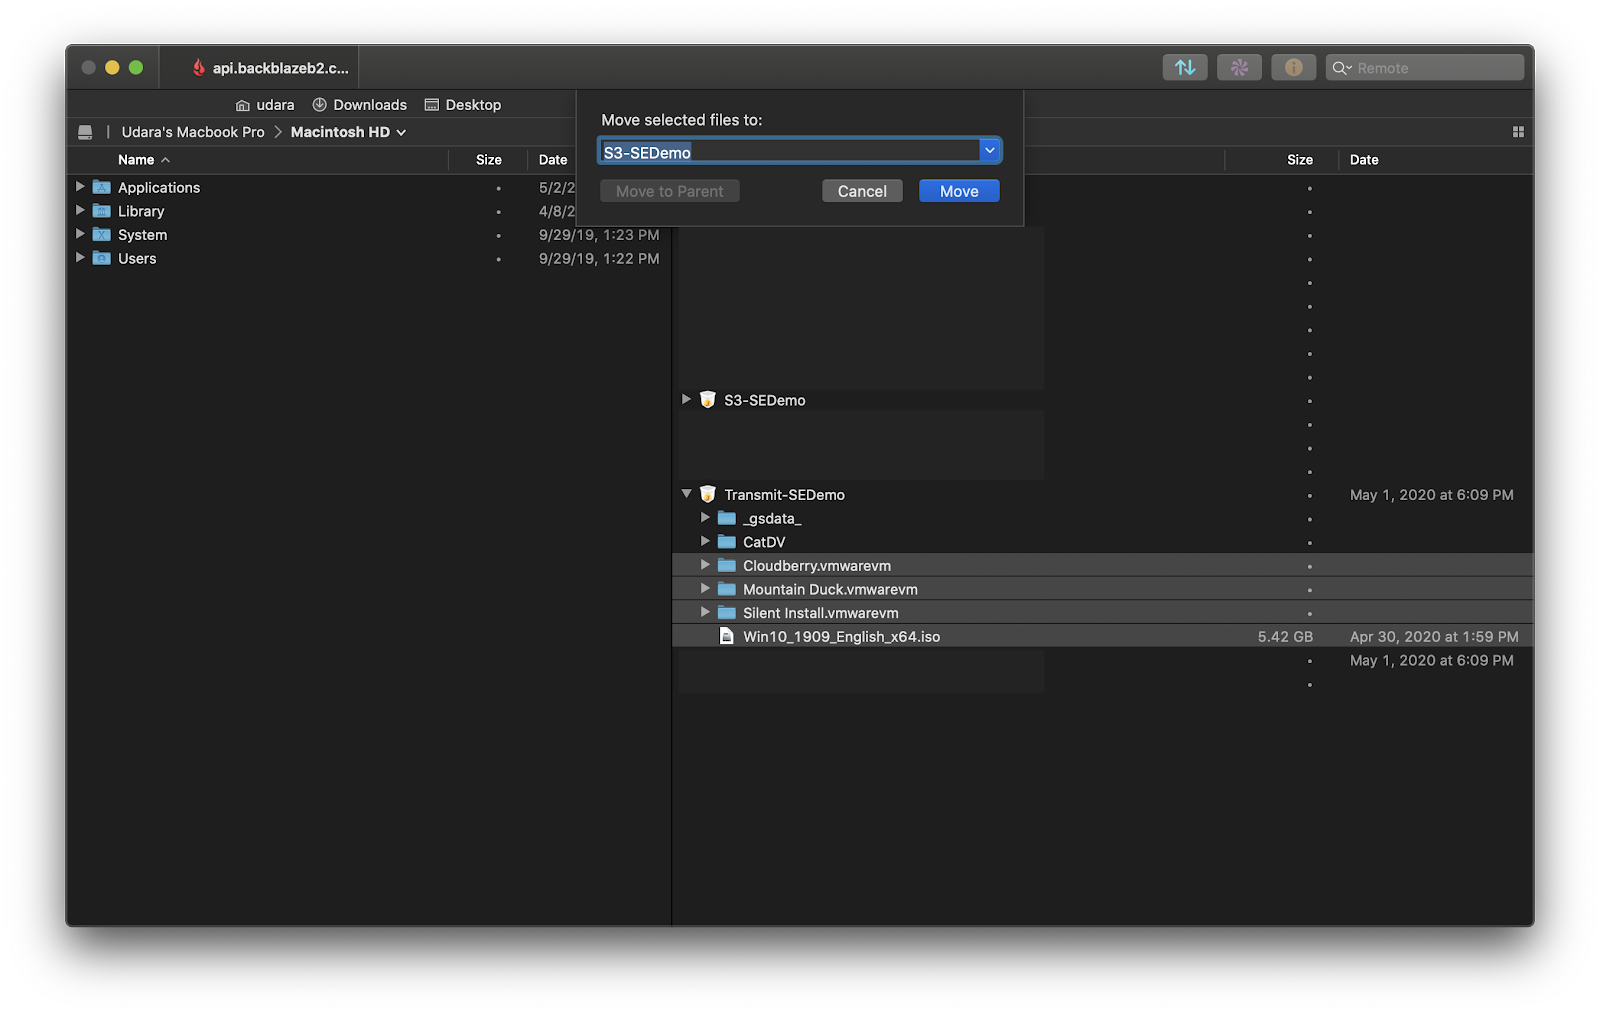
Select the file(s) you would like to move from your old bucket. Right-click on the files and select the move option. A menu asking you to select which bucket you’d like to move the files to will appear. In this case, of course, I am going to select the “S3-SEDemo” bucket.
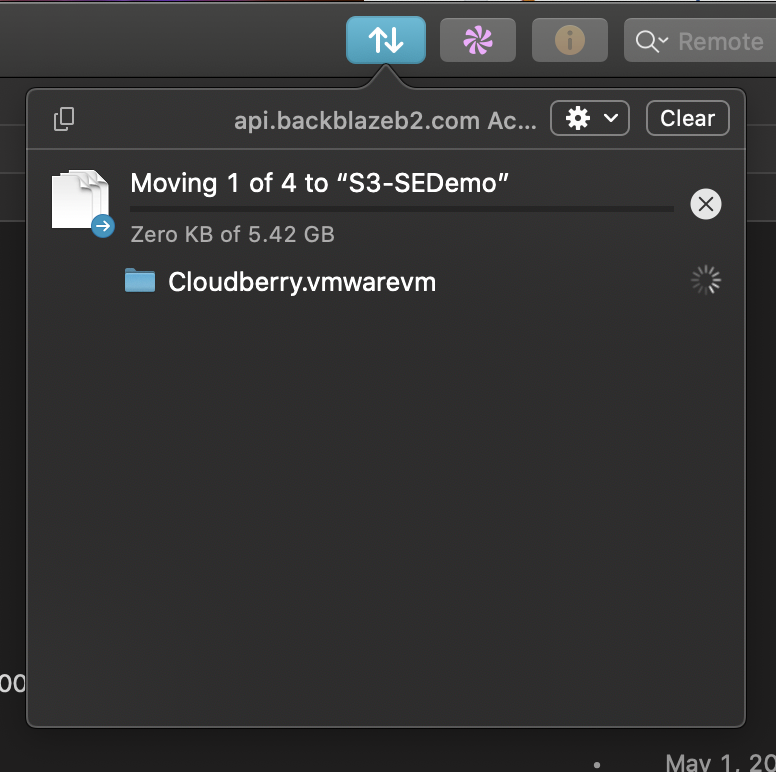
Transmit will start moving data between selected buckets. You can check on the status of this by pressing the pulsing transfers button.
Note: Given the nature of operations going on in the background Transmit won’t show the progress of the transfer. So give it some time.
Step 5
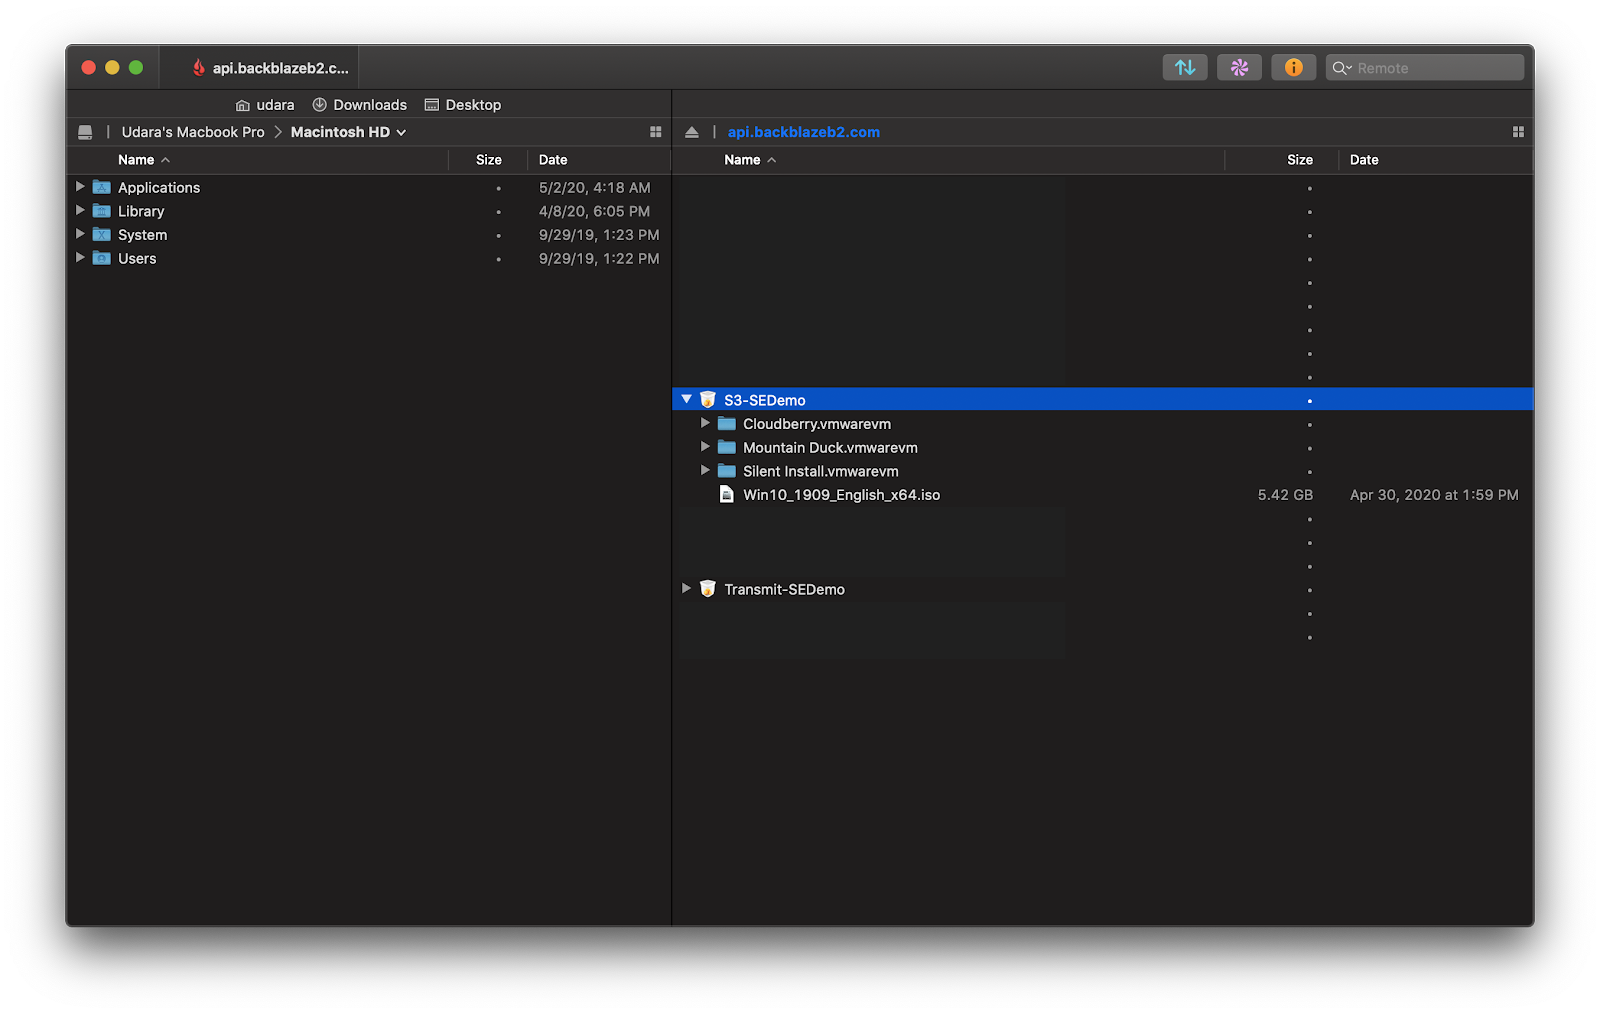
Once complete the move will show up as finished in the transfers tab and you will be able to see your data in your shiny new S3 bucket!
Method 2: Using the Backblaze B2 CLI
The Backblaze B2 CLI supports the b2-copy-file-by-id command which can be used to copy a file from one bucket to another. The context for making this call in the CLI is as follows:
b2 copy-file-by-id <sourceFileID> <destinationBucketName> <b2FileName>
The sourceFileID is the file id of the file you want to copy to the new bucket. You can find this either by using the list-file-names command in the B2 CLI or in the web UI by clicking the ‘i’ icon next to a file. The fguid is the file id for that file.
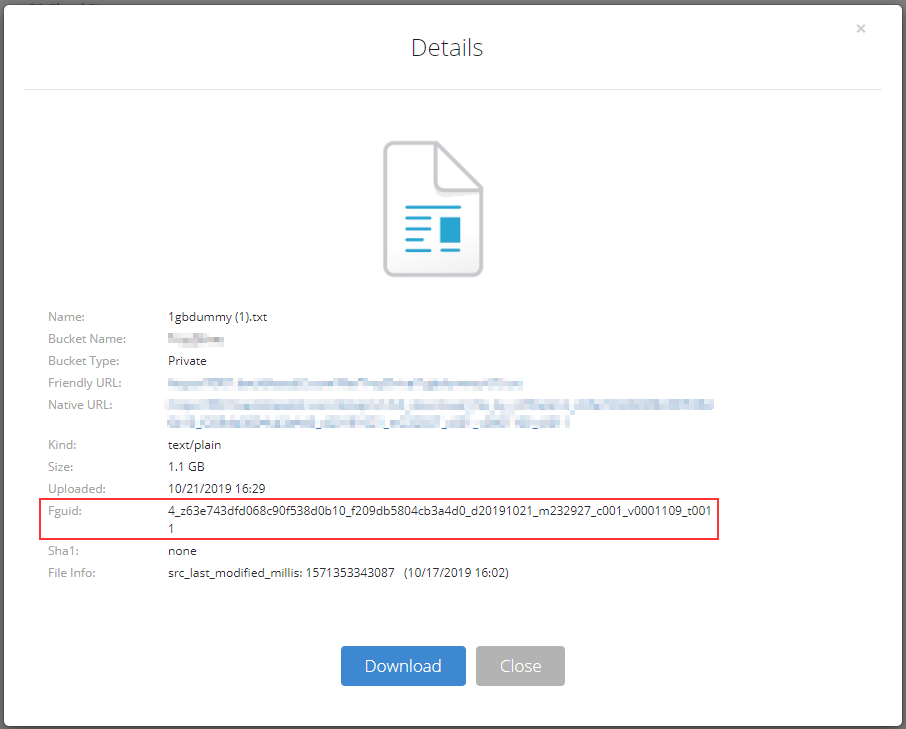
Here is an example of how to copy a file from one bucket to another:
b2 copy-file-by-id 4_z63e743dfd068c90f538d0b10_f209db5804cb3a4d0_d20191021_m232927_c001_v0001109_t0011 S3-SEDemo newfile.txt
The S3 Compatible API for Backblaze B2 Cloud Storage allows 1000’s of integrations to work with B2 natively. If you’re new to the S3 Compatible API, please see our Getting Started Guide. If you have any feedback on the S3 Compatible API, please let us know by emailing us at b2feedback@backblaze.com
Articles in this section
- How to Upload Files to B2 Using Fireball
- How to find Unfinished Large Files in your account
- B2 Mobile App Overview - iOS
- B2 Mobile App Overview - Android
- Getting Started with Instant Recovery in Any Cloud - DR Planning with Veeam and phoenixNAP
- How to setup Vultr Compute with Backblaze B2
- B2 & AWS CLI User Guide
- Guide to using Backblaze Fireball with Iconik Internet Storage Gateway (ISG)
- How to order a Snapshot Drive
- Why do I need to verify my email address to create a public bucket?