
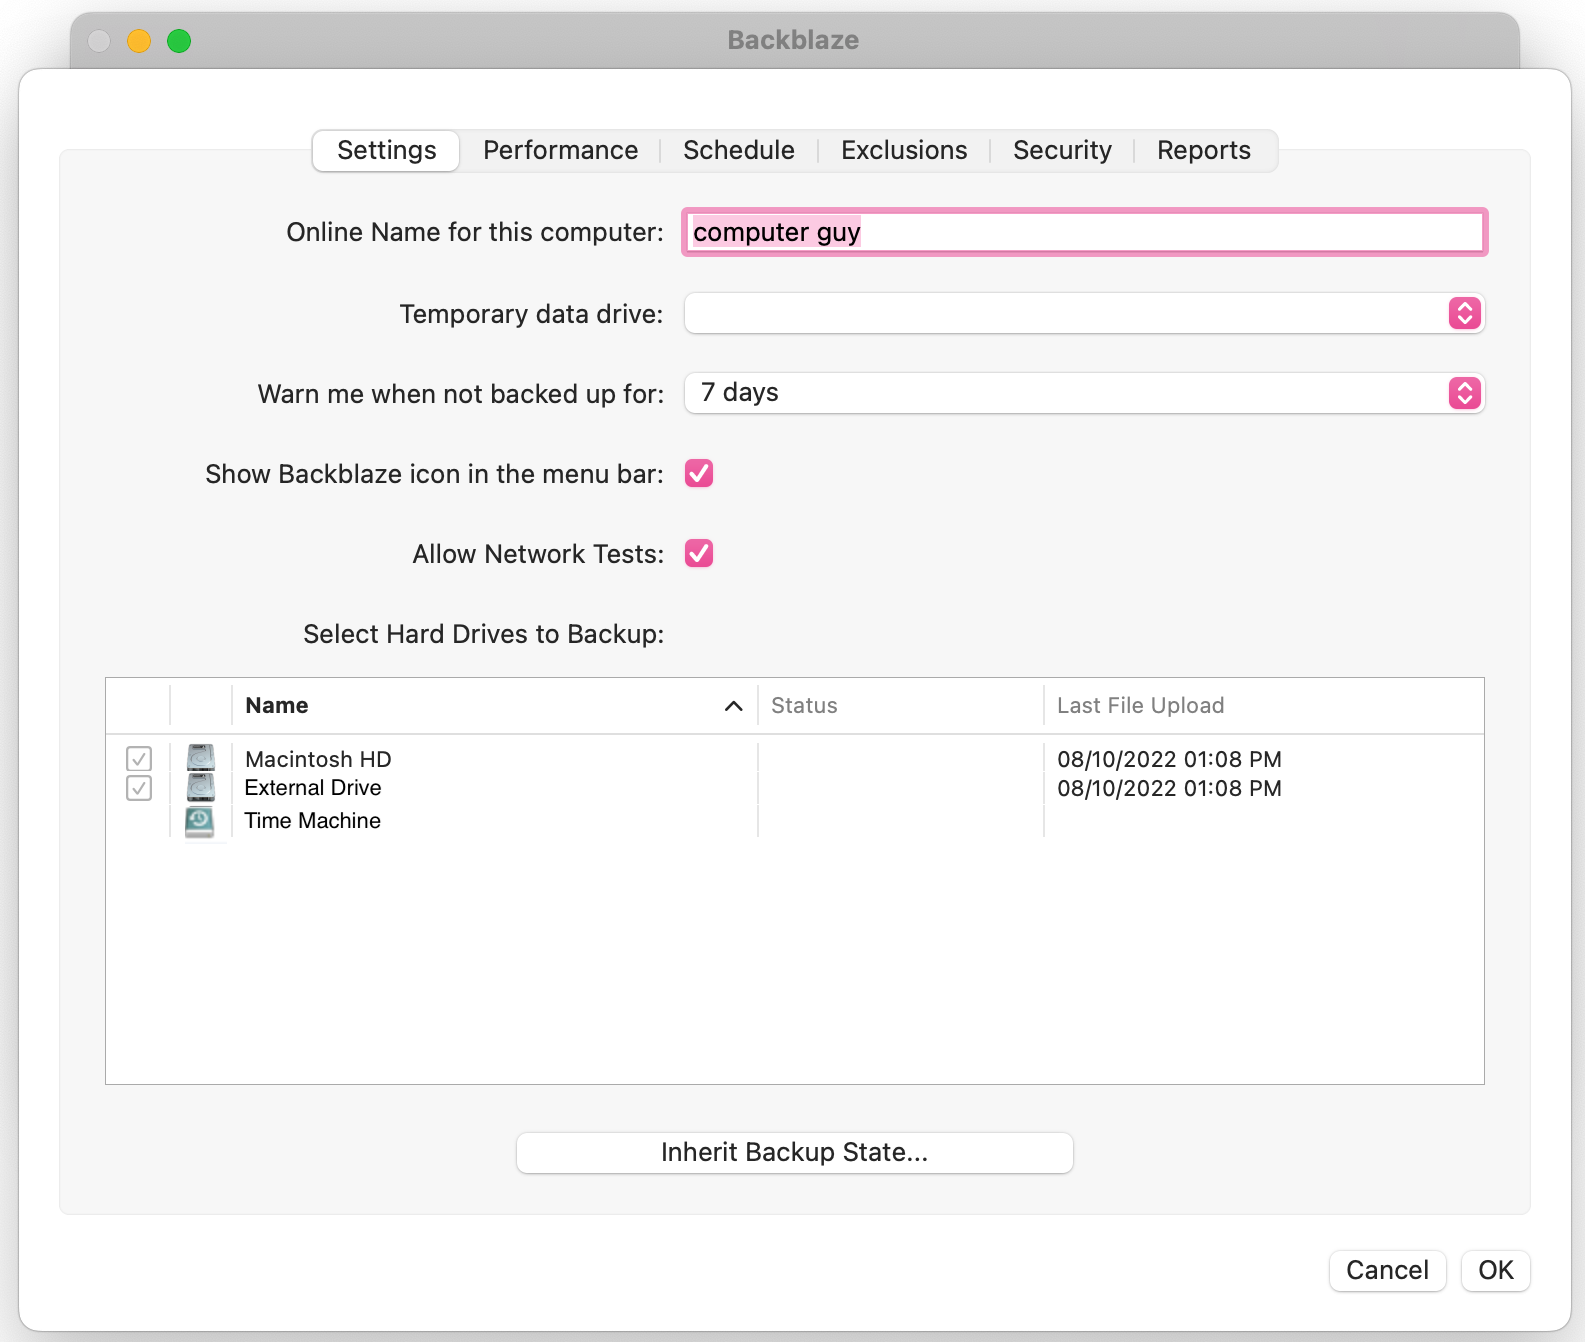
To avoid duplicating data, Backblaze will not back up any drive that contains Time Machine data on it. The drive will be listed in Backblaze's "Select Hard Drives to Backup" as Time Machine and will not be selectable.
If you'd like to back up that drive to Backblaze, you can split the drive in to two partitions, one for Time Machine, the other for storage. The storage drive can be backed up to Backblaze.
WARNING: These instructions involve making major changes to the structure of an external hard drive. It has the potential to cause data loss. Make sure any important files have been copied to another disk on your computer as well for safekeeping.
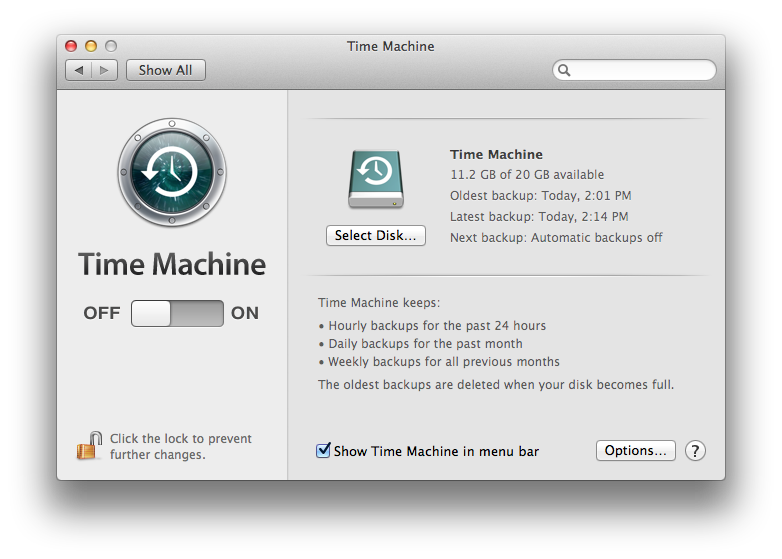
1. Turn off Time Machine
Open the System Preferences and choose Time Machine. Turn Time Machine off.
2. Open Disk Utility
Disk Utility can easily be found via Spotlight, but it's located in /Applications/Utilities/Disk Utility

3. Select the drive that contains your Time Machine volume
Note: Make sure to select the drive itself, not just the Time Machine volume.
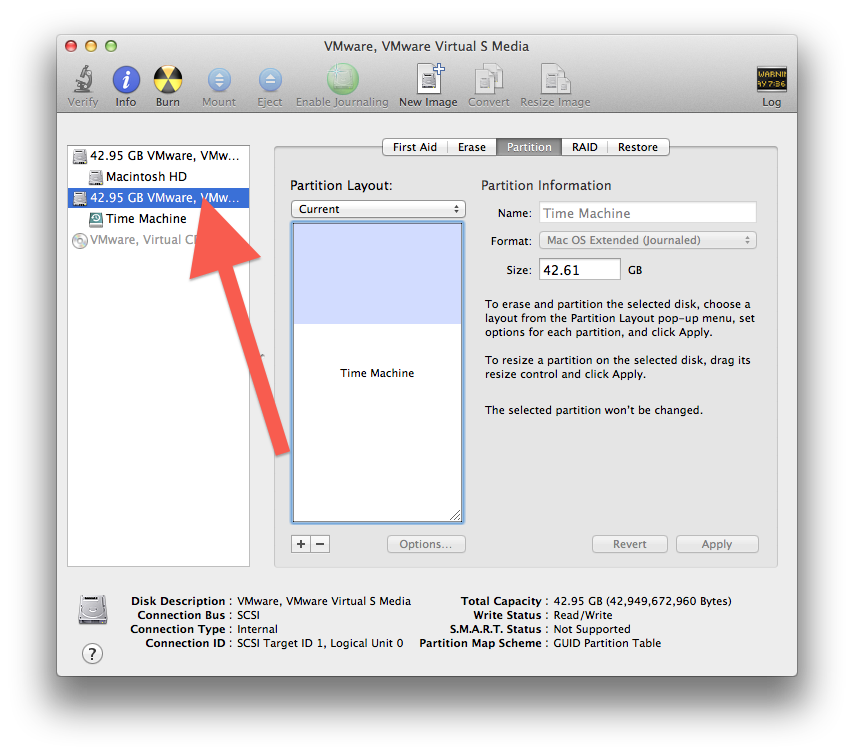
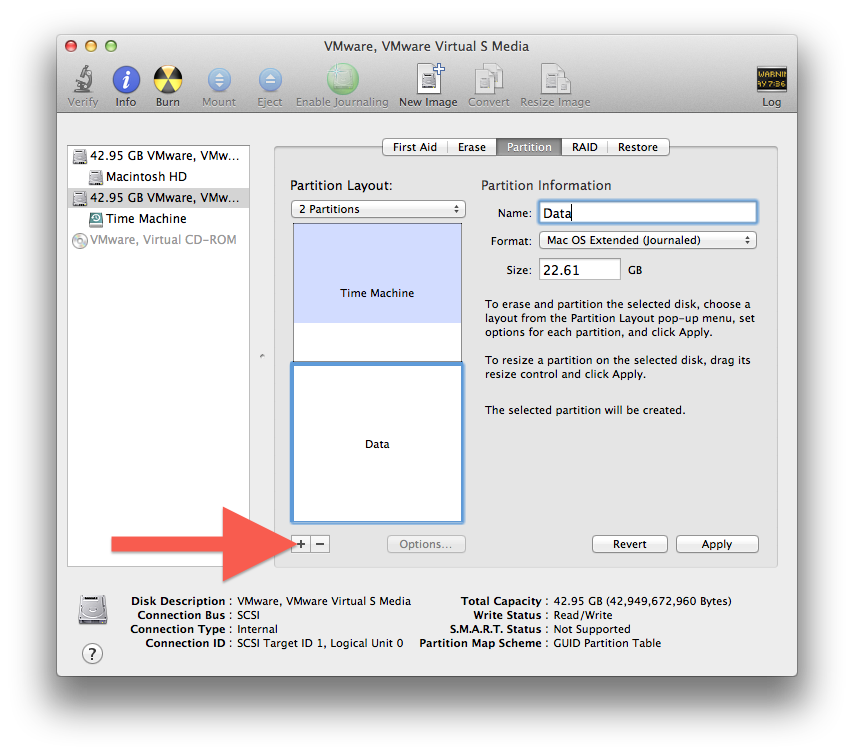
4. Drag the resize slider upwards to resize the Time Machine partition
You can slide it all the way up to the light blue area, or a lesser portion if you'd like. You can also type in a specific size in the Size field.
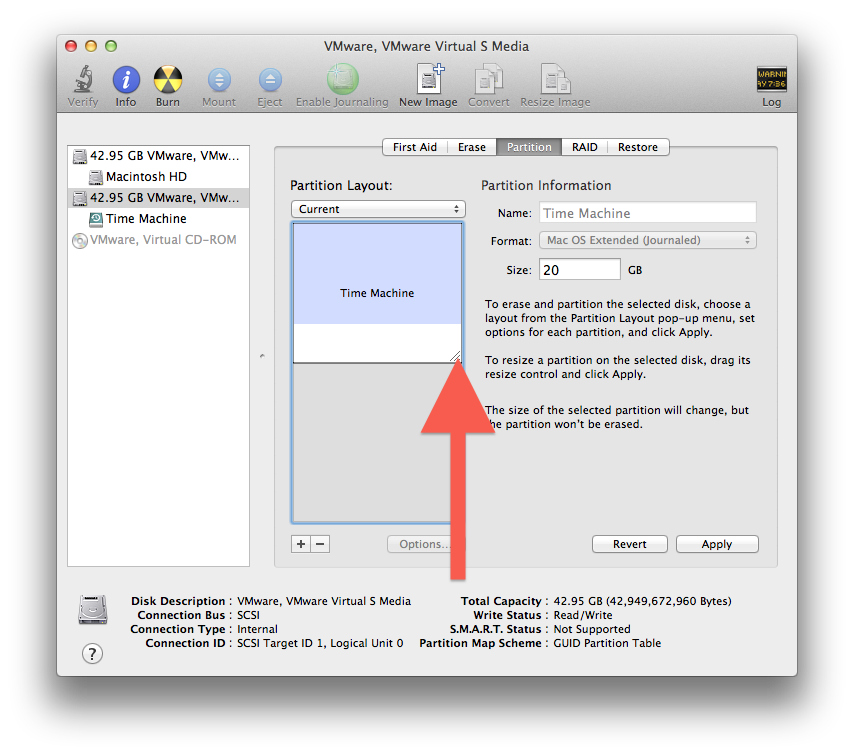
5. Click the plus sign to add a new partition
Give it a name in the Name field. Click "Apply"
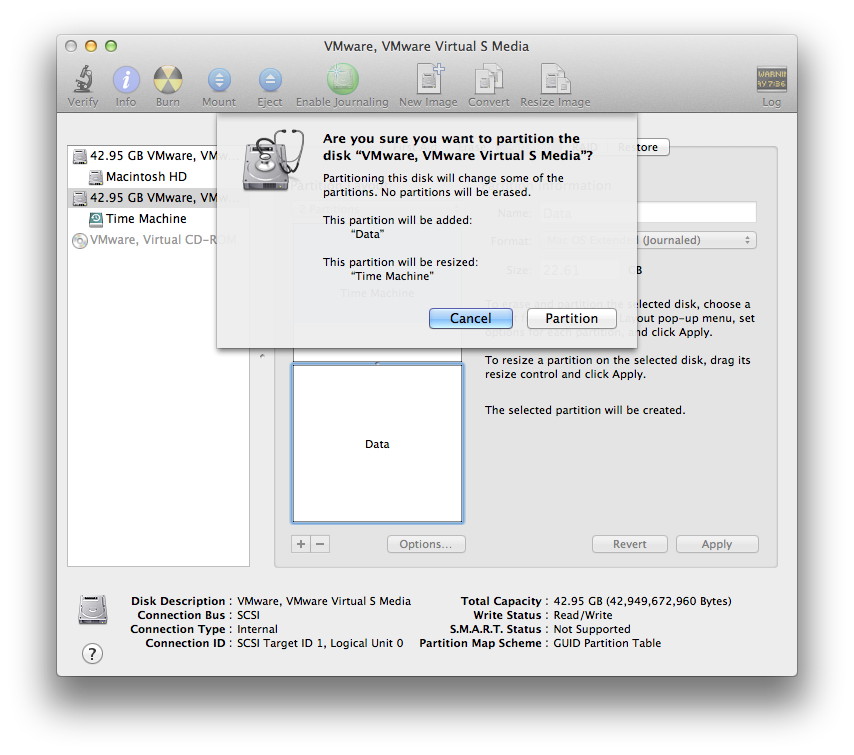
6. Click "Partition" to confirm the changes
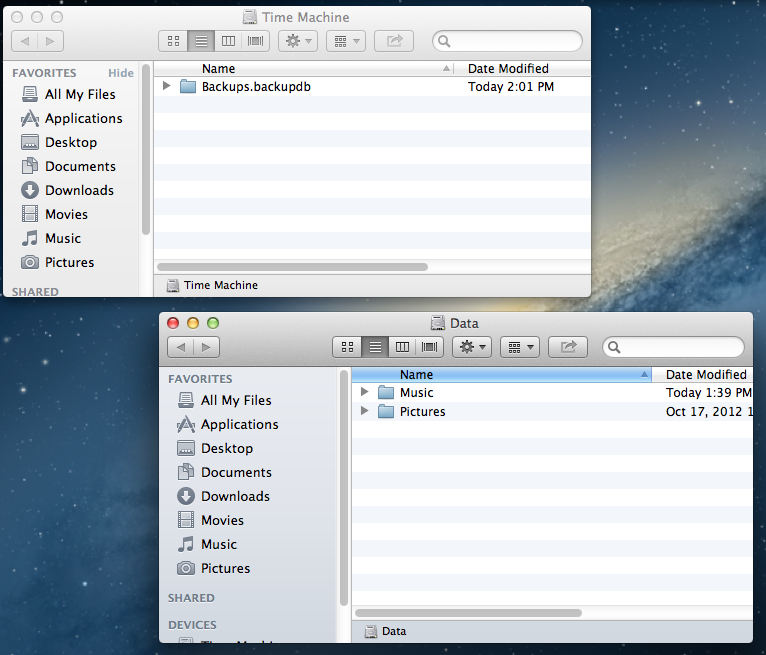
7. Quit Disk Utility and switch to the Finder.
Navigate to your Time Machine drive, and select all the files and folders, except Backups.backupdb.
Copy them to your newly created Data drive and delete the originals from the Time Machine drive.

8. Set Backblaze to backup the newly created drive
Open the System Preferences, choose Backblaze and click on Settings.
Select the newly created Data drive for backup to Backblaze.
Click OK to accept the changes.

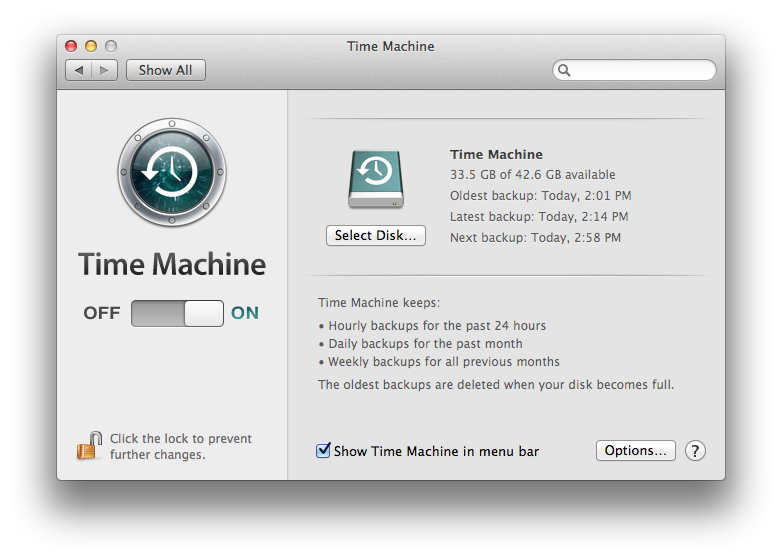
9. Turn back on Time Machine.
Open the System Preferences and choose Time Machine. Turn Time Machine on.
Articles in this section
- How to only backup select folders
- How to backup OneDrive on Mac
- Why is my Veracrypt software preventing my drive from backing up?
- Box Drive files cannot be backed up by Backblaze on Mac
- Will Backblaze back up iCloud Drive on Mac?
- Will Backblaze backup the iCloud drive on Windows?
- Network Management - Wi-Fi Block List
- Can Backblaze backup my OneDrive folder? (Windows)
- Backing Up a Boot Camp Partition
- Backblaze and Bootcamp