Introduction
Quest QoreStor is a storage product that allows global dedupe and compression across all media it stores. It can be used as a backup repository destination to dedupe all your backups, saving network bandwidth and cloud storage costs. It works directly with many backup vendors and also emulates a NAS with CIFS and NFS support, which is how it works with Veeam.
This guide will cover how to configure guest QoreStor can be configured with B2 Cloud Storage and Veeam Backup and Recovery. These instructions are for Veeam 11 but should be the same for Veeam 10 as well.
Note: QoreStor Rapid CIFS plug needs to be installed on your Veeam Proxy server to get the full benefits of the deduplication offered by QoreStor. You can download the Rapid CIFS plugging for Windows, for your version of QoreStore here: https://support.quest.com/qorestor/
Guide
1) Login to the QoreStor admin console, and click on Cloud Storage, then in the right-hand section, click on Configure to configure the Cloud Tier Settings.


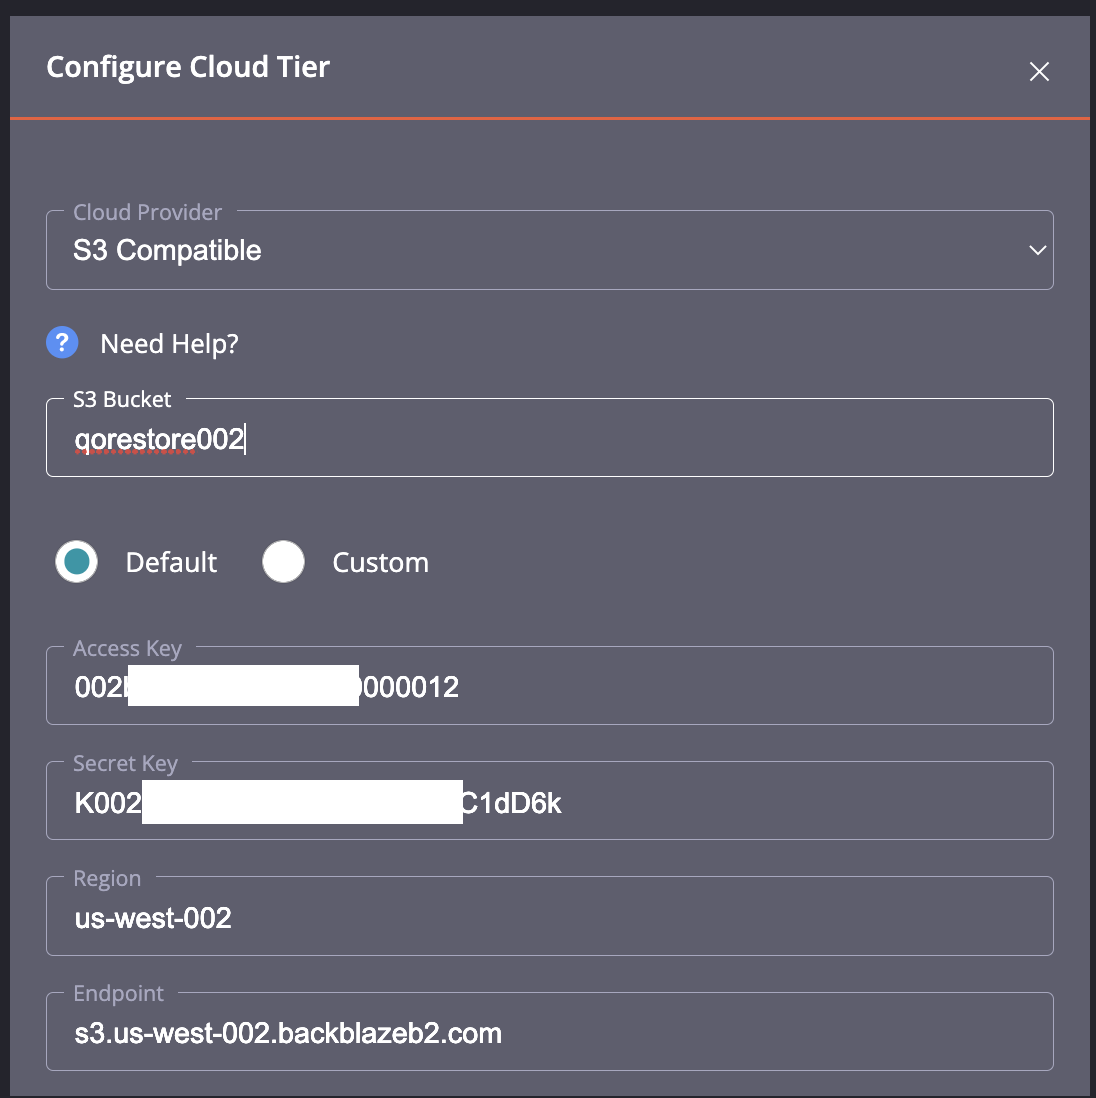
2) Fill out the Cloud Tier form, selecting S3 Compatible for the Cloud Provider, followed by the name of the bucket to be created for use with QoreStor, and your AppKey credentials from your Backblaze account. Then scroll down the form and enter an encryption key (mandatory).

3) Next we need to add a shared folder that can be mounted by Veeam to use as a repository. In QoreStor, shared folders are called Containers. Click on Containers in the left-hand menu, and then click on Add Container

4) Change the Protocol to NAS, enter a container name, and leave the storage group as default.

5) Change the Marker to Auto, and de-select NFS, leaving only the CIFS protocol for this container.

6) Leave the CIFS Client access set to Open, or create an access list (recommended) to only allow your Veeam or backup servers of choice to access the container.

7) Optionally, enable the Recycle Bin feature, and then click Next. For more information, see the QoreStor User Guide.

8) Review the summary and then click Finish.

9) The next step is to add the QoreStor container as a repository in the Veeam Backup and Recovery Console.
In the Veeam Console, go to the Backup Infrastructure section, and click on Backup Repositories. Then select Add Backup Repository from the top menu bar.

10) For the backup repository type, click on Network attached storage (NAS).

11) For the type of NAS, click on SMB share.

13) Enter the container name and optional description.

14) Enter the path to the container (shared folder) on the QoreStor server, using UNC naming conventions. Then add credentials, which would be your Windows Admin credentials, not the QoreStor admin credentials.
Next pick the proxy server you will be using. This is important as a QoreStor agent needs to be installed on this same server (discussed later).

15) On the Repository page, click Advanced.

16) Review the settings below and make sure your options match the below settings and then click OK.

17) On the Mount Server page, make sure that vPower NFS is enabled.

18) Review the summary page and click Apply.

19) Wait until the settings are applied, and then click Next.

20) Review the summary page and then click Finish.

21) Now create a new backup job that uses the QoreStor repository that we just created. Click on the Home menu, and then click on Backup Job in the menu bar.

22) Enter a Job Name and click Next.

23) Add the VMs that will be part of this backup job and click Next.

24) Select the backup proxy where the Quest Rapid CIFS plug-in has been installed (see Note at the top of this article), then select the Quest Backup repository, choose your preferred retention period and then click Advanced.

25) On the Backup tab, select standard Incremental backups, and also choose the option to create periodic Active Full backups. Then click the Storage tab.

26) On the Storage tab, make sure the Data reduction options match those below. For Compression Level select Dedup-friendly, and for Storage optimization, select Local Target (large blocks), and then click OK.

27) Leave Guest Processing options at defaults and click Next.

28) Select your job schedule options and then click Apply.

29) Review the job summary, optionally picking to run the job now, and click Finish.

30) Return to the QoreStor Admin console to set the cloud tiering policy. Click on Containers, and then on the Container page to the right, click on the 3-dot menu, and select Enable Cloud Tiering Policy.

31) Define how long the files should be on the local disk before they are copied to your Backblaze B2 bucket, and then select how long the files should be on the local disk before they are deleted. Click Enable to activate the policy and you are done.

For more detailed information on connecting Qorestor to Veeam, please see the QoreStor integration guide for Veeam. https://support.quest.com/download/downloads?id=6118736
The S3 Compatible API for Backblaze B2 Cloud Storage allows 1000’s of integrations to work with B2 Cloud Storage natively. If you’re new to the S3 Compatible API, please see our Getting Started Guide. If you have any trouble using Quest QoreStor with B2, please let us know by emailing us at b2feedback@backblaze.com.
Articles in this section
- Quickstart Guide for Veeam 12 Direct-to-Cloud Backups to Backblaze B2 with Immutability
- Quickstart Guide for Acronis CyberProtect and Backblaze B2 Cloud Storage
- Quickstart guide for SFTPCloud
- Quickstart Guide for Veritas NetBackup and Backblaze B2 Cloud Storage
- Quickstart Guide for Offshoot and Backblaze B2
- Quickstart Guide for Files.com and Backblaze B2 Cloud Storage
- Quickstart Guide for Encoding.com and Backblaze B2 Cloud Storage
- Quickstart Guide for Mountain Duck and B2 Cloud Storage
- Quickstart Guide for Microsoft 365 Backup with MSP360 and Backblaze B2 (Multiple Instances)
- Quickstart Guide for Microsoft 365 Backup with MSP360 and Backblaze B2 (Single Instance)