
Introduction
Maytech Quatrix is a secure file sharing service that also allows automatic synchronization, copying and migration to cloud object storage providers. This guide will show you how to configure a copy/move/sync job using Backblaze B2 as the cloud object storage.
To get started, you will need the following:
- Backblaze account with B2 Cloud Storage enabled.
- B2 bucket
- Application Key and Application Key ID
- Maytech Quatrix account.
Add B2 Cloud Storage as a “Remote Site”
- In the left navigation menu, click on “Automations” to collapse the workflow options to find “External Workflows”
- Click on “Remote Sites” towards the top
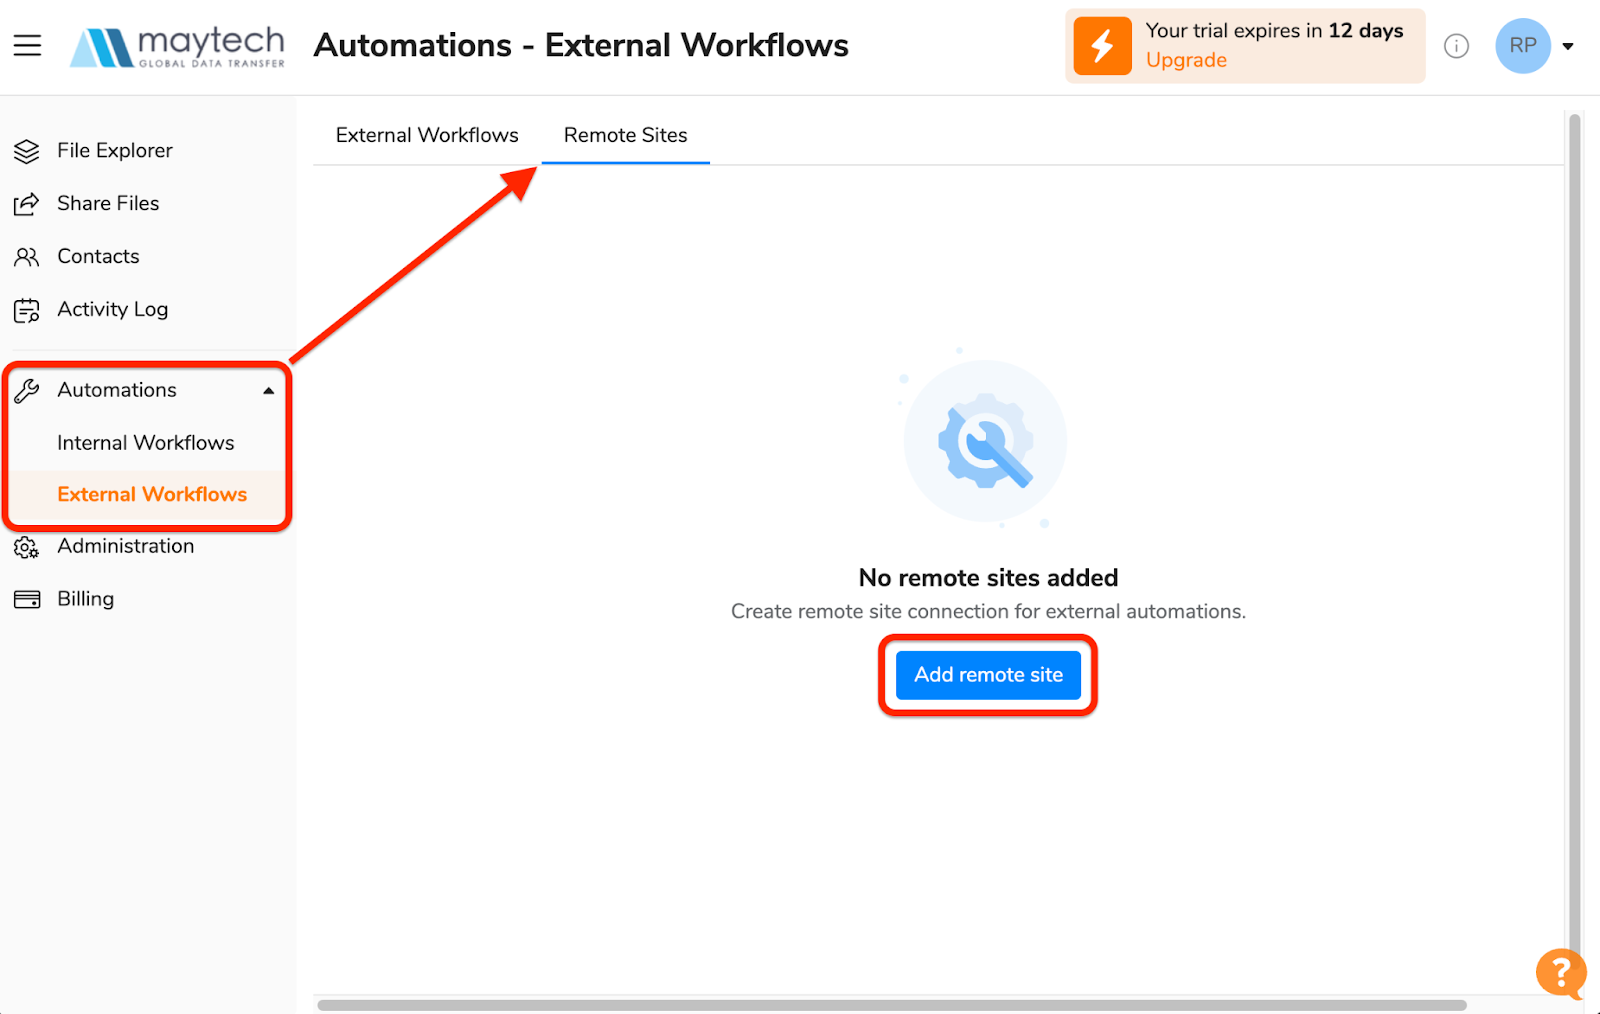
- Click

- “Name” - Type a name for your remote site
- “Type” - Select “Backblaze” in the dropdown menu and enter your keyID in the “Account” field then your applicationKey in the “Key” field. Be sure to leave the “Endpoint” field empty
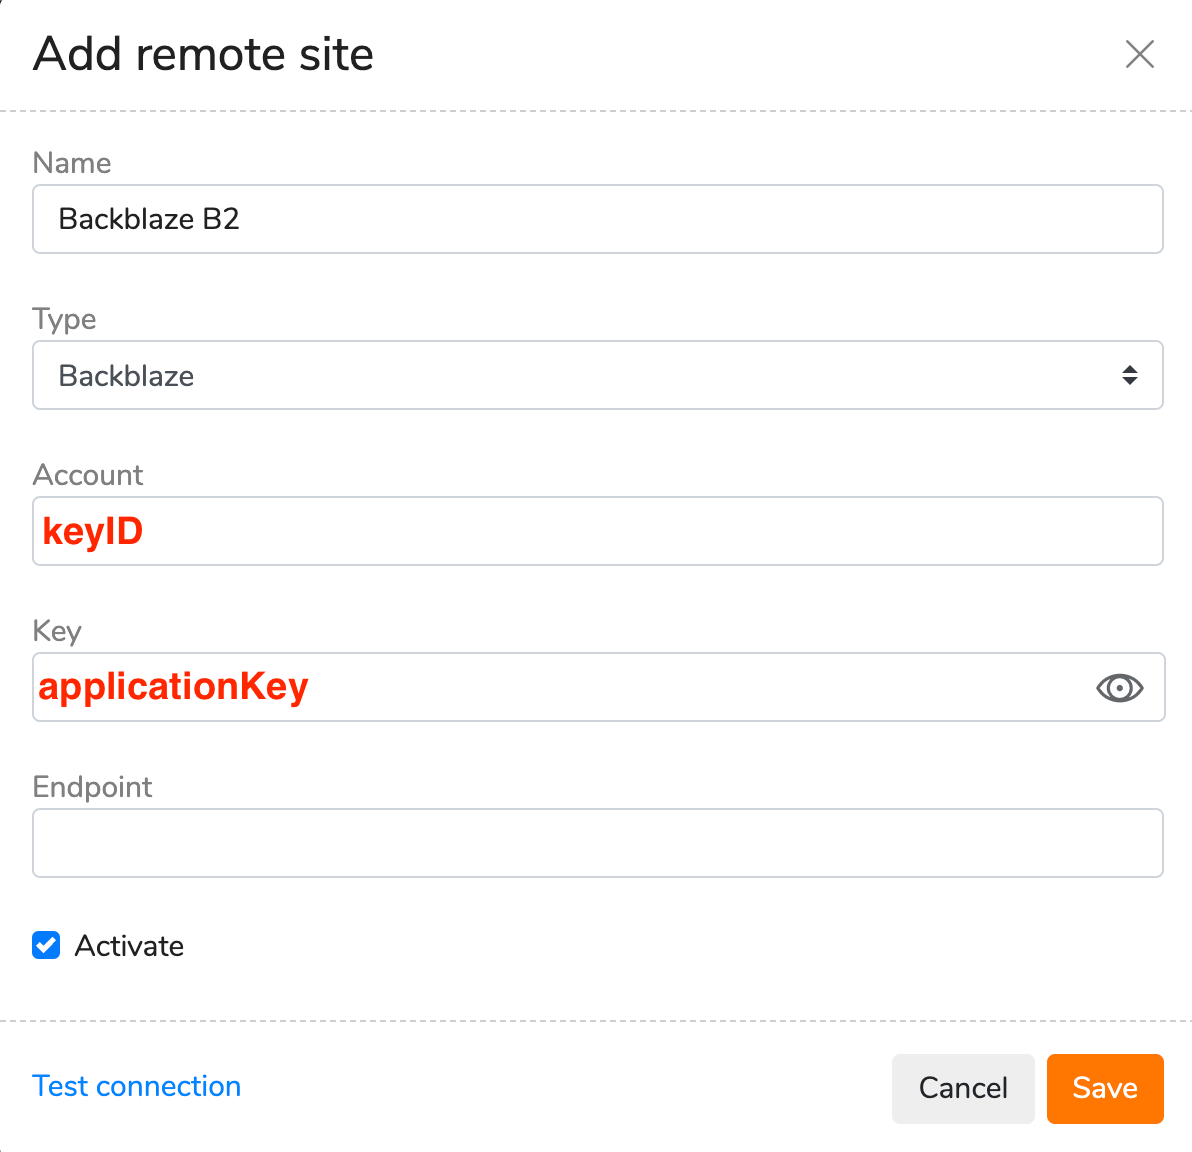
- Click “Save”
Create an External Workflow to start uploading data to B2
- Click on “External Workflows” towards the top
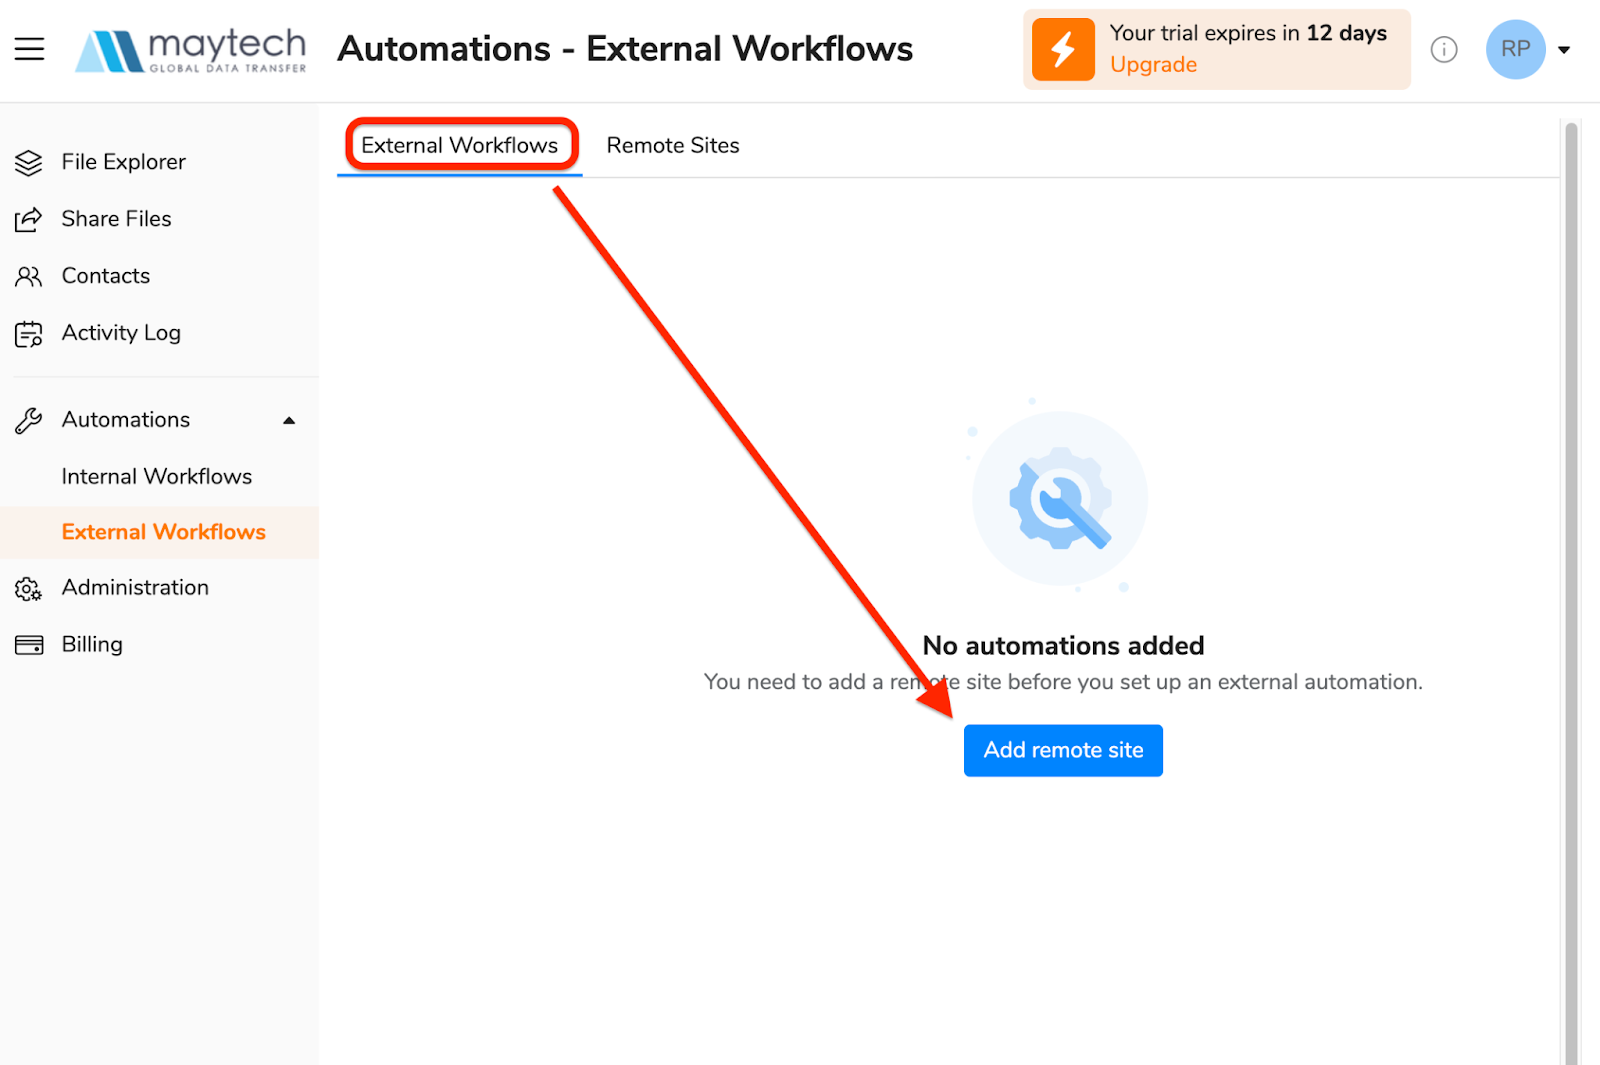
- Click

- “Automation name” - Name your automation
- “Workflow” - Select the appropriate job you would like to create
-
- Move files - move files from one location to another
- Sync files - mirror files between 2 locations
- Copy files - copy the files in 1 location to another location
- “Select source” - Choose the source location which contains the folder you want to move/sync/copy to B2.
- “Choose folder” - Choose the source folder you want to move/sync/copy to B2.
- “Select destination” - Choose the remote site you recently created for B2 in the dropdown menu
- “Type remote folder path” - Type in your B2 bucket name.
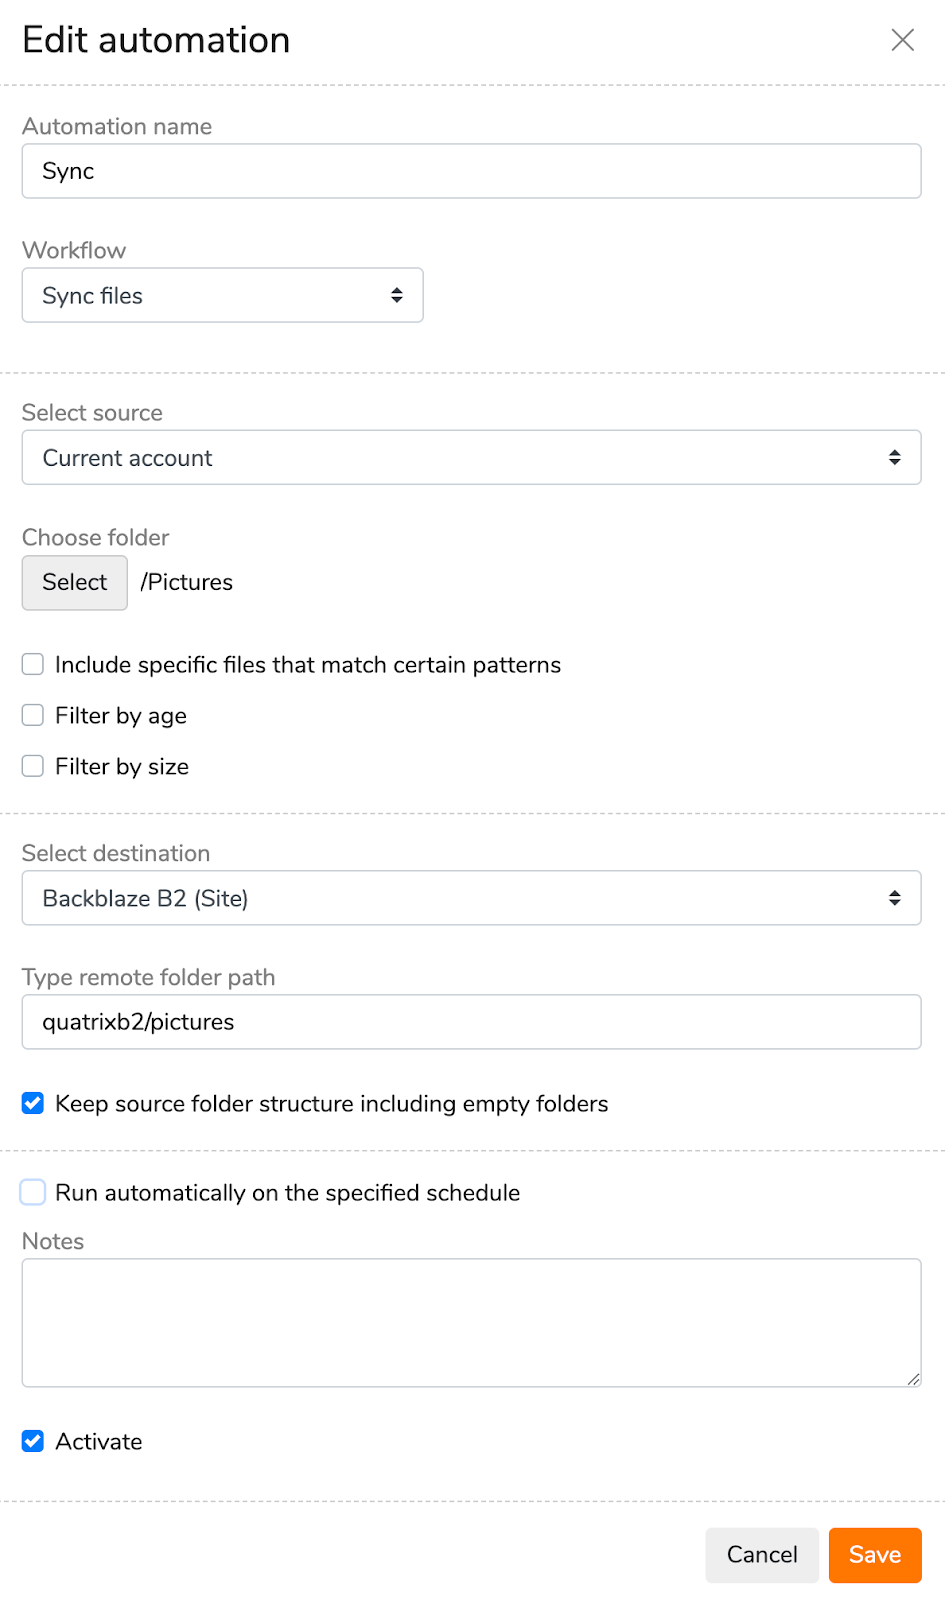
- Optionally you may designate a folder name after the bucket name indicated by a “/”. Example: quatrixb2/pictures (“quatrixb2” is the bucket name and “pictures” is the folder name. If the folder does not exist, it will automatically create it.)
- You may also add scheduling to this workflow:

- Click “Save”
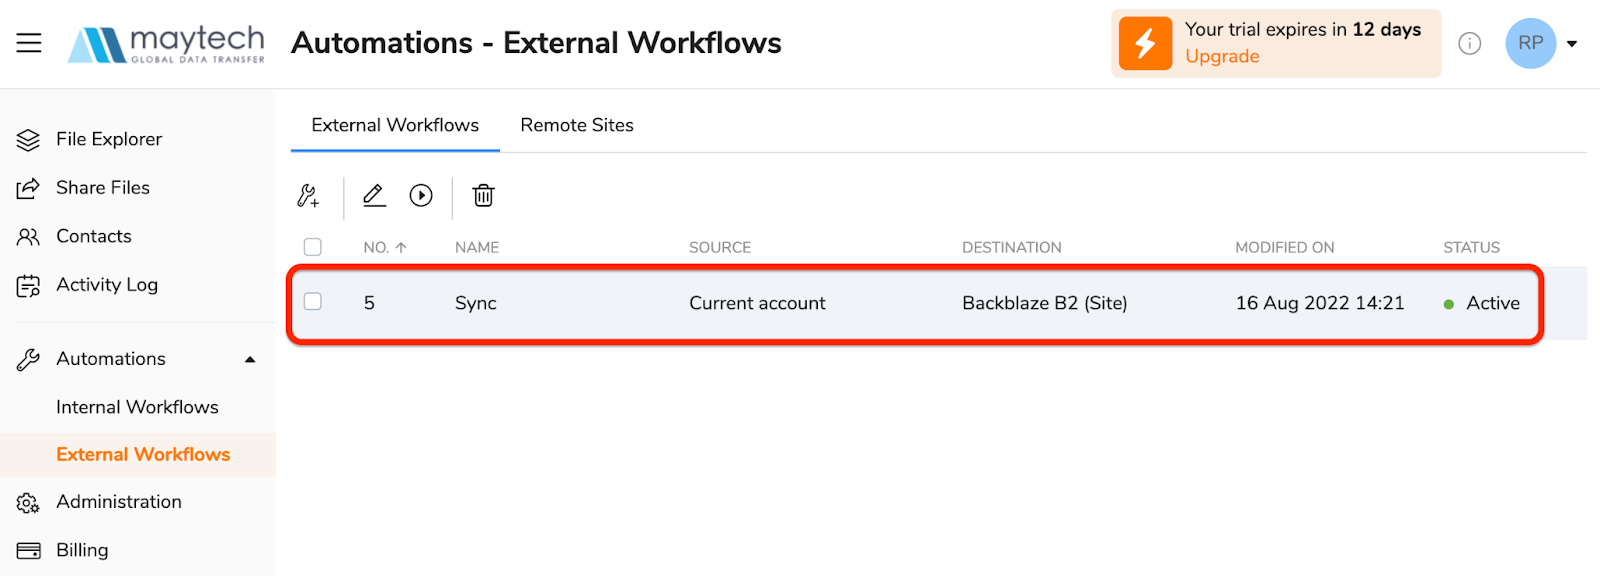
You should now see your newly created automation workflow under “External Workflows”
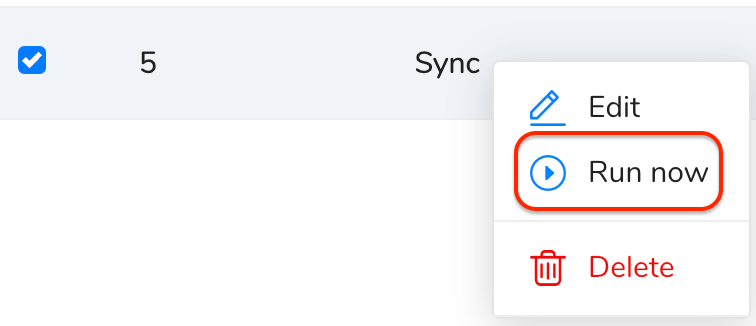
Note: If your workflow is not scheduled, it would be a manual workflow and will need to be manually run by selecting the workflow and clicking the “Run now” button (or right clicking the workflow directly and selecting “Run now”).

-OR-
Articles in this section
- Quickstart Guide for Veeam 12 Direct-to-Cloud Backups to Backblaze B2 with Immutability
- Quickstart Guide for Acronis CyberProtect and Backblaze B2 Cloud Storage
- Quickstart guide for SFTPCloud
- Quickstart Guide for Veritas NetBackup and Backblaze B2 Cloud Storage
- Quickstart Guide for Offshoot and Backblaze B2
- Quickstart Guide for Files.com and Backblaze B2 Cloud Storage
- Quickstart Guide for Encoding.com and Backblaze B2 Cloud Storage
- Quickstart Guide for Mountain Duck and B2 Cloud Storage
- Quickstart Guide for Microsoft 365 Backup with MSP360 and Backblaze B2 (Multiple Instances)
- Quickstart Guide for Microsoft 365 Backup with MSP360 and Backblaze B2 (Single Instance)