
Introduction
Cloudcasa is Kubernetes backup and DR as a service. With it you can easily set up a backup policy for your Kubernetes environment that sends its data directly to your Backblaze B2 bucket. In the case of a disaster, you can quickly restore your Kubernetes state as it was with a click of a button. In this guide we will go over the steps required to set up Cloudcasa with your B2 object storage bucket.
Prerequisites
- An active Kubernetes environment
- Kubernetes command-line tool, kubectl
- Cloudcasa and Backblaze account
Guide
Get your B2 Application Keys and S3 Endpoint URL
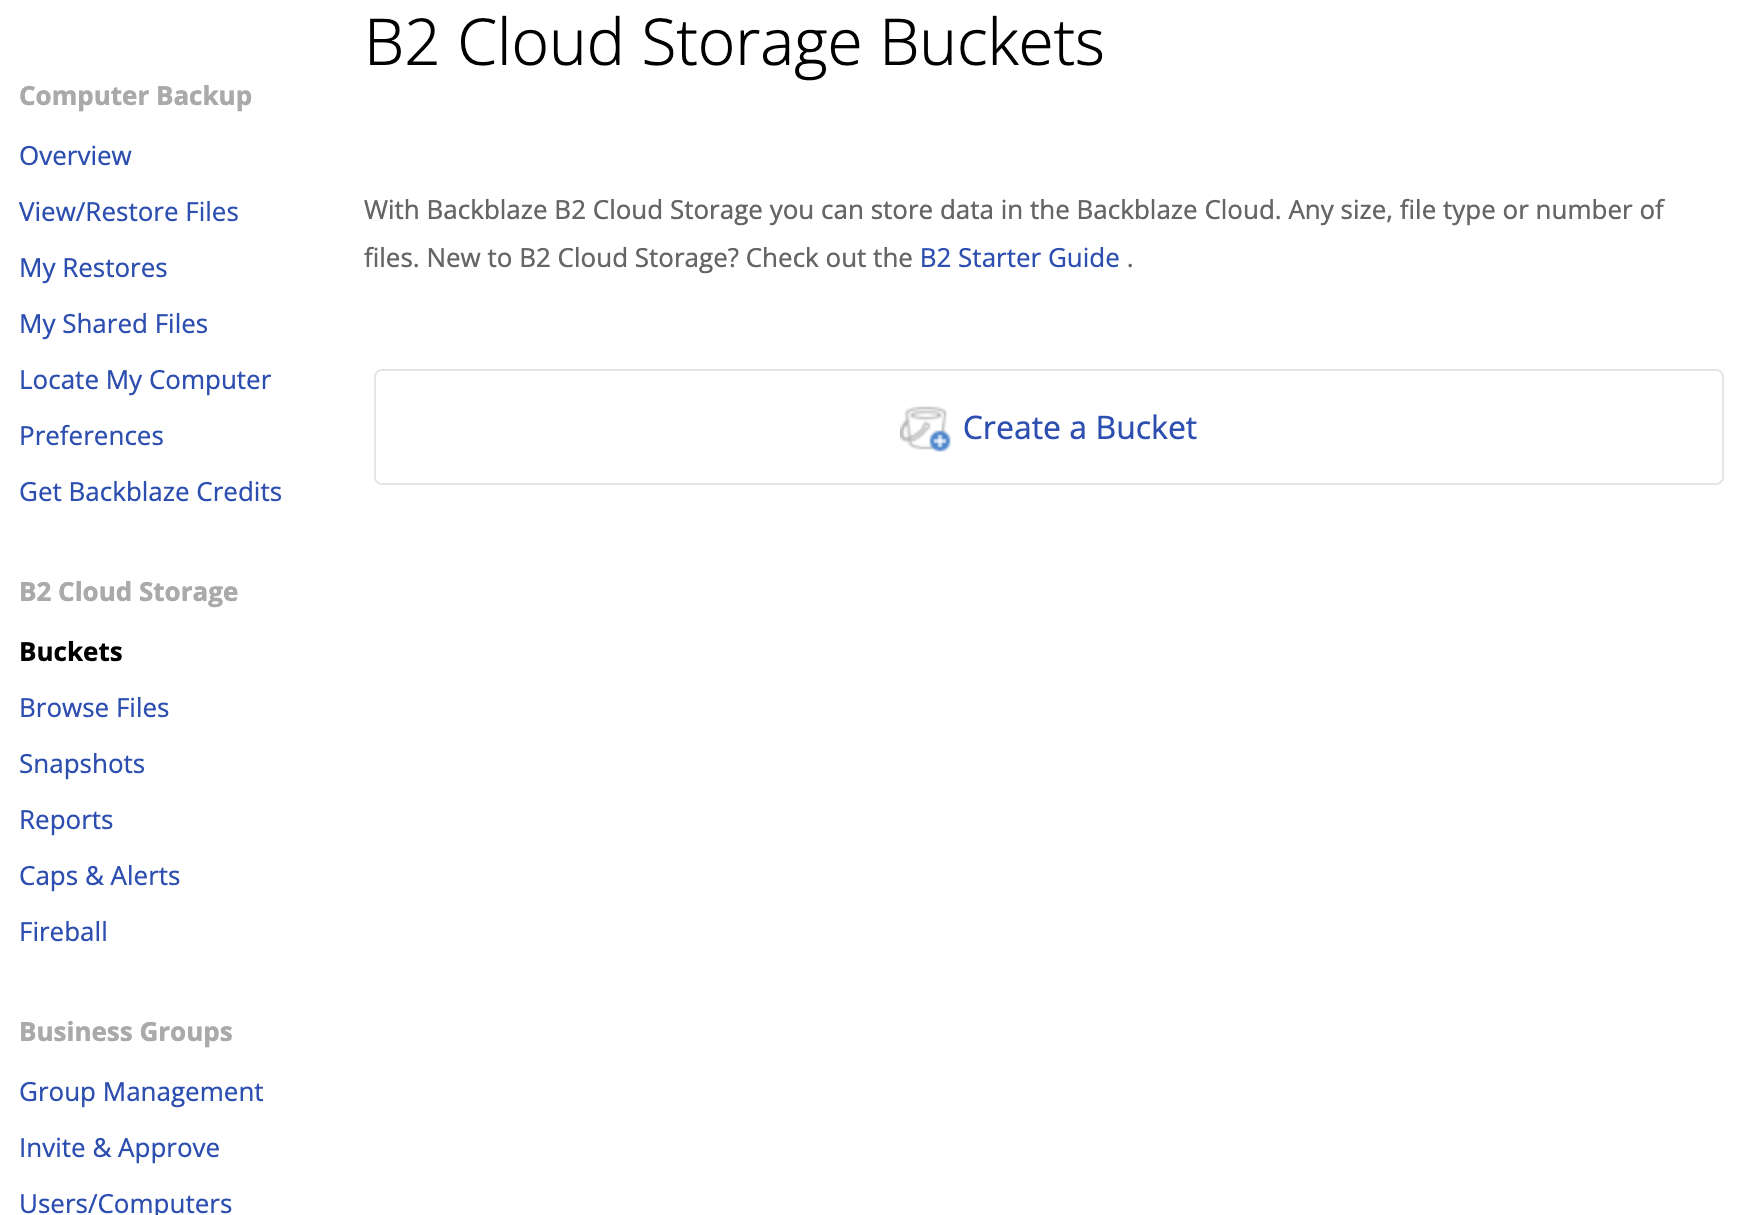
1) Log in to your account at www.backblaze.com and click the Buckets in the left-hand column. Once here, click the Create a Bucket button.
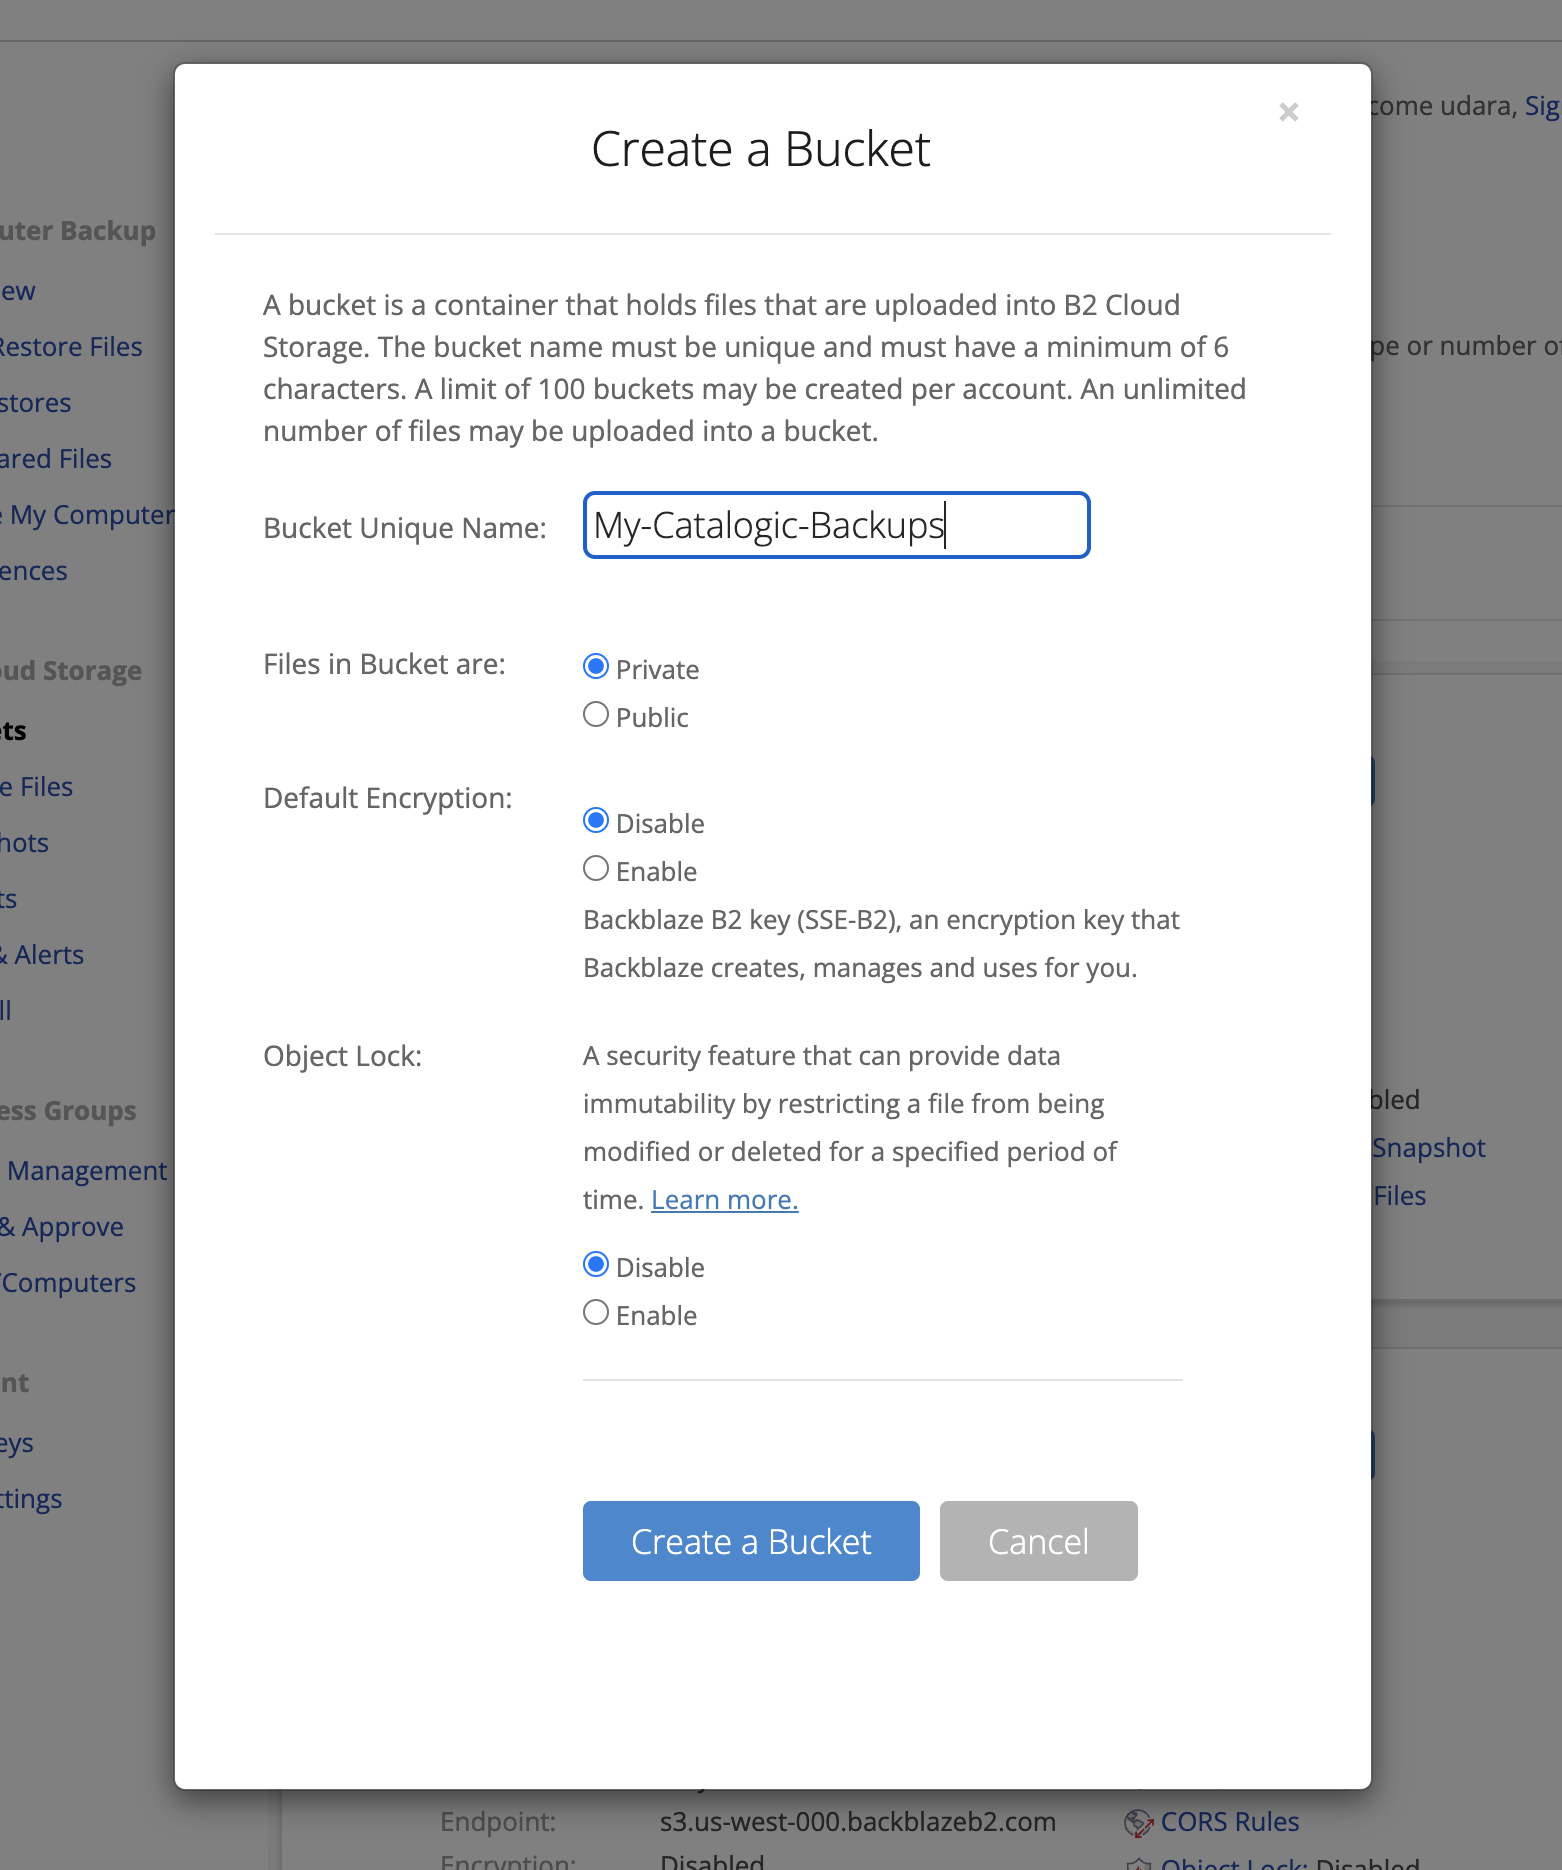
2) Give your Bucket a unique name. You will see a few settings here namely Default Encryption; enable this if you would like to enable server-side encryption.
Note: We do not recommend using server-side encryption if you are using client-side encryption through Kasten. Server-side encryption will add latency to restores of files from B2.
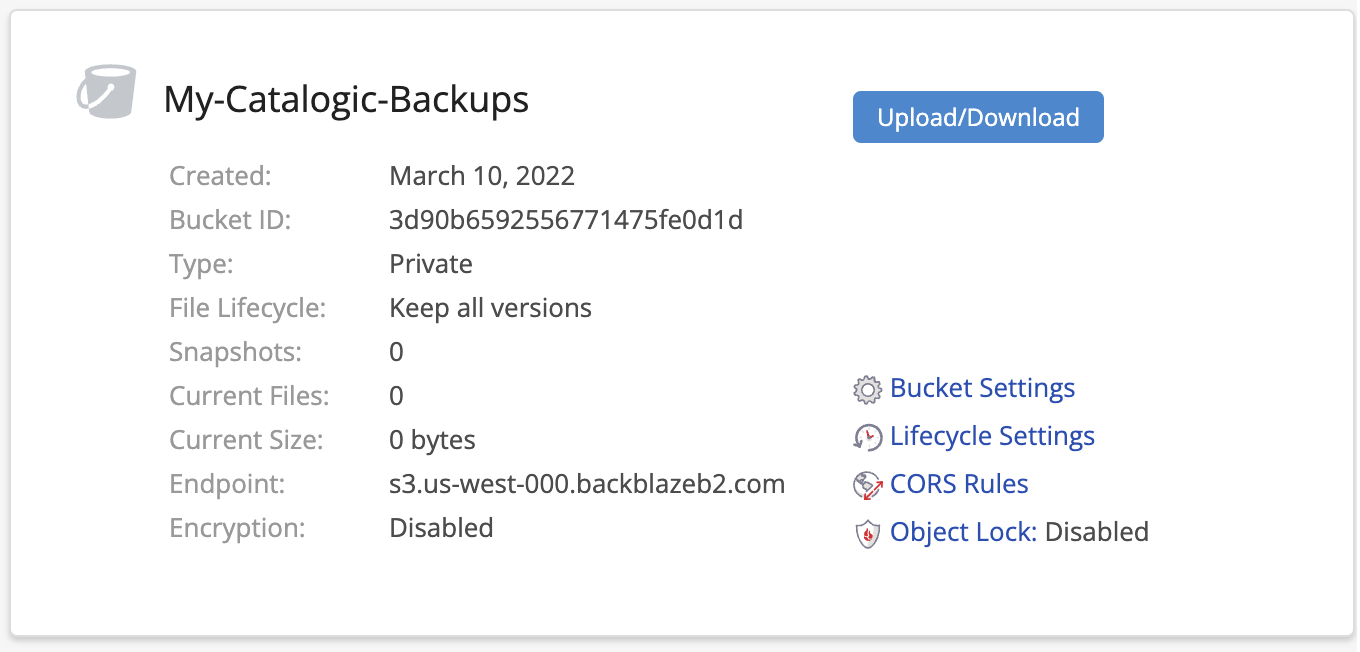
3) You will now see your Bucket on the Buckets page. Take note of the S3 Endpoint listed here for use later when setting up B2 with Cloudcasa.
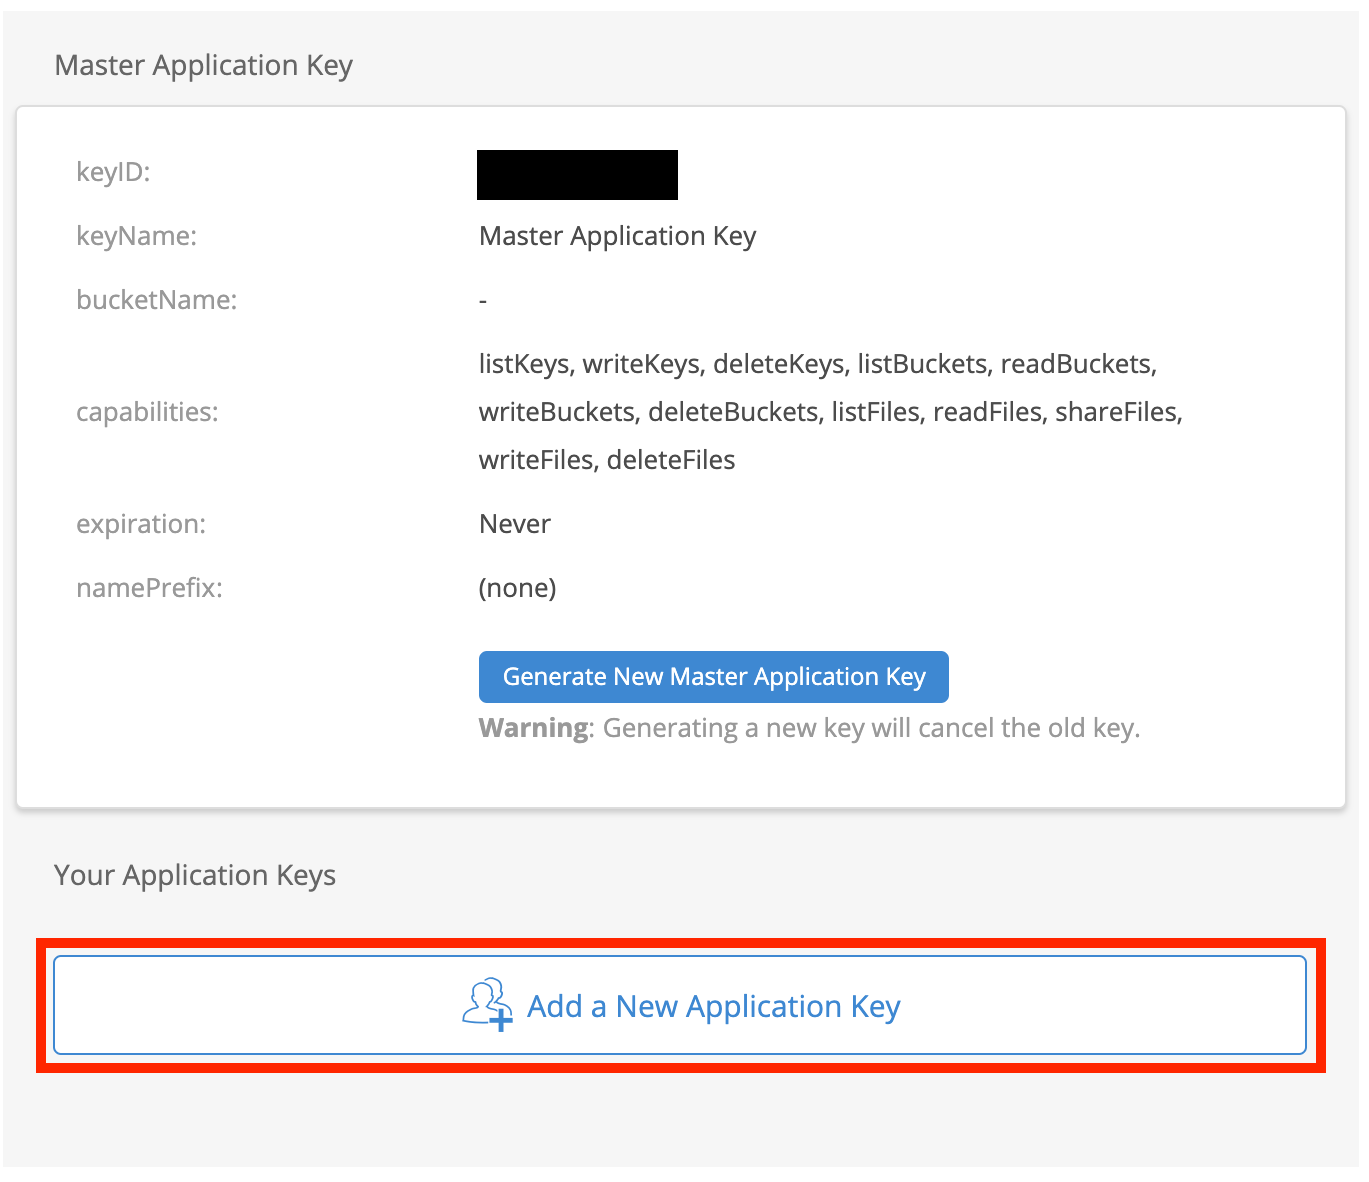
4) Now click the App Keys link in the left-hand column to navigate to the App Keys page and click Add a New Application Key.
5) Give your key a name, and access to the bucket you created. Then click Create New Key.
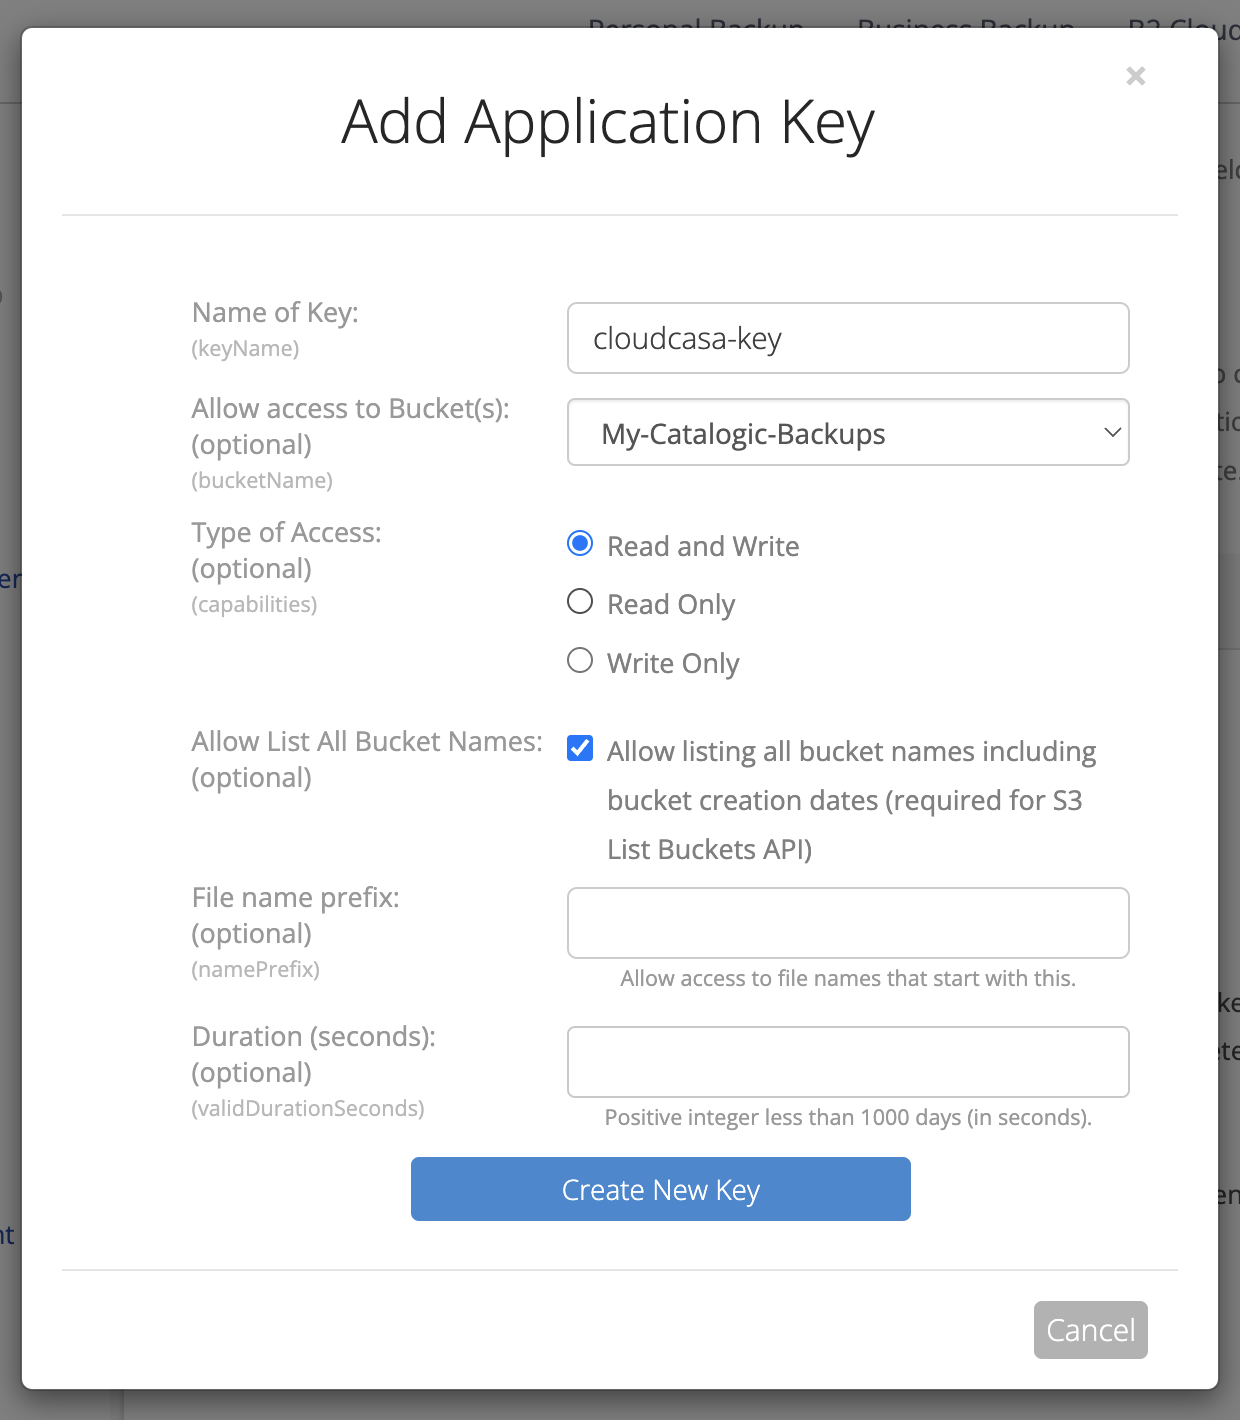
6) In a blue box on the App Keys page you’ll now see the keyID and applicationKey listed here, along with the S3 Endpoint we saw when making the bucket. Make sure you copy the keyID and applicationKey listed somewhere safe as the applicationKey will NOT be available again to view once you leave the page.

Now that you have the applicationKey, keyID, and S3 URL Endpoint you are ready to start setting up the Bucket as a storage target in Cloudcasa.
Setting Up Cloudcasa
Add Backblaze B2 to your Cloudcasa storage buckets.
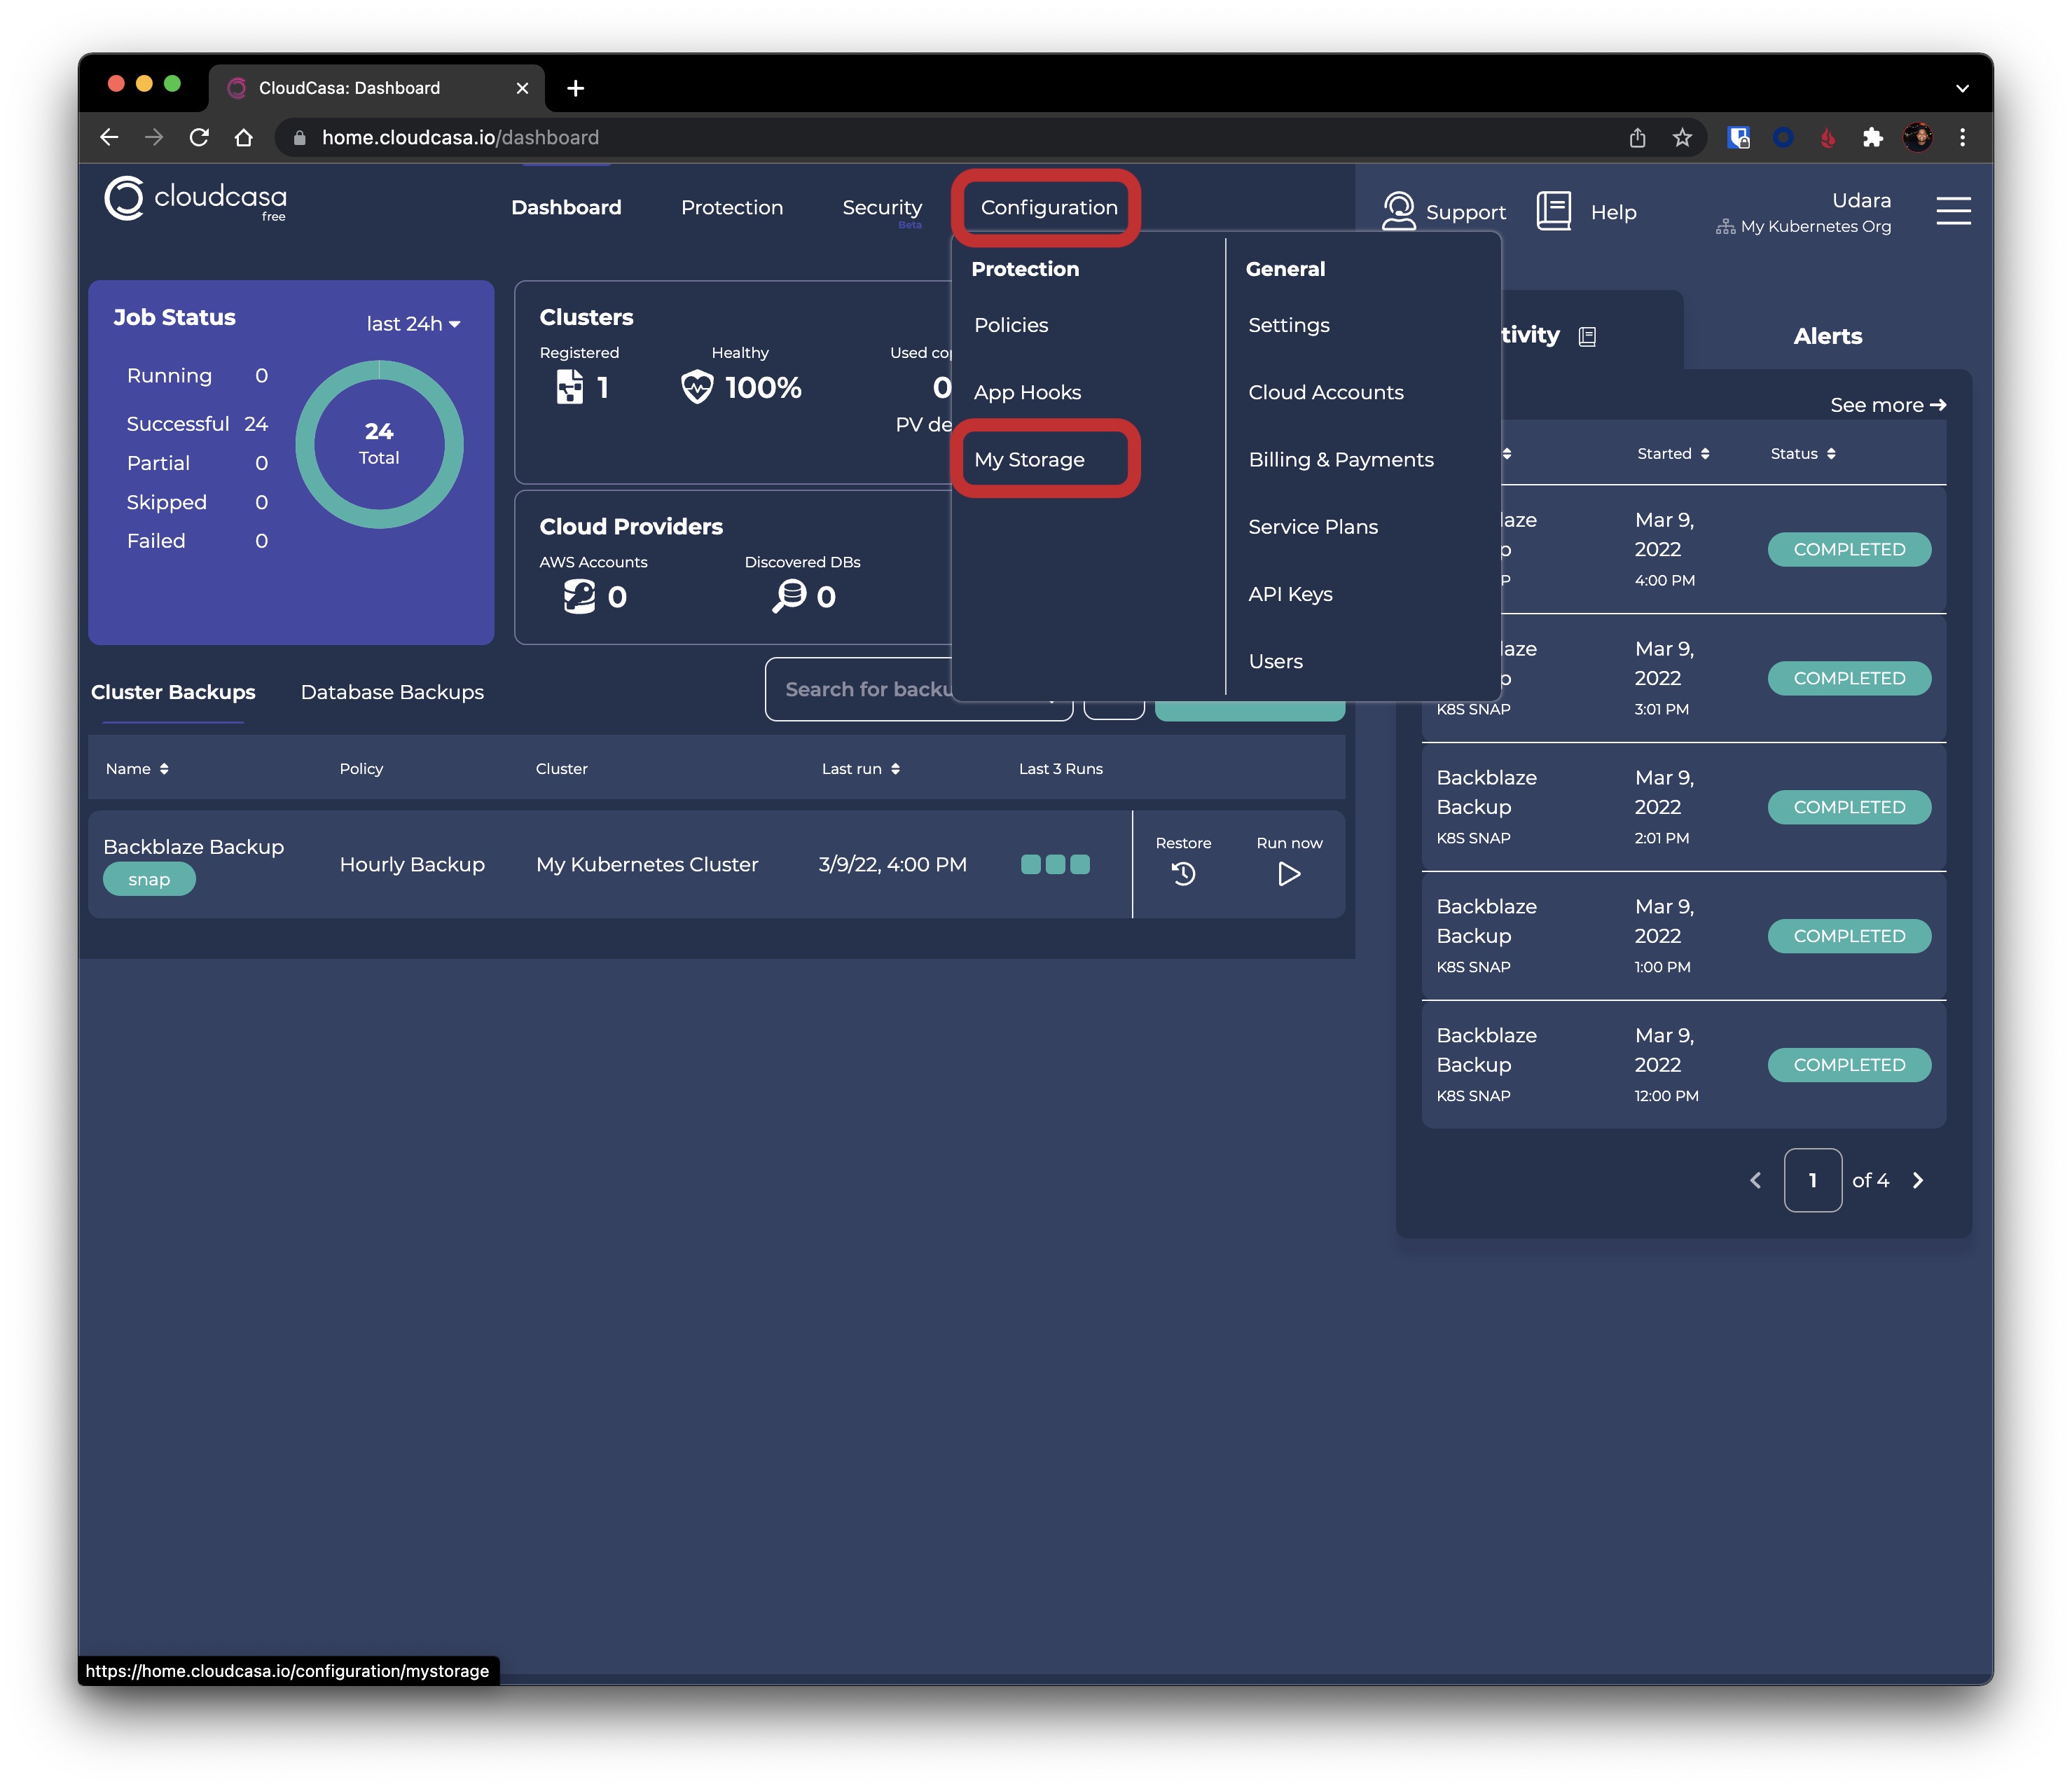
1) Select My Storage under the Configuration tab on your homepage
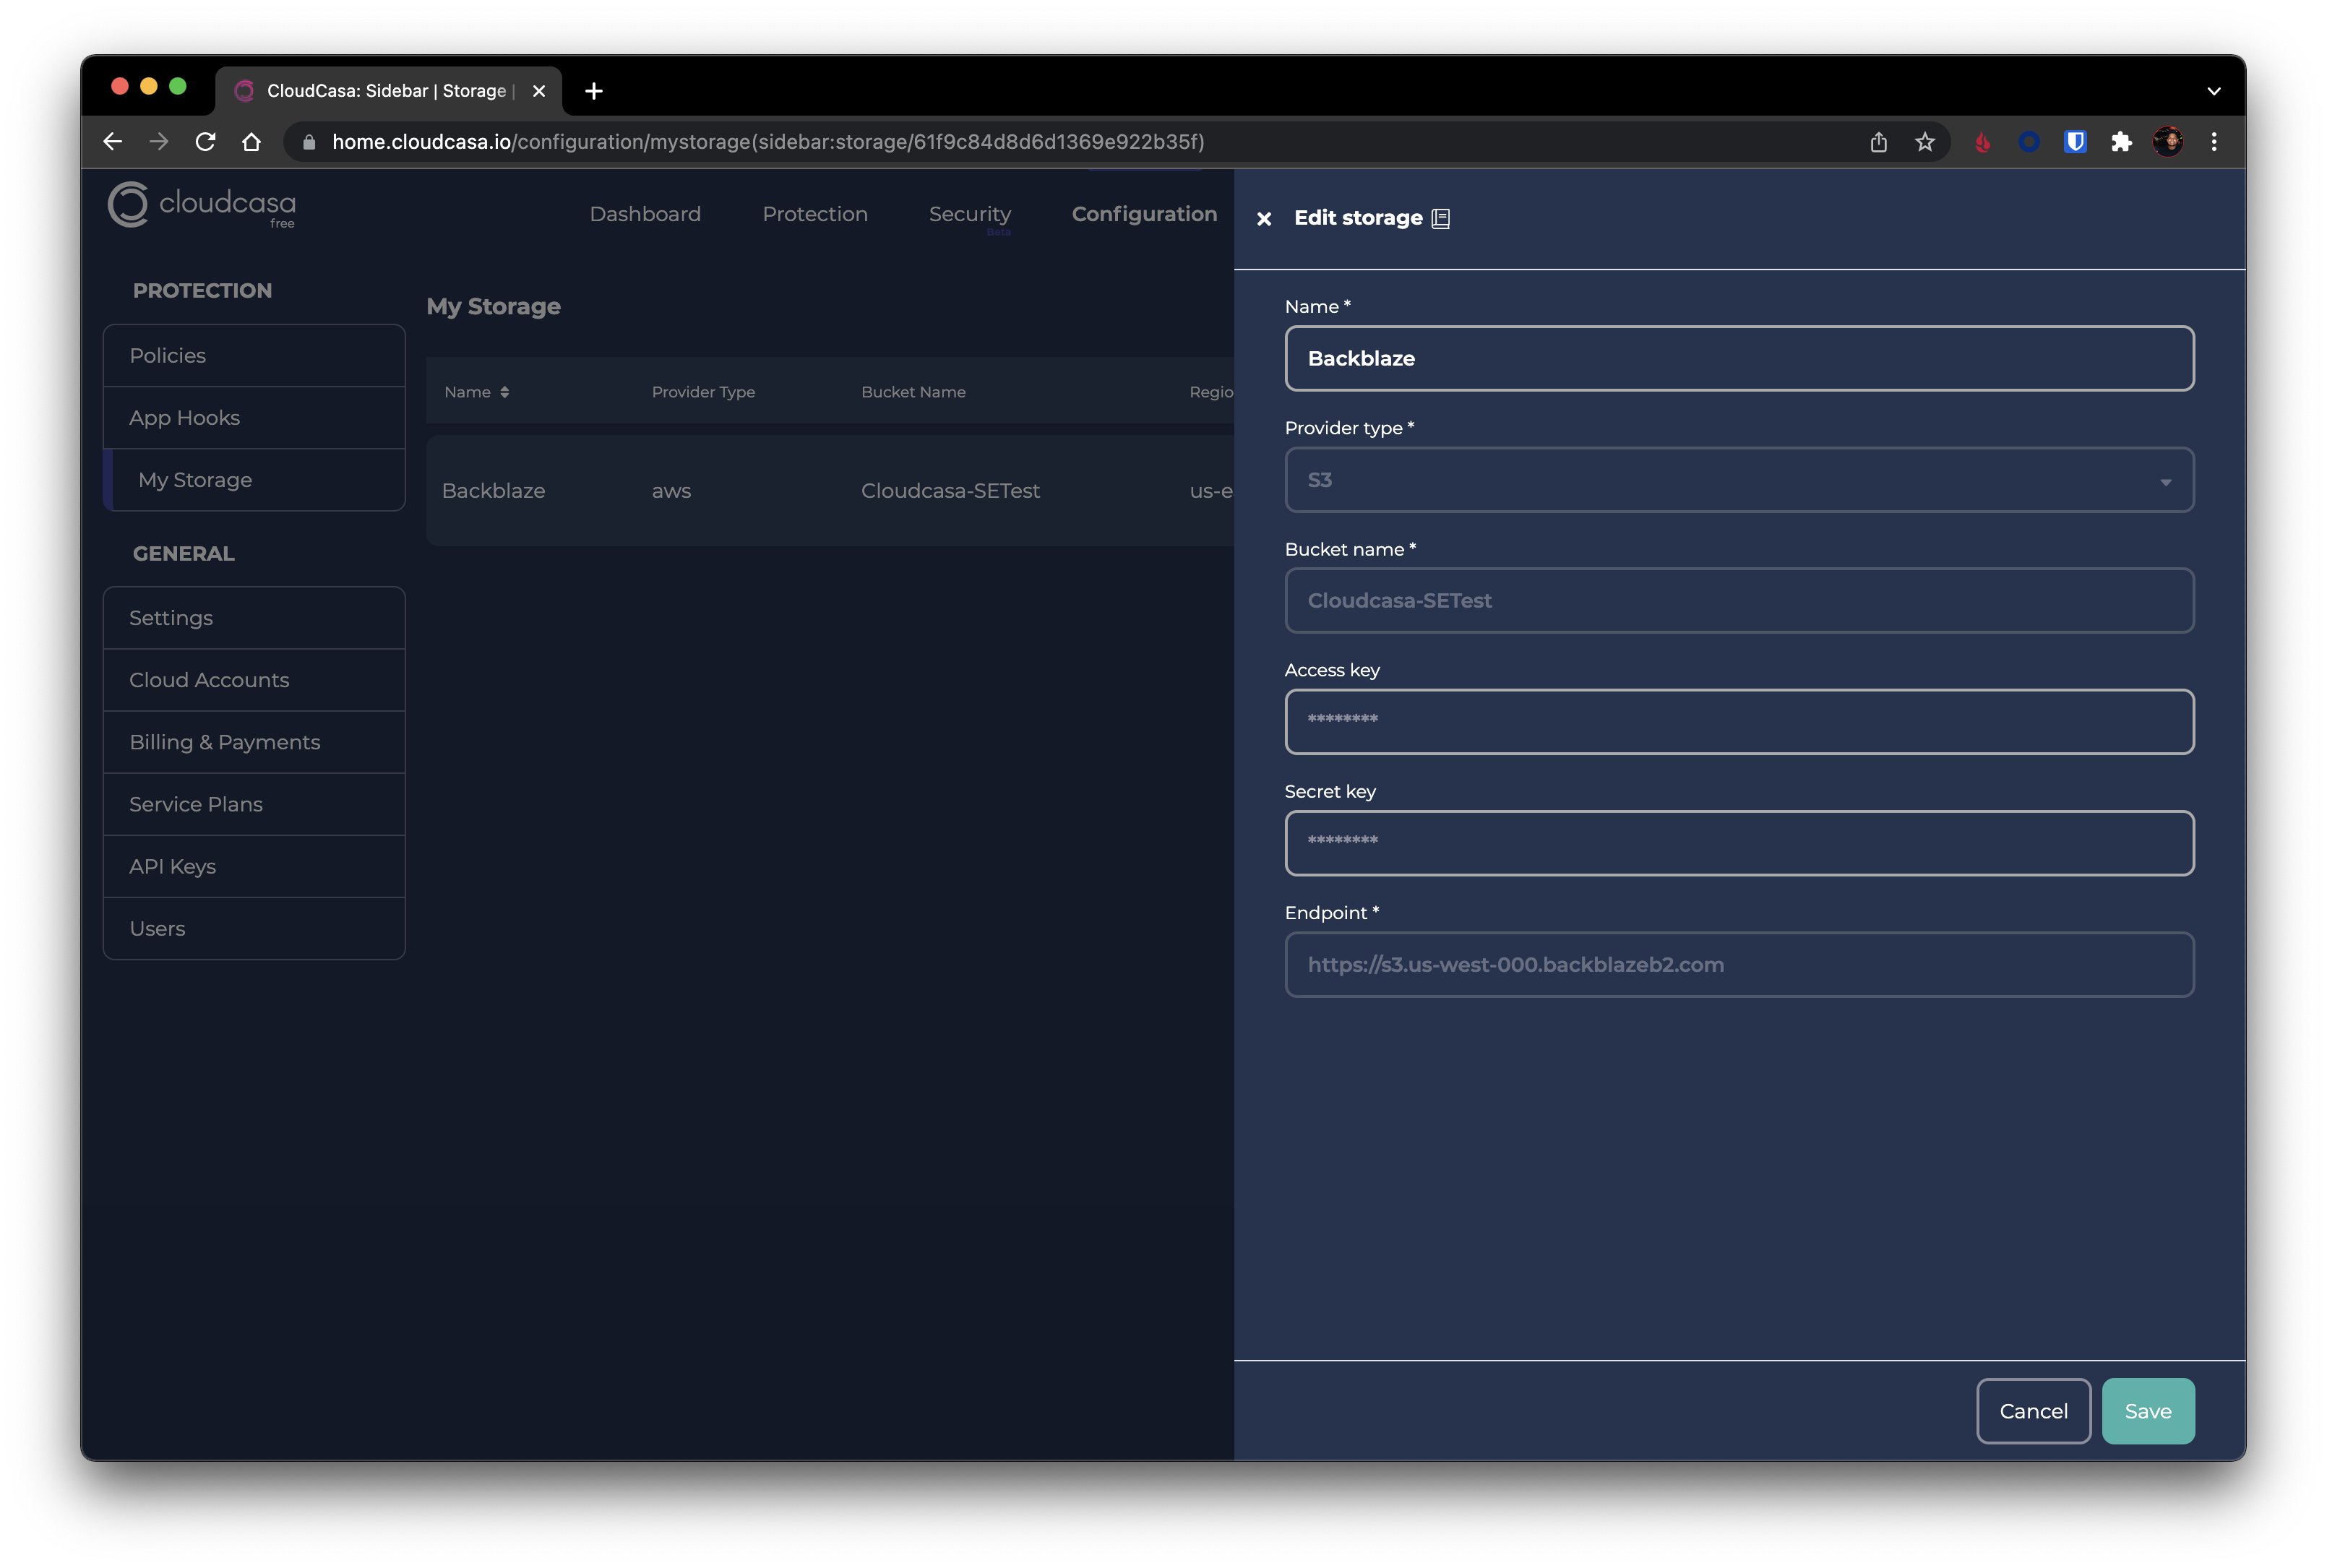
2) Select Add Storage at the top right. Now go ahead and give your storage a friendly name and select S3 as Provider Type. Once you select S3 you will see some new options appear that allow you to fill in the B2 bucket details you collected above.
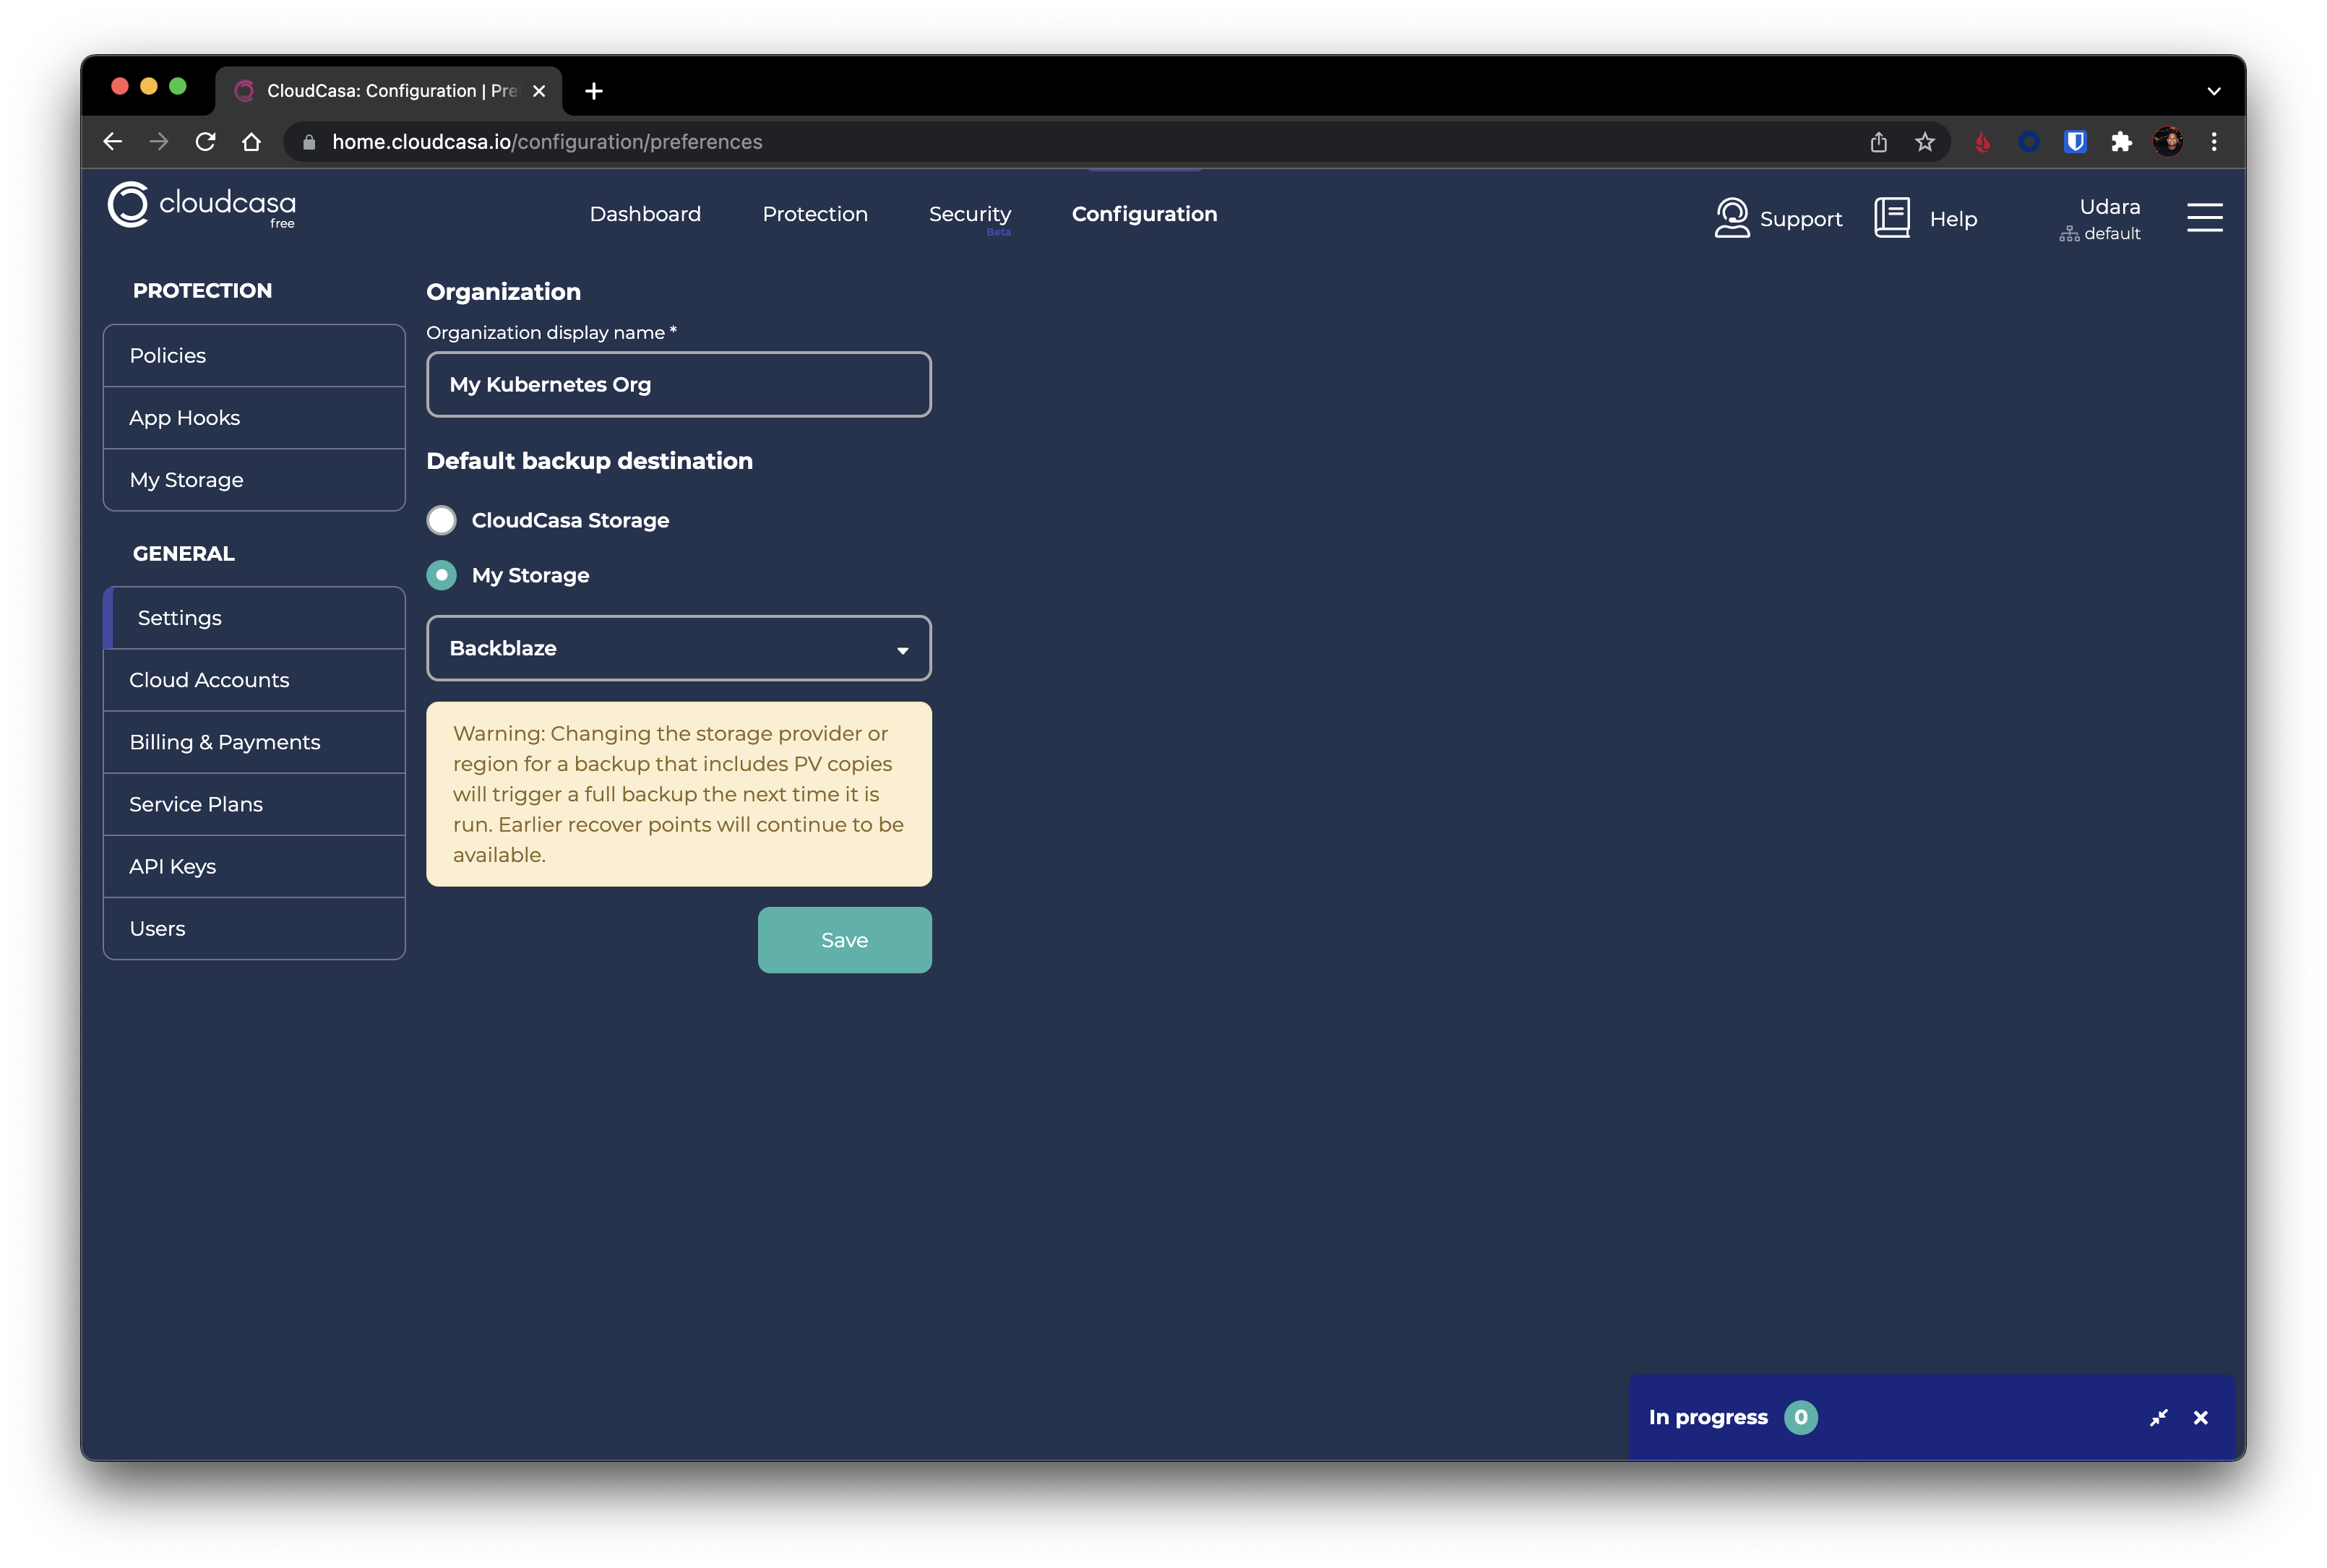
3) Last step would be to configure Backblaze as your default backup destination. Select Settings on the left. Select My Storage and then the Backblaze bucket you just set up.
Add your cluster to Cloudcasa
During this process, you will also install its backup agent on your Kubernetes cluster.
1) Log into your Catalogic portal and select Protection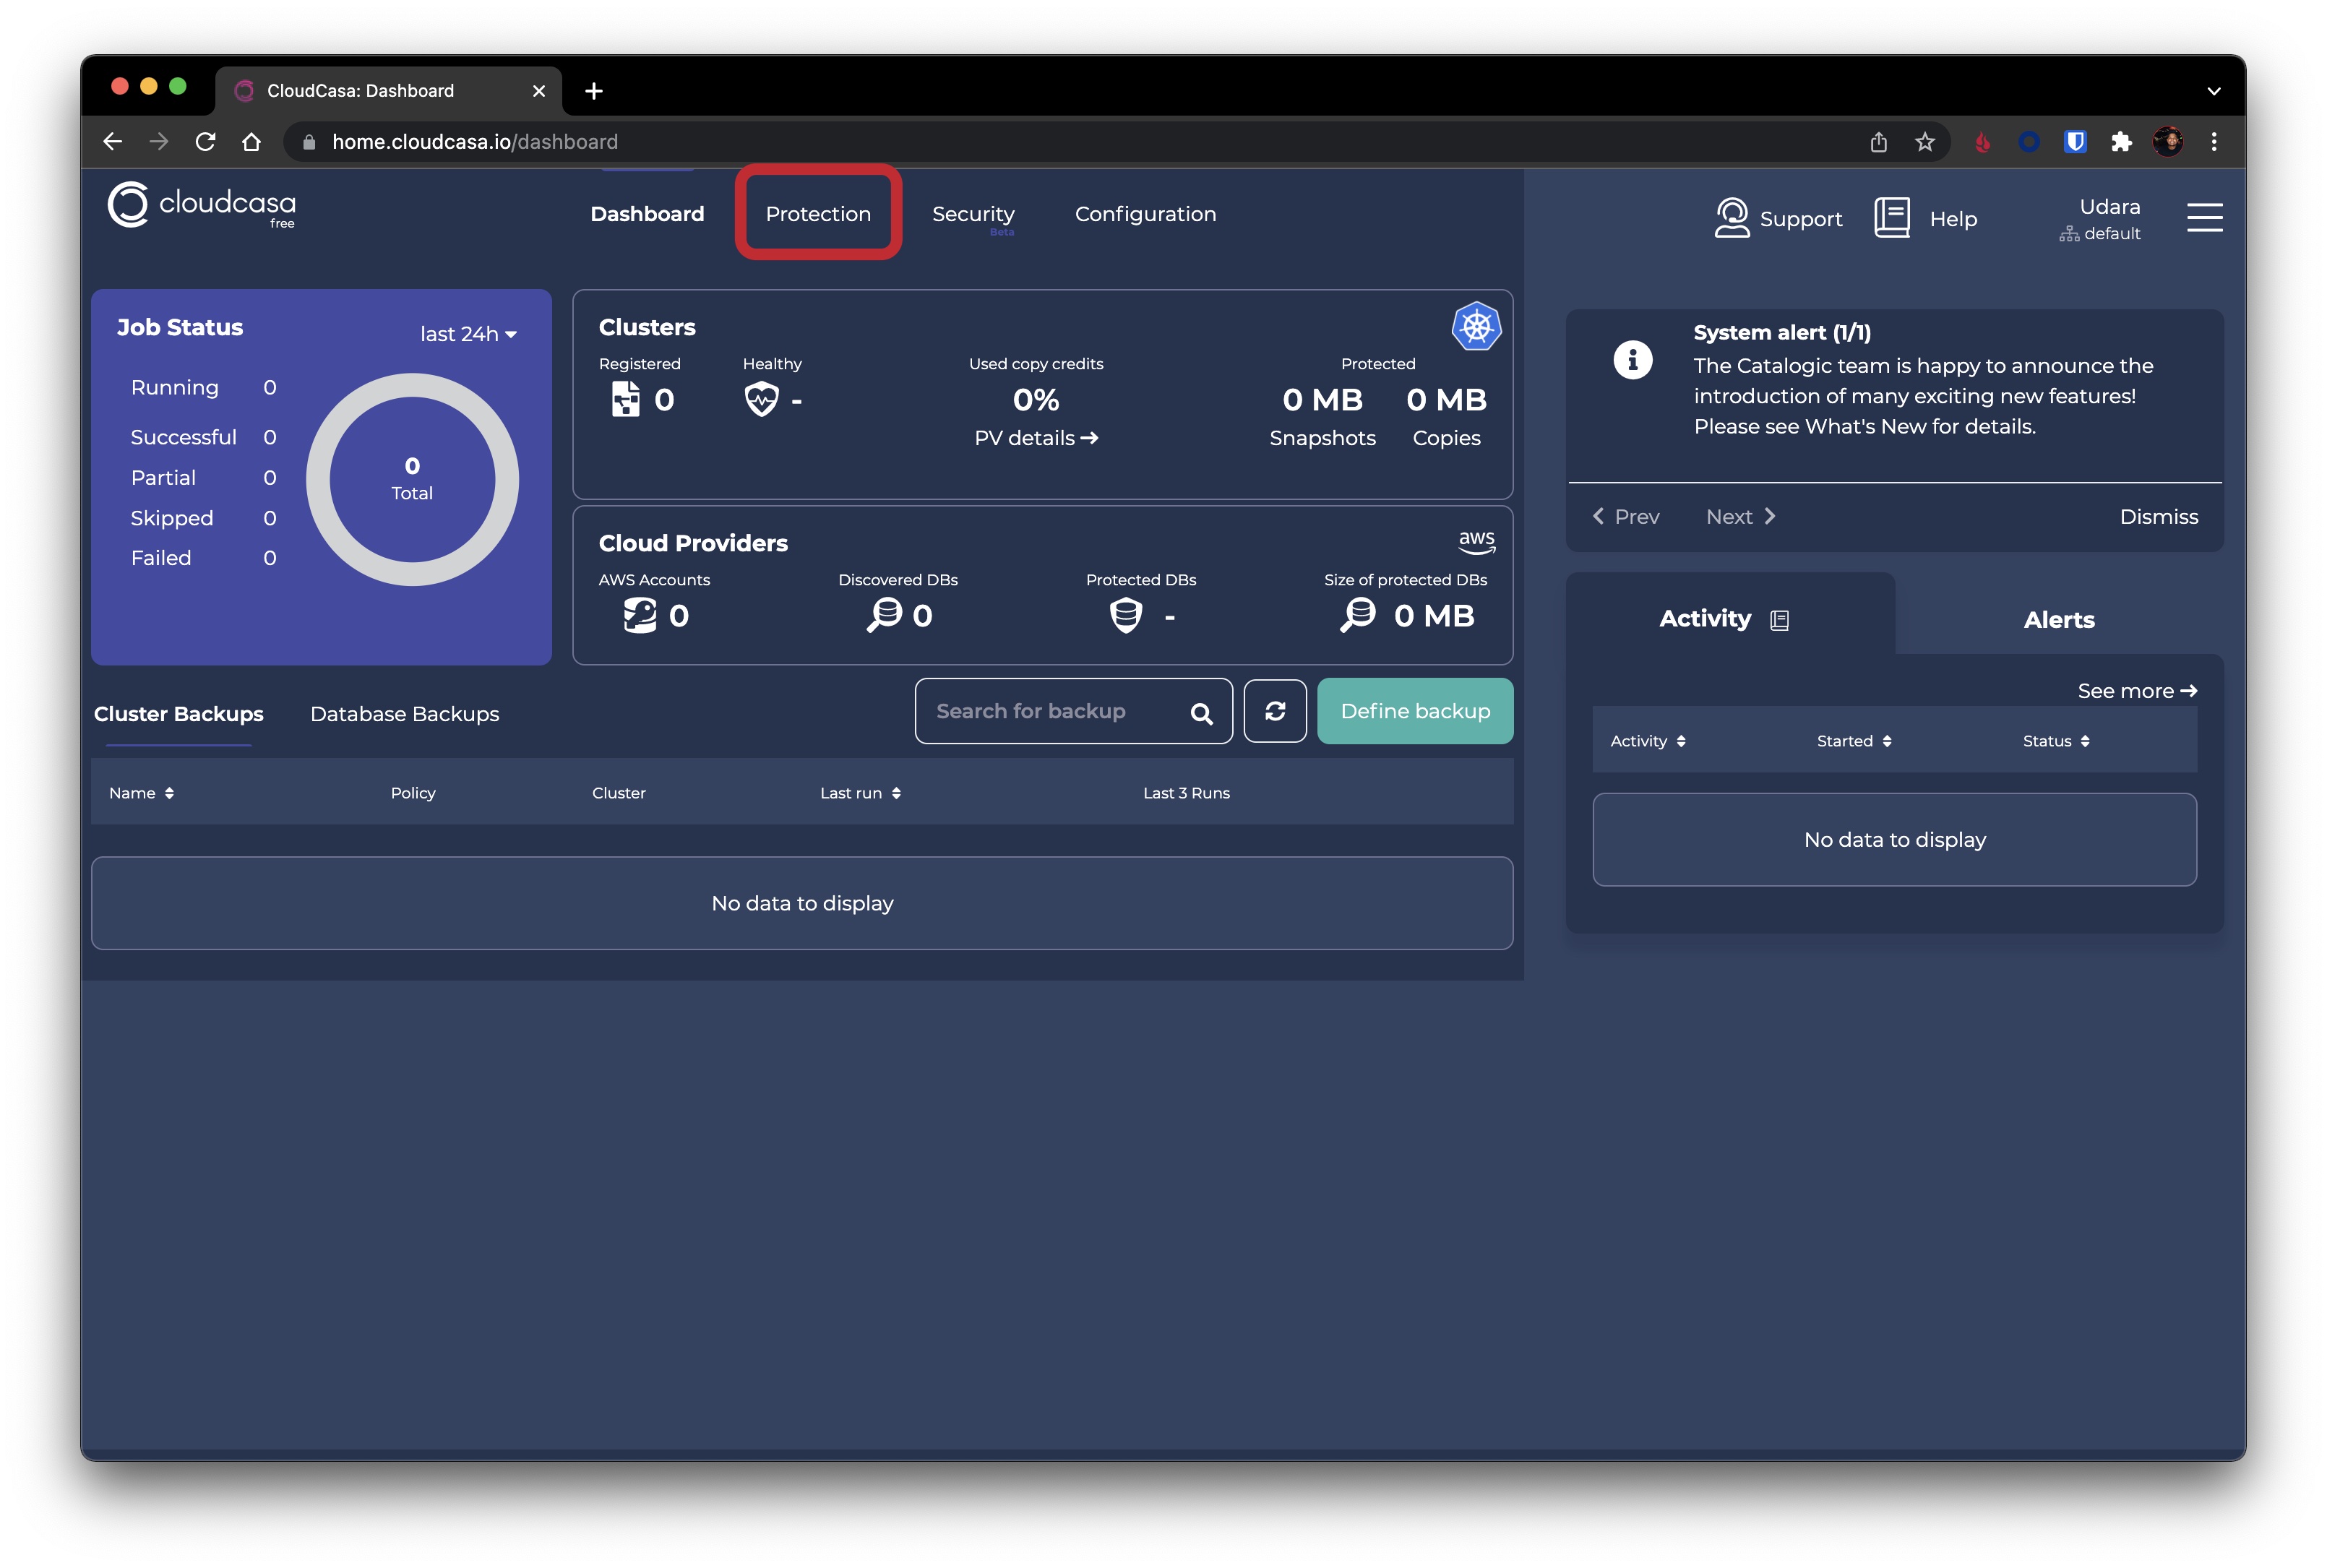
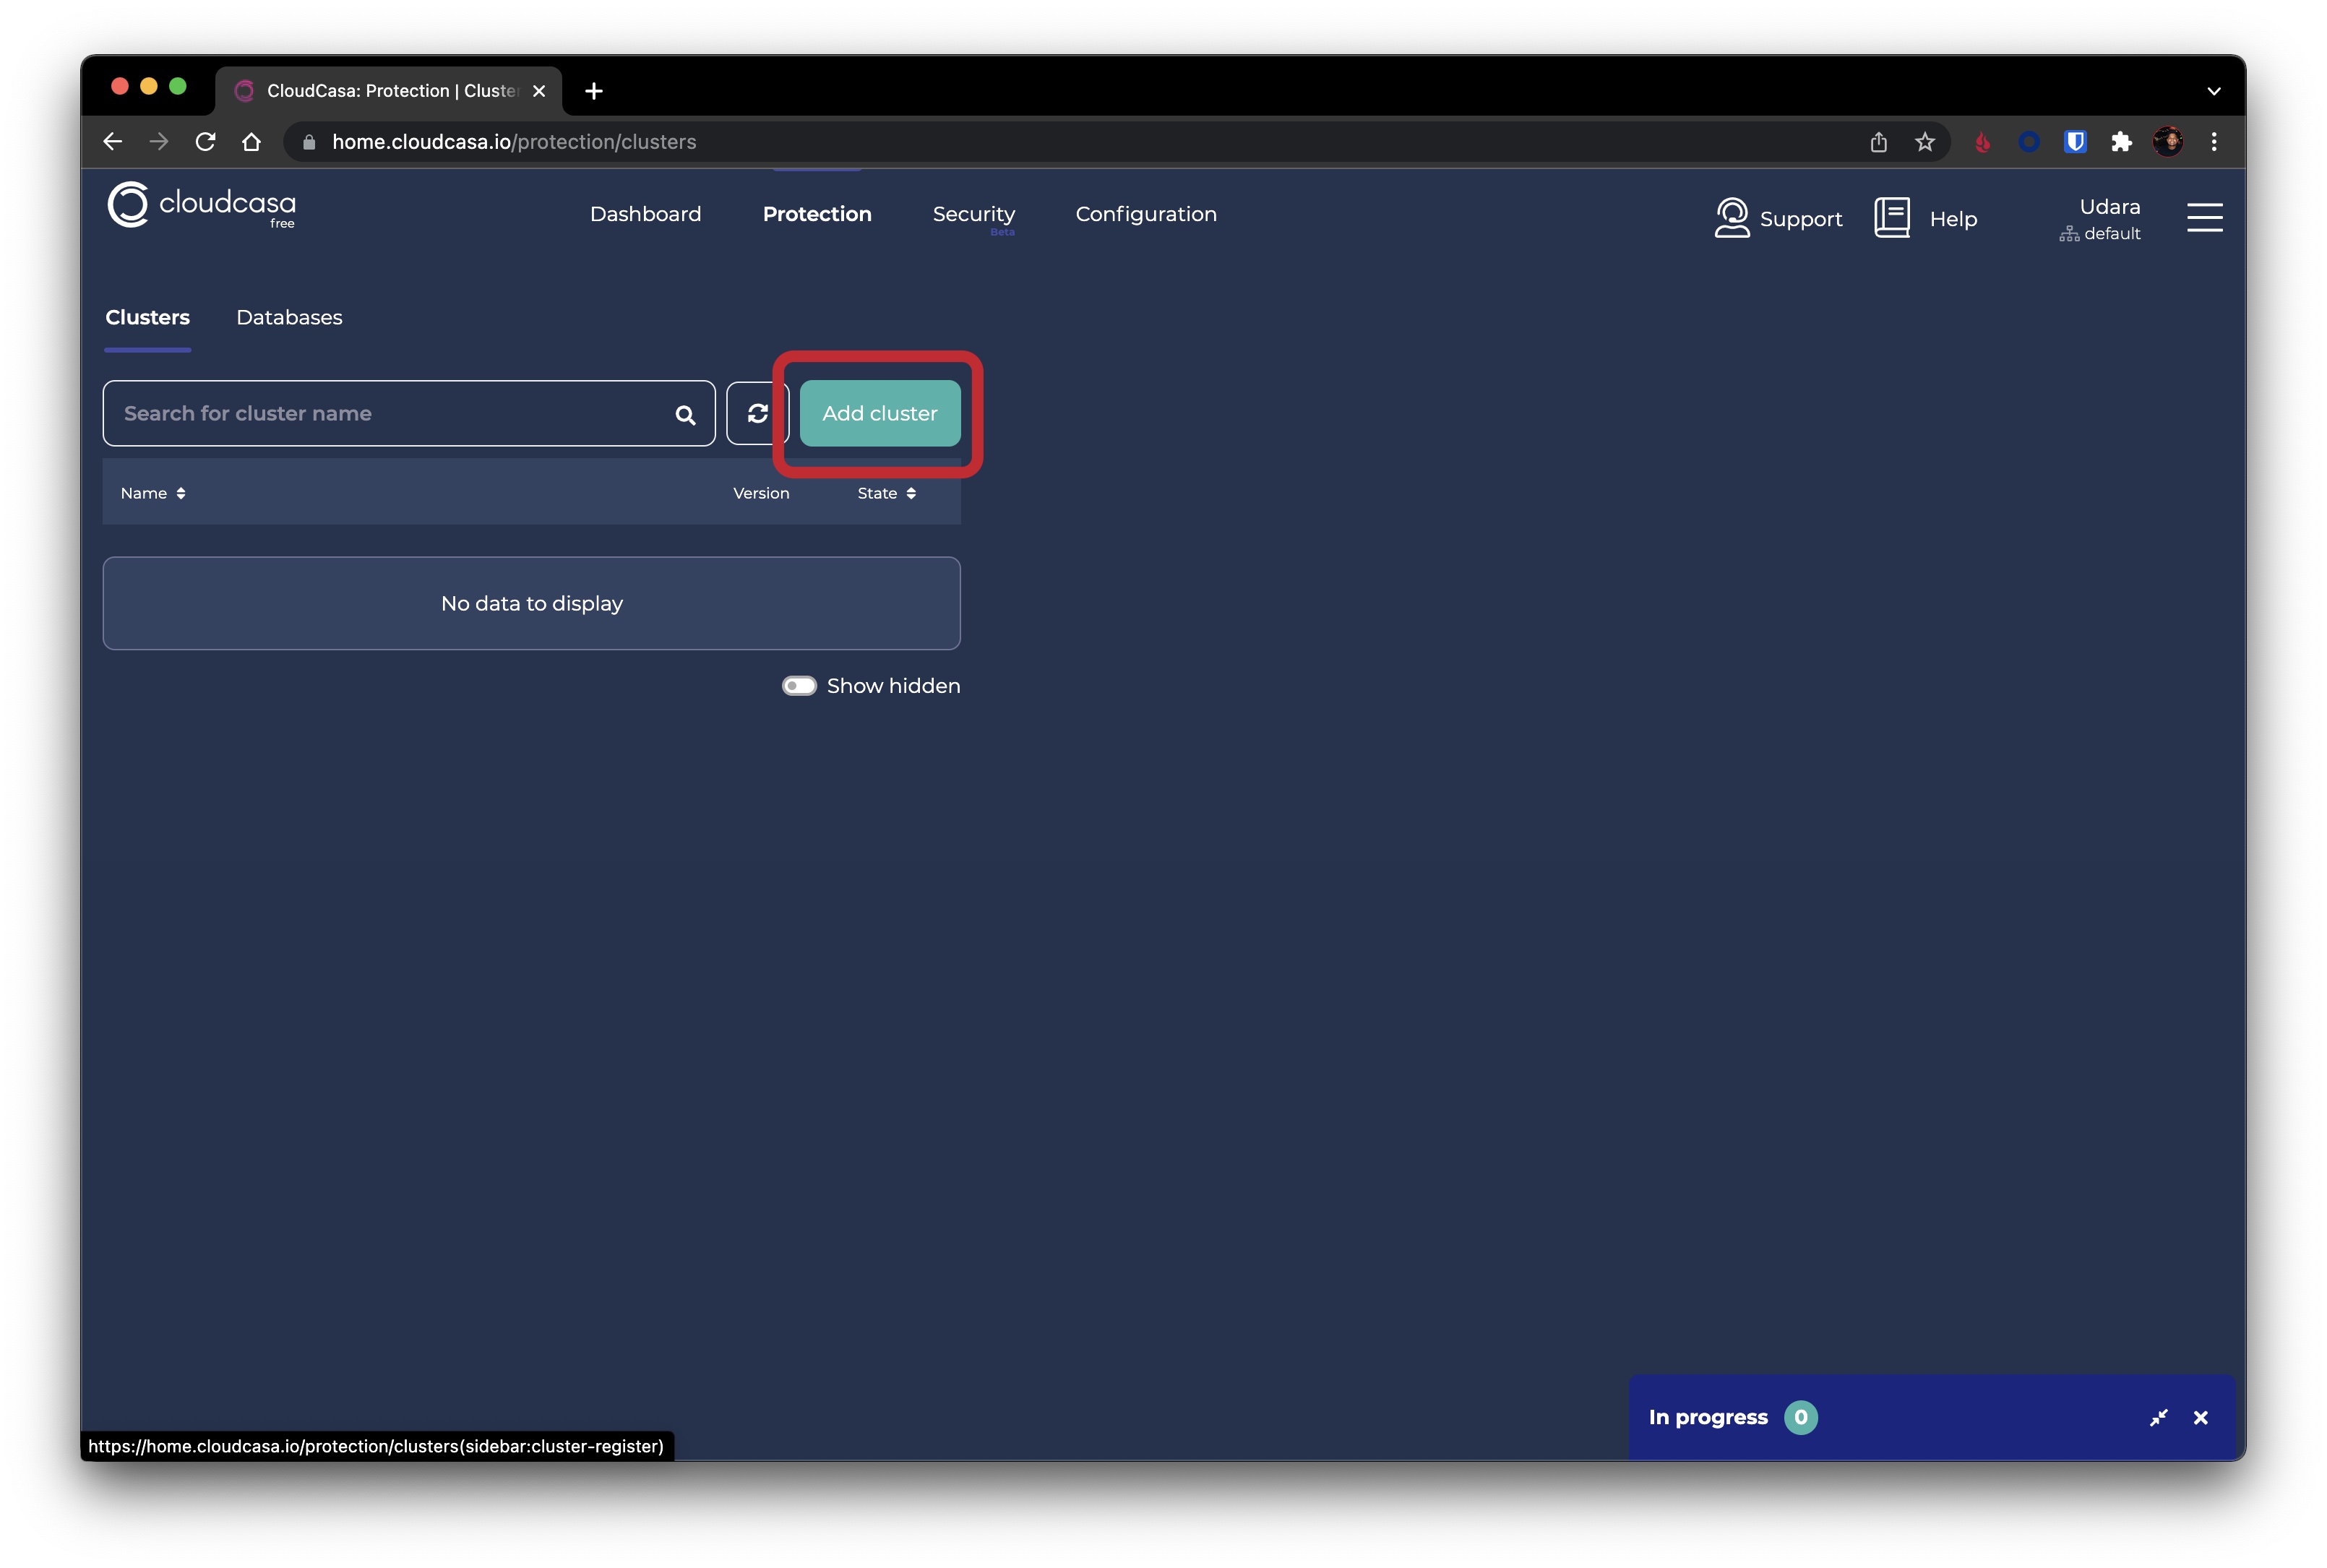
2) Select Add cluster and give your cluster a name
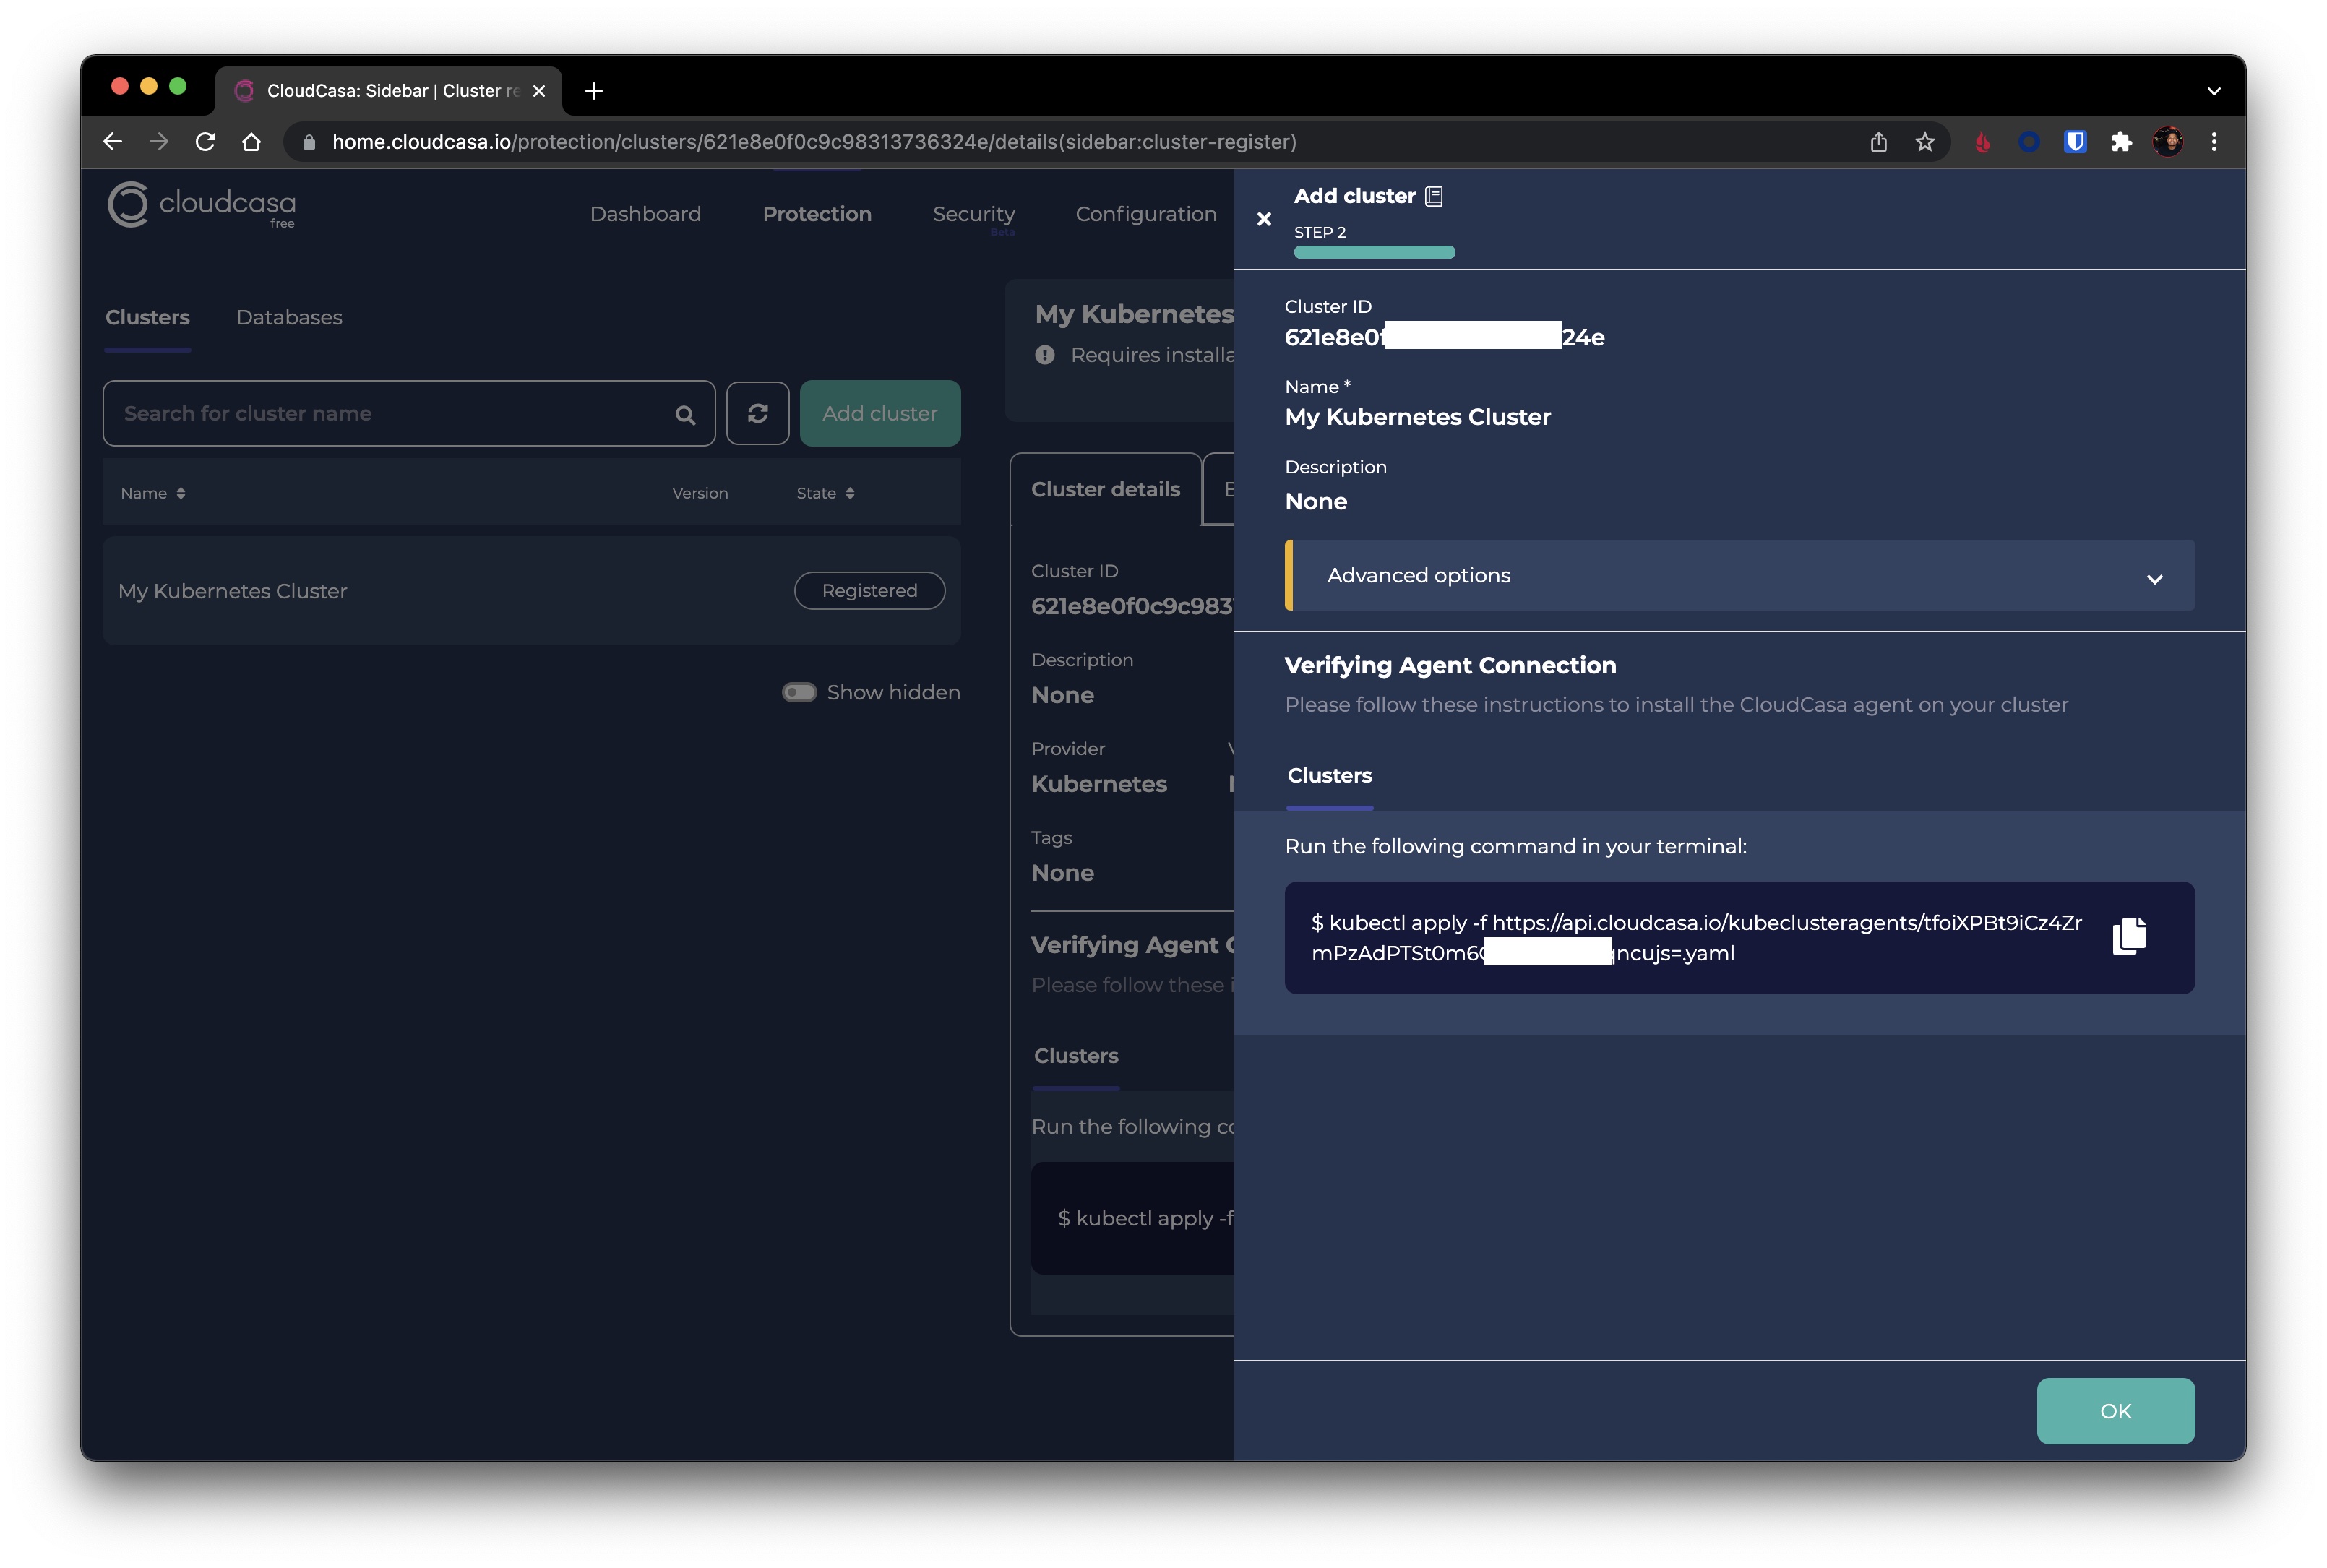
3) Give this cluster a name and make sure your Backblaze cloud storage is selected under the Advanced options

4) You will now see a command you will need to run on your Kubernetes cluster through Kubectl. This will install the agent and relate it to your Cloudcasa environment.
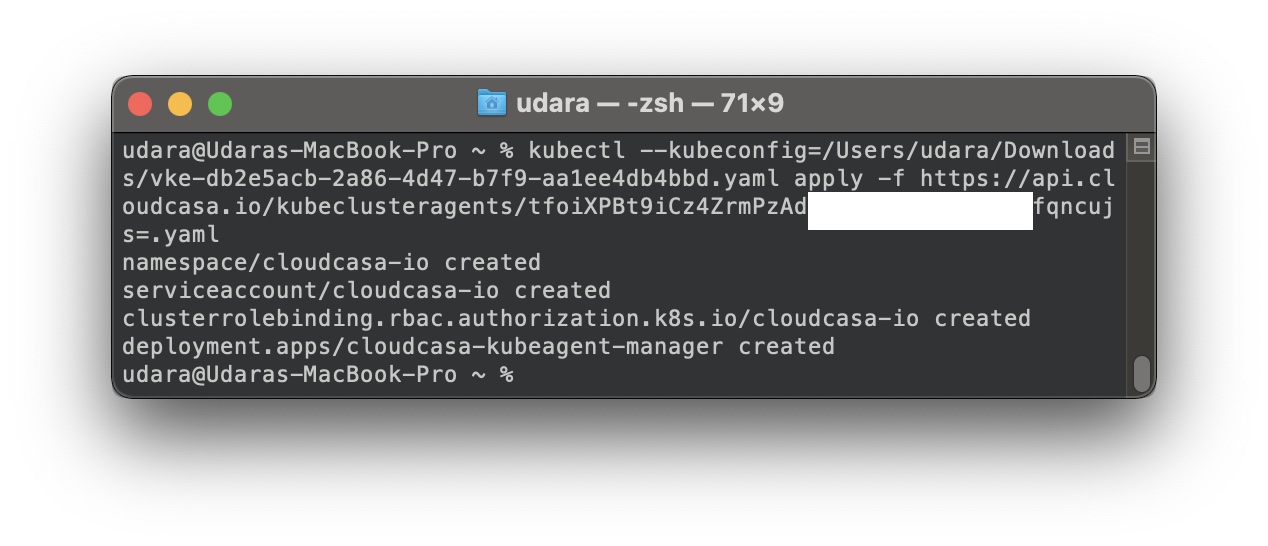
5) Once successfully deployed you will see your Cluster saved and now in an Active state.
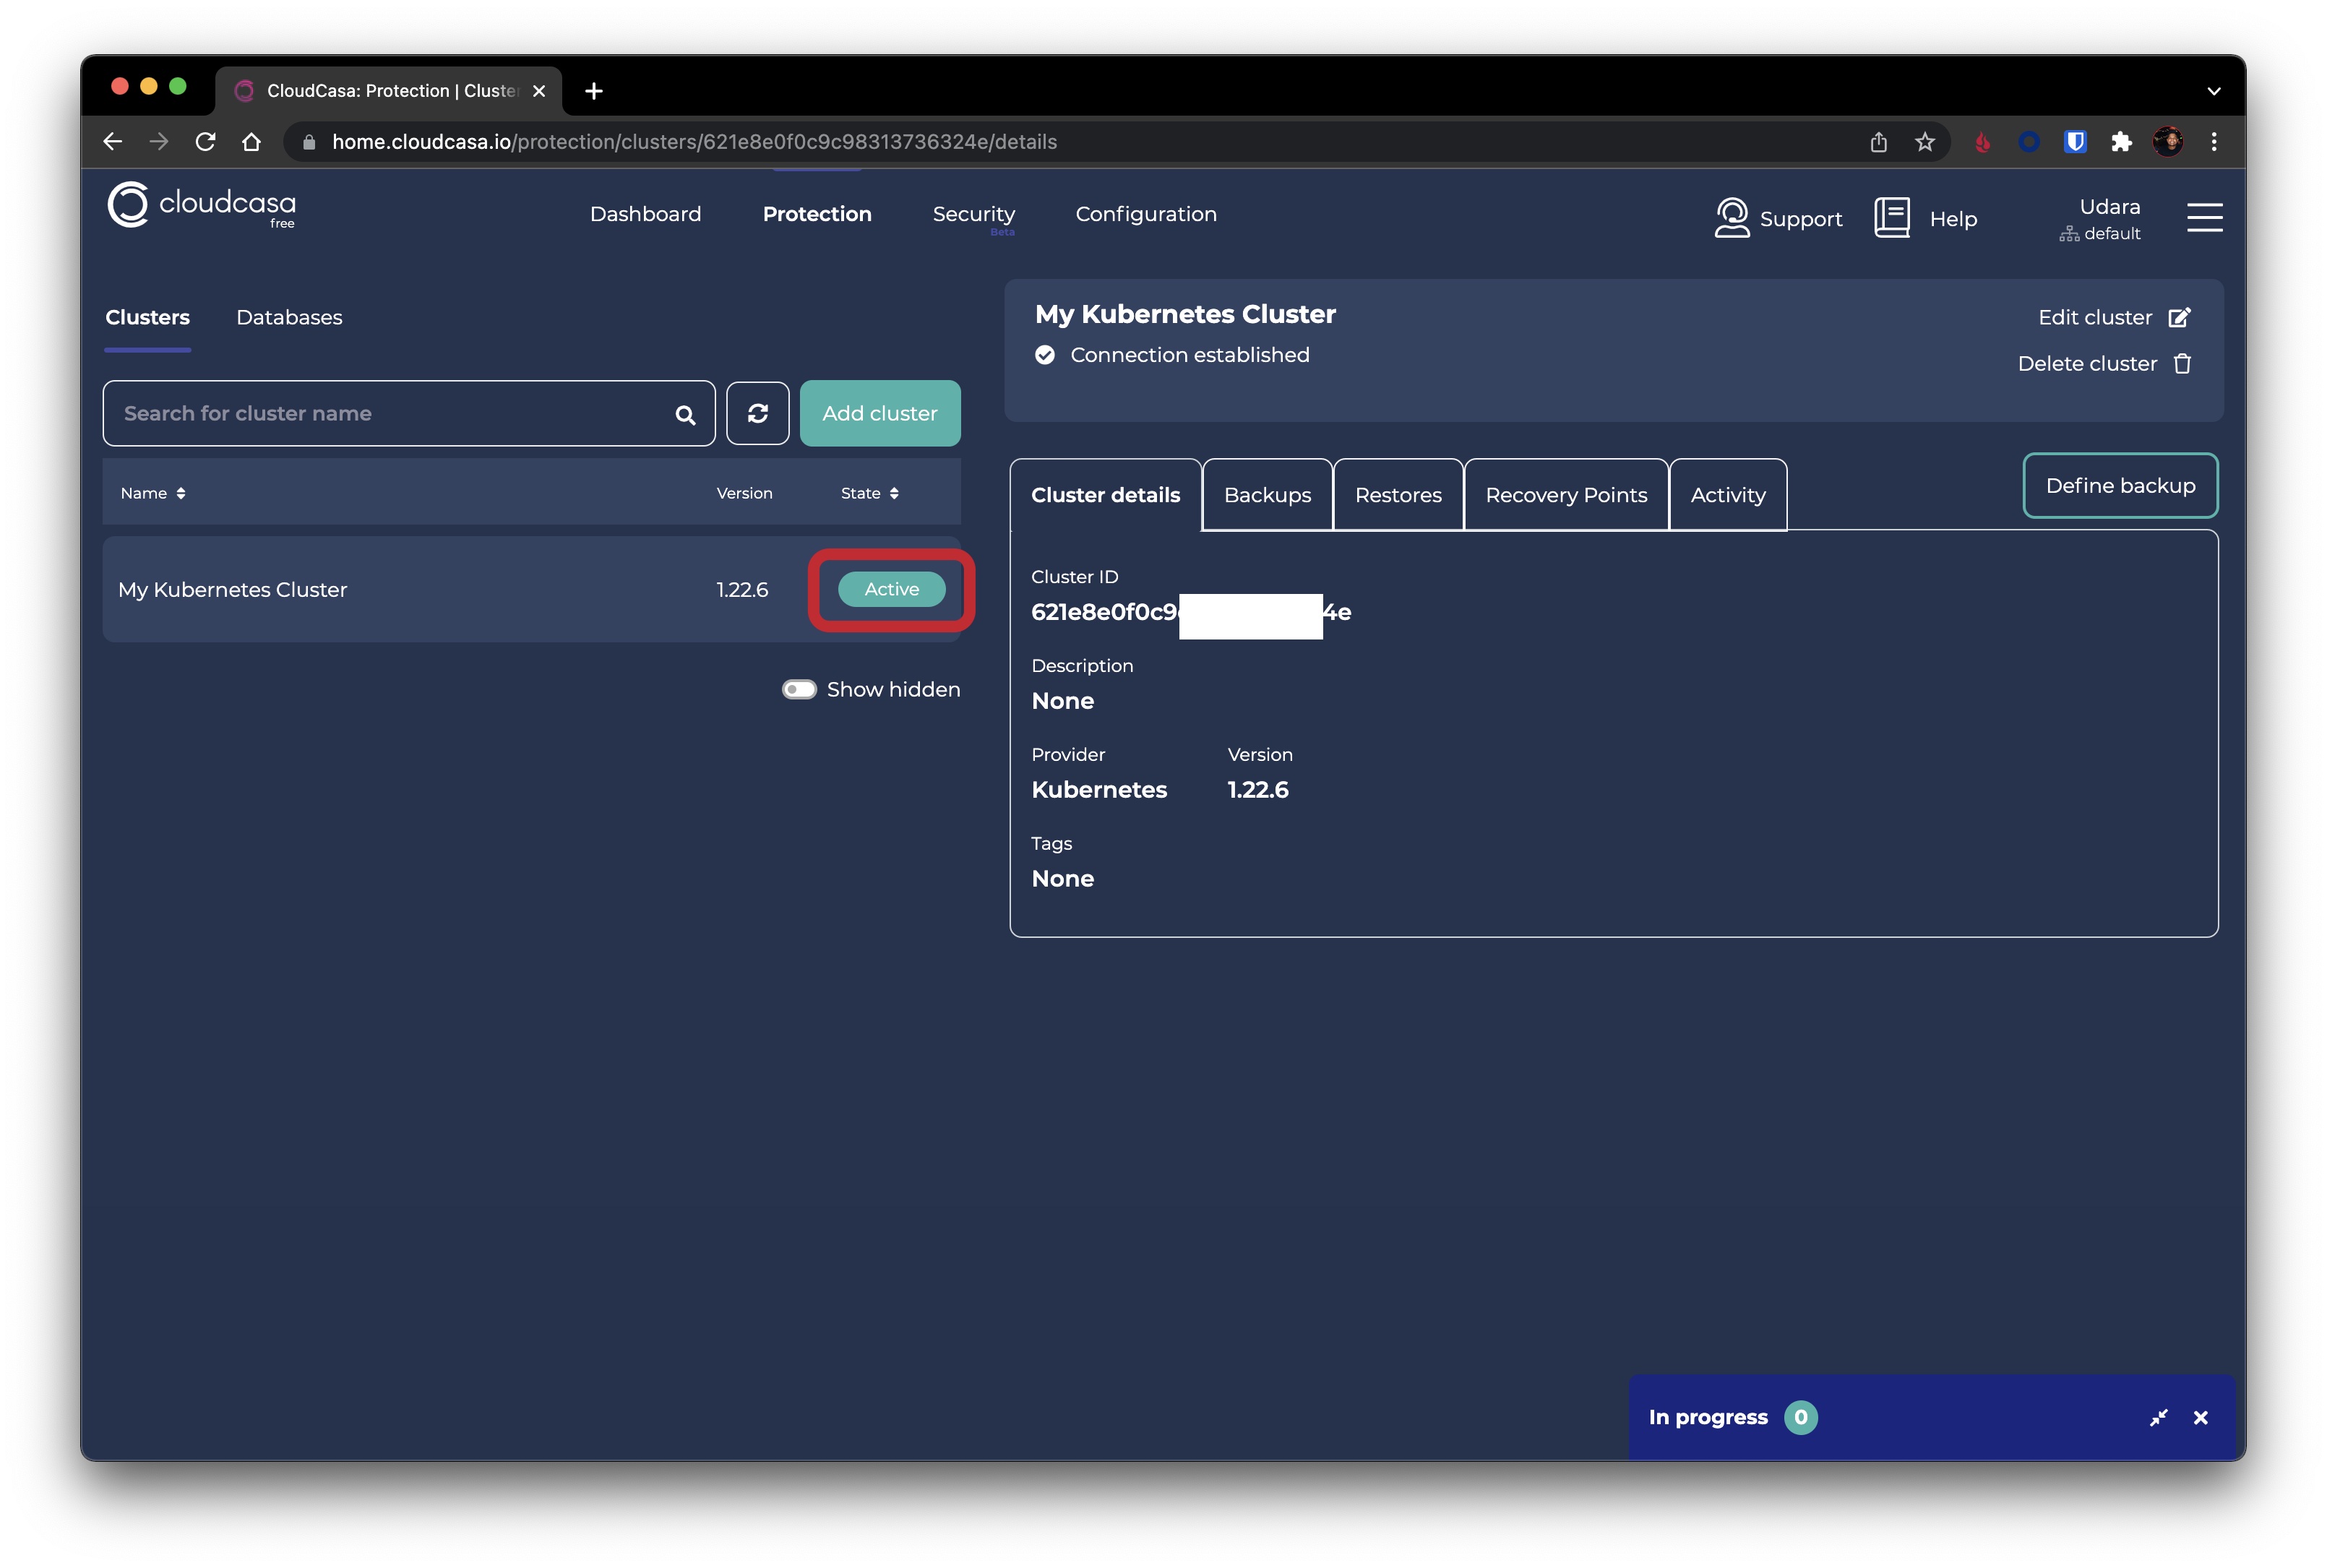
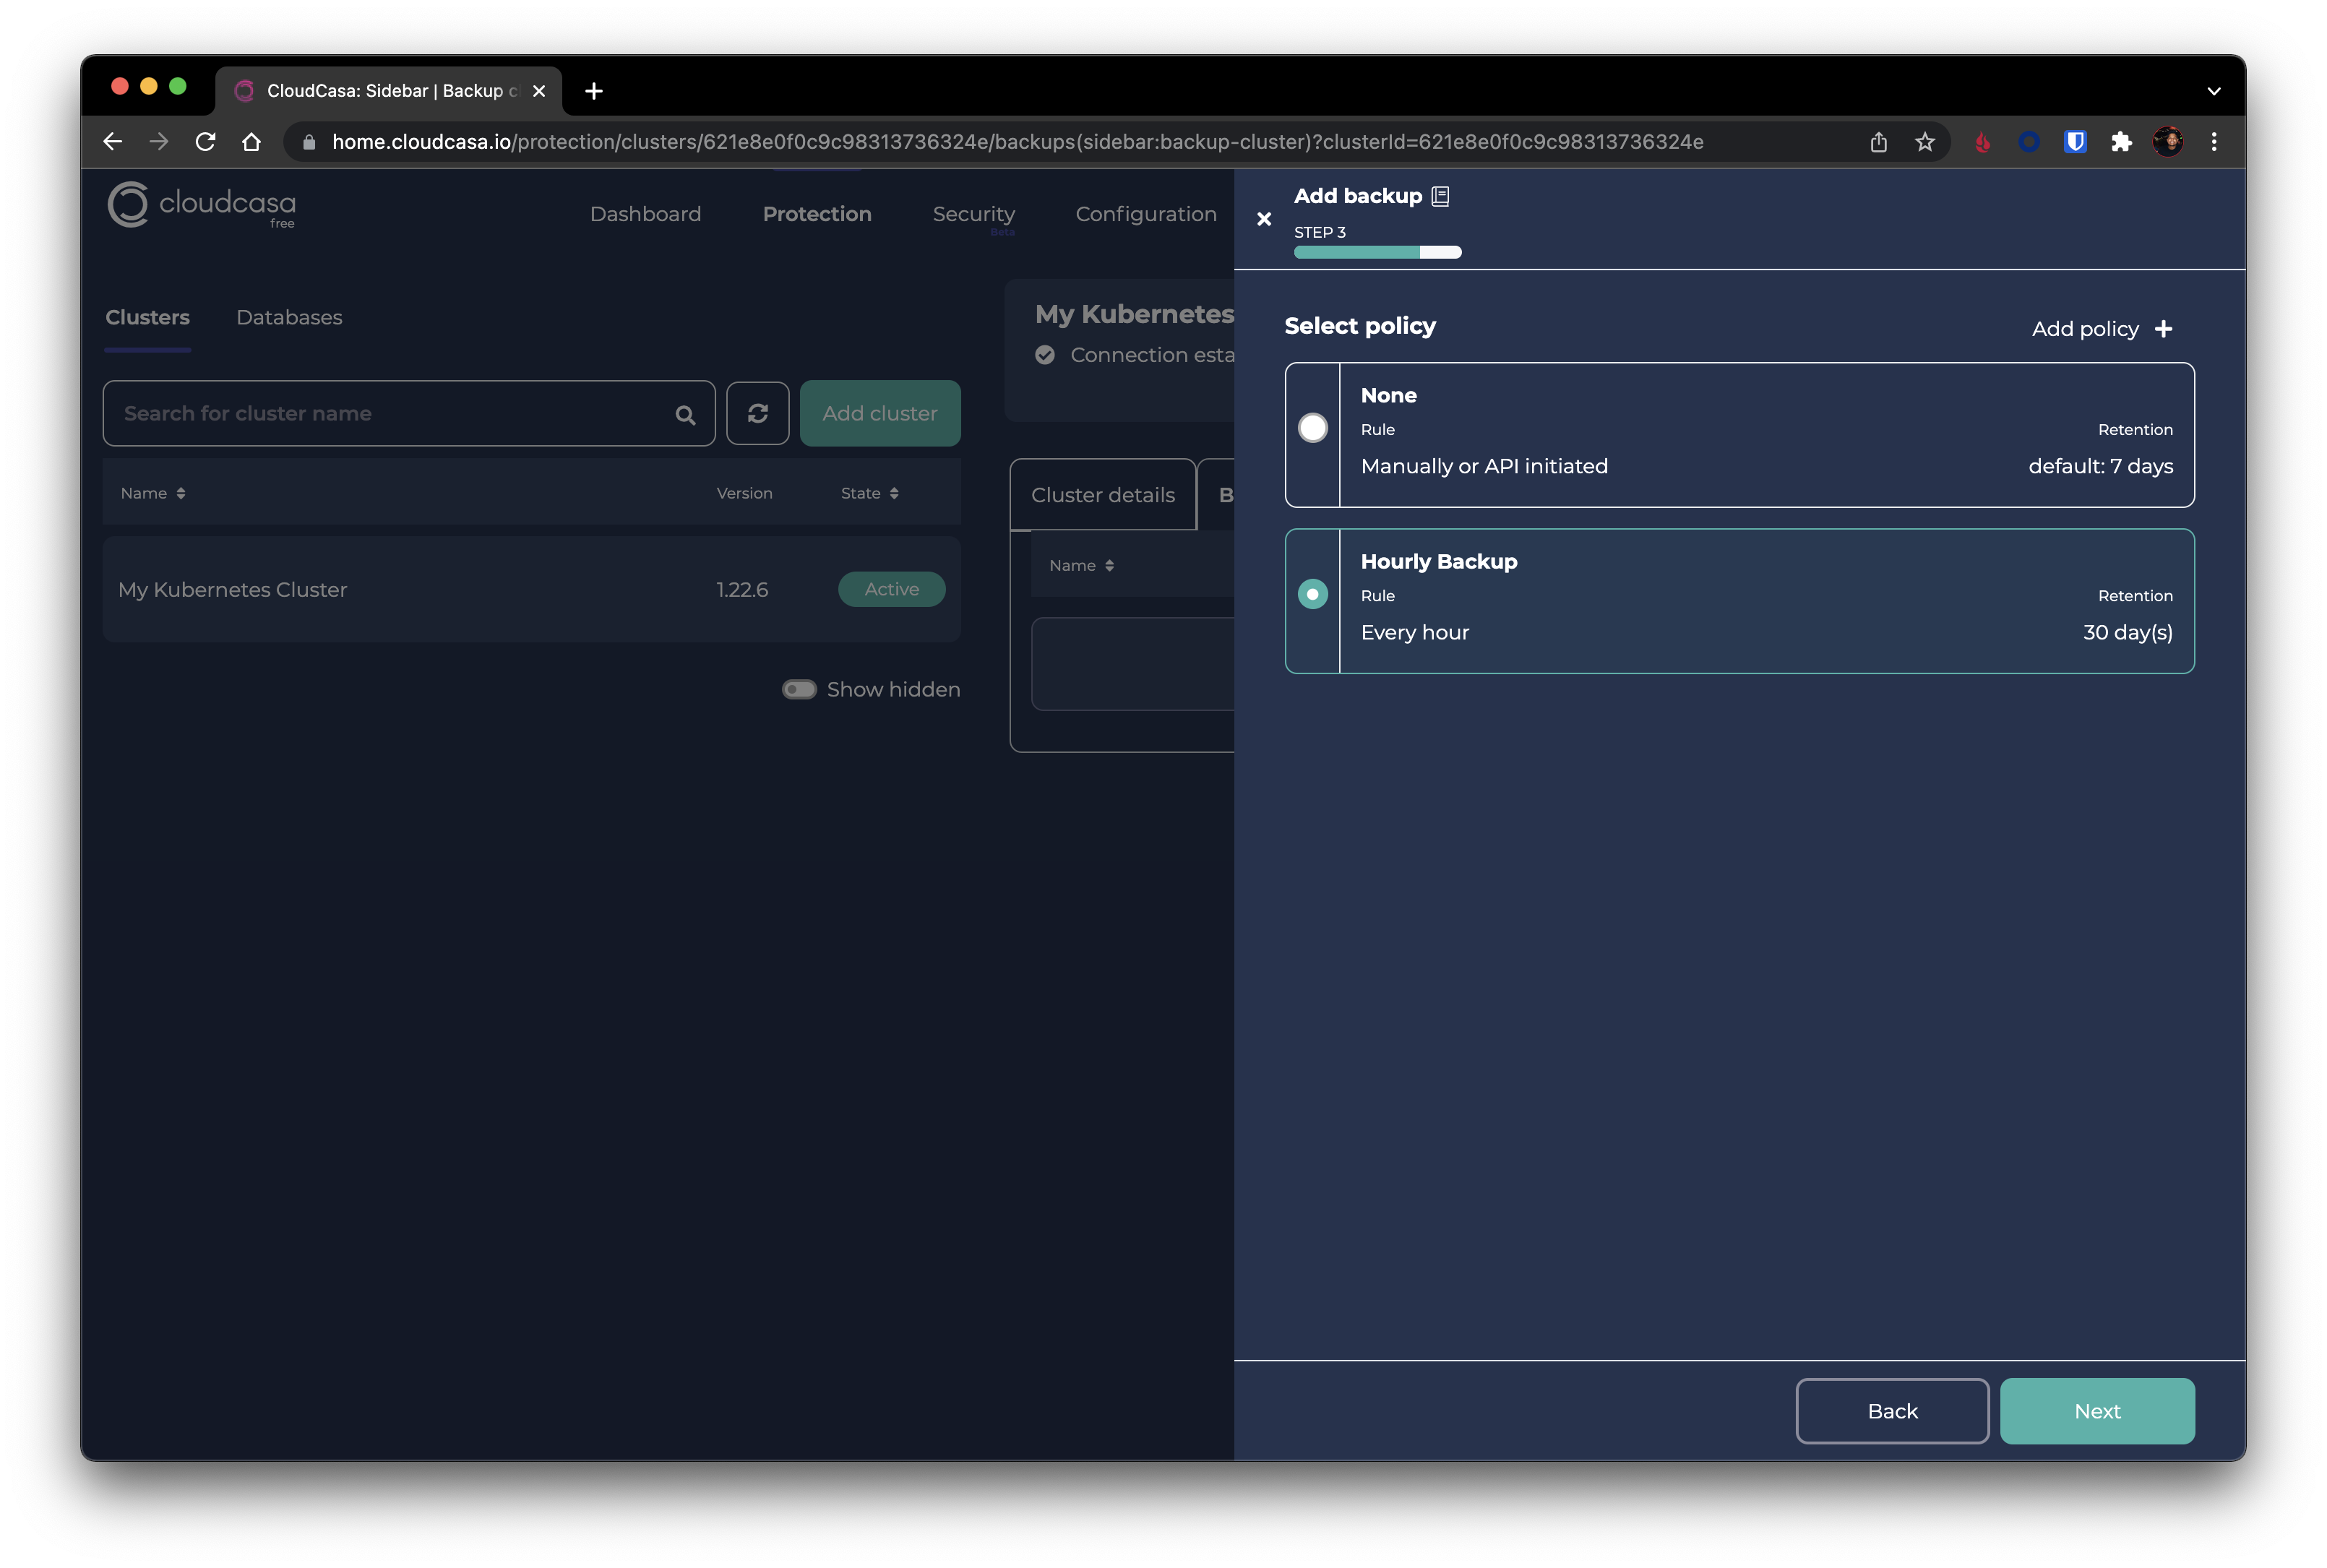
Create and run your cluster backup policy
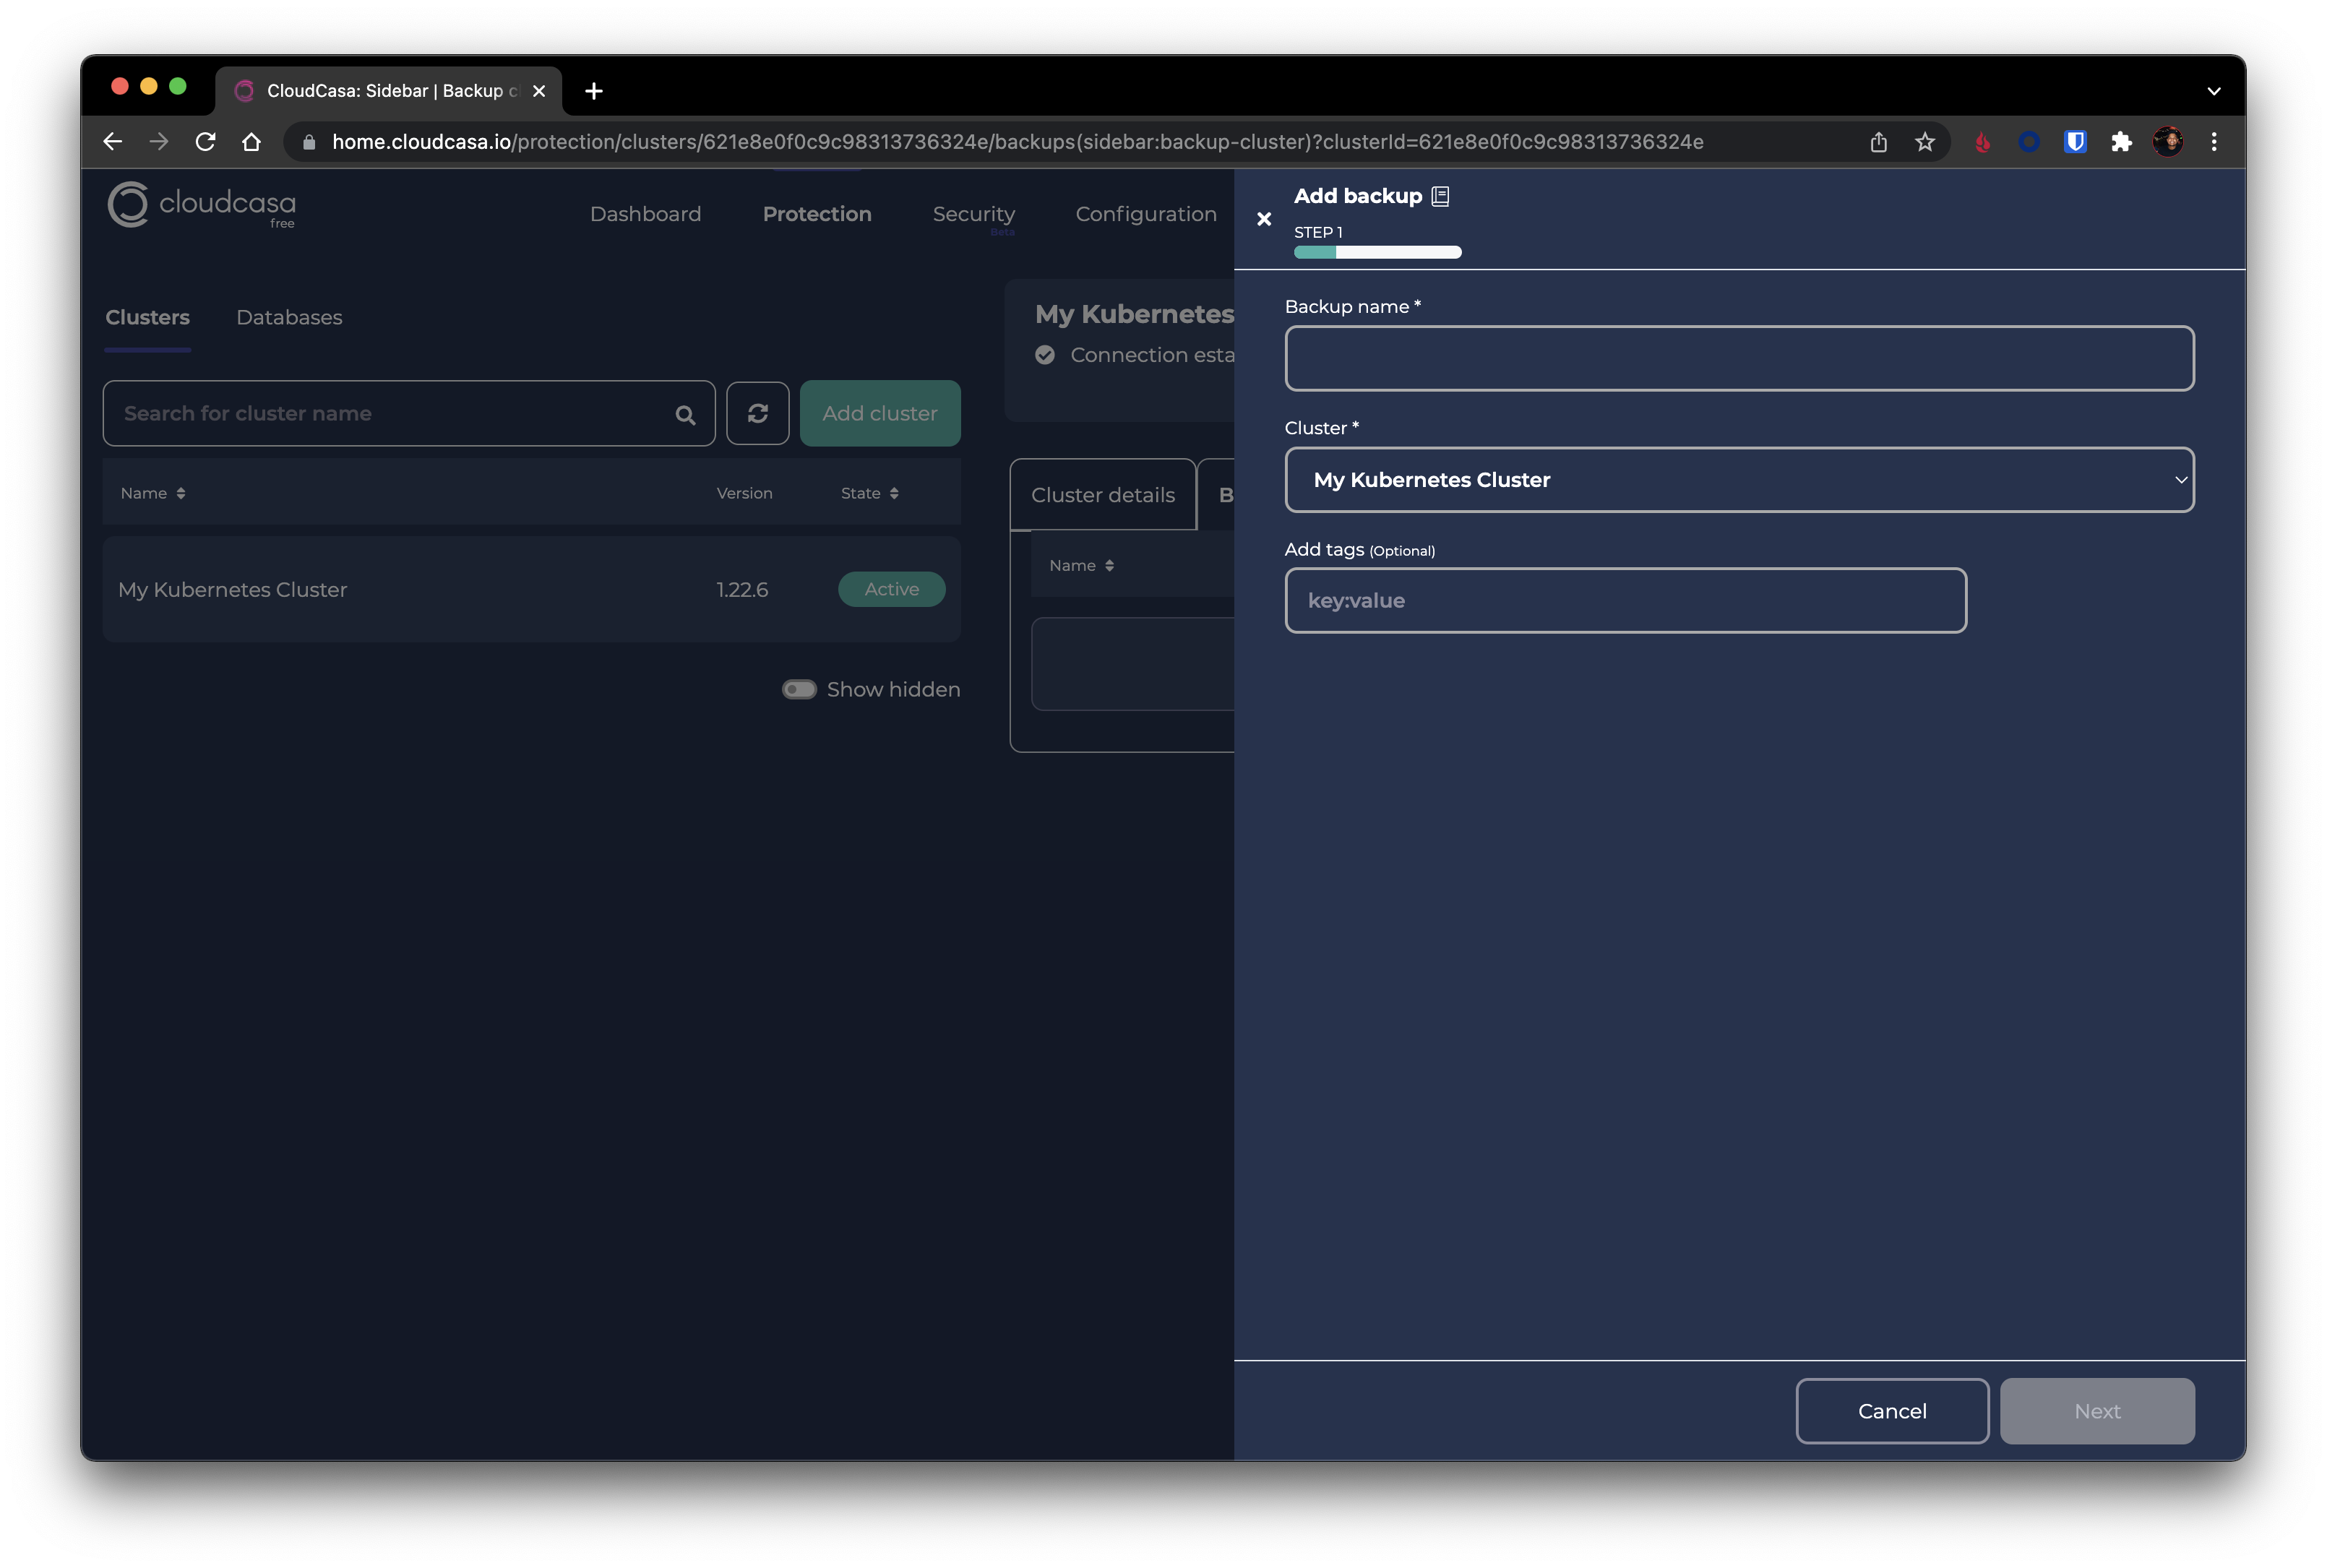
1) Select the Backups tab related to your newly created cluster profile. Give it a name and make sure the correct cluster is selected.
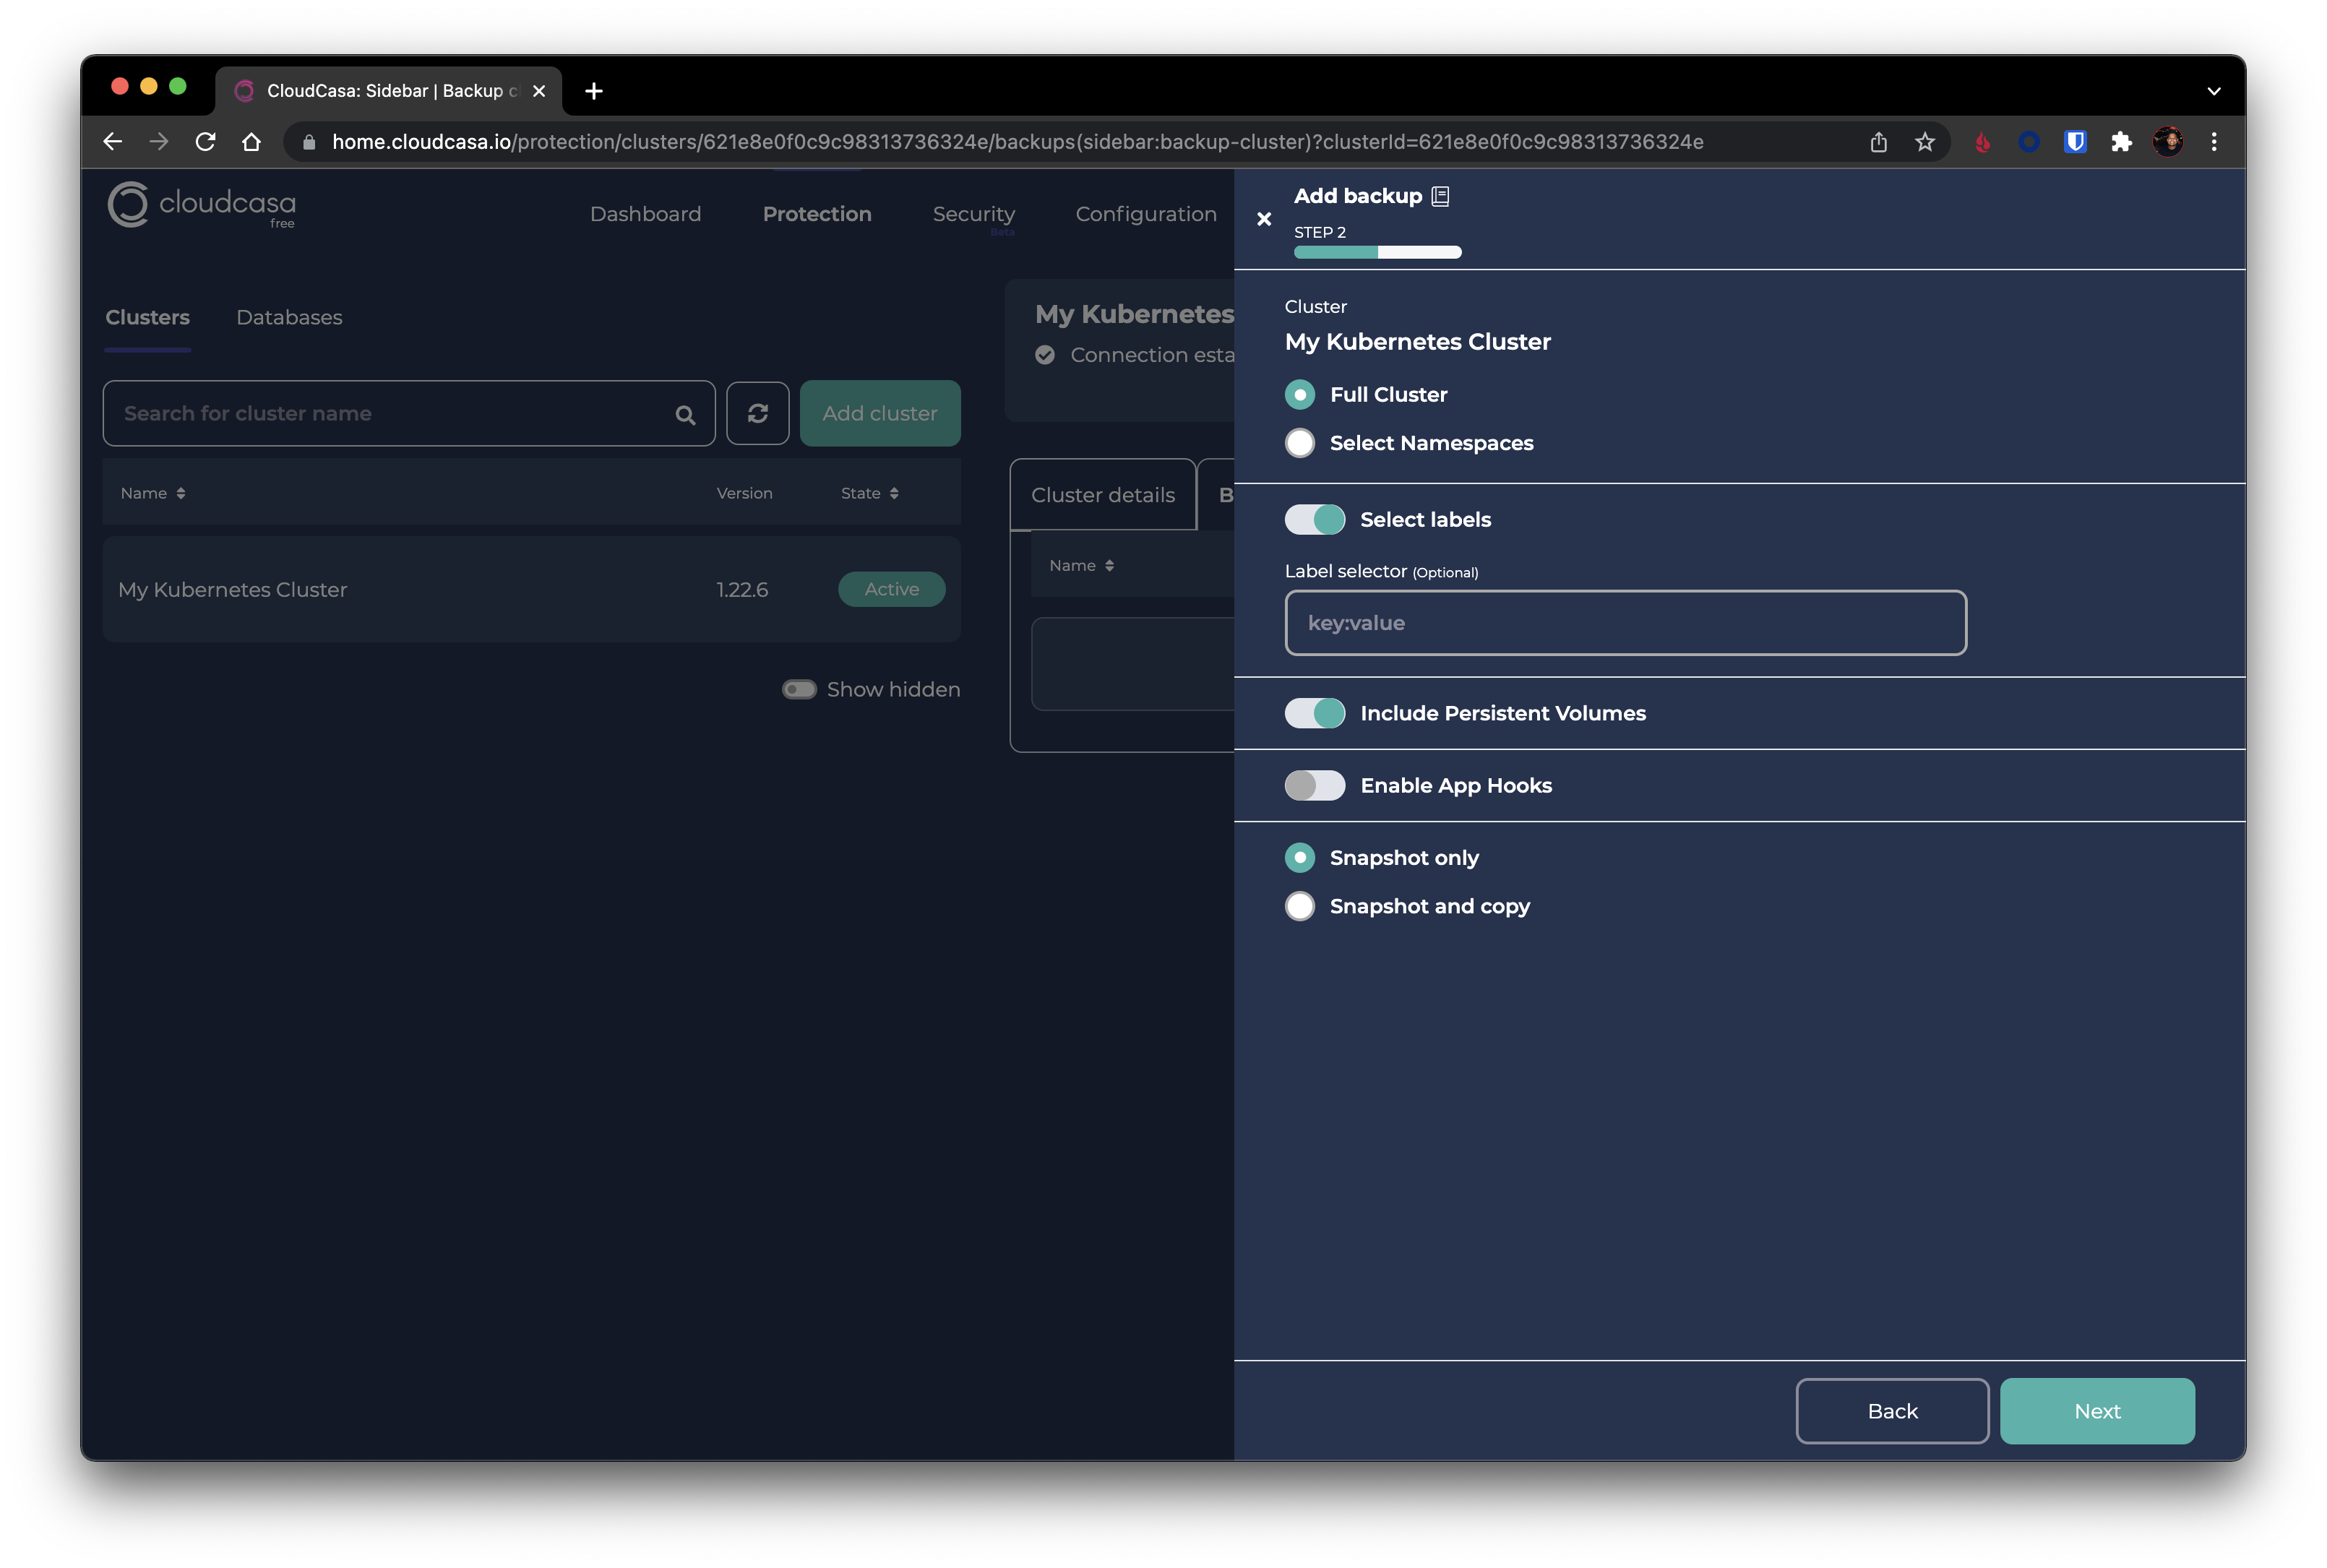
2) Configure your backups settings and schedule policy. Here you can decide whether to backup the entire cluster or rather specific namespaces.
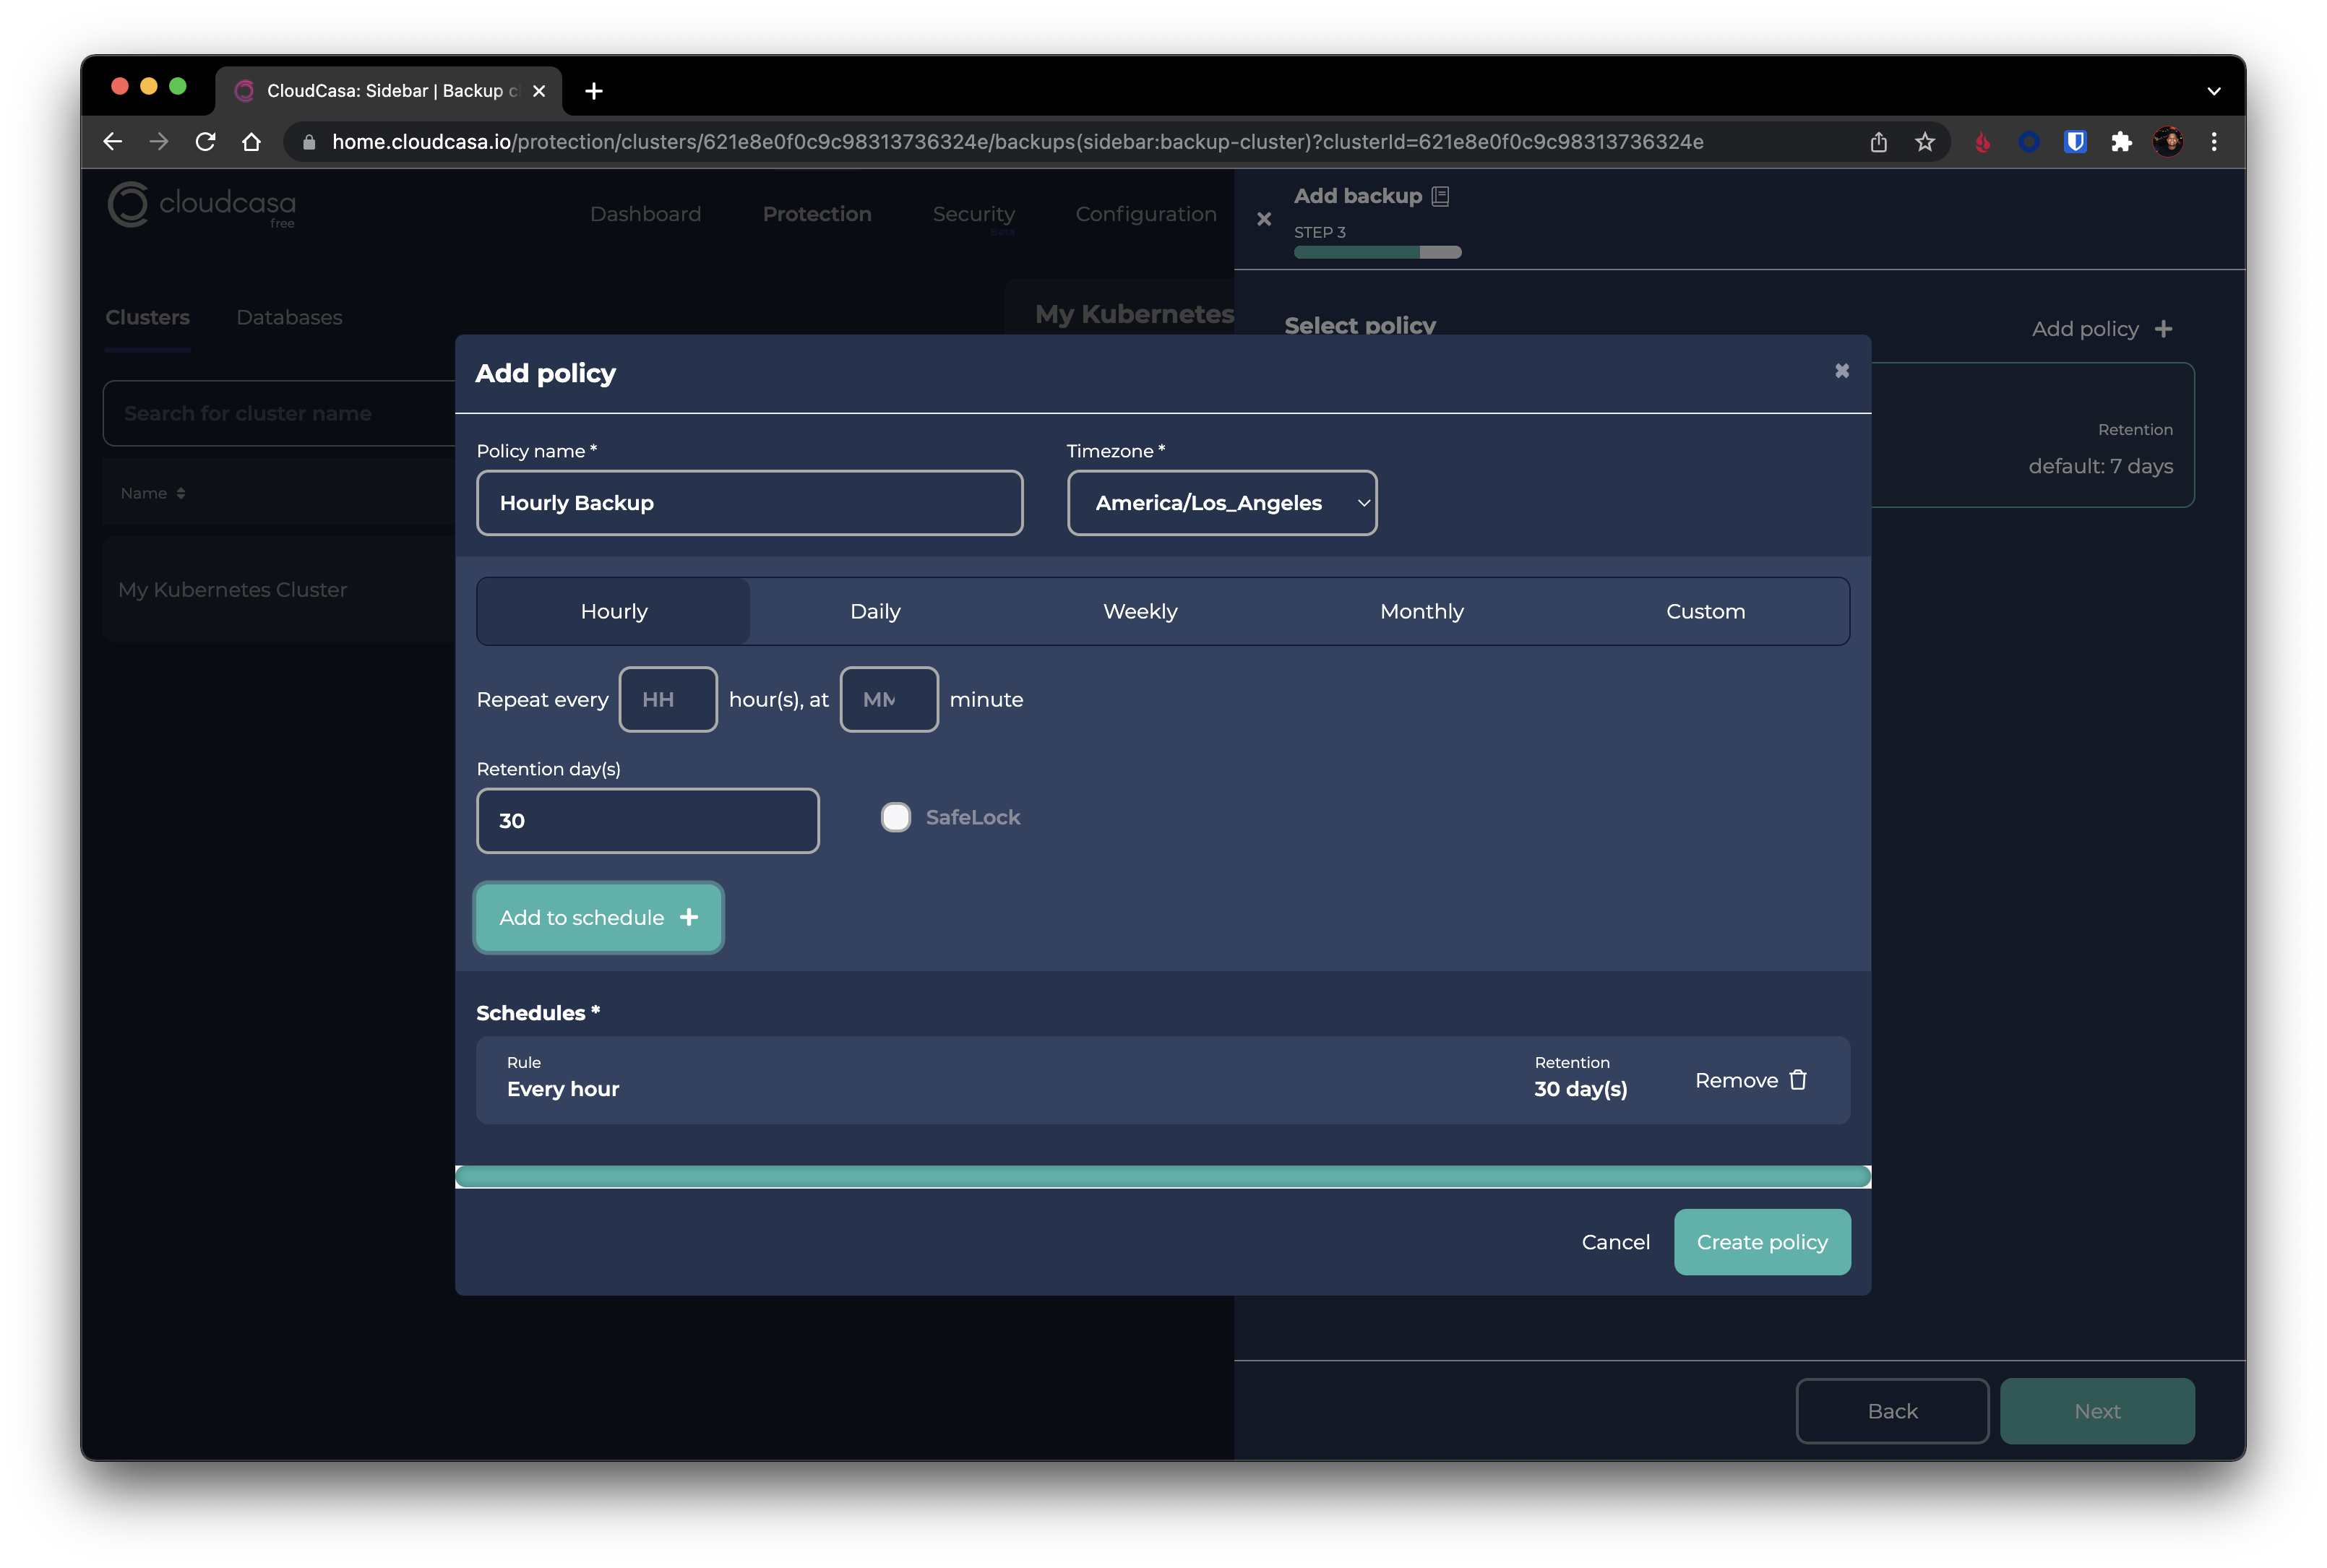
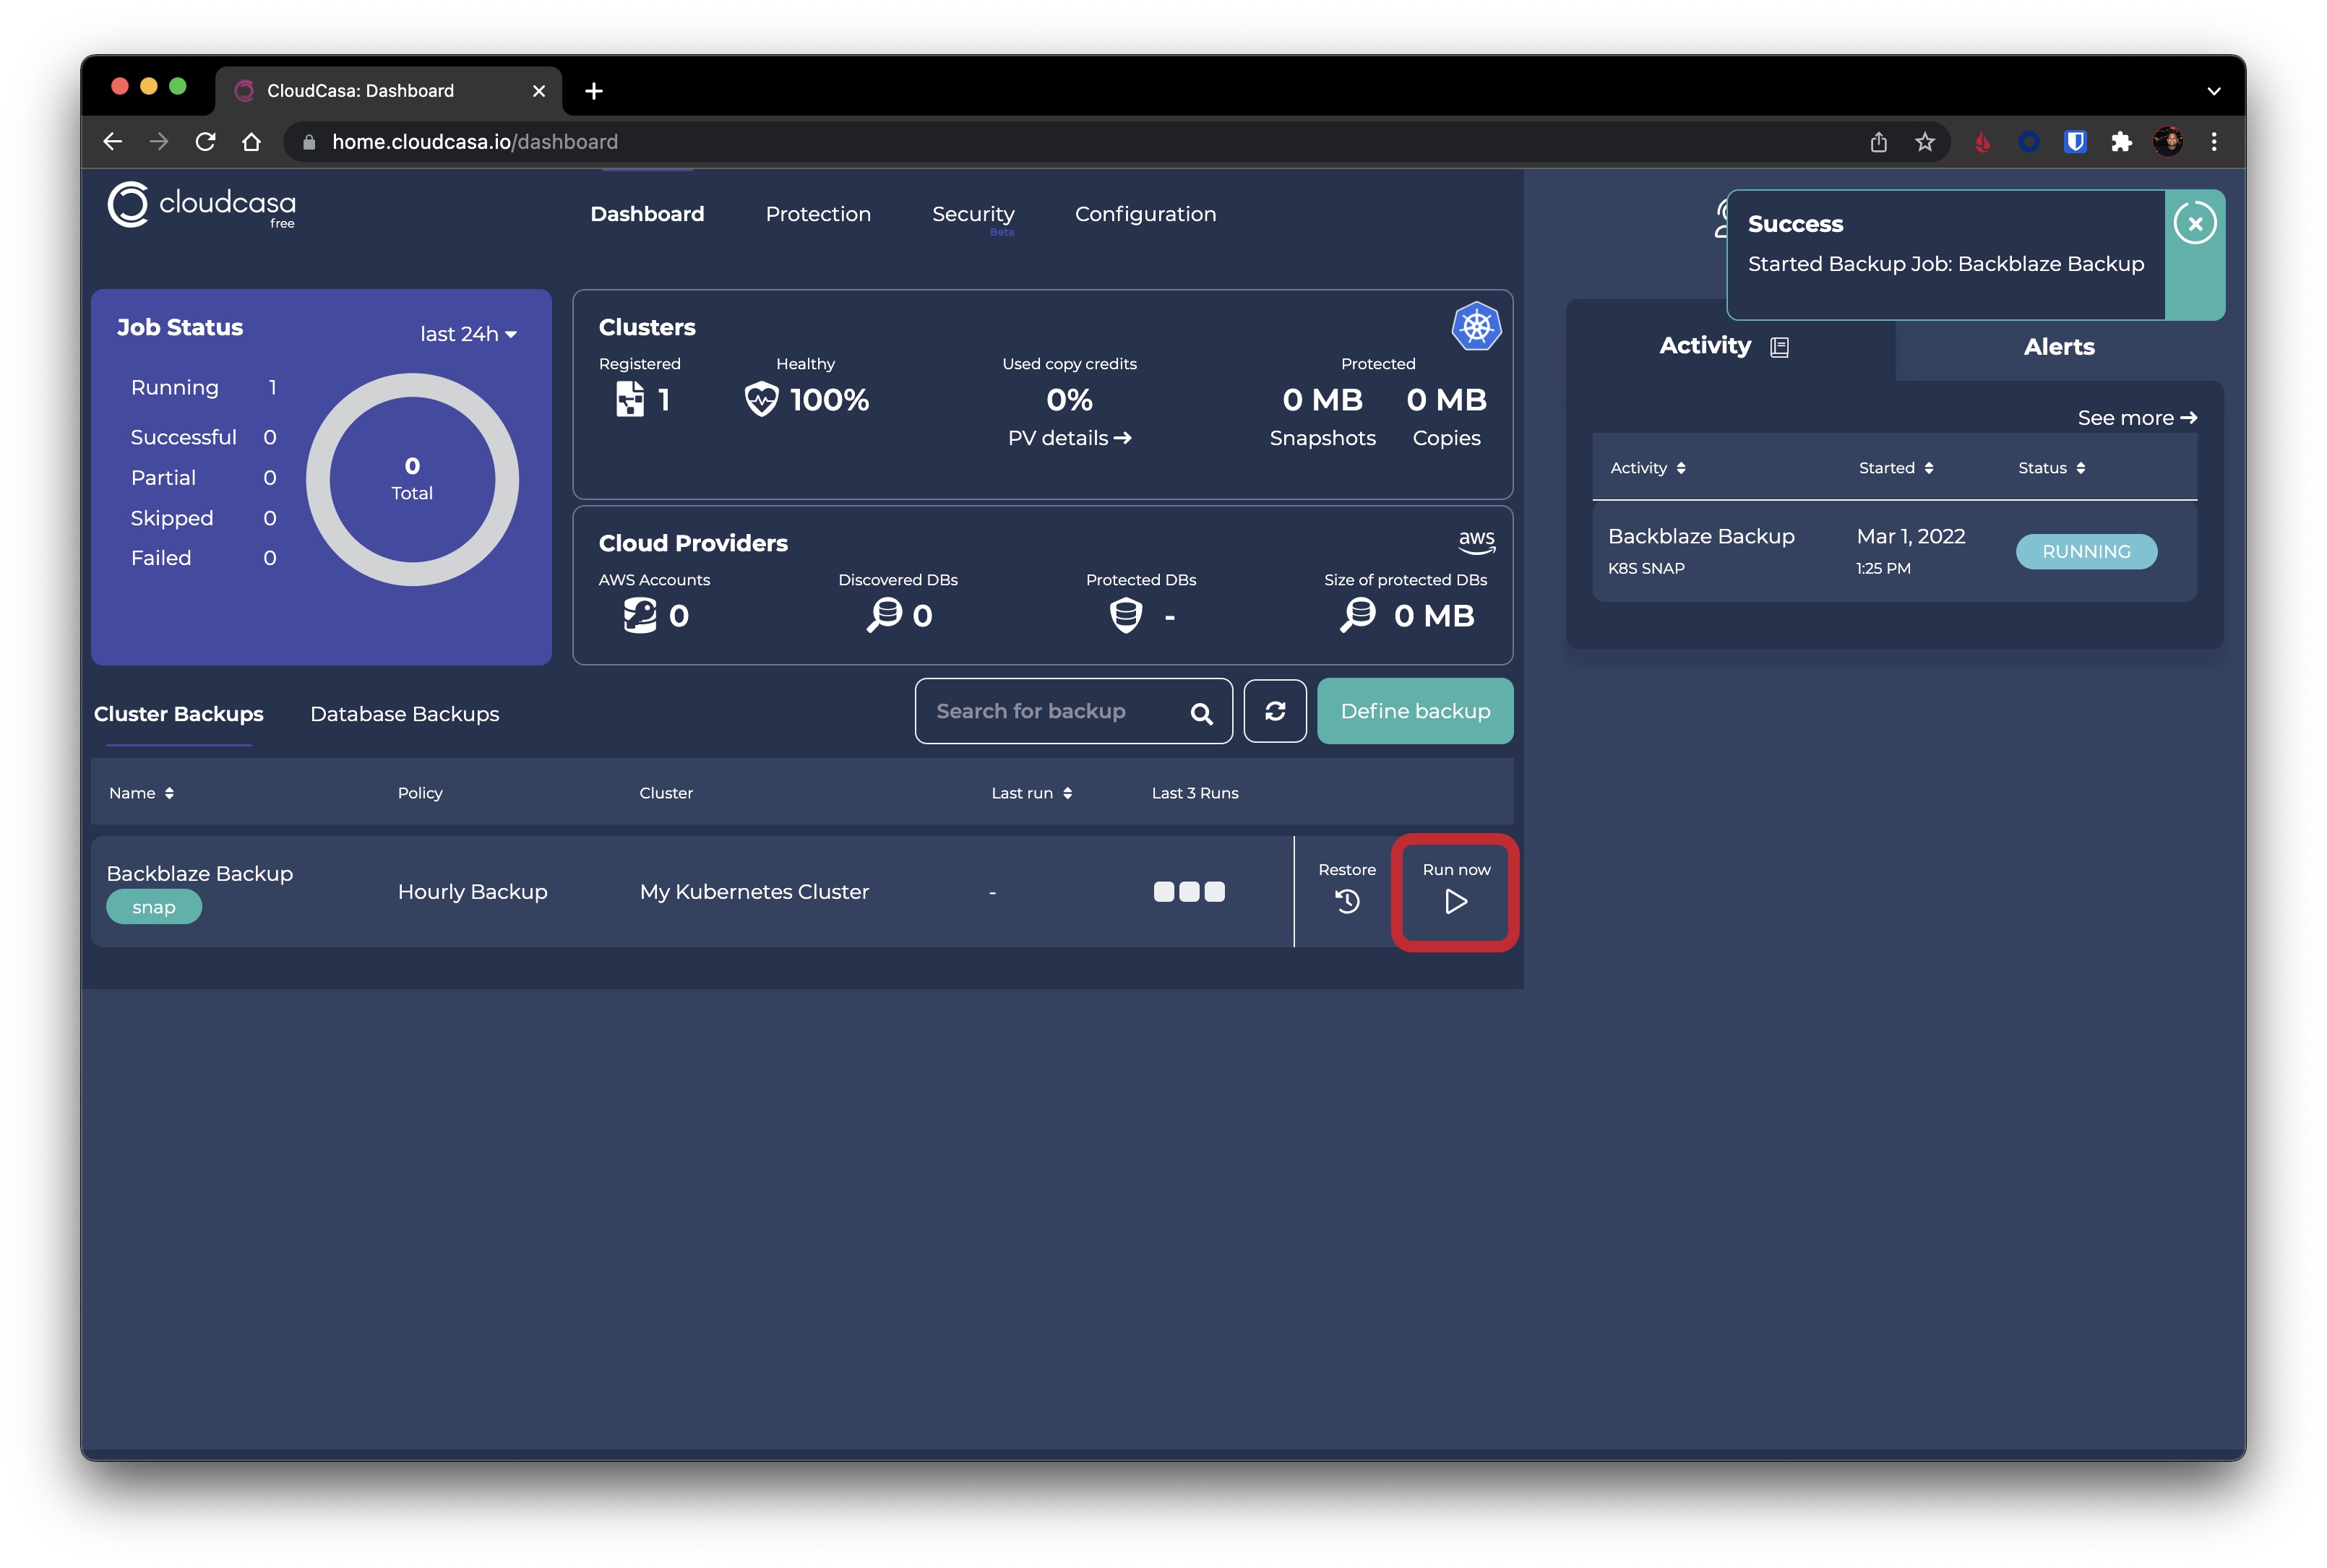
3) Go ahead and save the job and you are now ready to run your first backup! You can either wait for your schedule to run or If you would like to test go ahead and select Run now on the home page next to your backup job. Select Run at the bottom right.
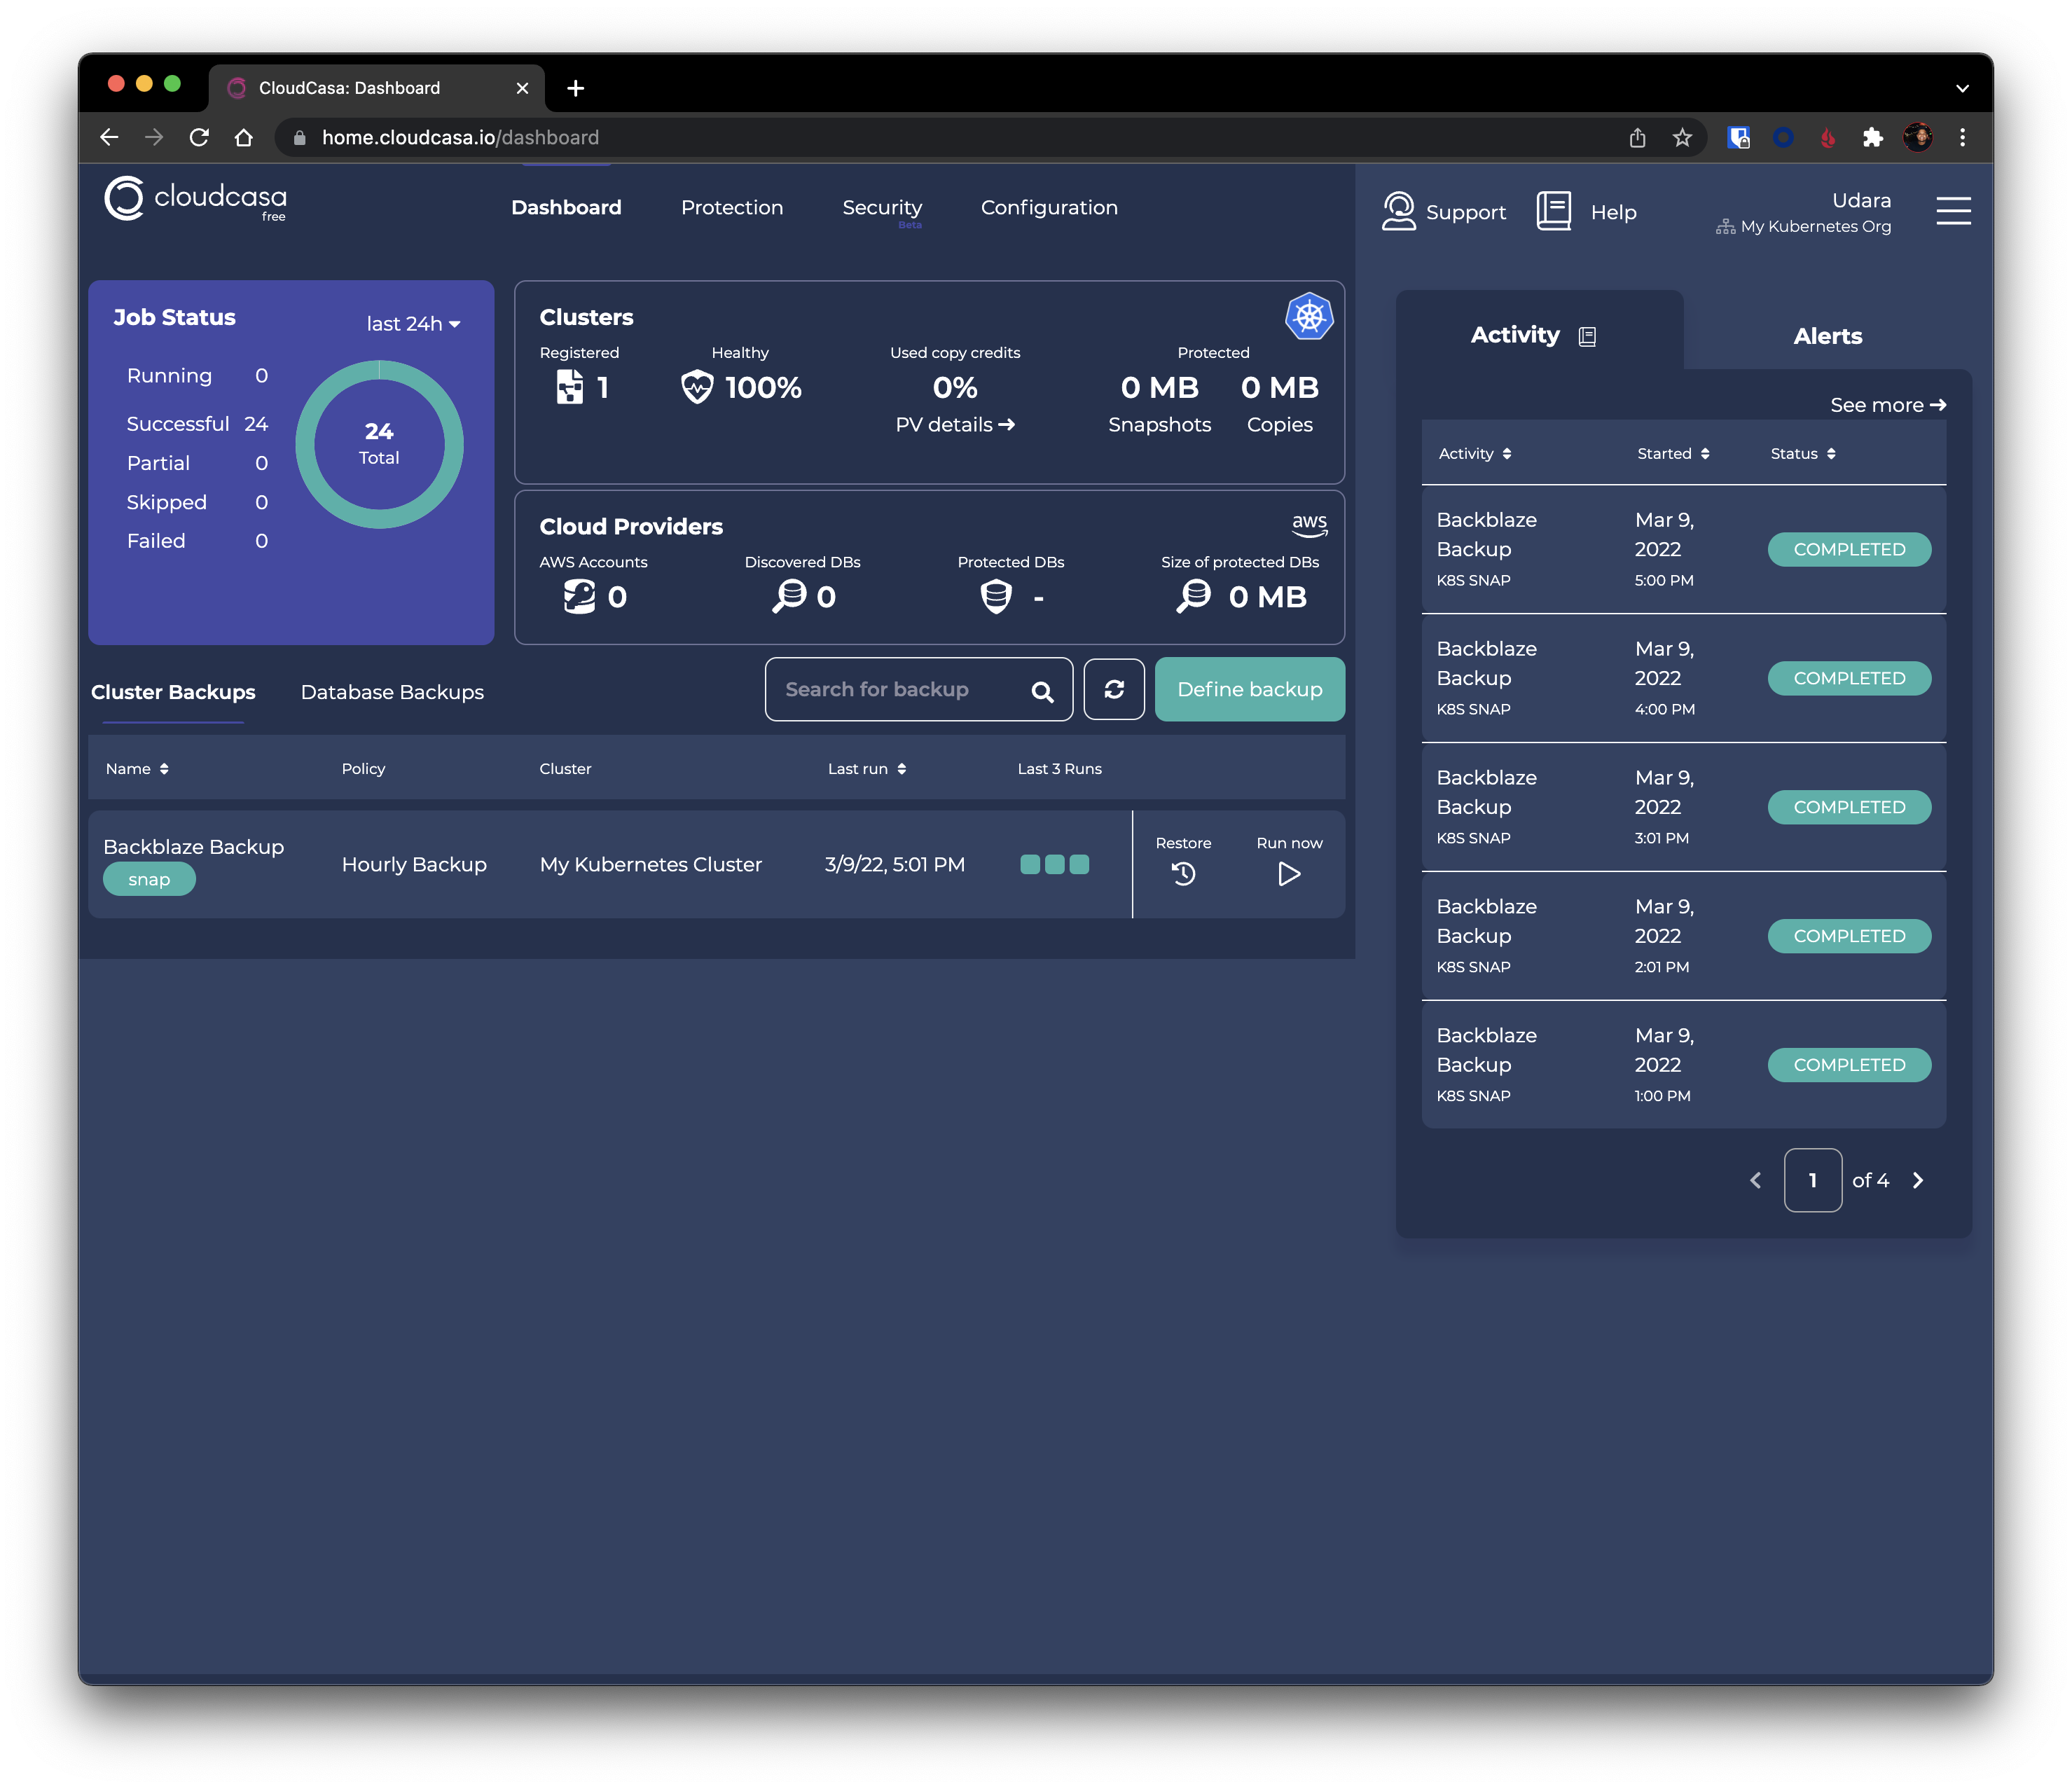
Congratulations your cluster is now protected by Cloudcasa and Backblaze B2. To learn more about Cloudcasa and how to do restores please visit their detailed guide.
Articles in this section
- Quickstart Guide for Veeam 12 Direct-to-Cloud Backups to Backblaze B2 with Immutability
- Quickstart Guide for Acronis CyberProtect and Backblaze B2 Cloud Storage
- Quickstart guide for SFTPCloud
- Quickstart Guide for Veritas NetBackup and Backblaze B2 Cloud Storage
- Quickstart Guide for Offshoot and Backblaze B2
- Quickstart Guide for Files.com and Backblaze B2 Cloud Storage
- Quickstart Guide for Encoding.com and Backblaze B2 Cloud Storage
- Quickstart Guide for Mountain Duck and B2 Cloud Storage
- Quickstart Guide for Microsoft 365 Backup with MSP360 and Backblaze B2 (Multiple Instances)
- Quickstart Guide for Microsoft 365 Backup with MSP360 and Backblaze B2 (Single Instance)