
Introduction
Soda is a SaaS application that allows users to transfer data from an on-premise storage device (NAS, SAN, private cloud, etc.) to cloud object storage. This walkthrough will help you understand the basics for configuring SoDA to transfer data between an on-premise NAS device and Backblaze B2 object storage.
Requirements
- A Linux host is needed in the environment, either bare metal or virtual machine to host the SoDA Docker container. In this example, we are using a Ubuntu 18 virtual machine.
|
SoDA Conductor (Virtual Hardware specifications) |
||
|
|
Minimum |
Recommended |
|
ESXil |
Version 6.5 or above |
Version 6.5 or above |
|
CPU |
8 - vCPU |
8 - vCPU |
|
Storage |
200GB |
1TB (single partition) |
|
Memory |
16GB |
32GB |
|
SoDA Agent (Virtual Hardware specifications) |
||
|
|
Minimum |
Recommended |
|
ESXil |
Version 6.5 or above |
Version 6.5 or above |
|
CPU |
4 - vCPU |
16 - vCPU (running Intel Icelake or AMD EPYC/Zen3, Apple M1 processors) |
|
Storage |
100GB |
200GB |
|
Memory |
4GB |
8GB |
Gathering Backblaze Information:
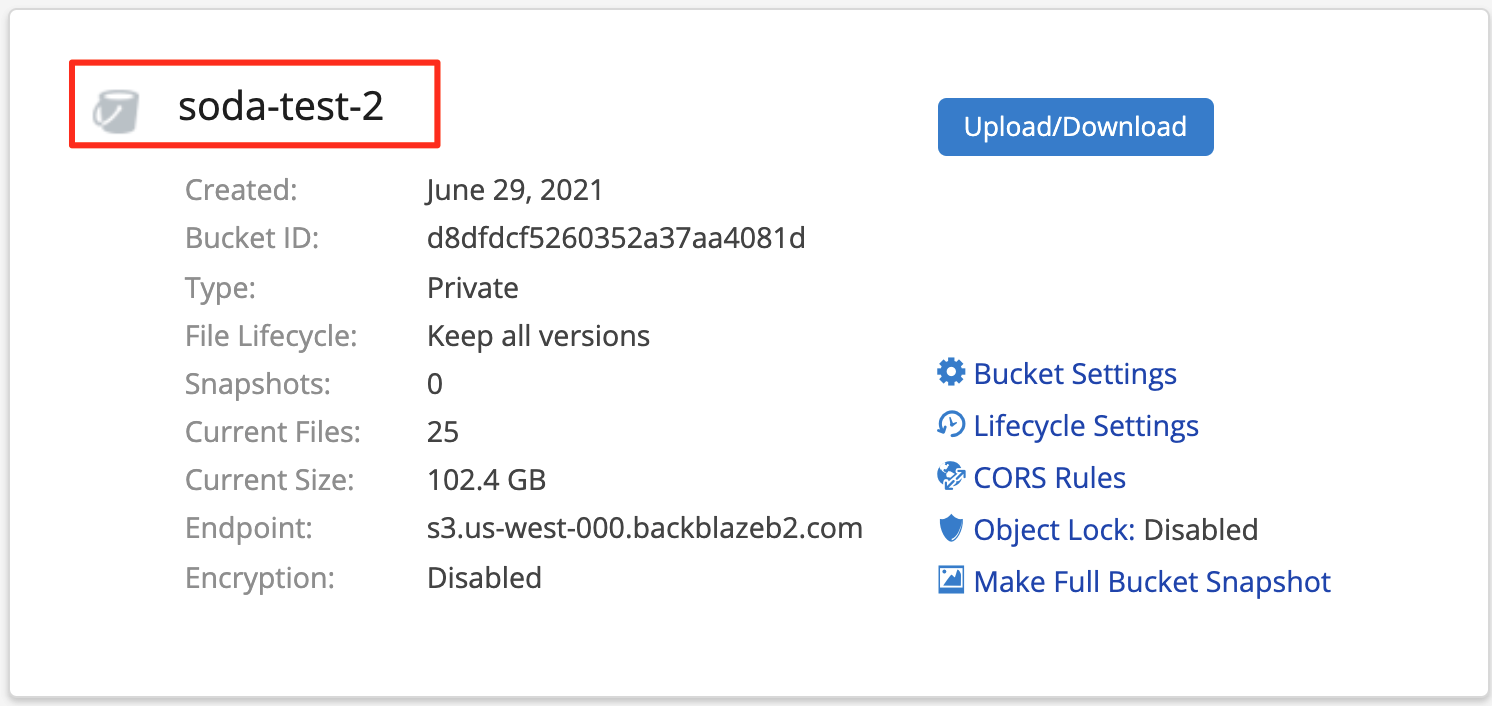
Once SoDA is installed on your host machine, you will need your Bucket Name, Application Key and Application Key ID from your Backblaze account associated with the target bucket you will be moving data to.
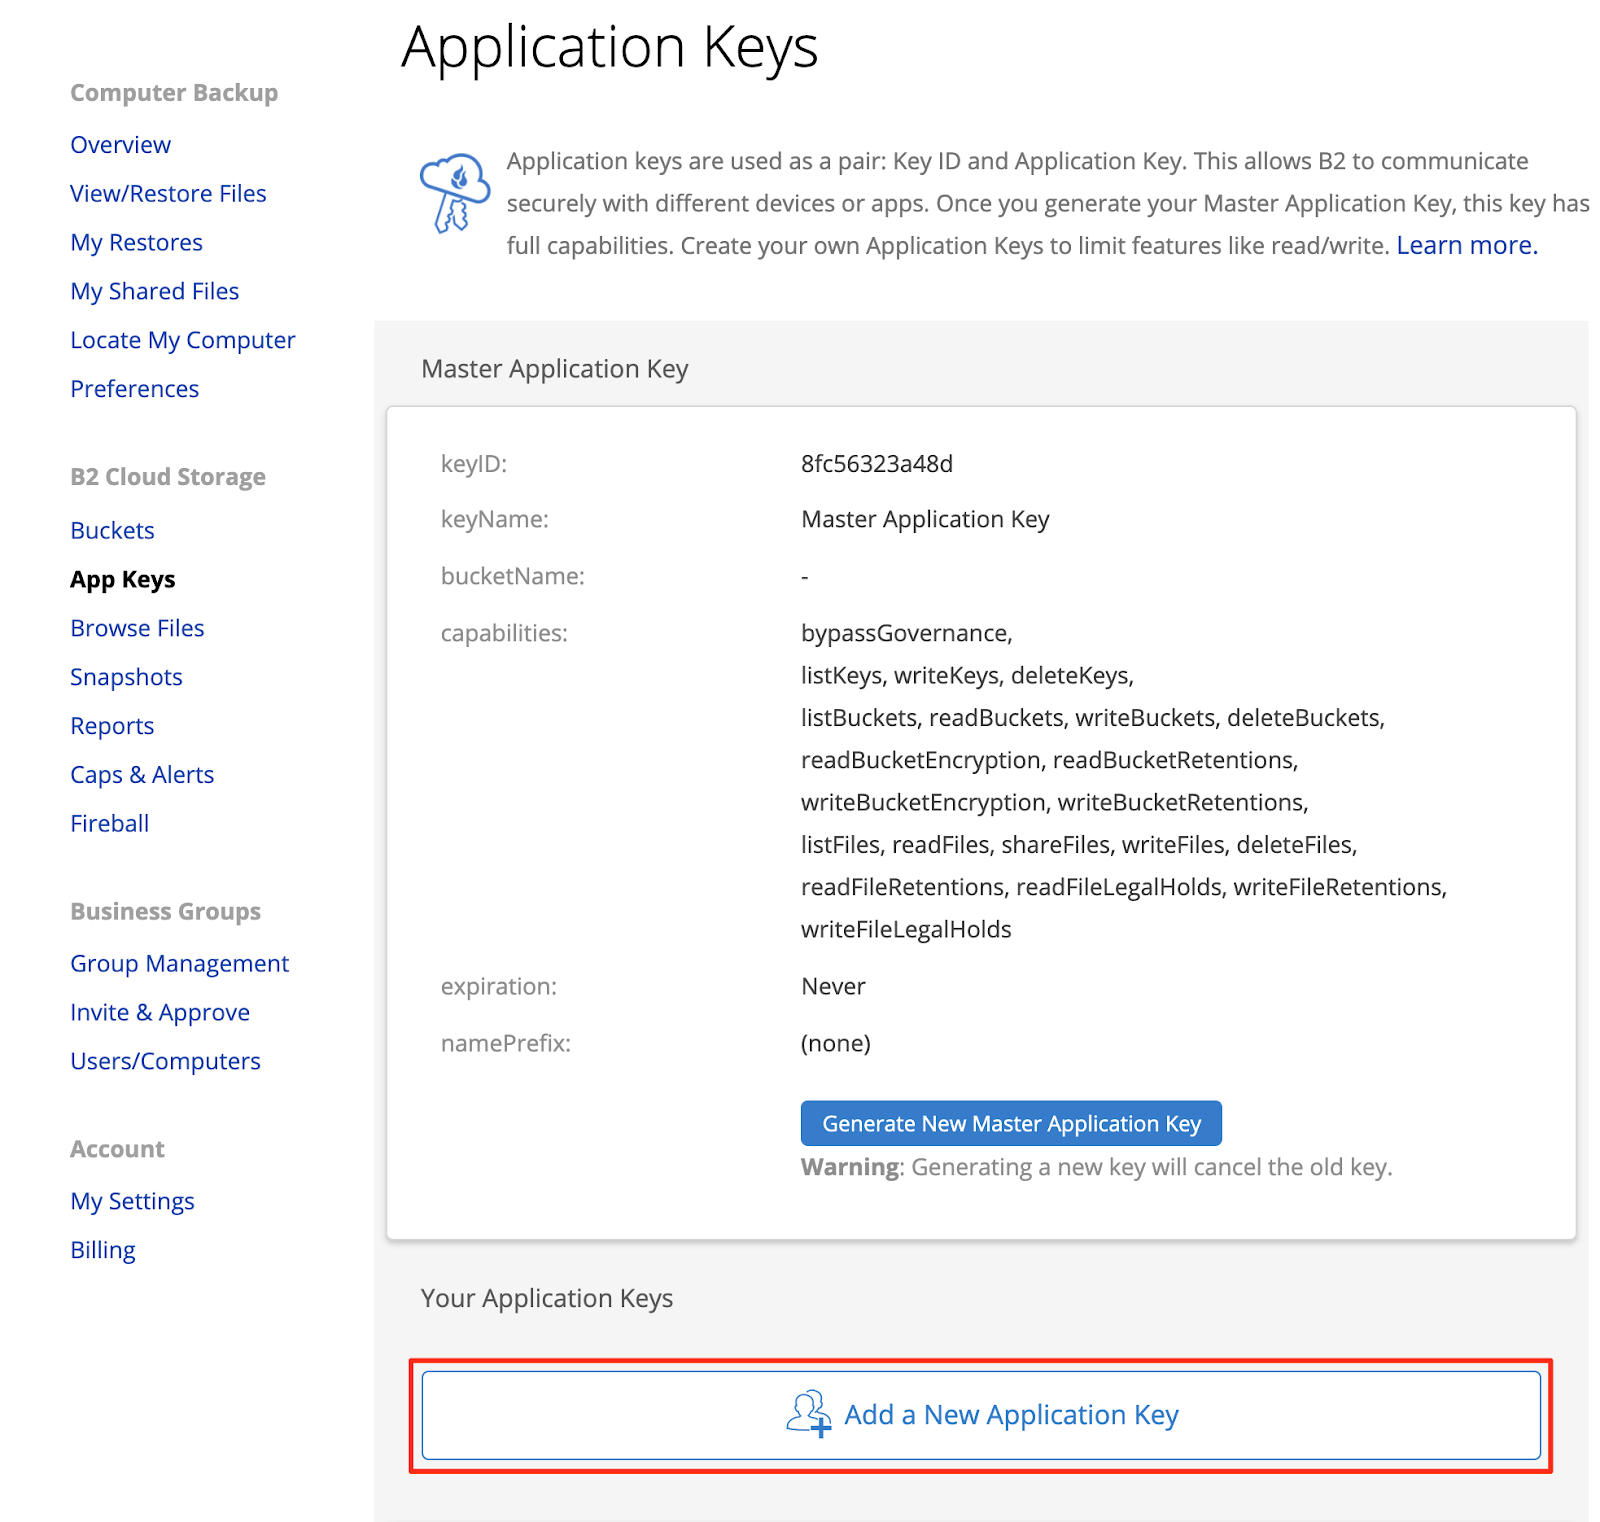
To get this information you will need to go here:
- Type your email address and password used for Backblaze, then click Sign In.
- Once you have signed in, click the App Keys link in the left-hand navigation pane.
Find your Bucket Name:
Then you will need to create a new App Key as shown here:

Gathering Local Storage Information:
- Make sure local network storage is mounted to your SoDA Linux machine.
- Cat the /etc/fstab file and obtain the mount entry for the NFS mounted storage.
freenas:/mnt/NFS1 /mnt/nfs1 nfs auto,nofail,noatime,nolock,intr,tcp,actimeo=1800 0 0
(NOTE: you will need this information late in the configuration.)
- IP Address of NAS device
- Export path:
- Mount Options
Guide SoDA
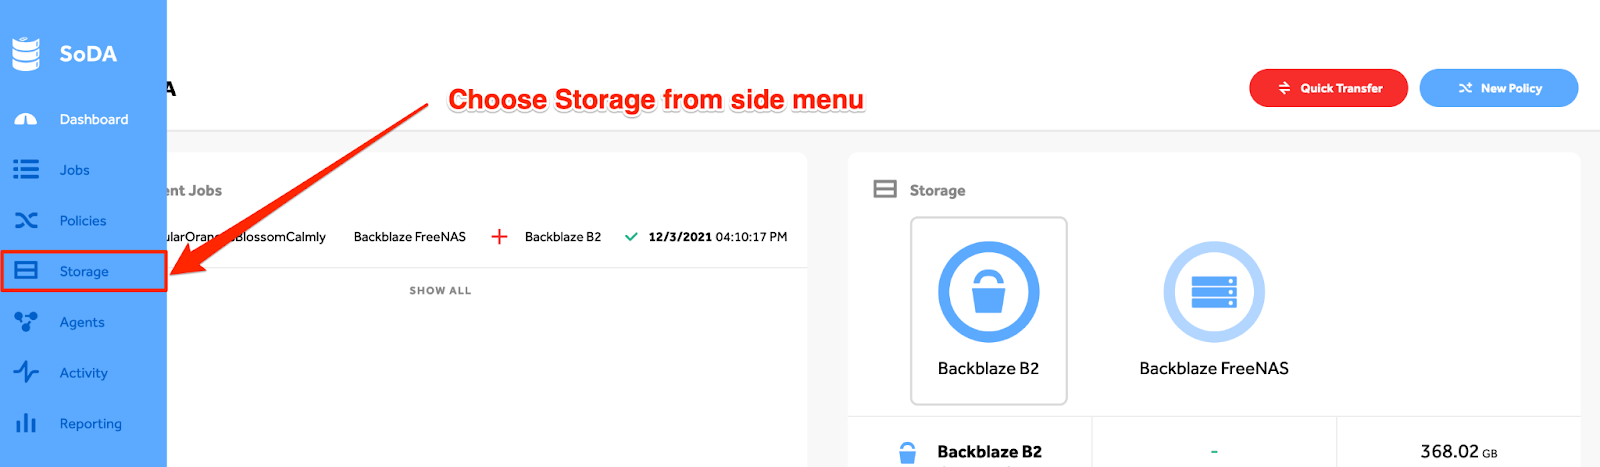
1. Login to the SoDA interface
2. Add Backblaze B2 and Local Storage Accounts to SoDA
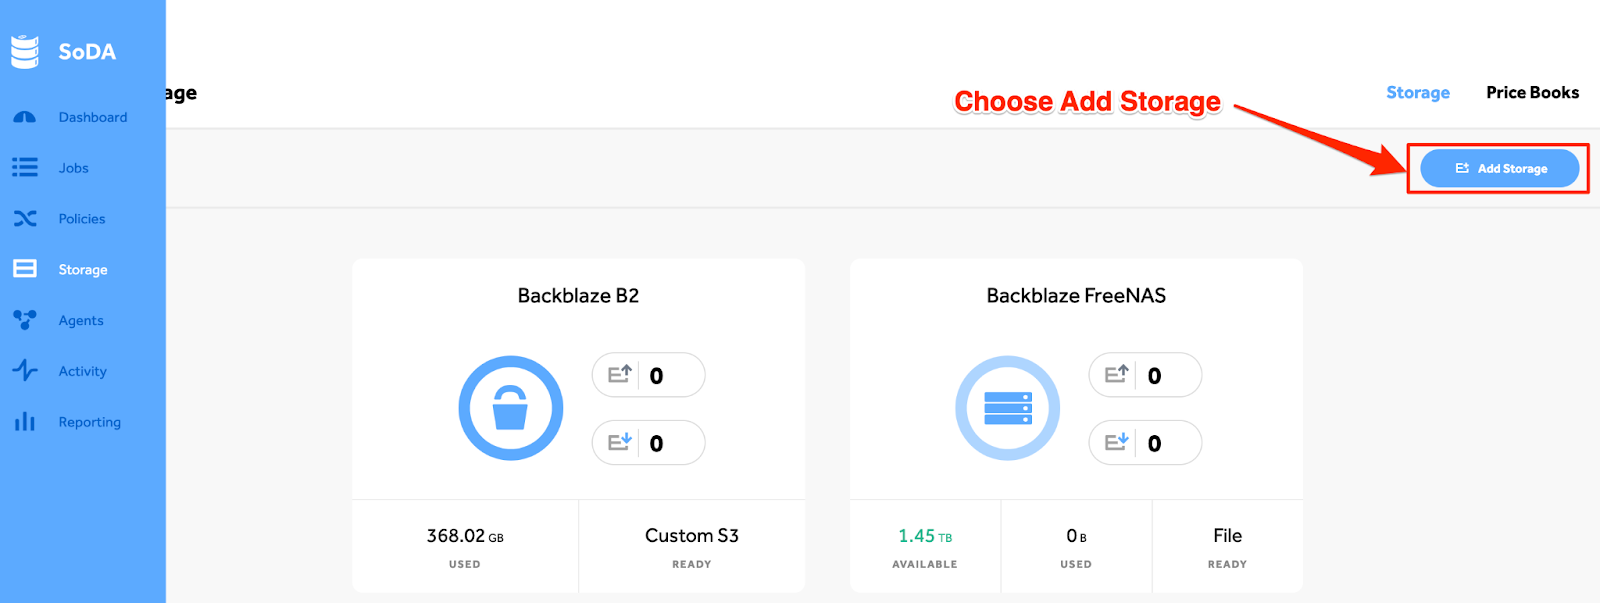
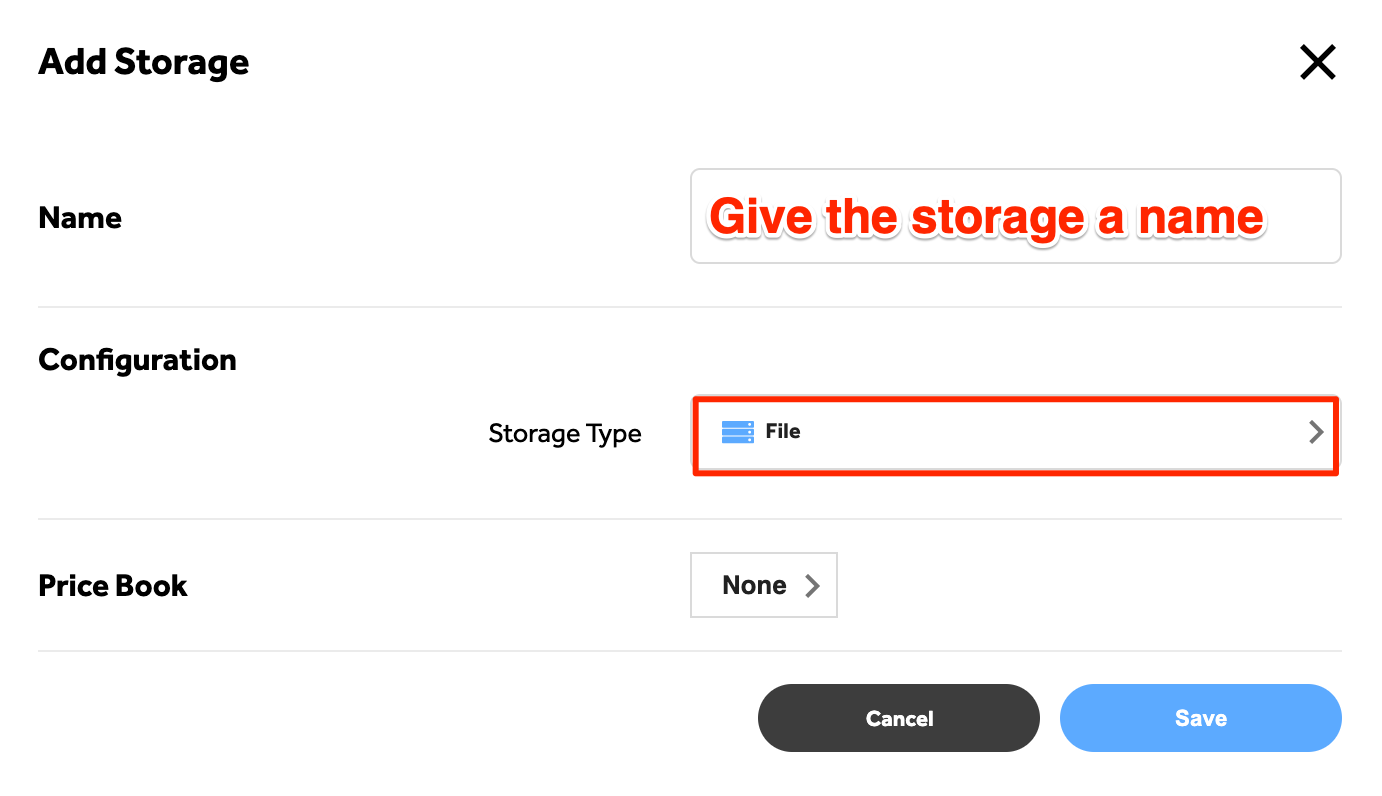
3. Click Add Storage
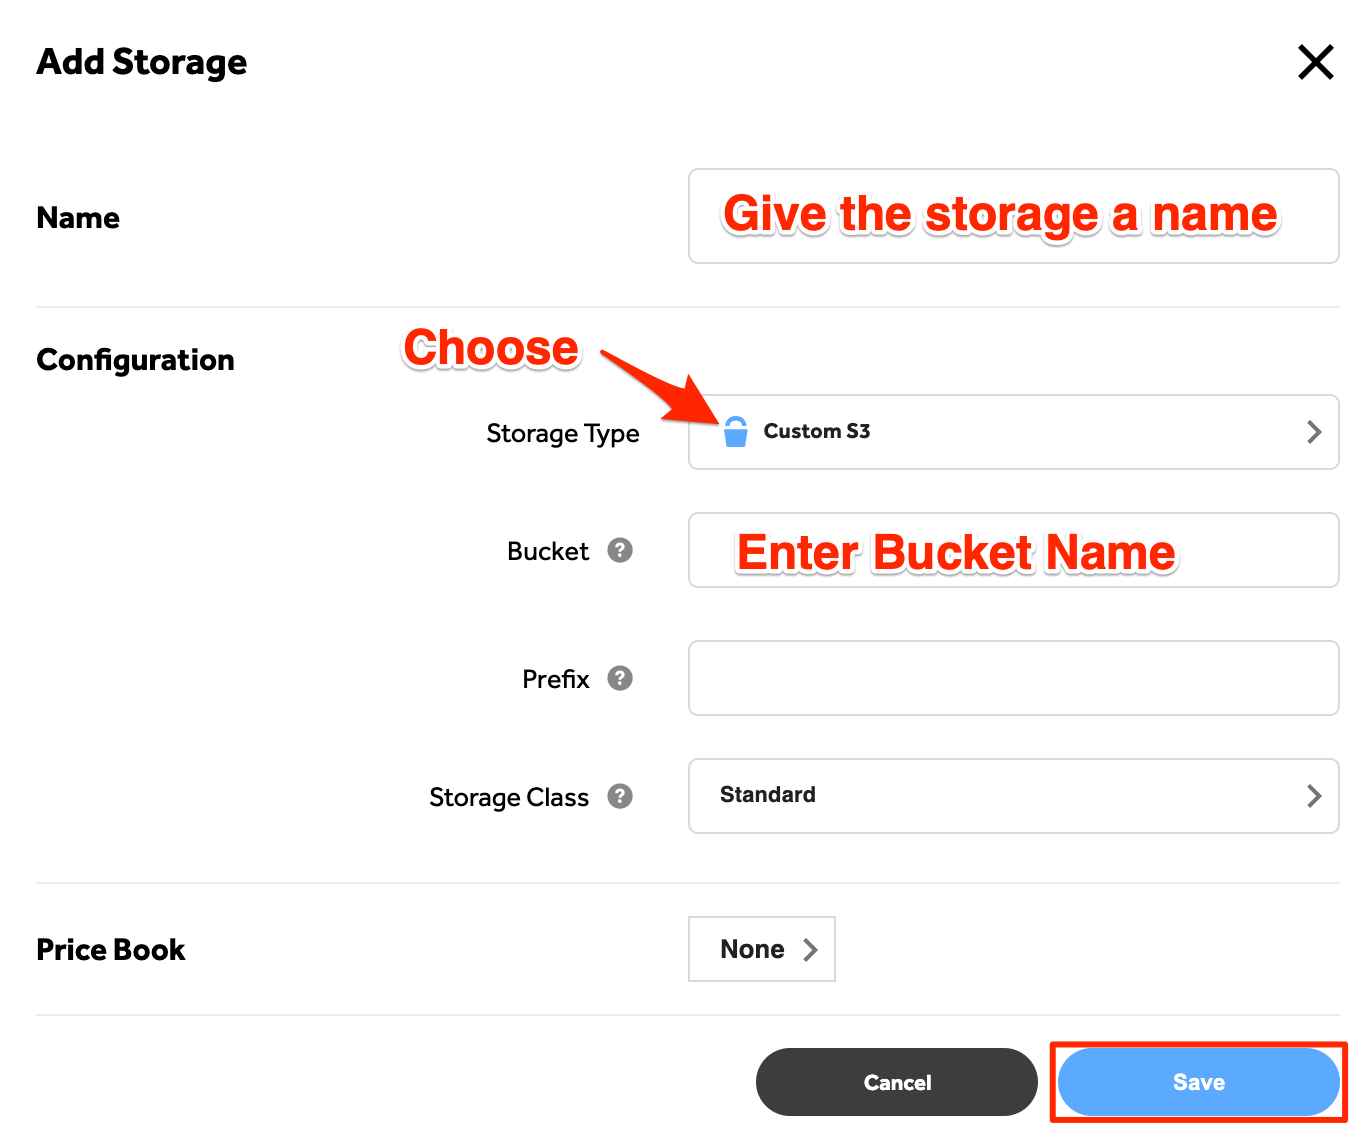
4. Enter the information in the image below and Click Add Storage
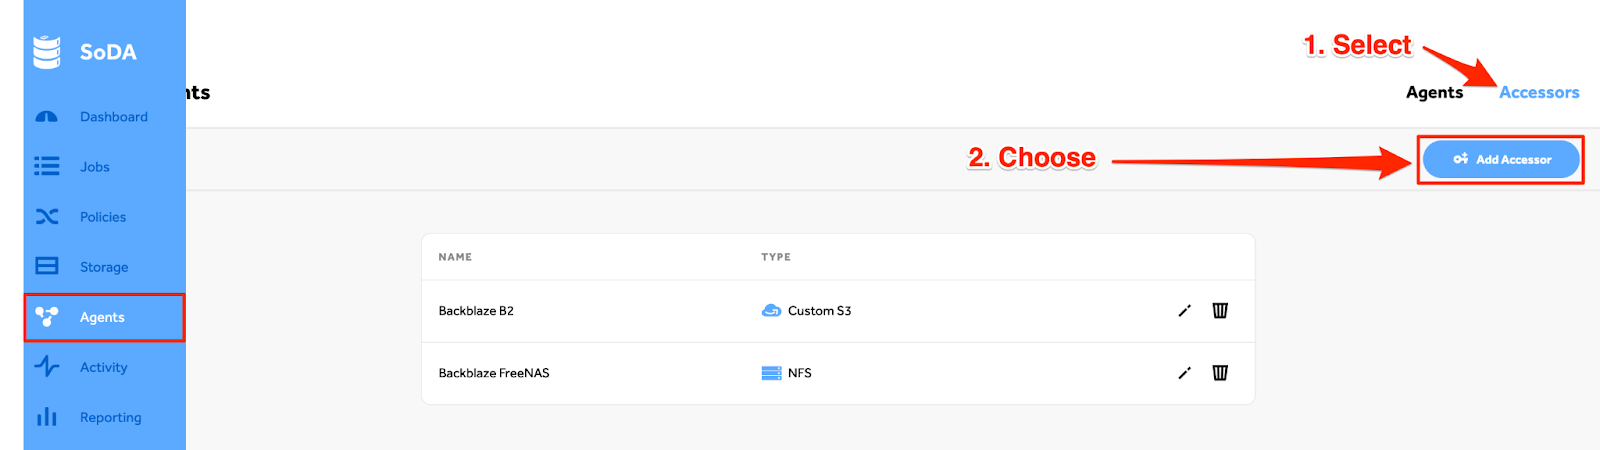
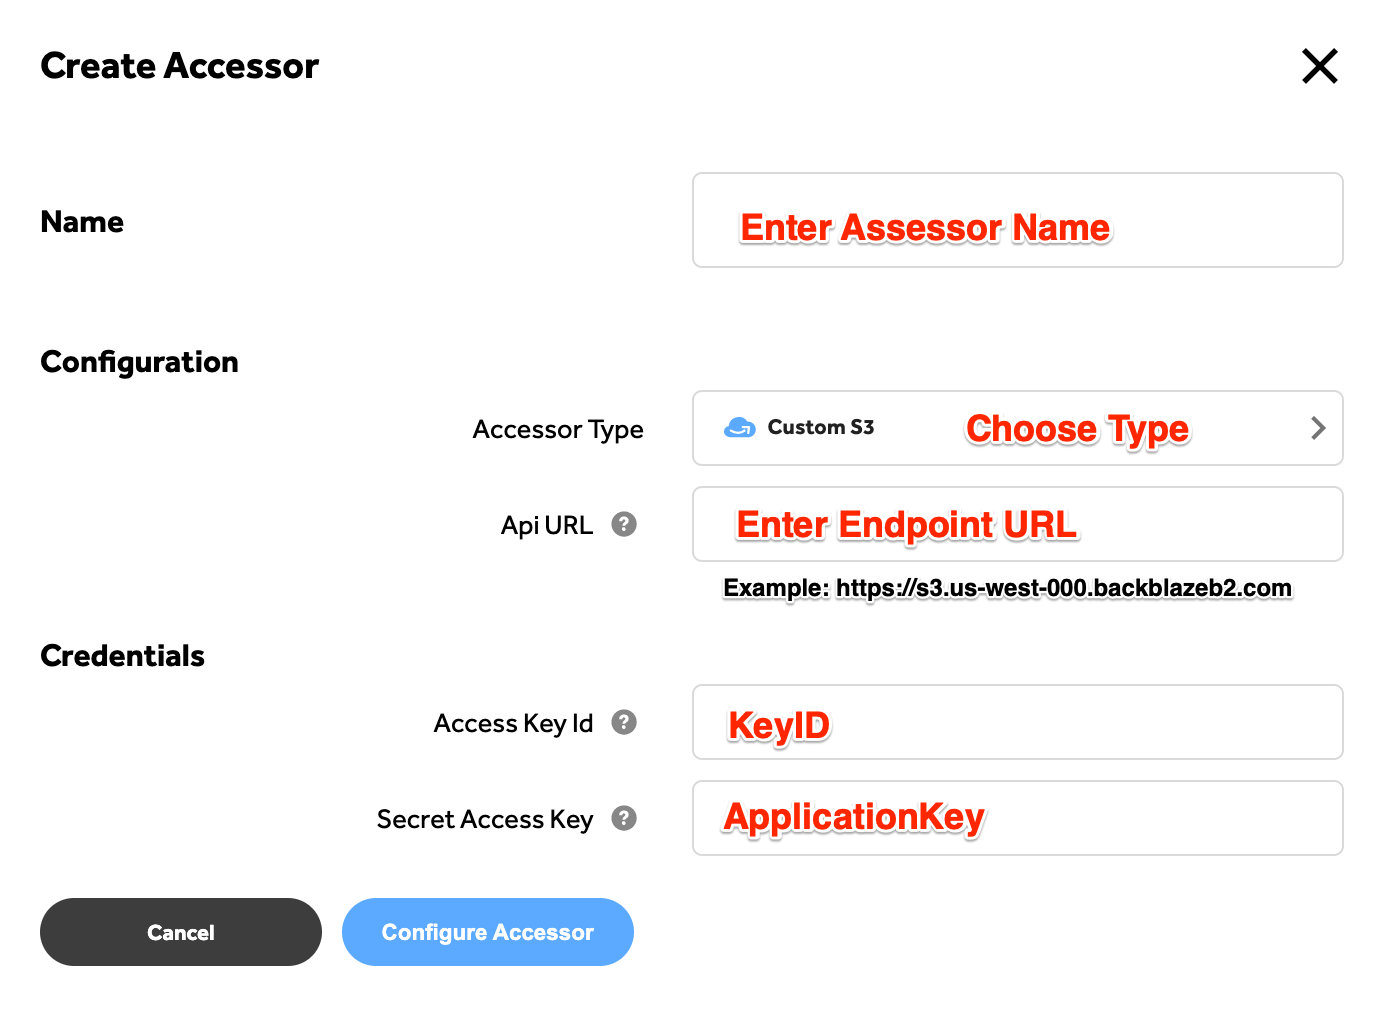
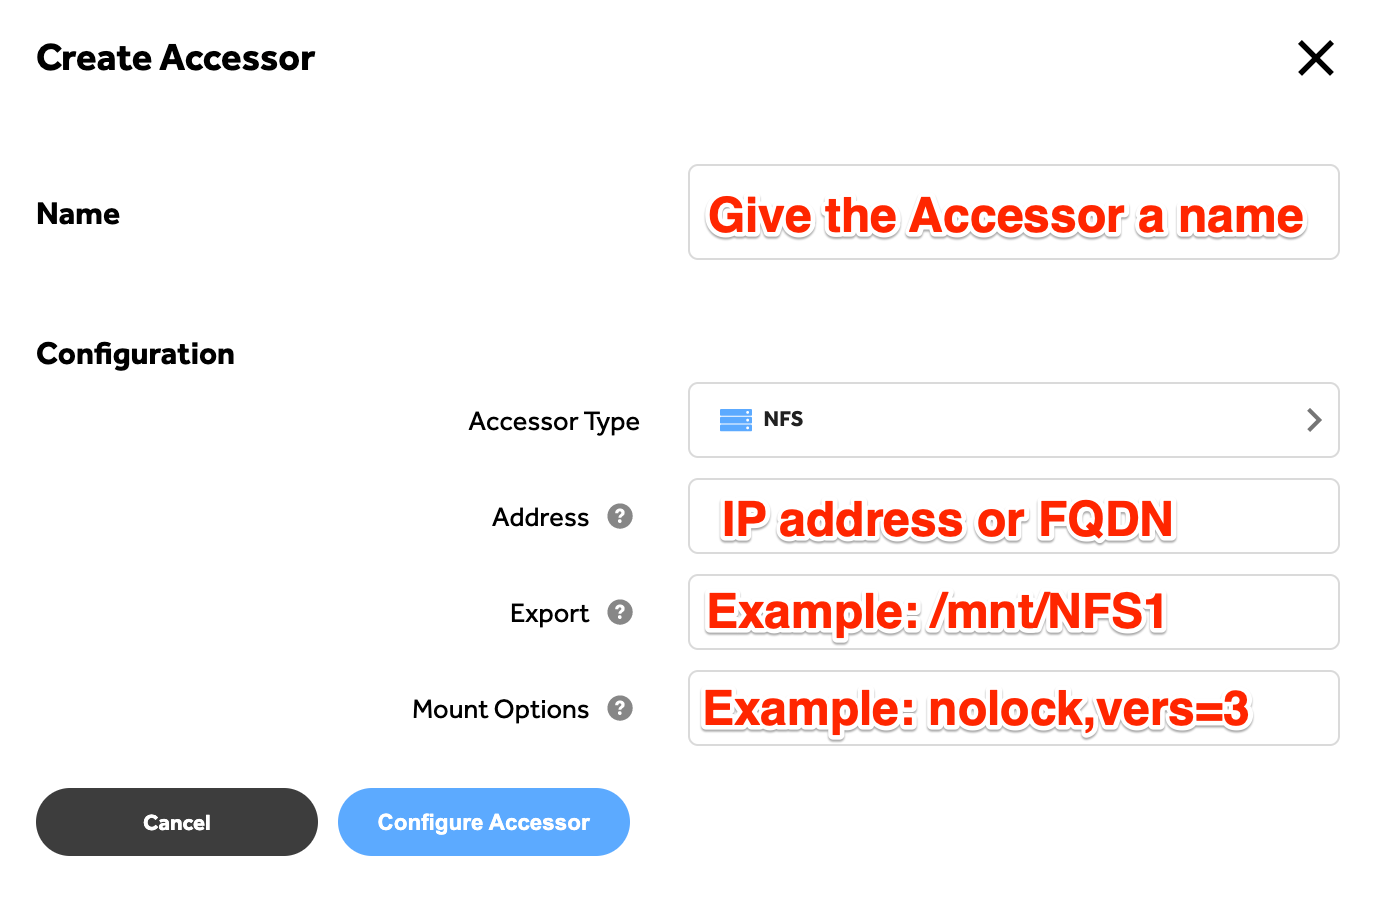
5. Choose Agents from the menu on the right, then, Add Accessor
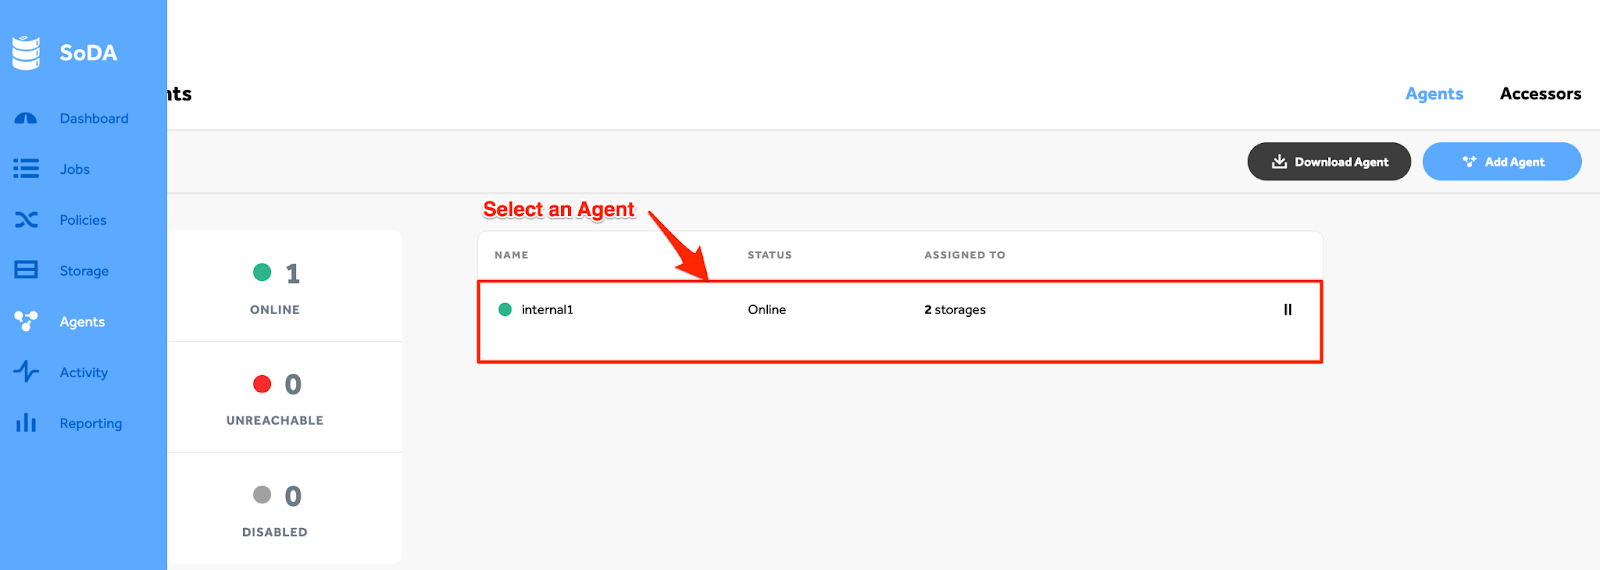
Attaching the Storage to the Agent
1. Select the Agent
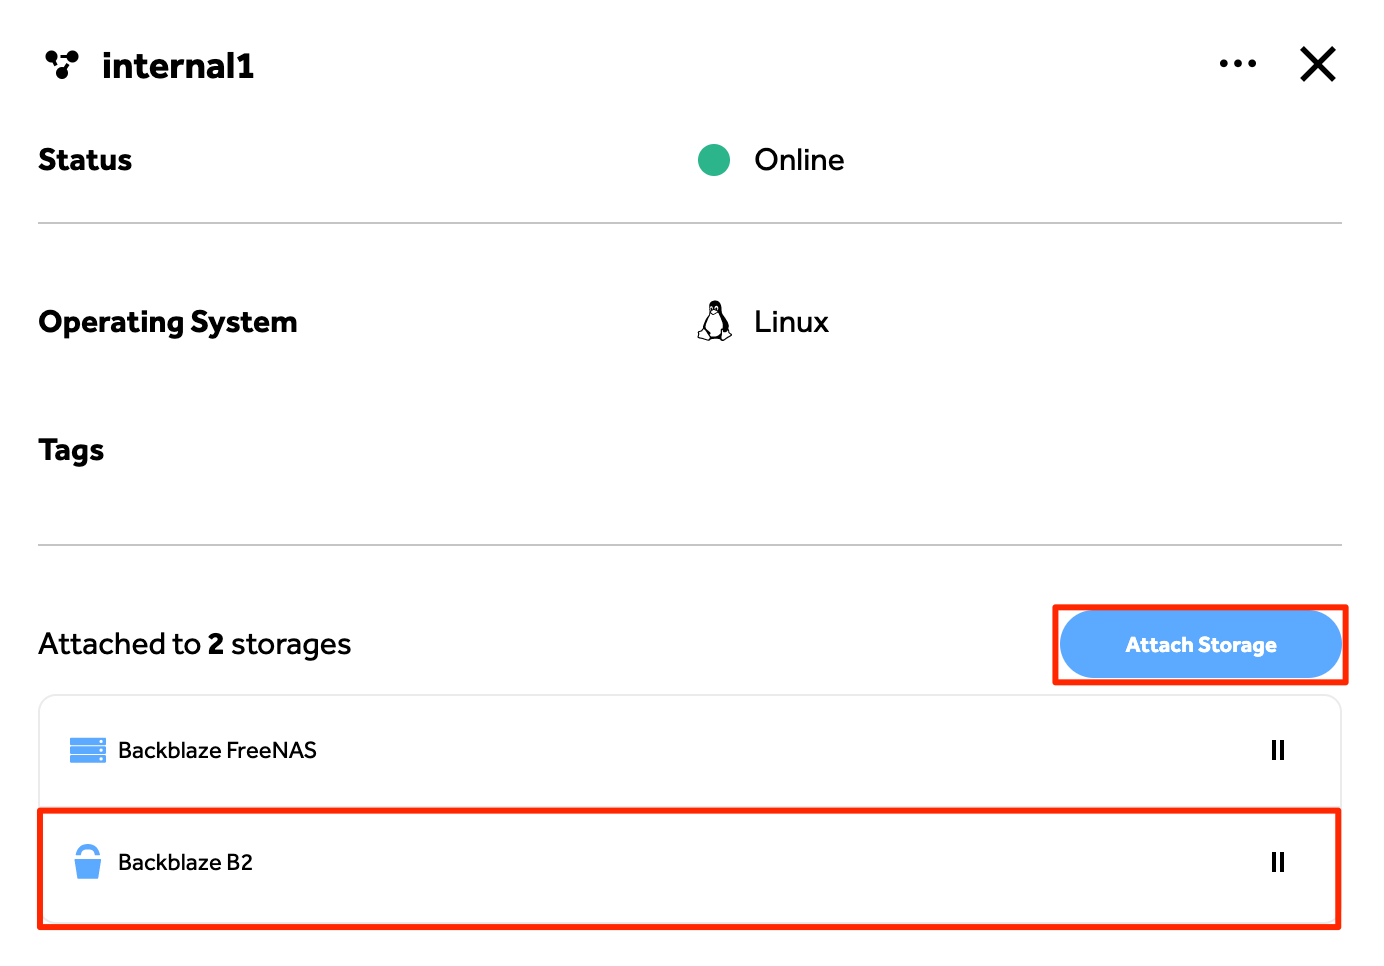
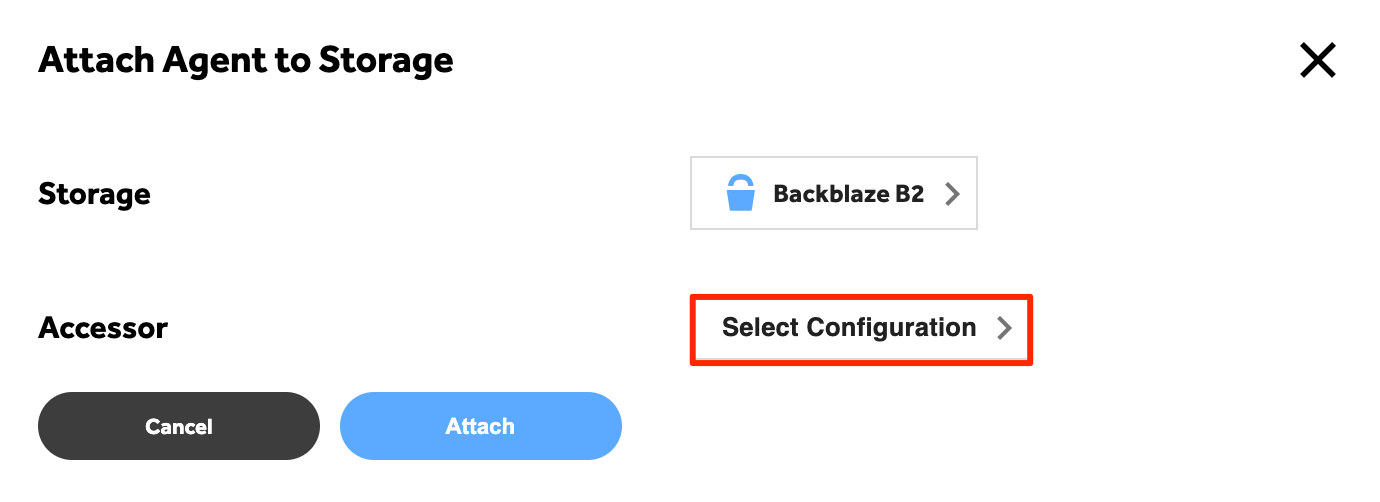
2. Choose Storage and Select Attach Storage
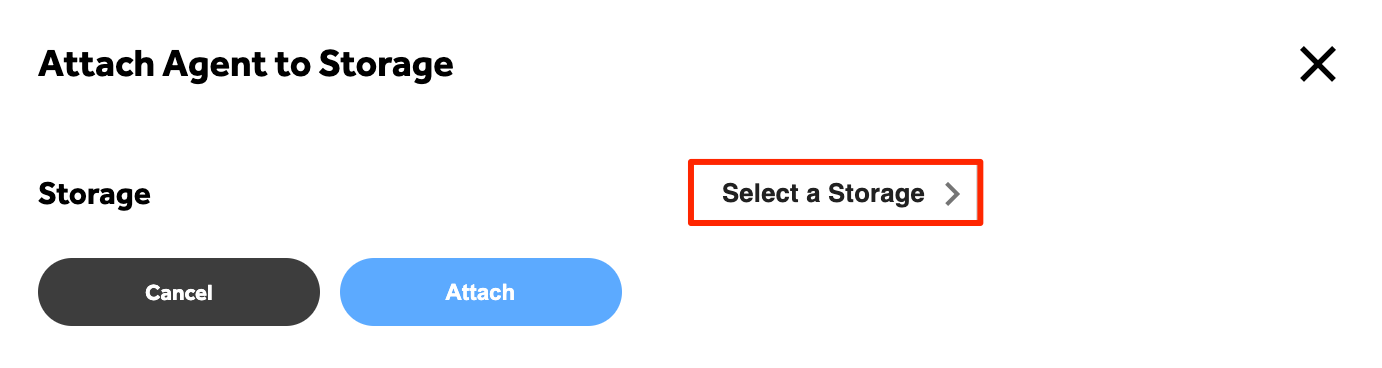
3. Select a Storage
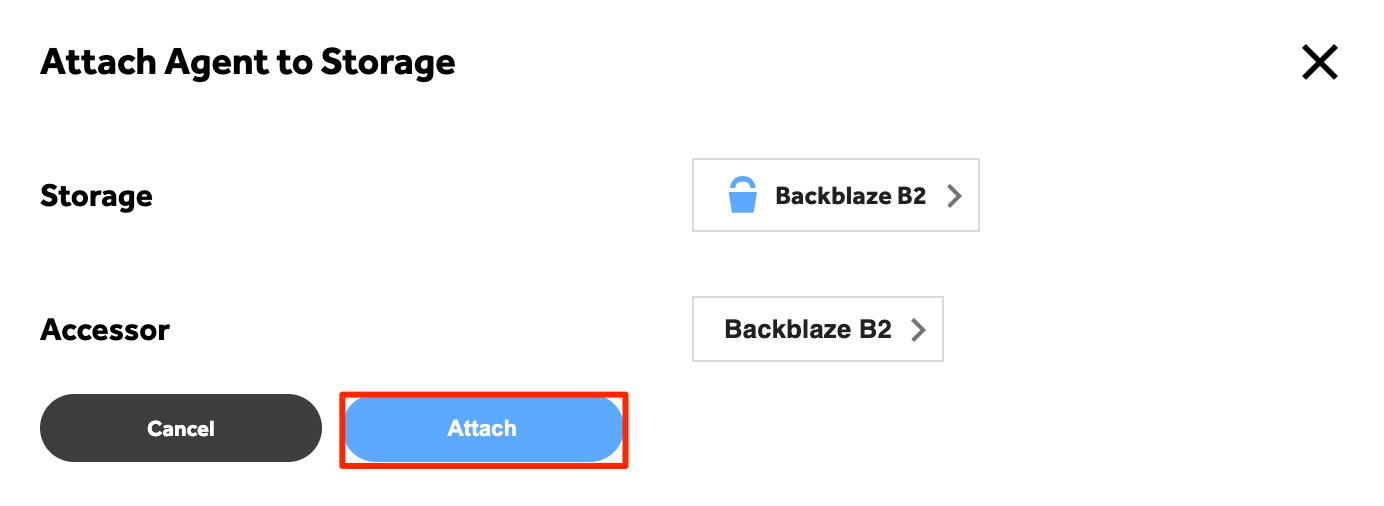
4. Select Accessor
5. Select, Attach
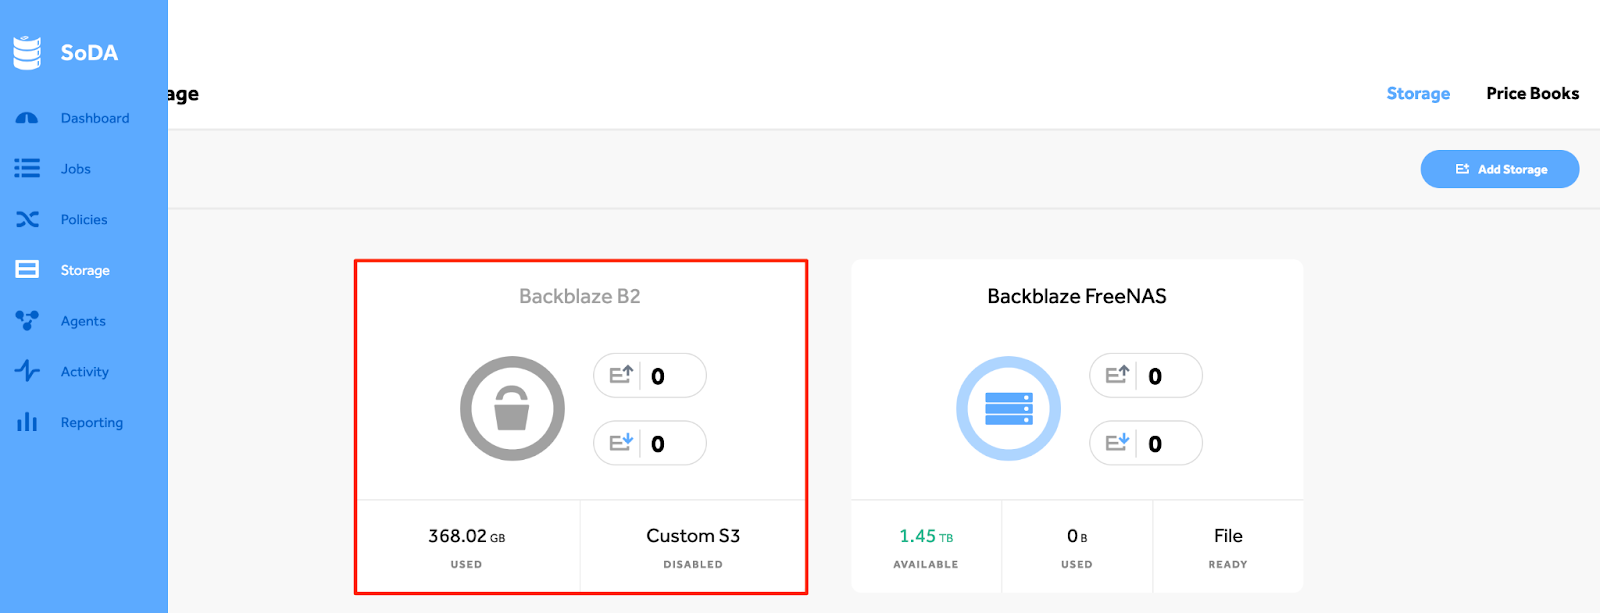
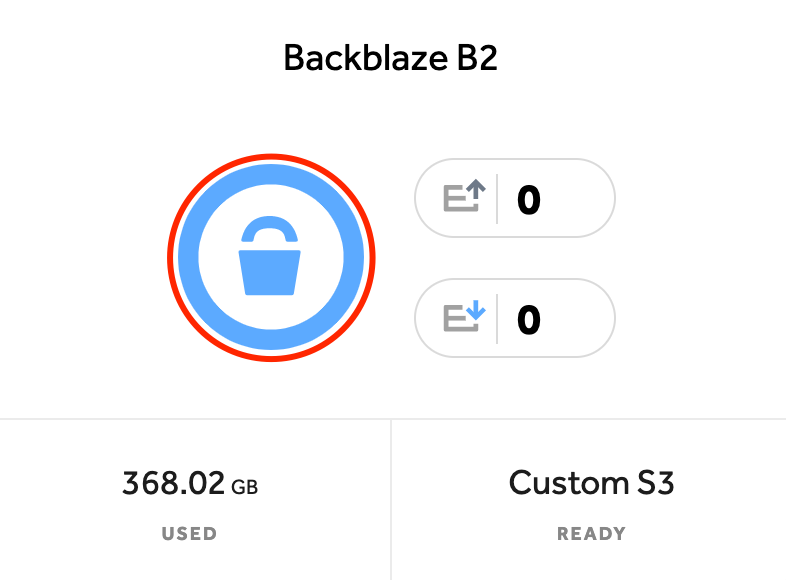
Now that the Storage is attached to the Accessor, you will now need to Enable the storage
1. Select the storage
2. Select the … On the top right of the box
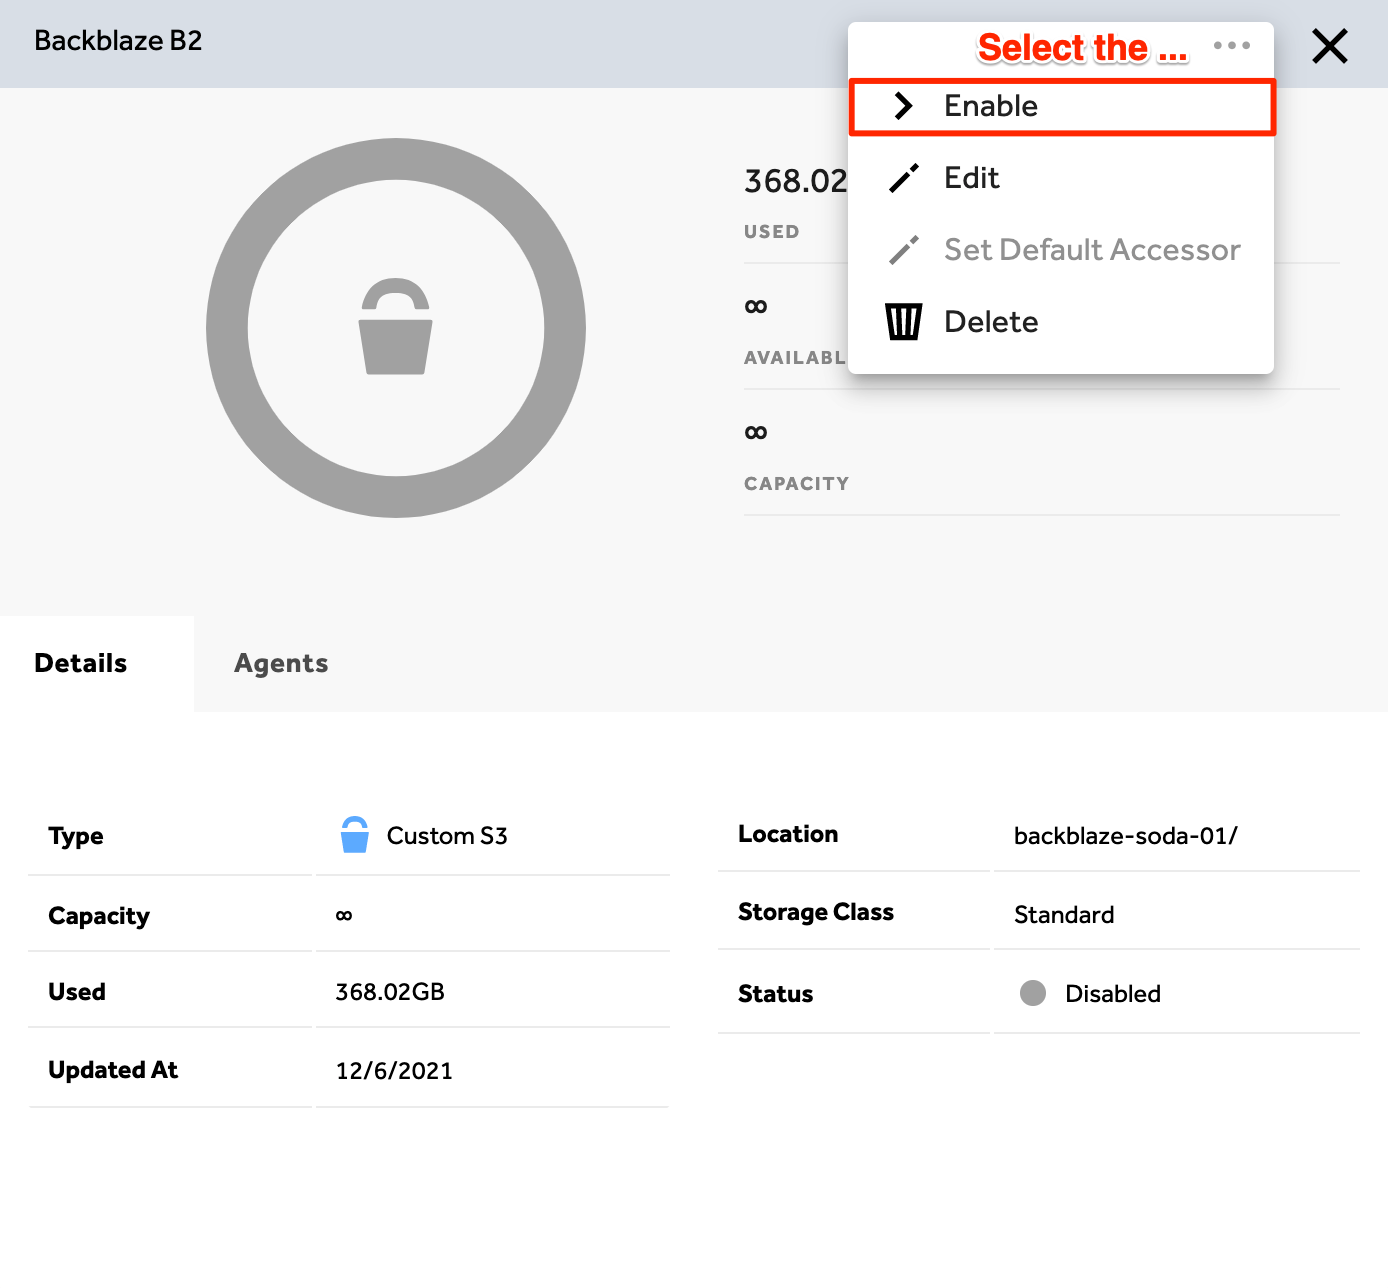 3. Now notice the Circle is Blue, which identifies the storage as Enabled.
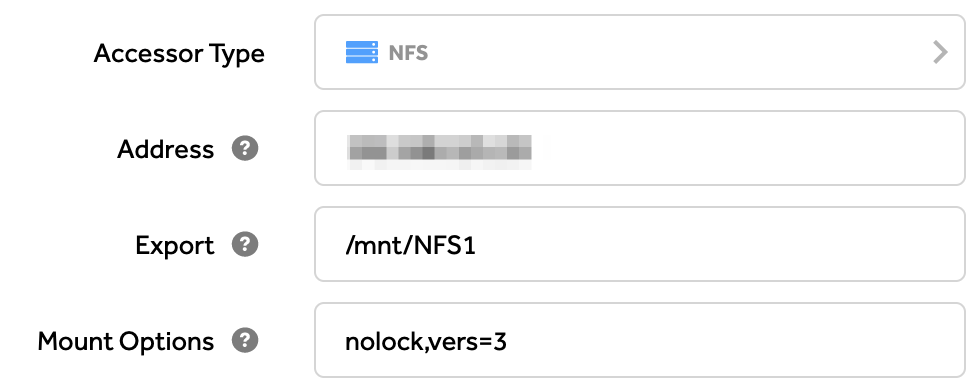
Repeat this process for the Local Storage, in this example, we are using NFS Storage as the local source storage. Below are examples of the screens that differ from the above instructions 1-7.
1. Choose Storage: File
2. Enter NFS Information
Now that you have added all the credentials for both the Source NAS device and the Target Backblaze B2 Bucket, you can proceed to create a transfer job.
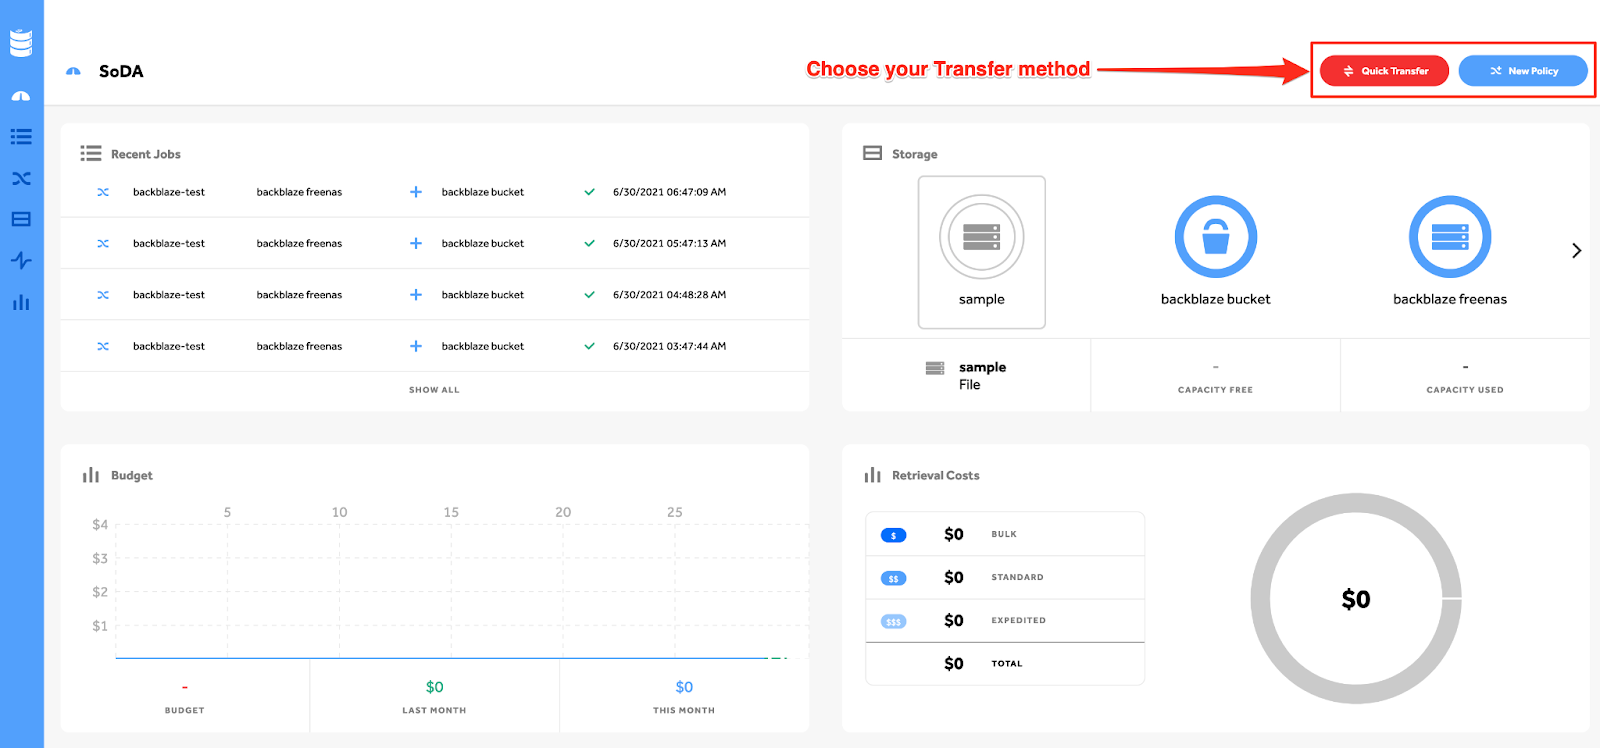
Creating Quick Transfer or Policy
Creating a Quick Transfer
1. Select Quick Transfer at the top right and then choose a Source Location
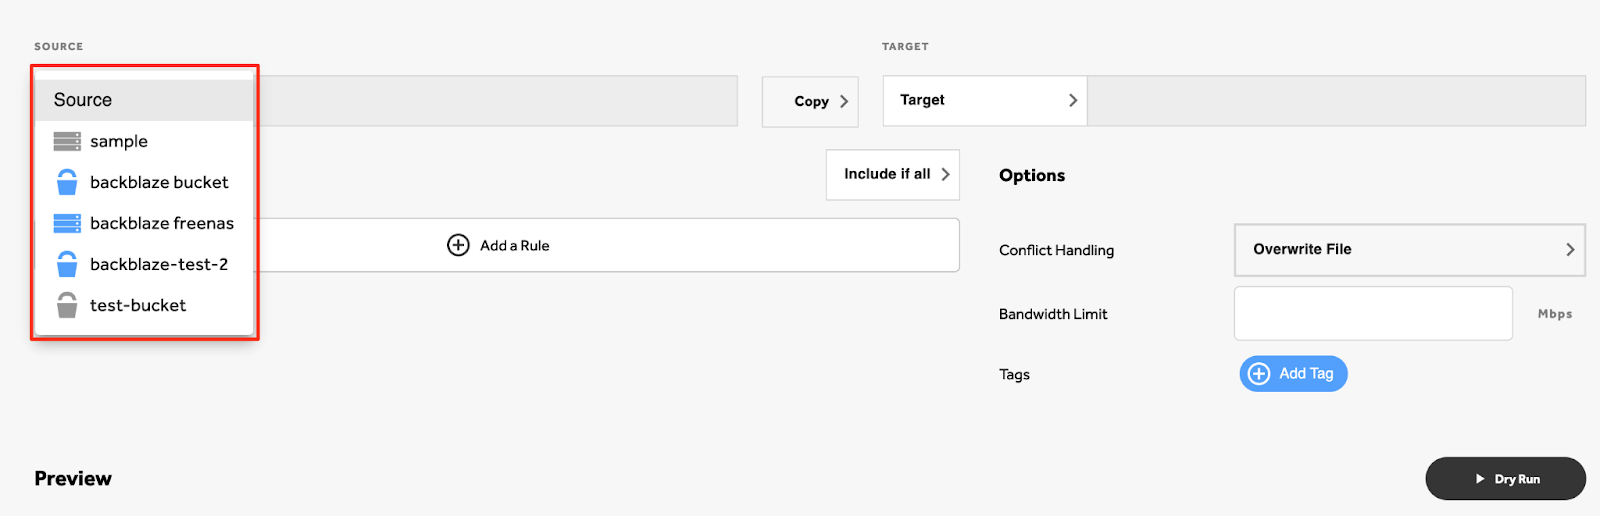
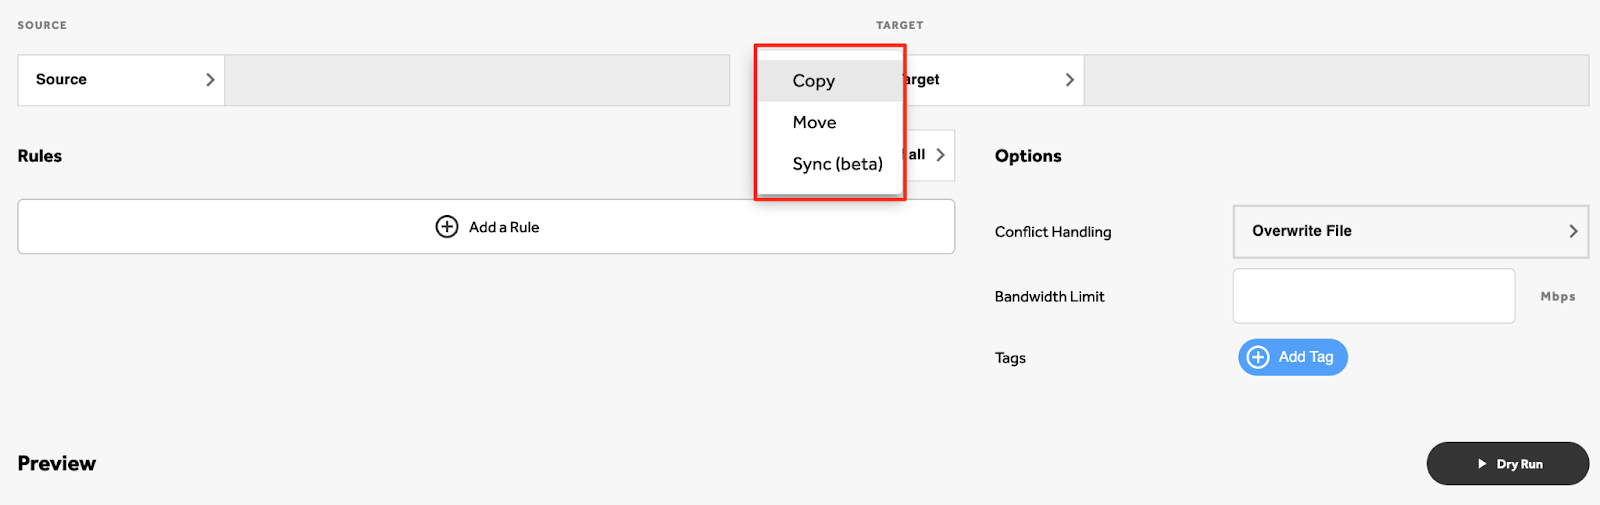
2. A method of transferring the data (Copy, Move, or Sync)
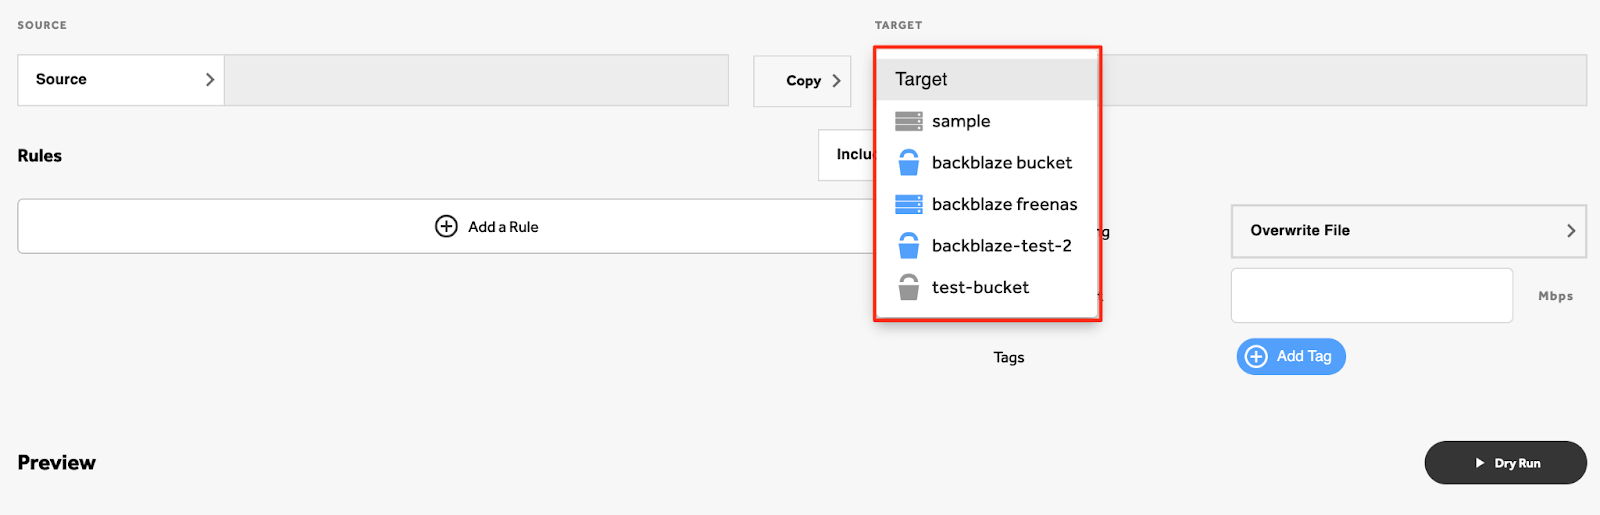
3. Select a Target Location
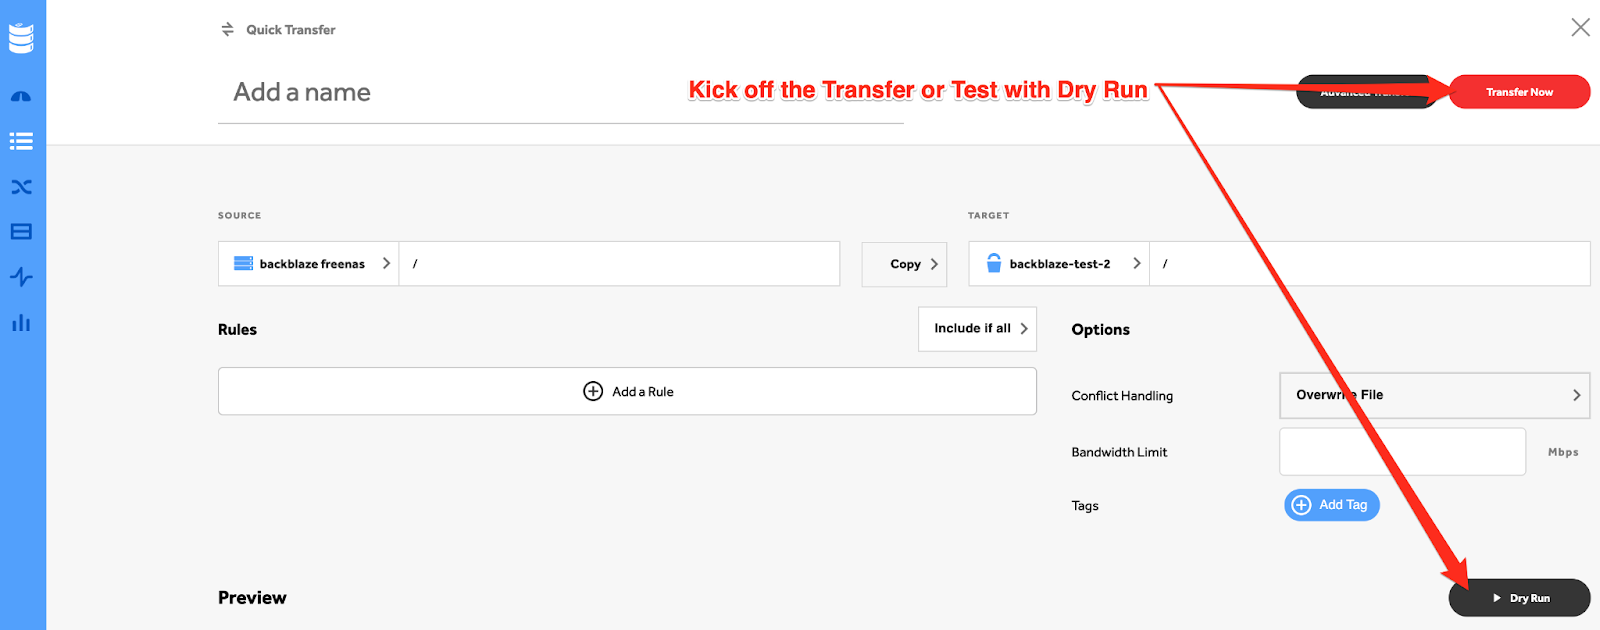
4. Once you have chosen your Source and Target locations, there are additional optional parameters you can manipulate to meet your needs as with all other data transfer software. I.e. Adding a Rule, or what do do with Conflict Handling.
5. Now you can kick off your transfer by clicking Transfer Now, or if you would like to test out your configuration before you move data, Click Dry Run.
6. Now you can Monitor the job from the Jobs Screen
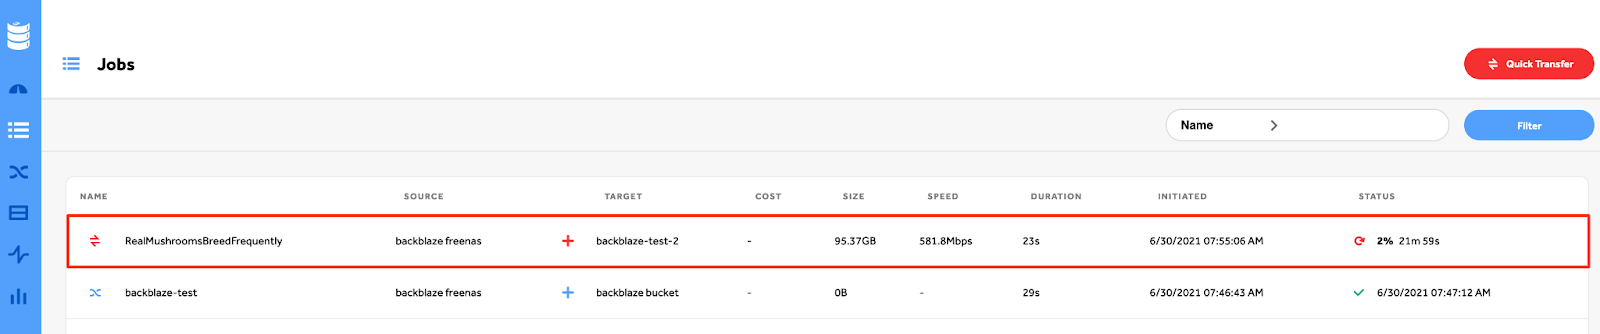
7. Click the active Job to get real-time statistics

Creating a Policy
Choosing New Policy is almost the same as Quick Transfer, but with a scheduling component.
1. Click New Policy from the Dashboard Screen
2. Choose a Source Location
3. A method of transferring the data (Copy, Move, or Sync)
3. Select a Target Location
4. Once you have chosen your Source and Target locations. Click Deploy, you will be brought to the Scheduling screen before you actually Deploy the policy
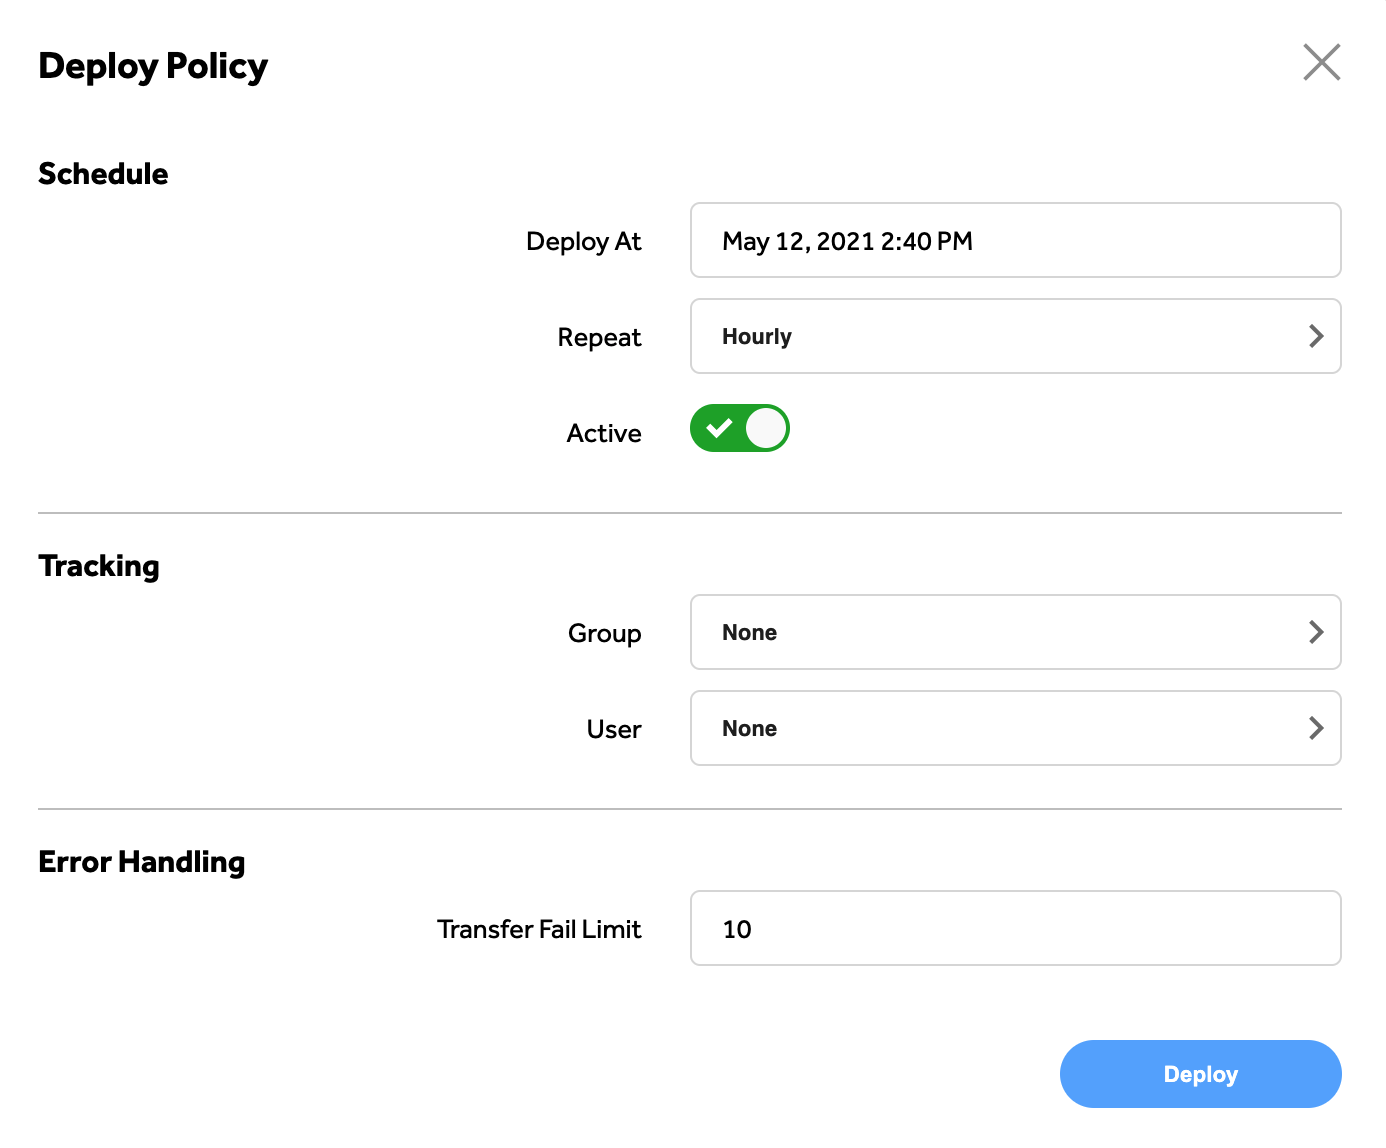
5. Now that you have set your schedule, you can click Deploy to set your Policy active
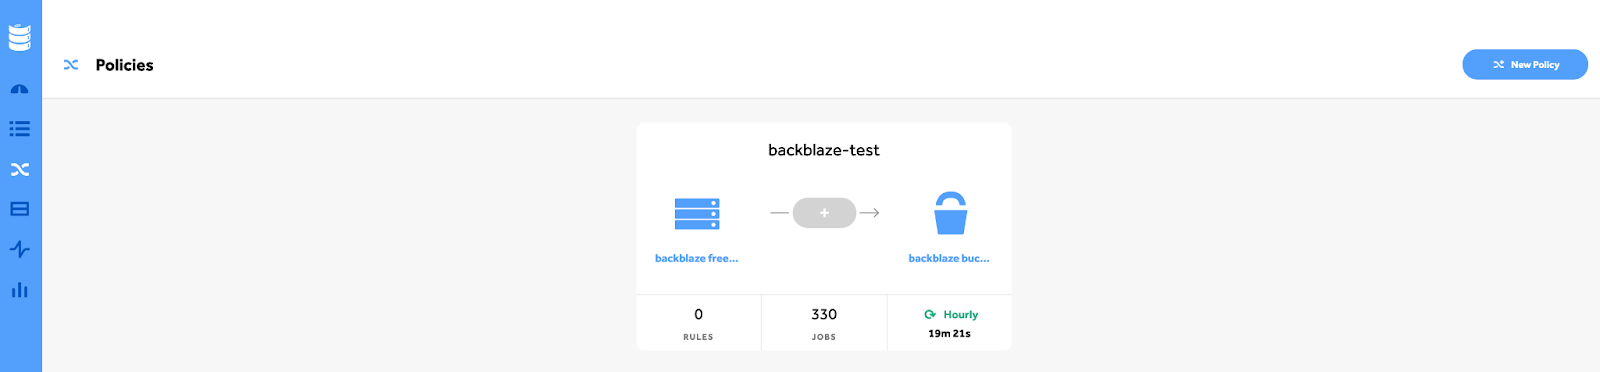
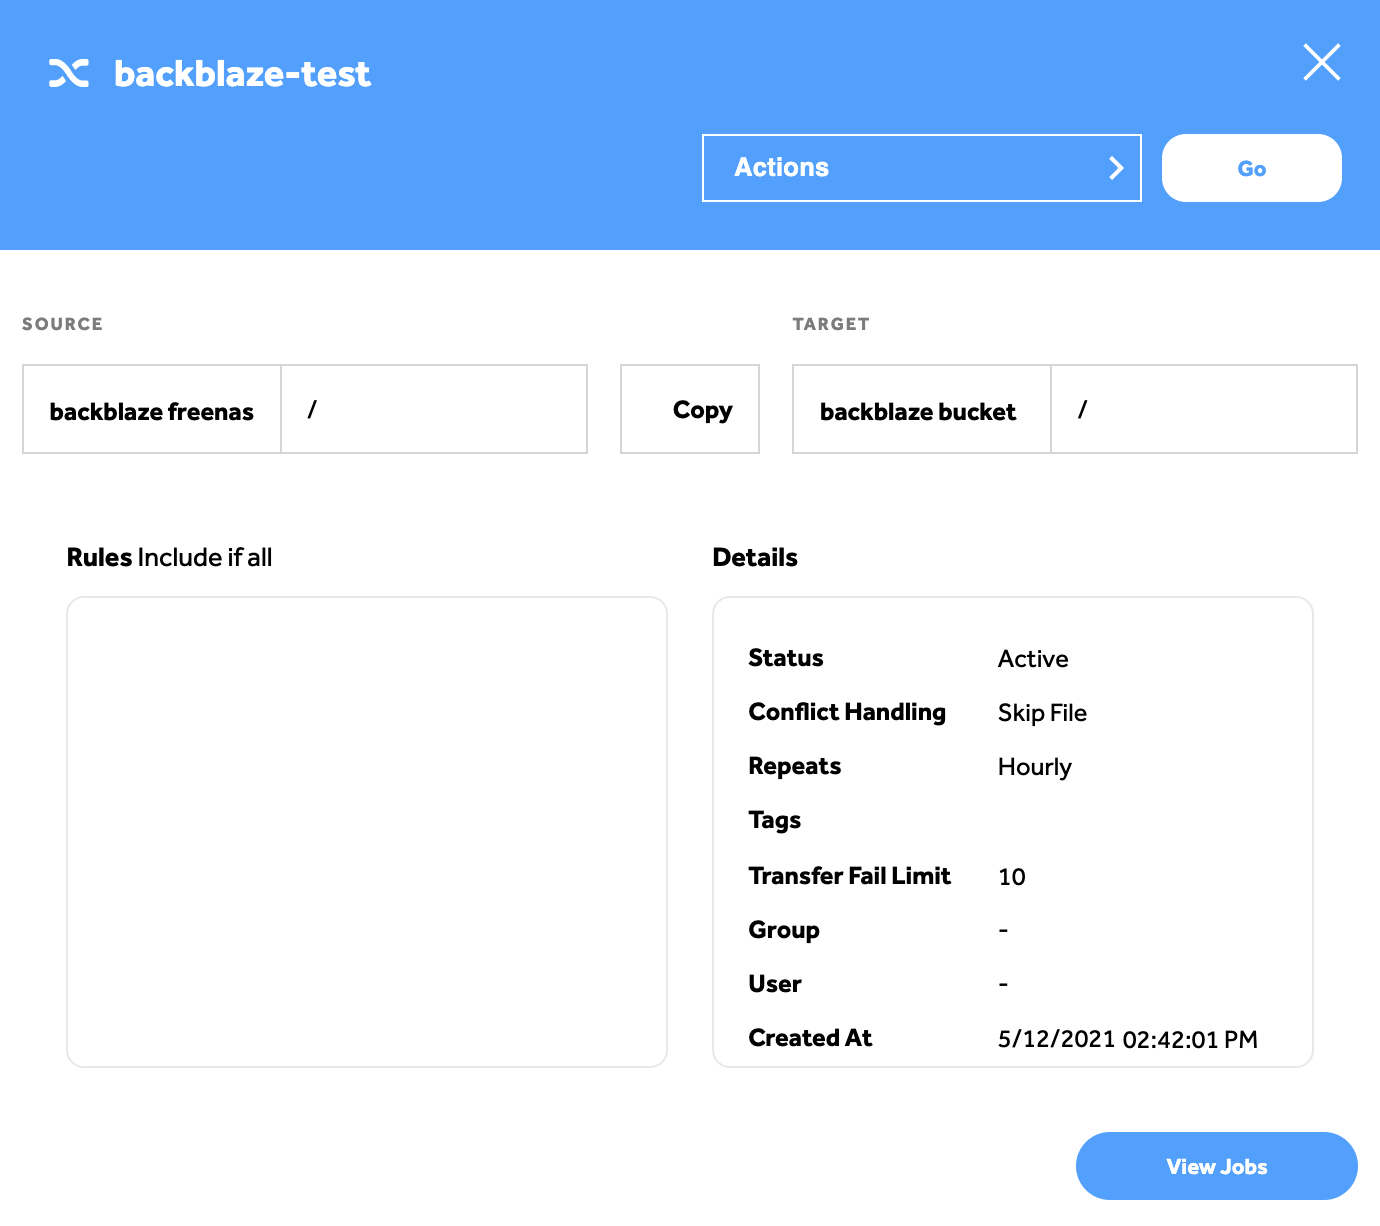
6. You can click on the new Policy and see the details of the Policy Job
Articles in this section
- Quickstart Guide for Veeam 12 Direct-to-Cloud Backups to Backblaze B2 with Immutability
- Quickstart Guide for Acronis CyberProtect and Backblaze B2 Cloud Storage
- Quickstart guide for SFTPCloud
- Quickstart Guide for Veritas NetBackup and Backblaze B2 Cloud Storage
- Quickstart Guide for Offshoot and Backblaze B2
- Quickstart Guide for Files.com and Backblaze B2 Cloud Storage
- Quickstart Guide for Encoding.com and Backblaze B2 Cloud Storage
- Quickstart Guide for Mountain Duck and B2 Cloud Storage
- Quickstart Guide for Microsoft 365 Backup with MSP360 and Backblaze B2 (Multiple Instances)
- Quickstart Guide for Microsoft 365 Backup with MSP360 and Backblaze B2 (Single Instance)