
Introduction
BackupAssist is a backup software for physical and virtual Windows servers with support for cloud backup. Follow this guide to set up B2 Cloud Storage with BackupAssist’s Cloud Backup
Guide
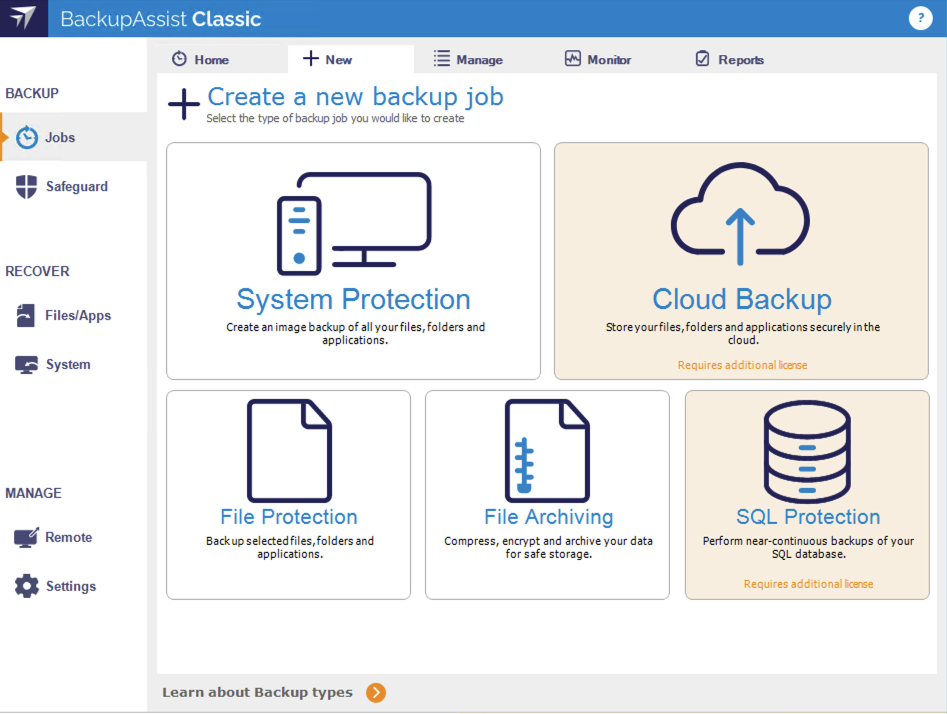
1. From the Jobs page, select Cloud Backup
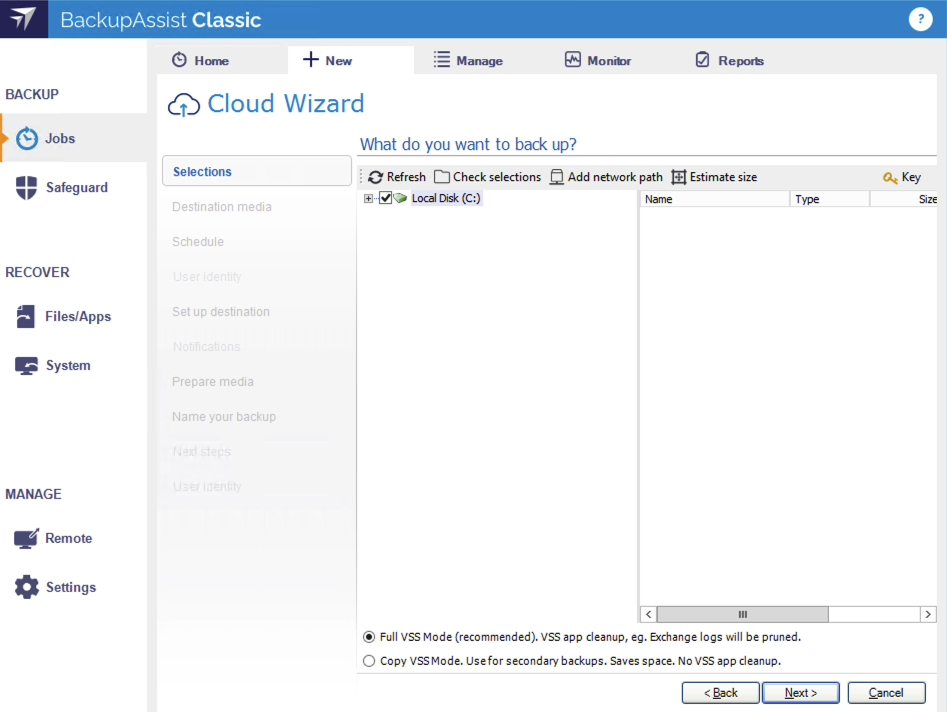
2. Select the data you want to backup, then click Next
3. Select your destination. Click S3 compatible cloud storage, then select Next

4. Set a backup schedule, then click Next

5. Set up your destination. You’ll need your Application Key, Key ID, and Service URL
Note: Your service URL can be located on the Buckets page of your account in your bucket details

6. Give your backup a name and a description. Then click Next

7. All done. Take a moment to confirm your configuration. When you are ready, click Finish.

Your new job will now appear in the Manage tab. You can click Run to begin your new backup, or you can set a schedule so that it will run automatically!

Articles in this section
- Quickstart Guide for Veeam 12 Direct-to-Cloud Backups to Backblaze B2 with Immutability
- Quickstart Guide for Acronis CyberProtect and Backblaze B2 Cloud Storage
- Quickstart guide for SFTPCloud
- Quickstart Guide for Veritas NetBackup and Backblaze B2 Cloud Storage
- Quickstart Guide for Offshoot and Backblaze B2
- Quickstart Guide for Files.com and Backblaze B2 Cloud Storage
- Quickstart Guide for Encoding.com and Backblaze B2 Cloud Storage
- Quickstart Guide for Mountain Duck and B2 Cloud Storage
- Quickstart Guide for Microsoft 365 Backup with MSP360 and Backblaze B2 (Multiple Instances)
- Quickstart Guide for Microsoft 365 Backup with MSP360 and Backblaze B2 (Single Instance)