
Introduction
Many of us trust Facebook to store hundreds if not thousands of our most precious photos and videos but there is always a good case for having a secondary copy of that data just as a precaution. In this article, we will go over the steps needed to get your Facebook Photo and Video library backed up to Backblaze B2.
Setup Your Backblaze B2 Account & Gather Keys
Facebook will automatically create a Backblaze B2 bucket within your account to store photos and videos. In order to do this, you will need to create a pair of App Keys that give Facebook permissions to do so.
Create your Backblaze account using this link.
Once your Backblaze B2 account is created,
1. Click on 'App Keys' on the left of your account and then click on the button that reads 'Add A New Application Key'

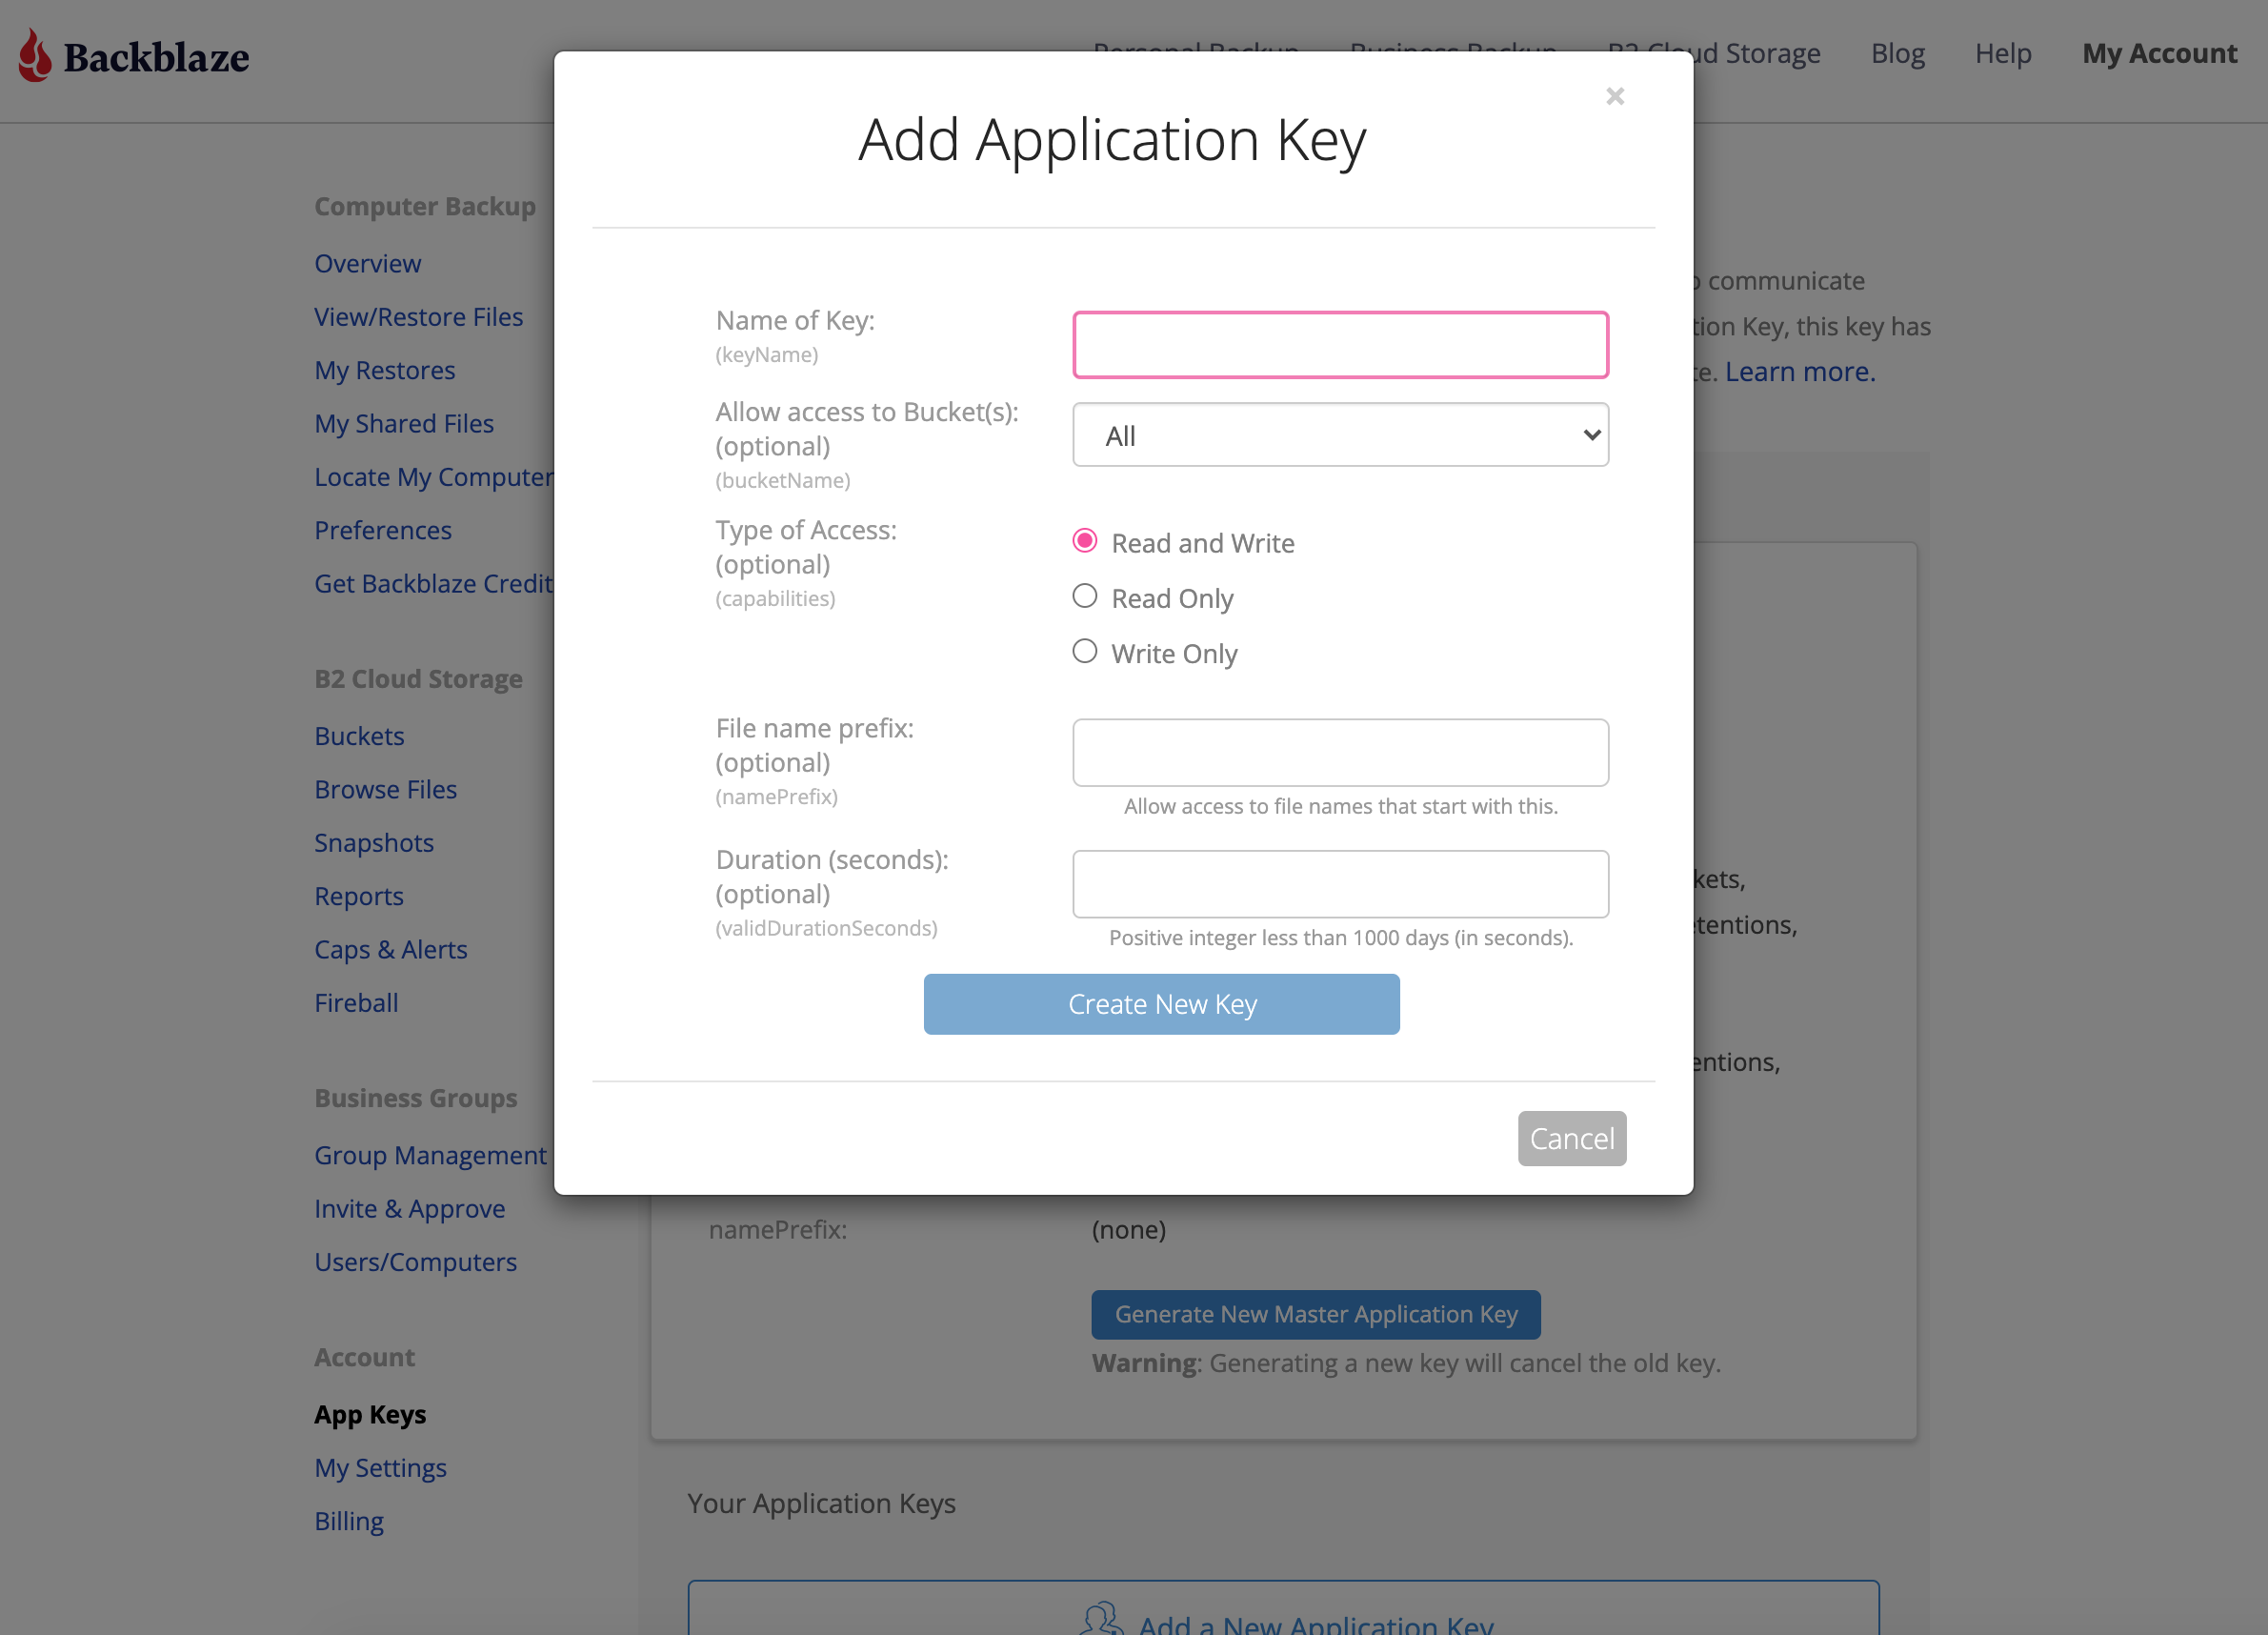
2. You can then enter a name for the key (this is used purely for you to keep track of keys you have generated) and use the "Allow access to Buckets" drop-down to select "All" (the transfer will fail if this option is misconfigured). Click on the button that says 'Create New Key'.
3. We will return a pair of keys in a blue box, be sure to copy them and keep both of these in a safe location
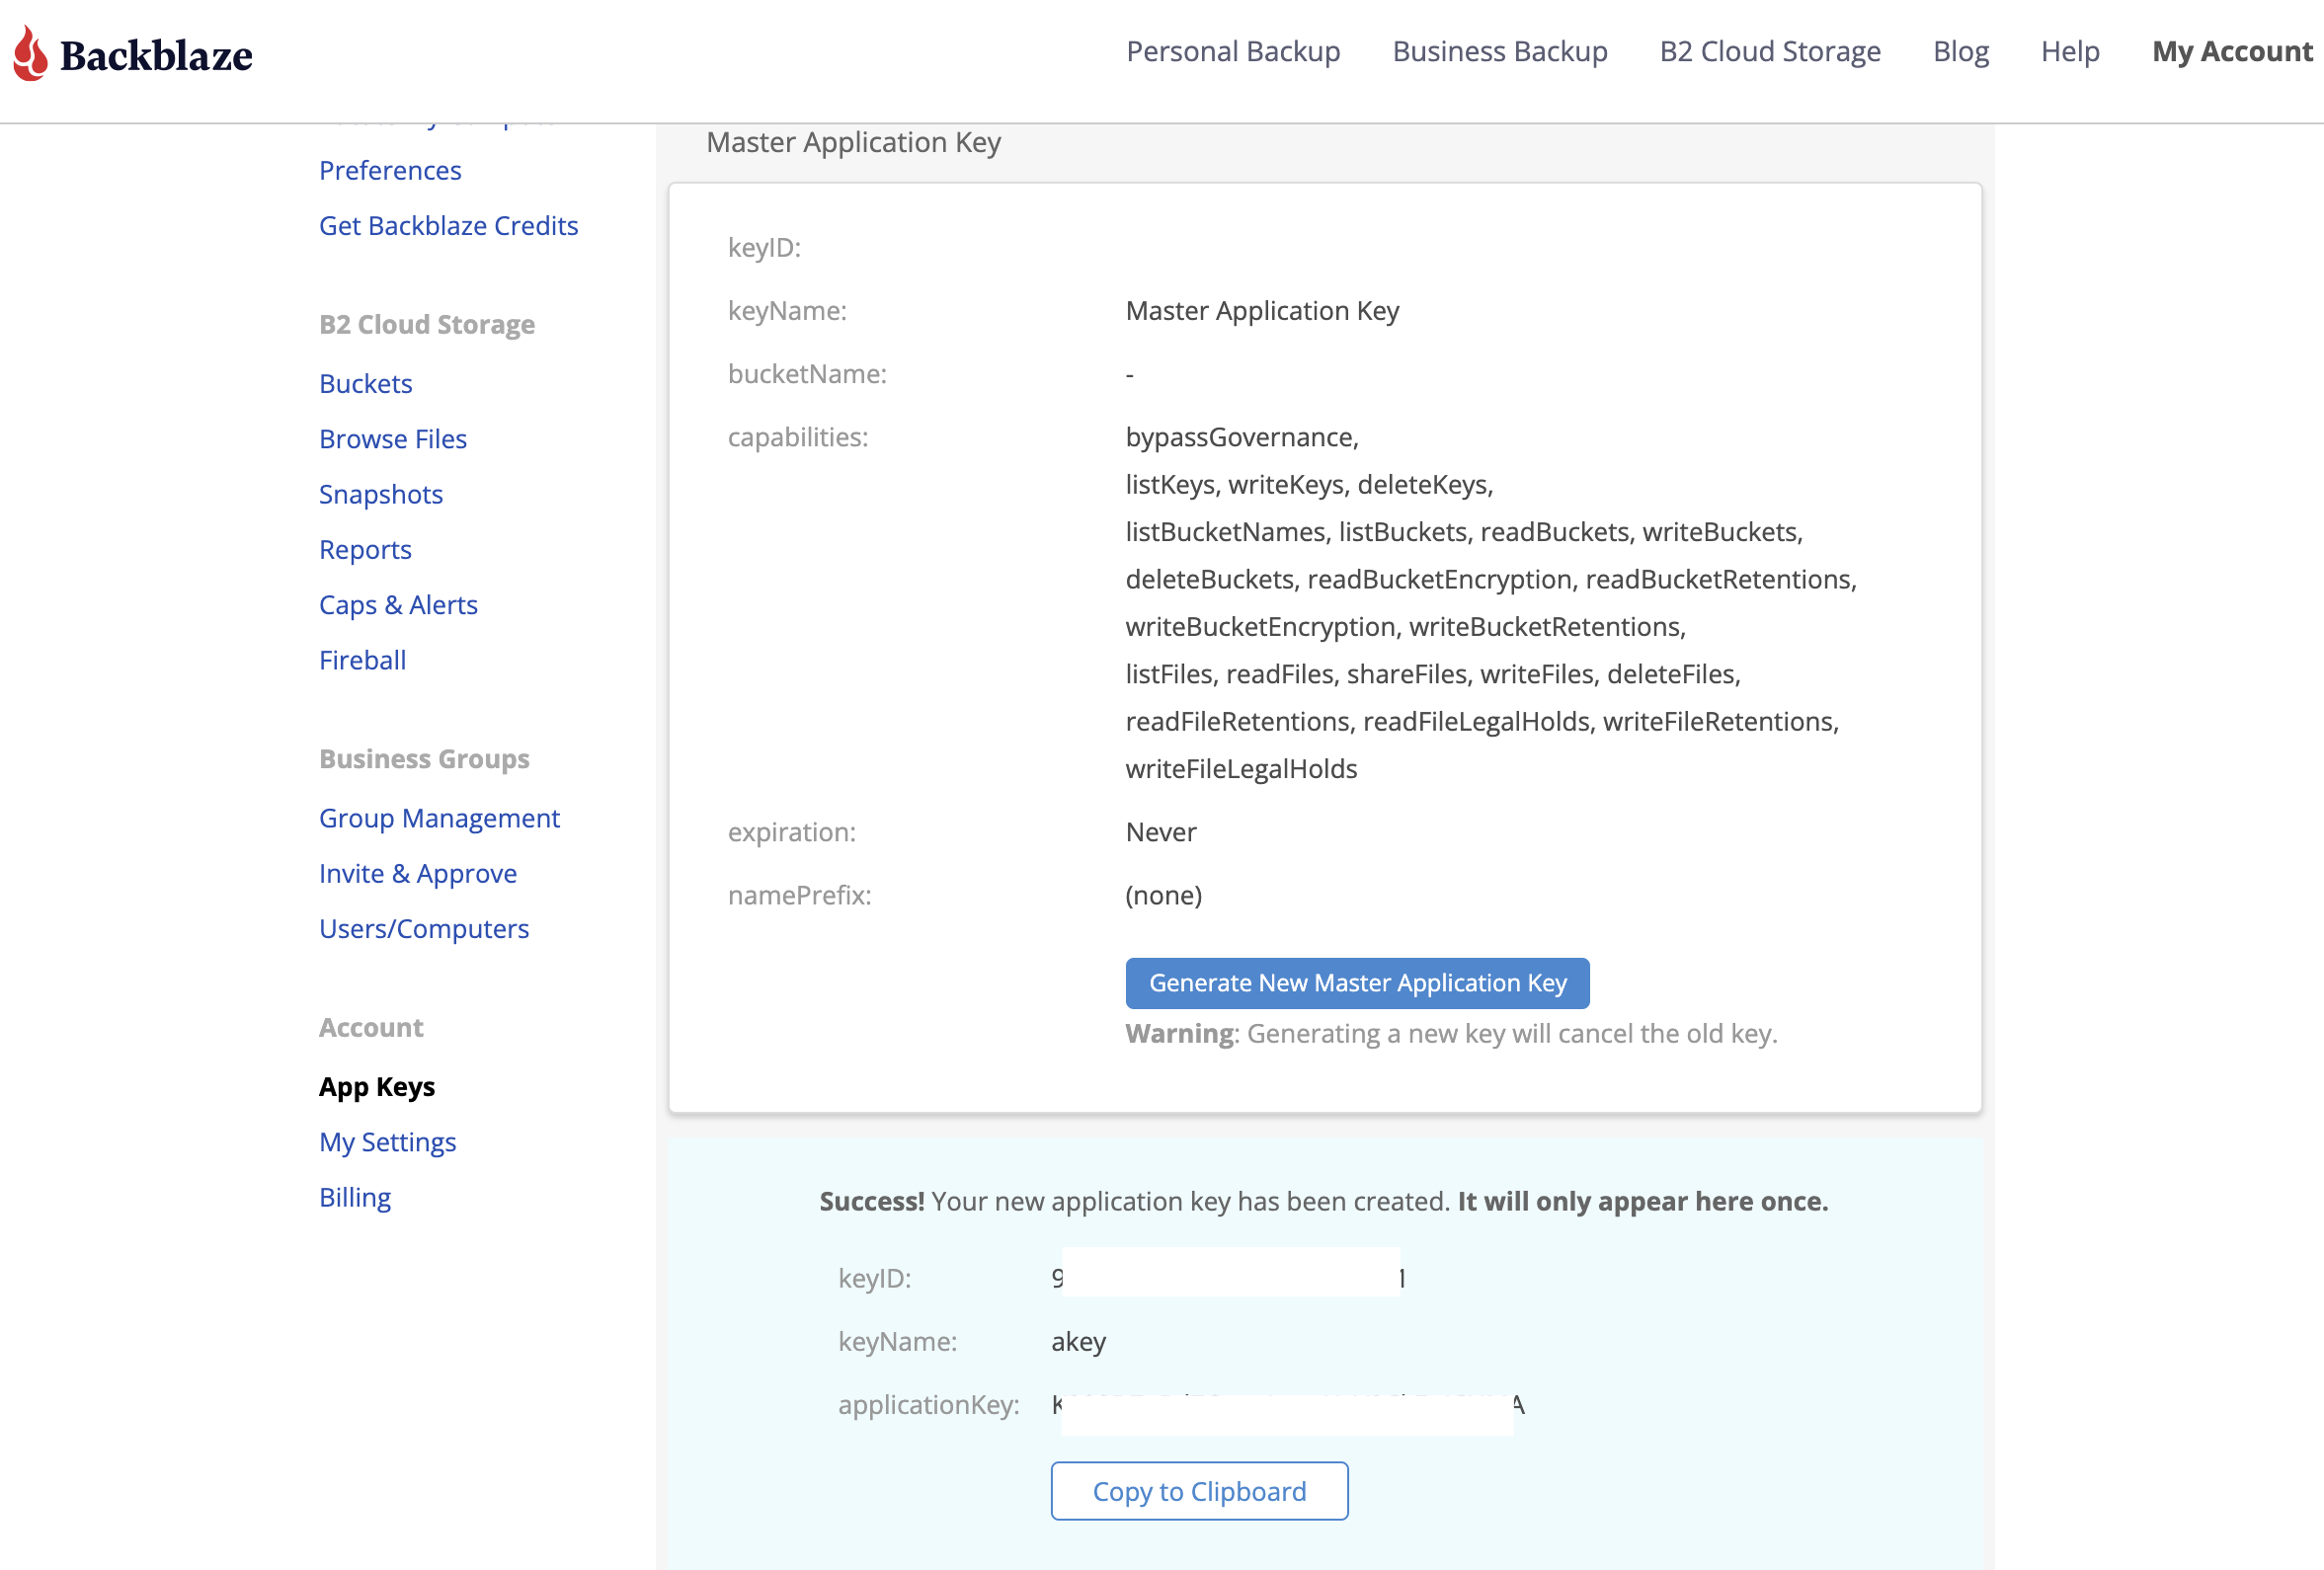
Once you close this window, the current Application Key will not display again and you will need both of these values to set up your Facebook transfer
IMPORTANT: If you lose the App Keys, the values are not recoverable. You will need to set up a new App Keys for your client starting again from step 3
Your Backblaze B2 account is now ready to be used with Facebook!
Setup Your Facebook Transfer with your B2 credentials
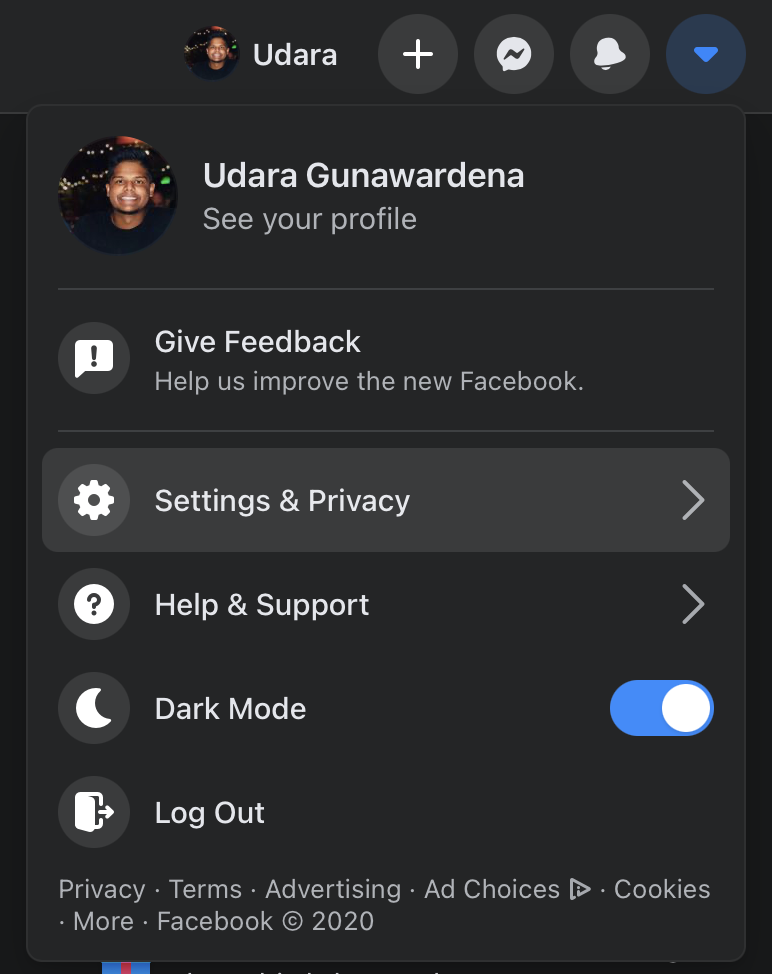
1. Log into your Facebook account. In the top right press the dropdown arrow, select 'Settings & Privacy' and then 'Settings'
 .
. 
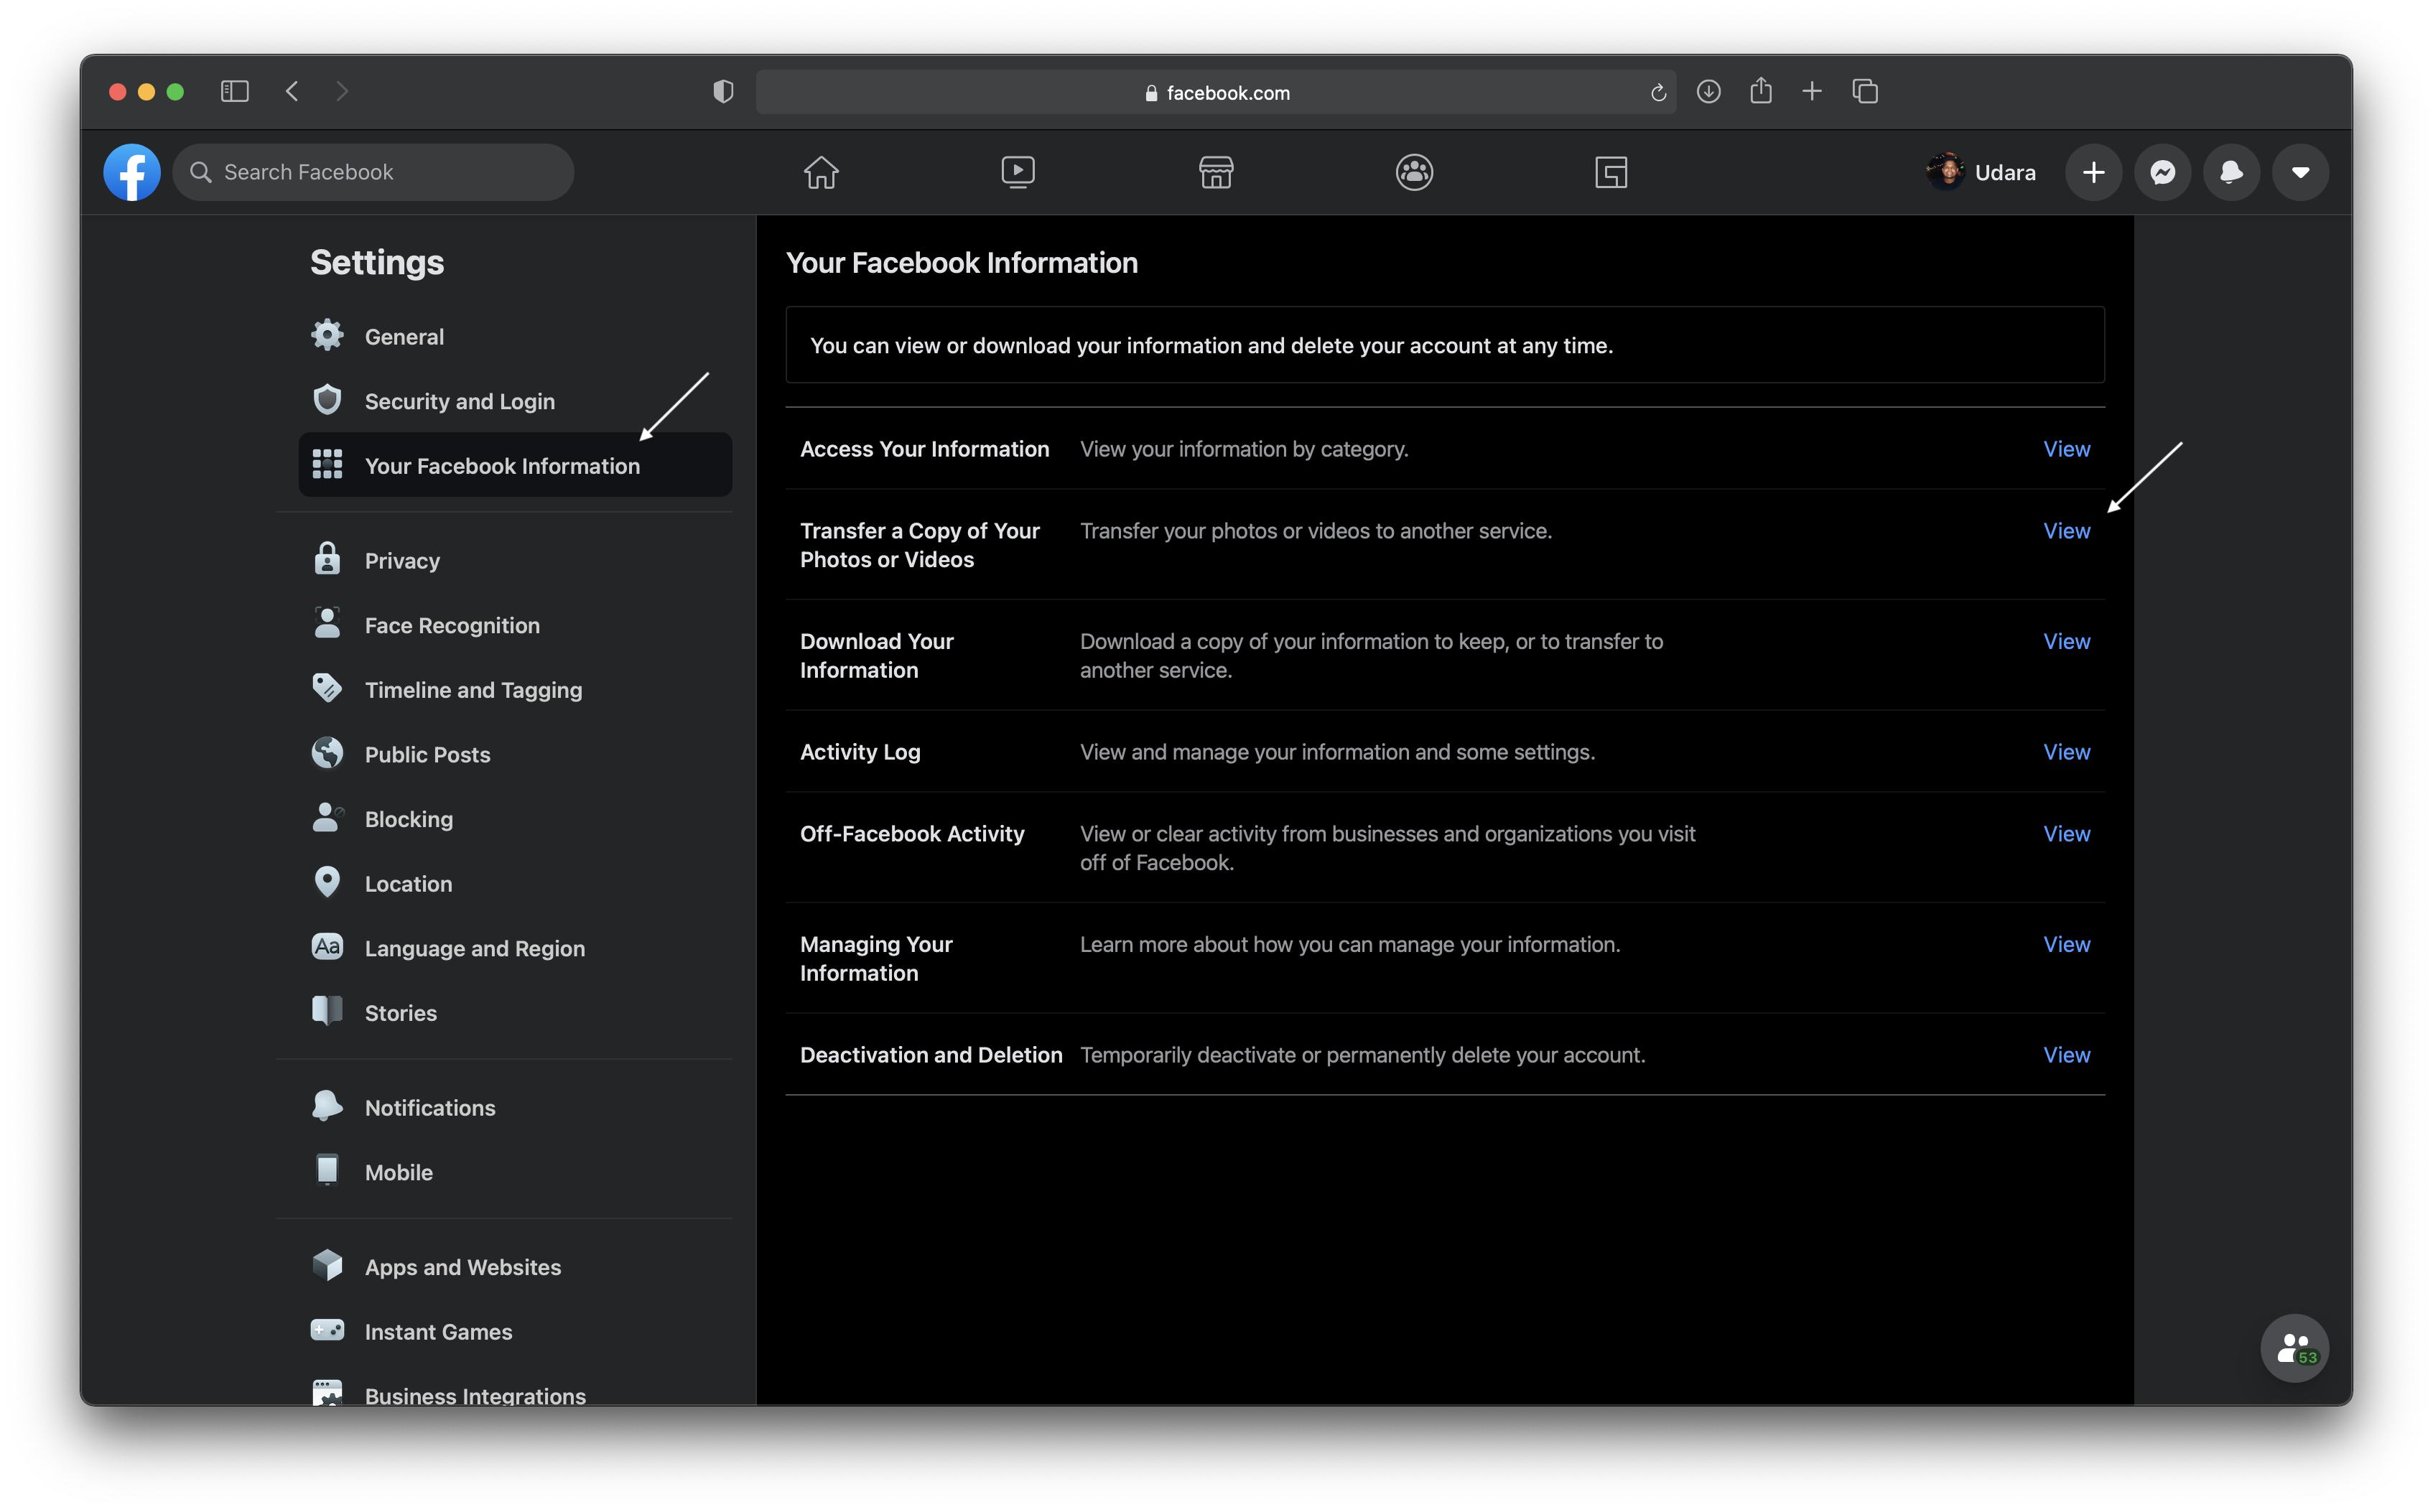
2. On the left-hand side, select 'Your Facebook Information'. Then select the view button next to "Transfer a Copy of Your Photos or Videos"
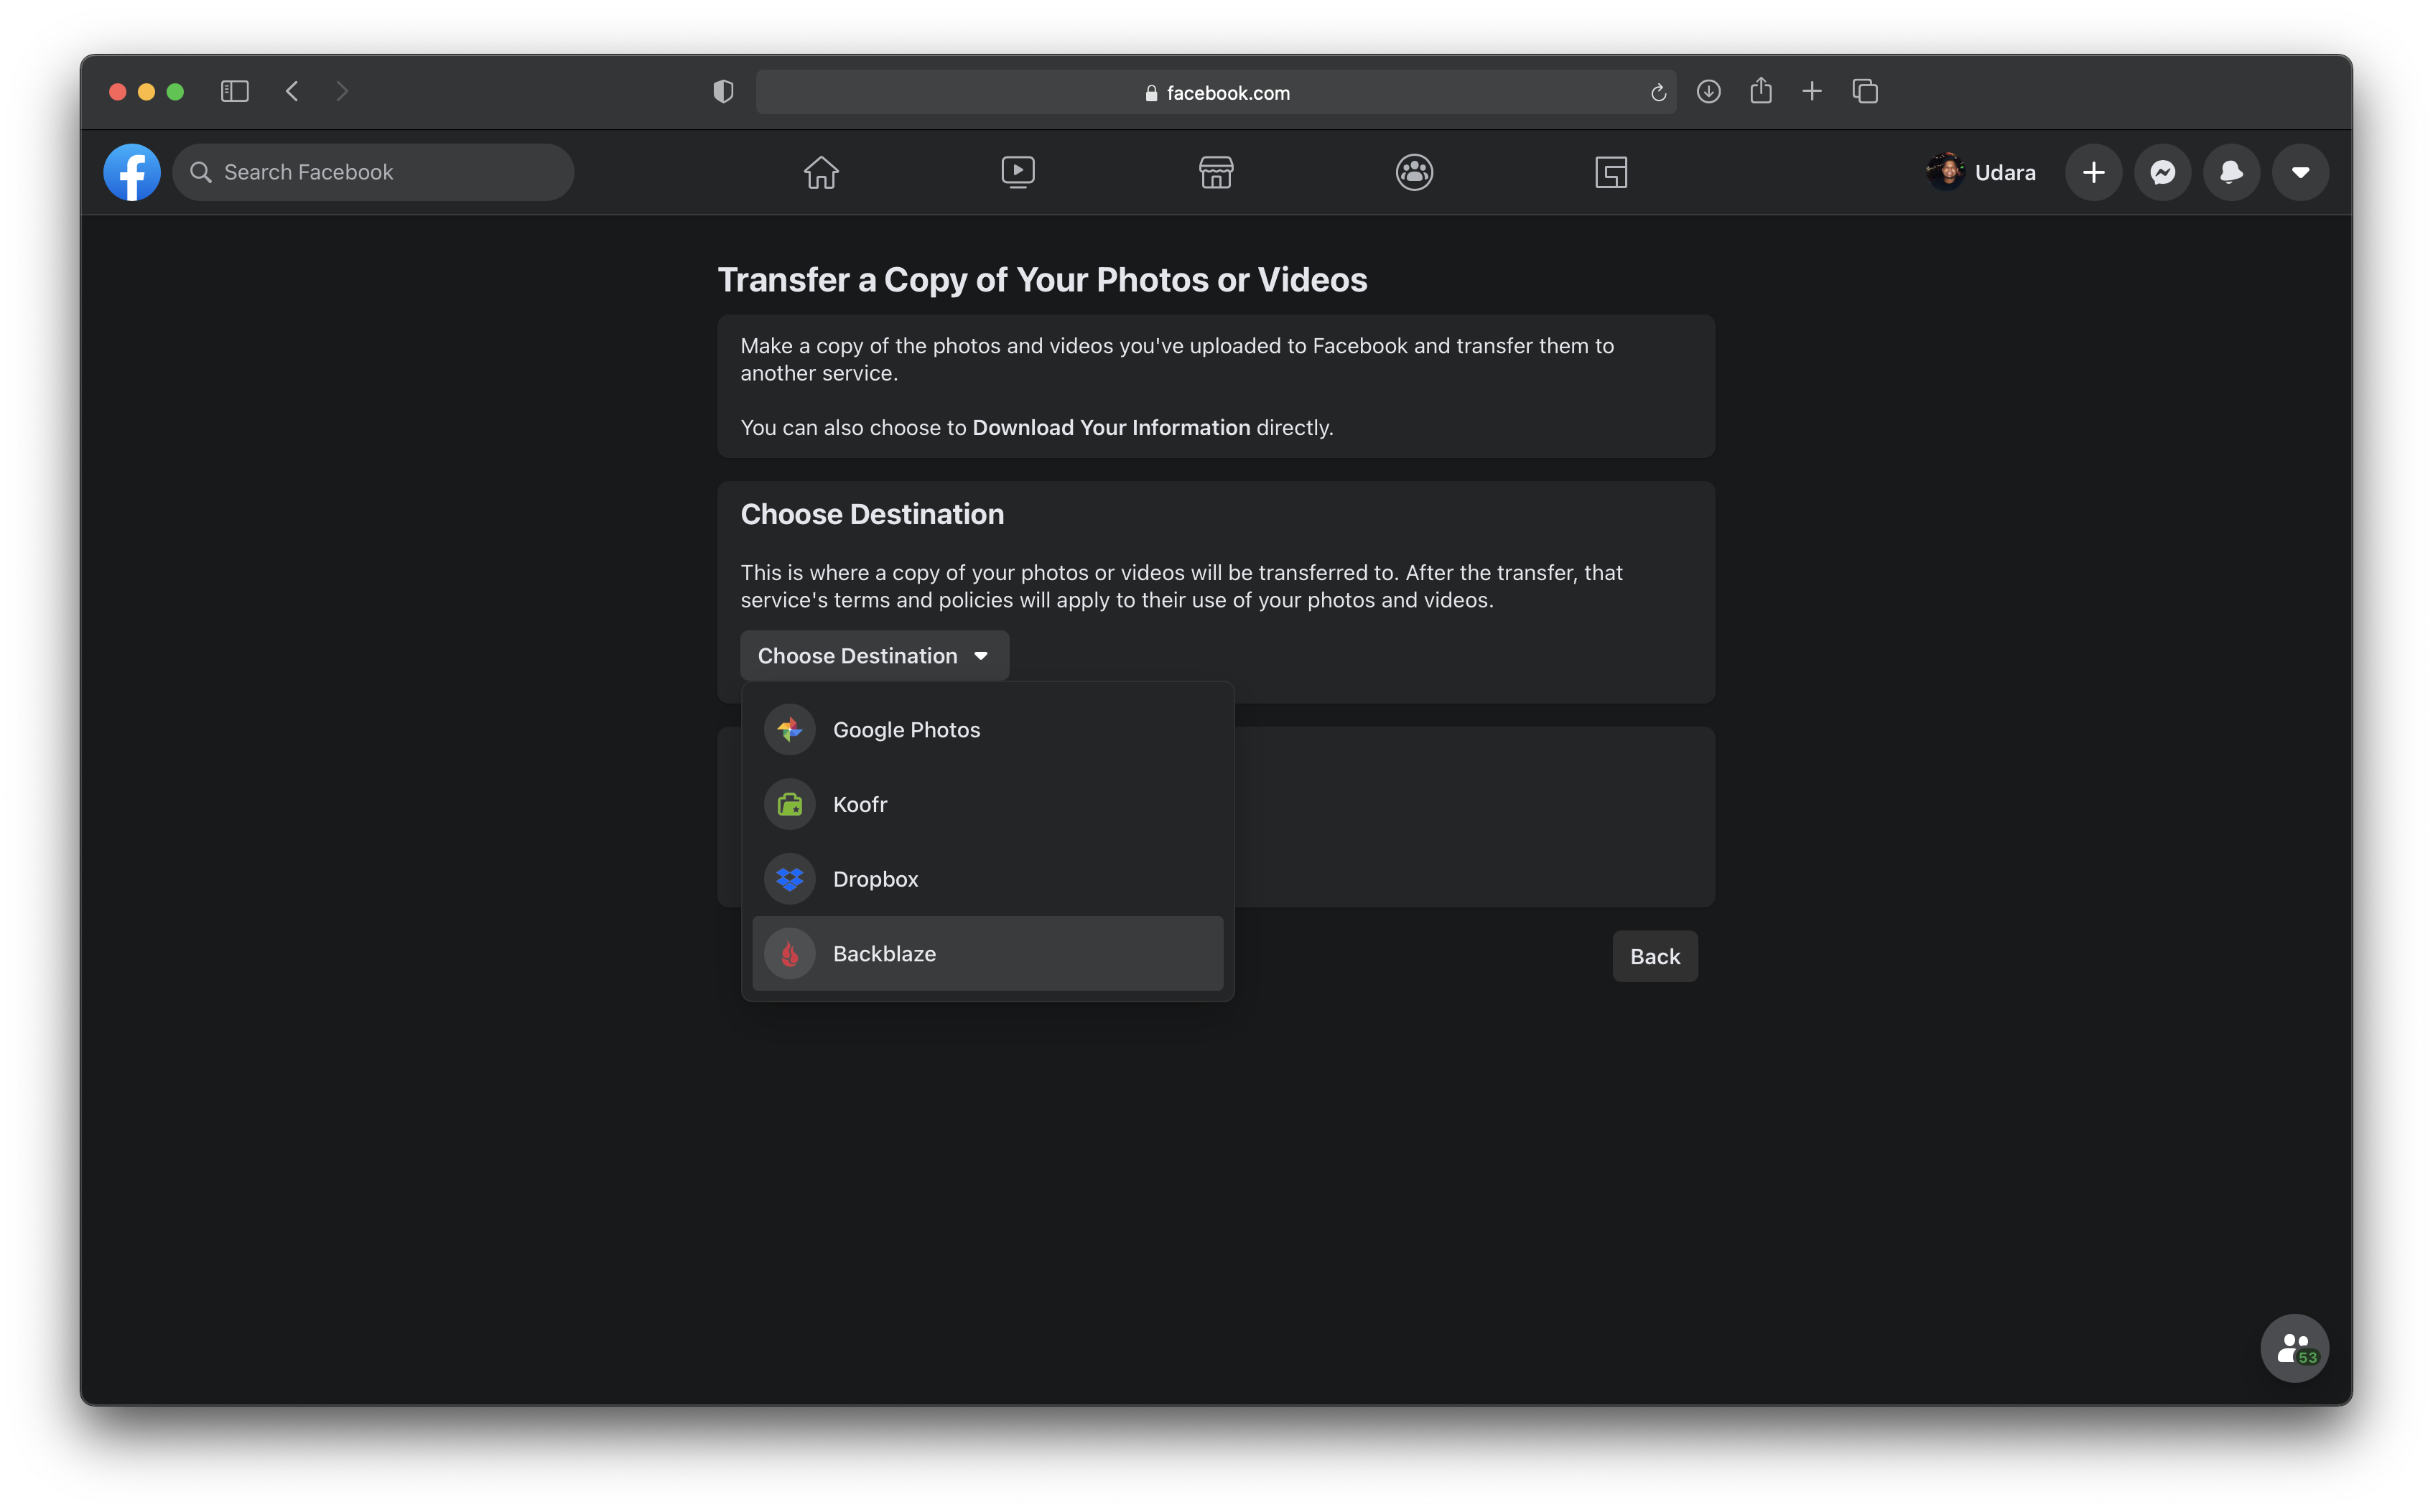
3. This is the main console for Facebook's photo and video transfer service. In the choose destination section, use the drop-down to select Backblaze.
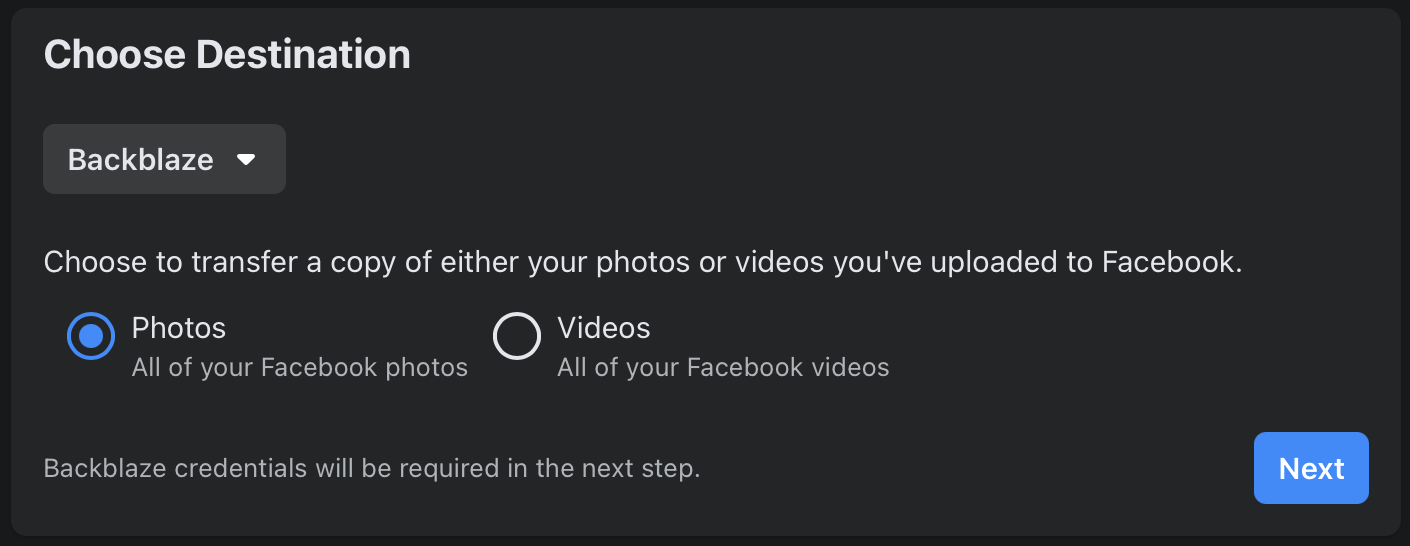
4. You will need to set up a transfer job for your Photos and Videos separately. In this case, I am selecting my Photos first.
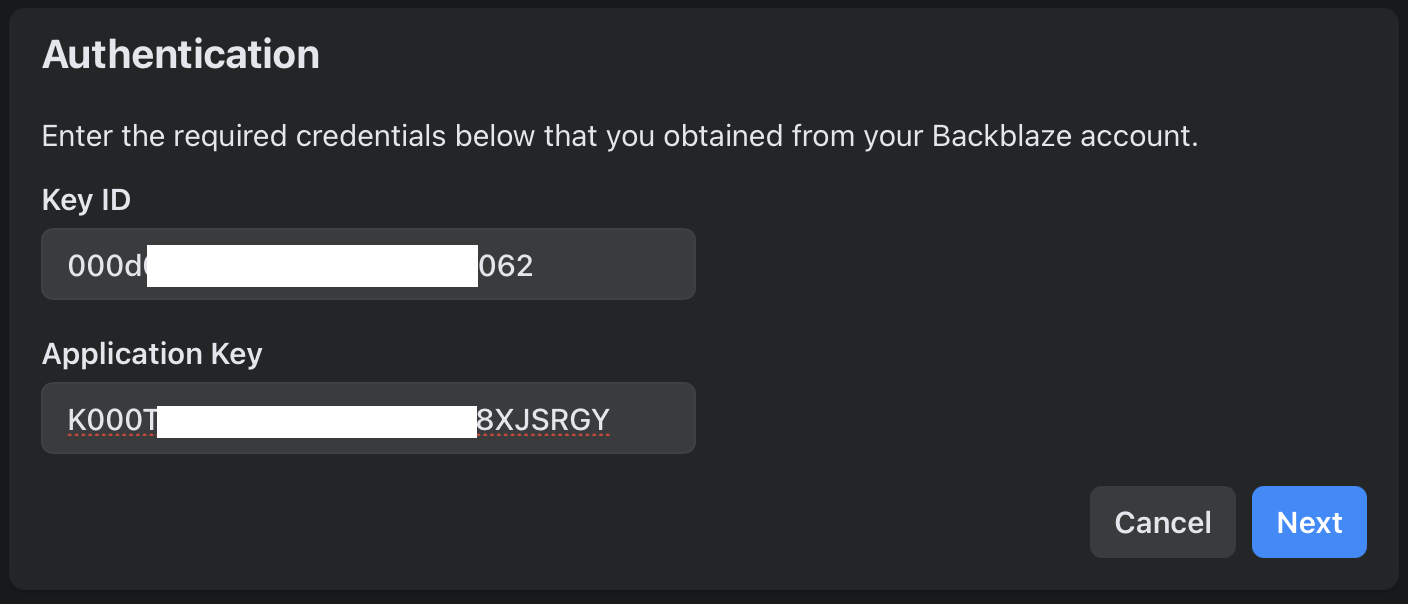
5. You will now need to pass the keys you saved from our Backblaze website earlier
Backblaze Keys correspond to the Facebook fields as follows...
keyID = Key ID
applicationKey = Application Key
6. Follow through on the following prompts and your transfer should commence

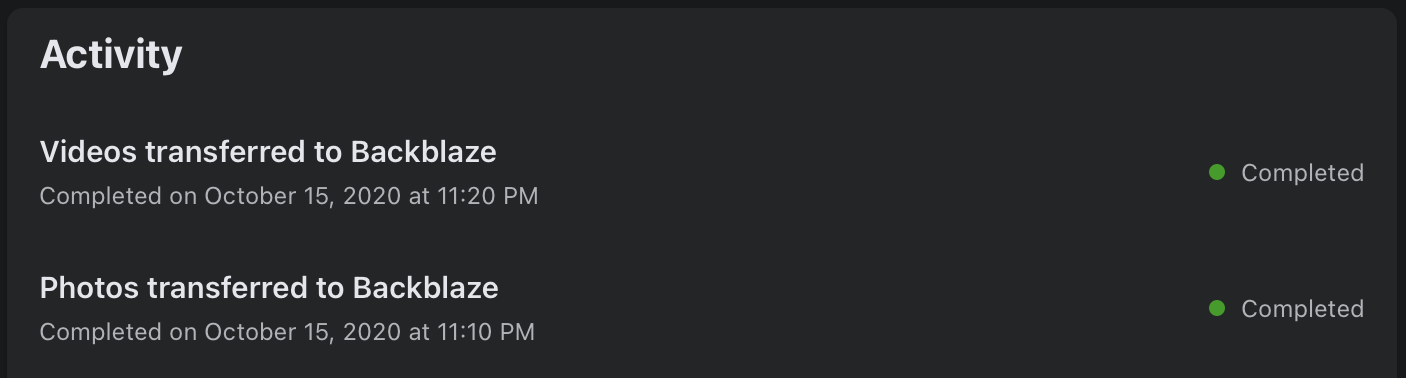
Congratulations you have successfully backed up your photos and videos to Backblaze B2!
Browse your Photos and Videos now in your Backblaze B2 Bucket
1. Now back in your Backblaze account window. Navigate to 'Browse Files' on the left. Here you will see a list of all the Buckets related to your account.
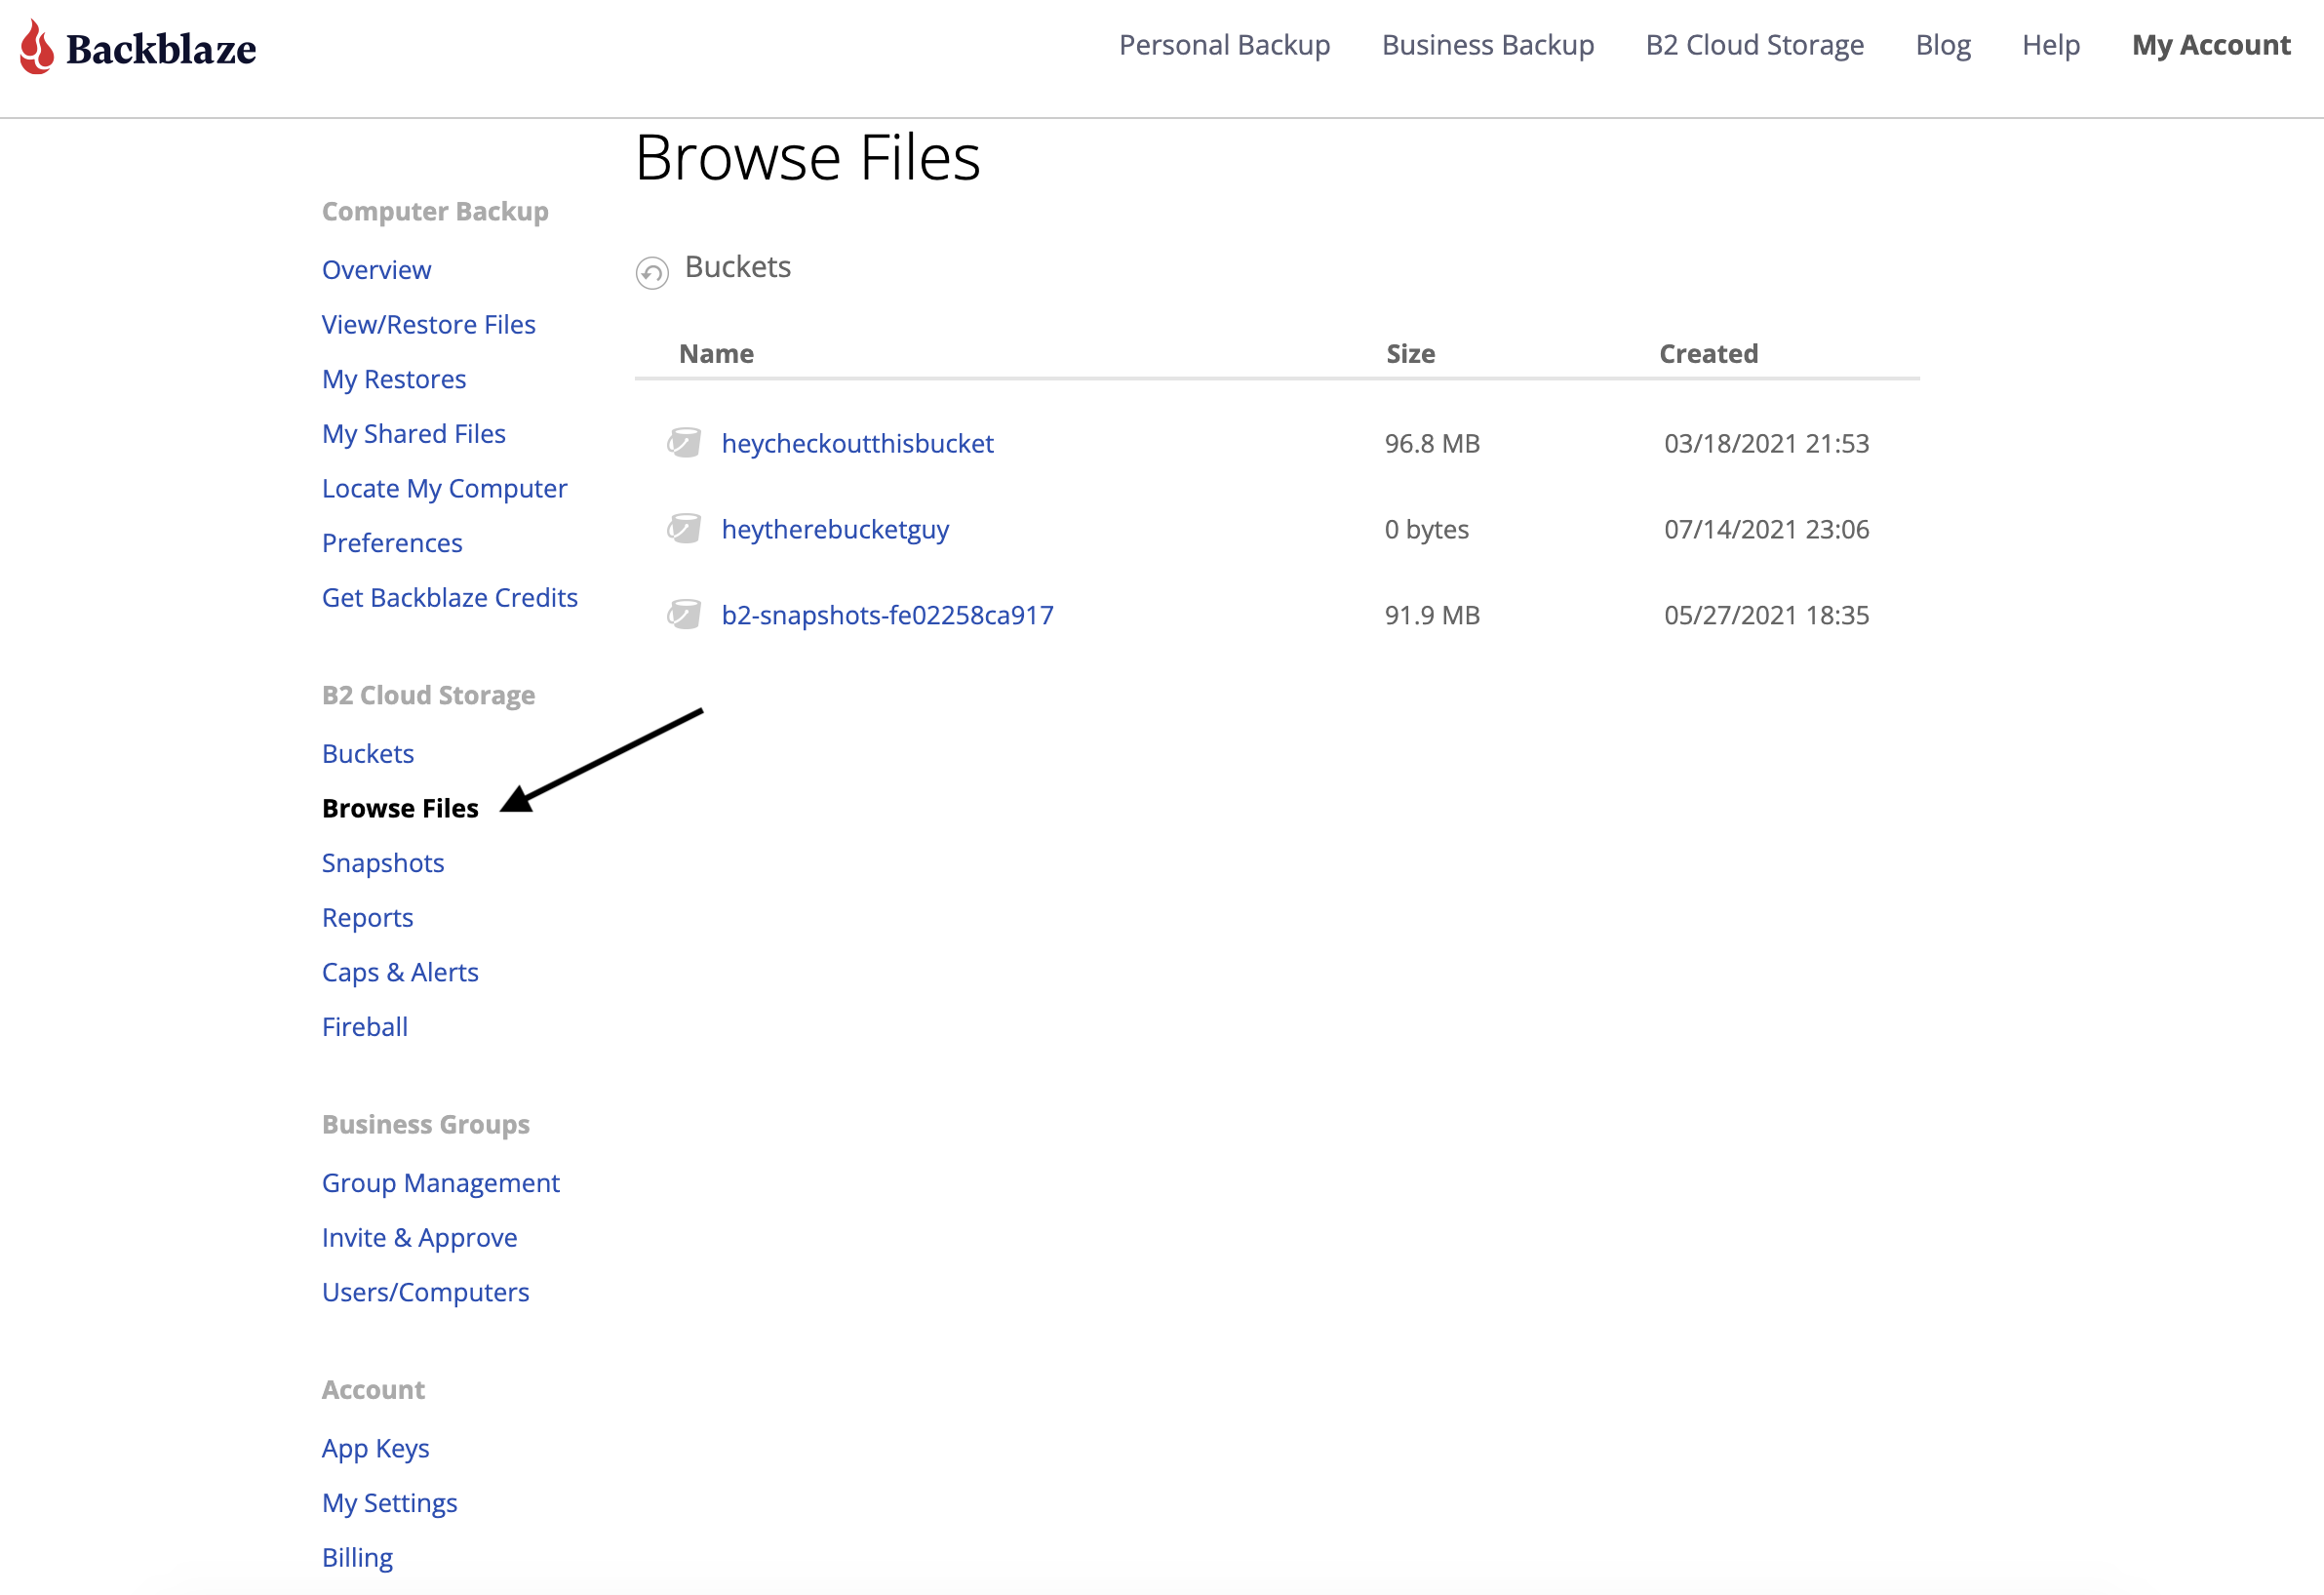
2. Locate the bucket related to your Facebook transfers. It will generally follow the format of 'facebook-data-transfer-XXXXXXXX'

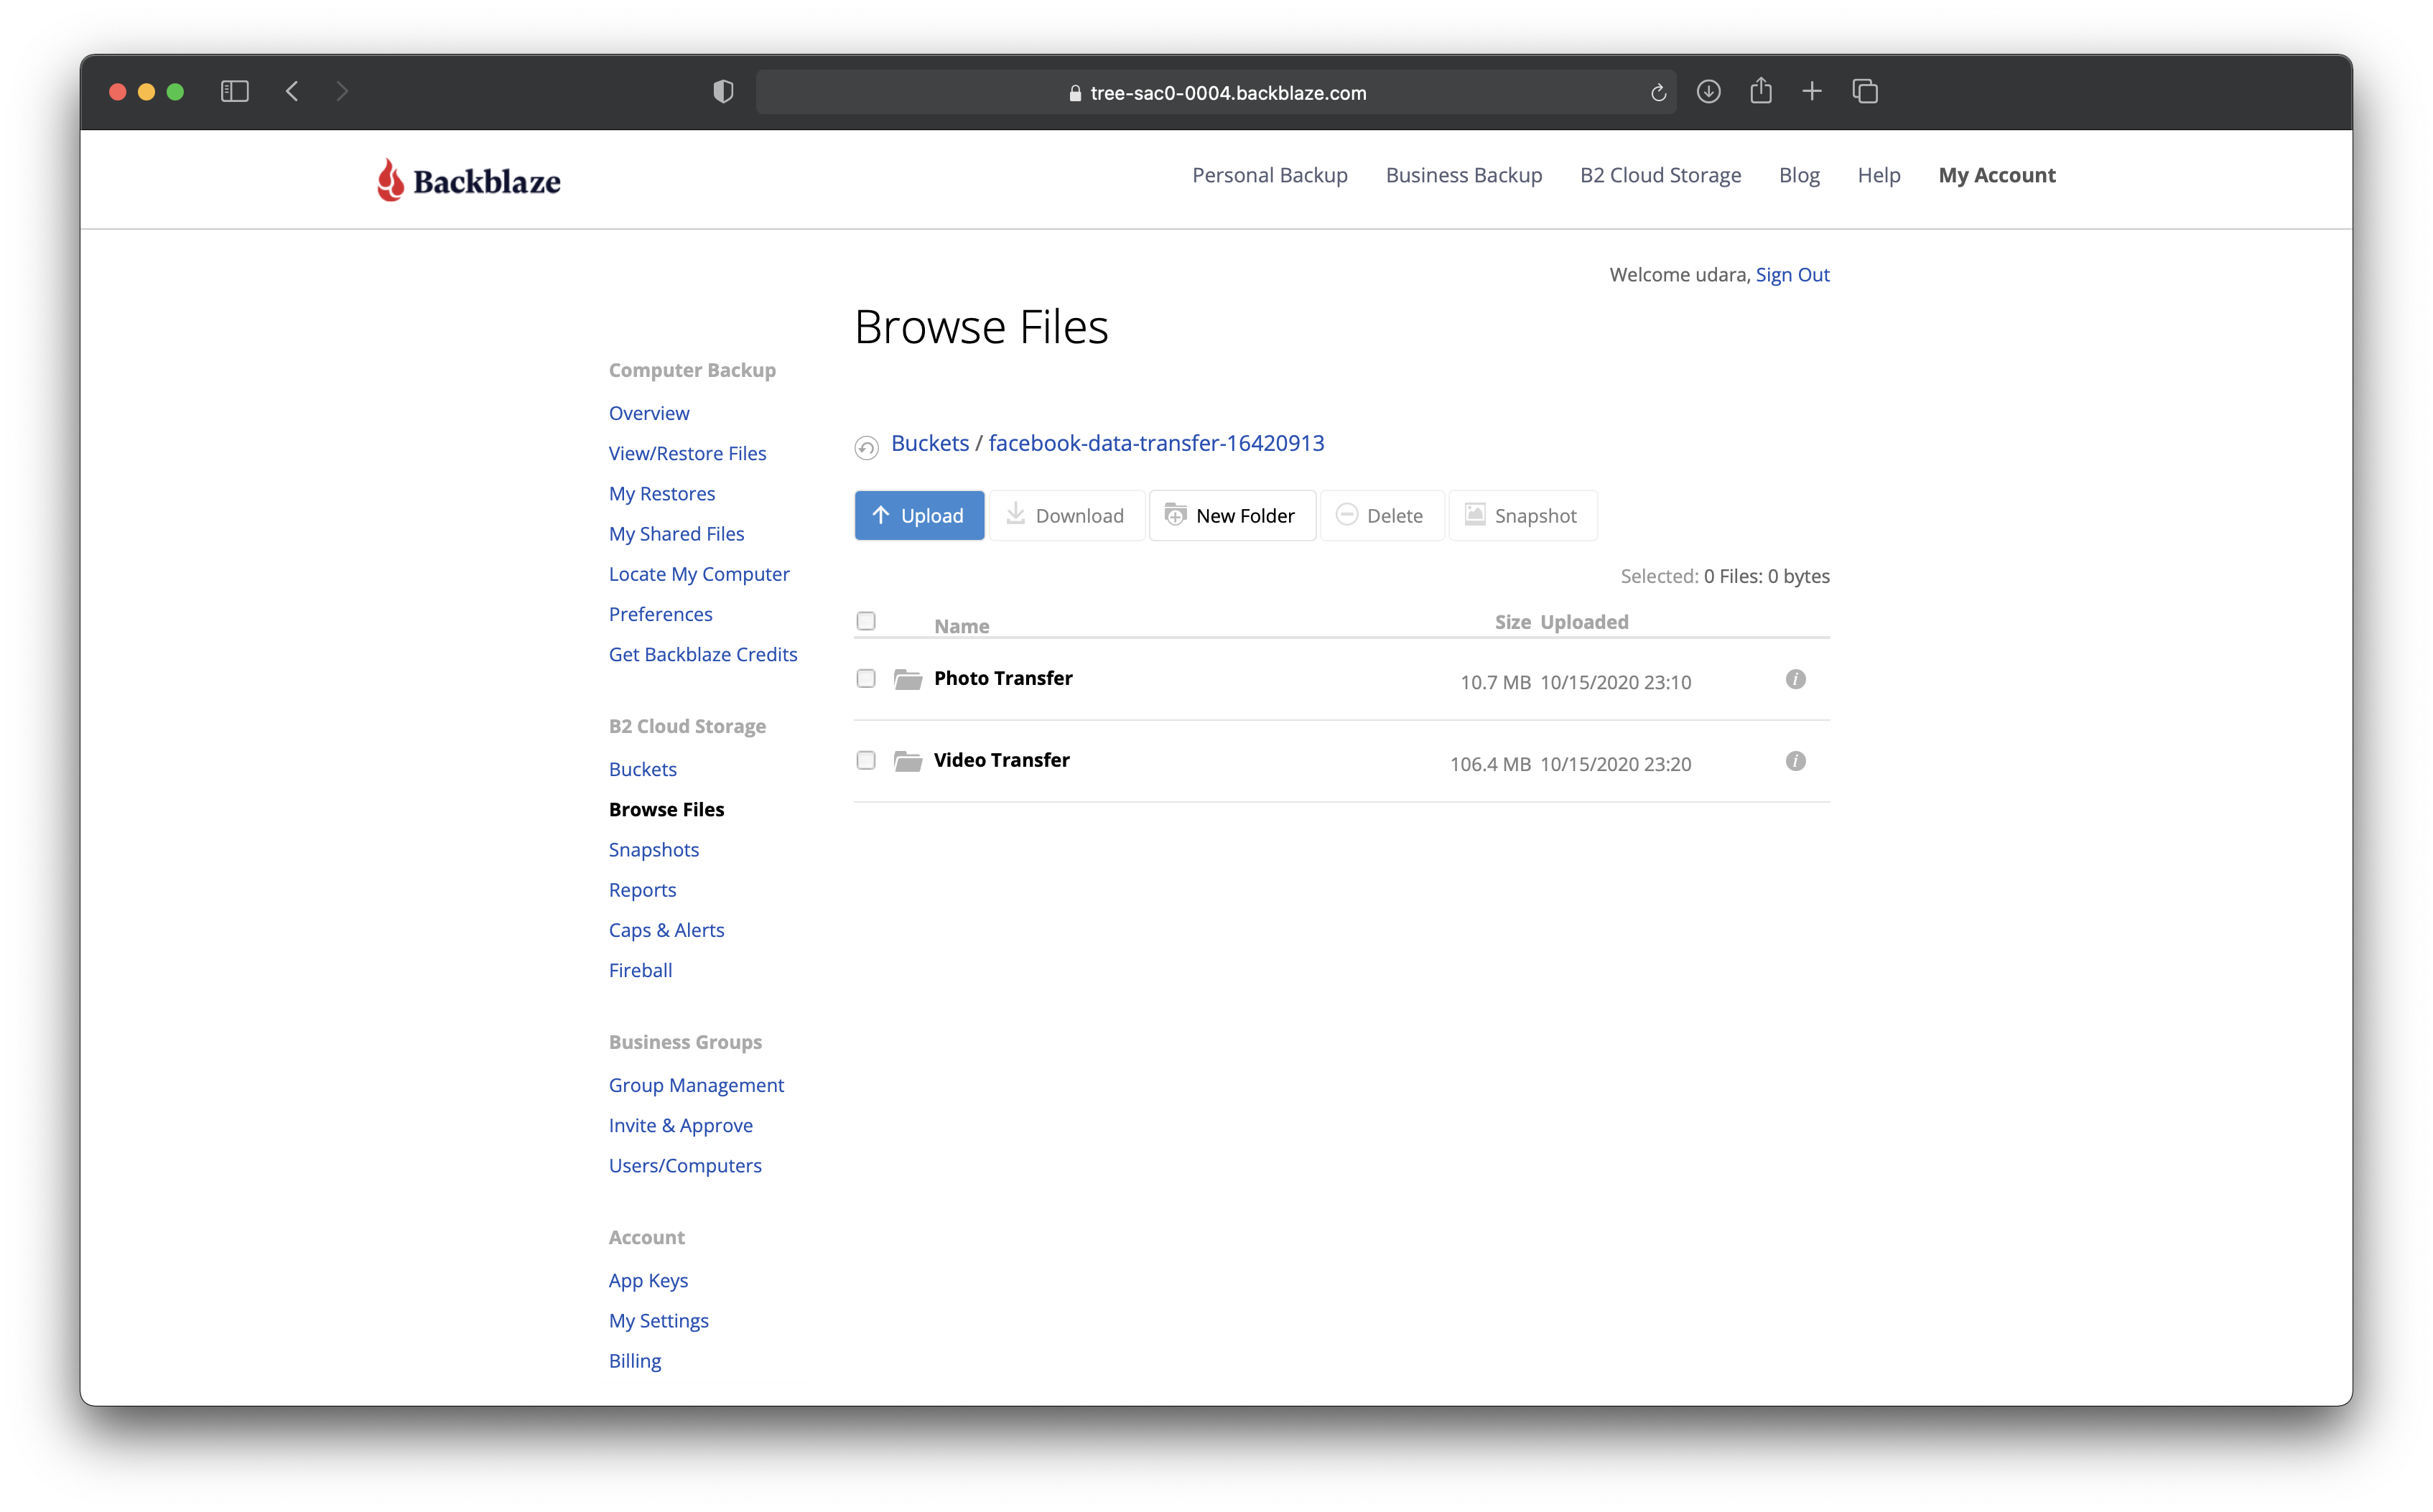
3. Clicking on this bucket will open up a file browser that will have both your photo and video folders on your root depending on which transfer(s) you made. From here you can browse all your Facebook media now backed up on Backblaze B2!
Articles in this section
- Quickstart Guide for Veeam 12 Direct-to-Cloud Backups to Backblaze B2 with Immutability
- Quickstart Guide for Acronis CyberProtect and Backblaze B2 Cloud Storage
- Quickstart guide for SFTPCloud
- Quickstart Guide for Veritas NetBackup and Backblaze B2 Cloud Storage
- Quickstart Guide for Offshoot and Backblaze B2
- Quickstart Guide for Files.com and Backblaze B2 Cloud Storage
- Quickstart Guide for Encoding.com and Backblaze B2 Cloud Storage
- Quickstart Guide for Mountain Duck and B2 Cloud Storage
- Quickstart Guide for Microsoft 365 Backup with MSP360 and Backblaze B2 (Multiple Instances)
- Quickstart Guide for Microsoft 365 Backup with MSP360 and Backblaze B2 (Single Instance)