
Introduction
Welcome to the Backblaze guide for JetStream! JetStream is a robust file transfer solution that helps your teams in locations around the world collaborate faster and better, especially through digital workflow automation. Using the application you can allow your group of users to upload and share files through a B2 object store using a private client-server architecture. In this guide, we will go through the steps needed to get you and your team up and running with JetStream.
Setup Your Backblaze B2 Account & Bucket
If you haven’t created your account with Backblaze already, create an account here
1. Select "Buckets" on the side menu listed under "B2 Cloud Storage"
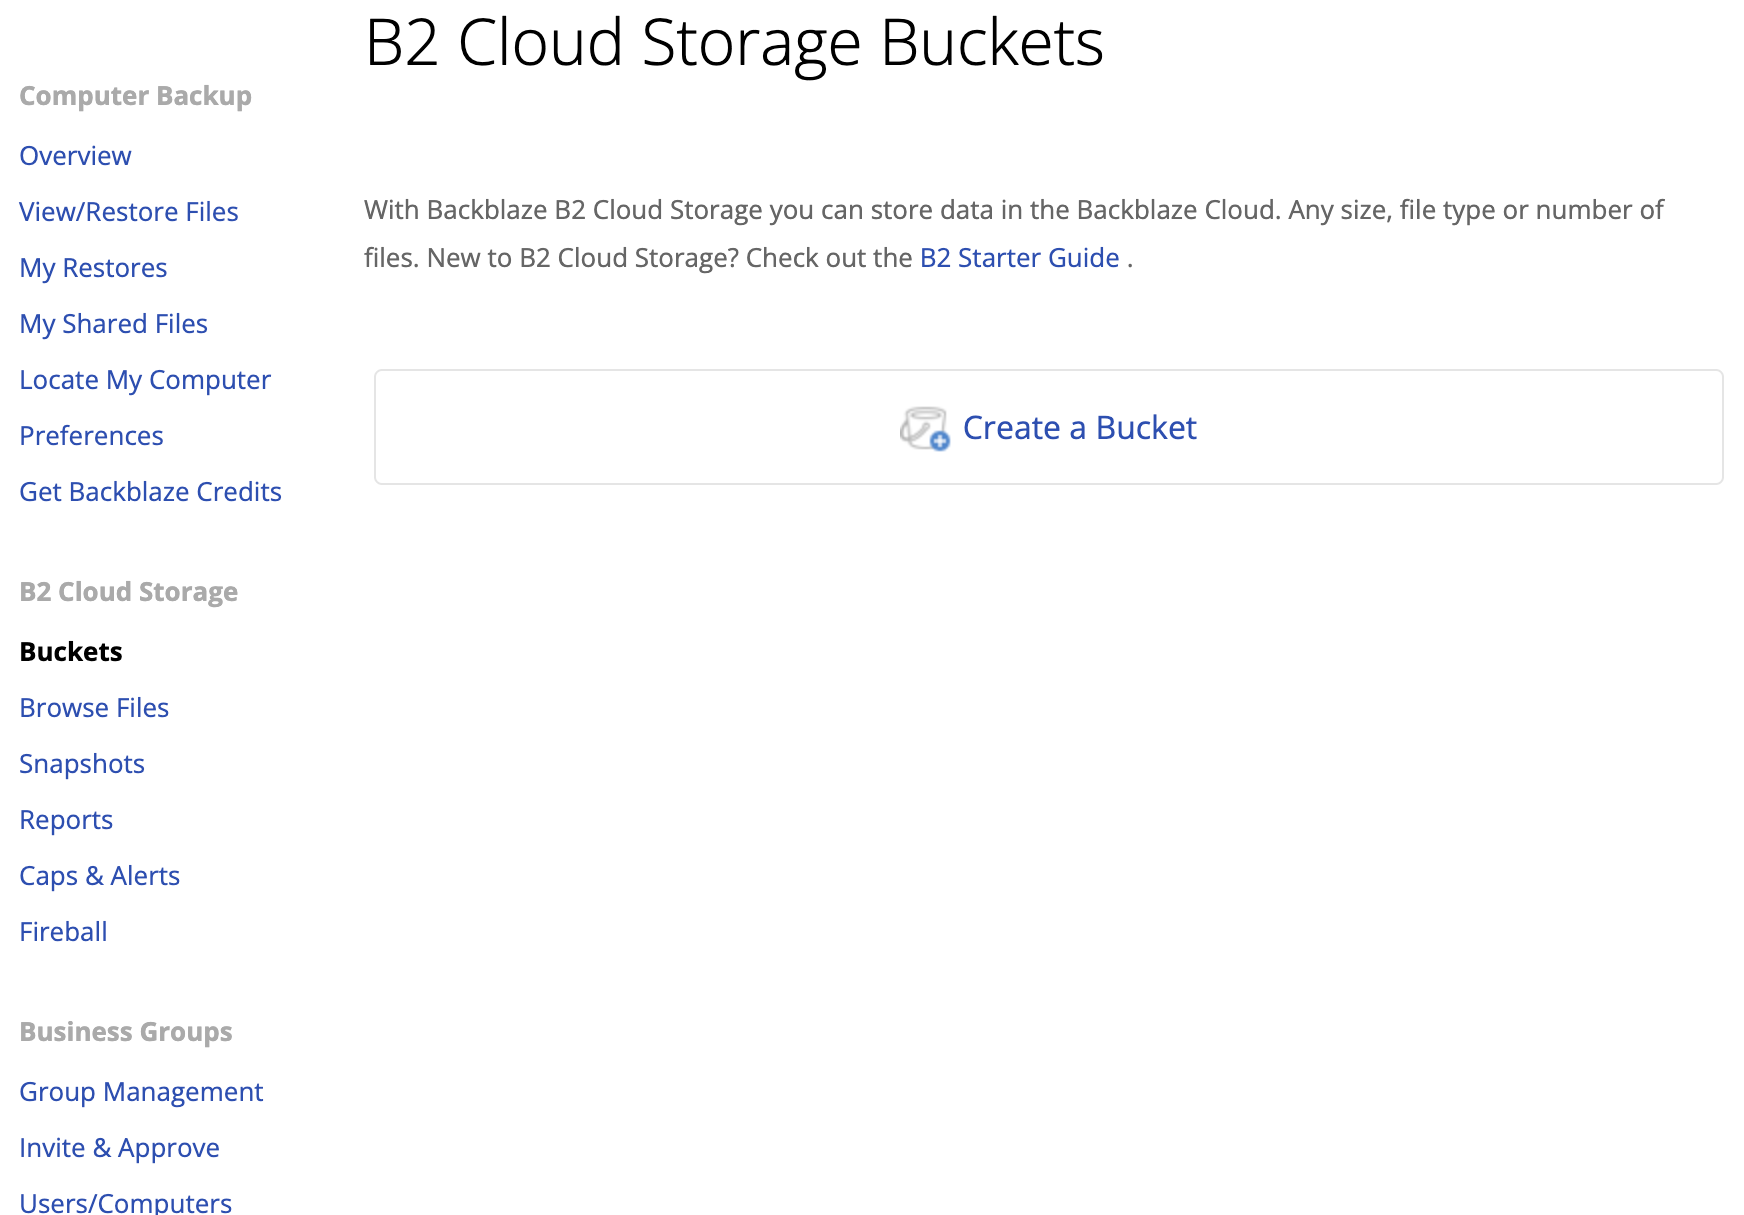
2. Create a Bucket for your JetStream file repository. 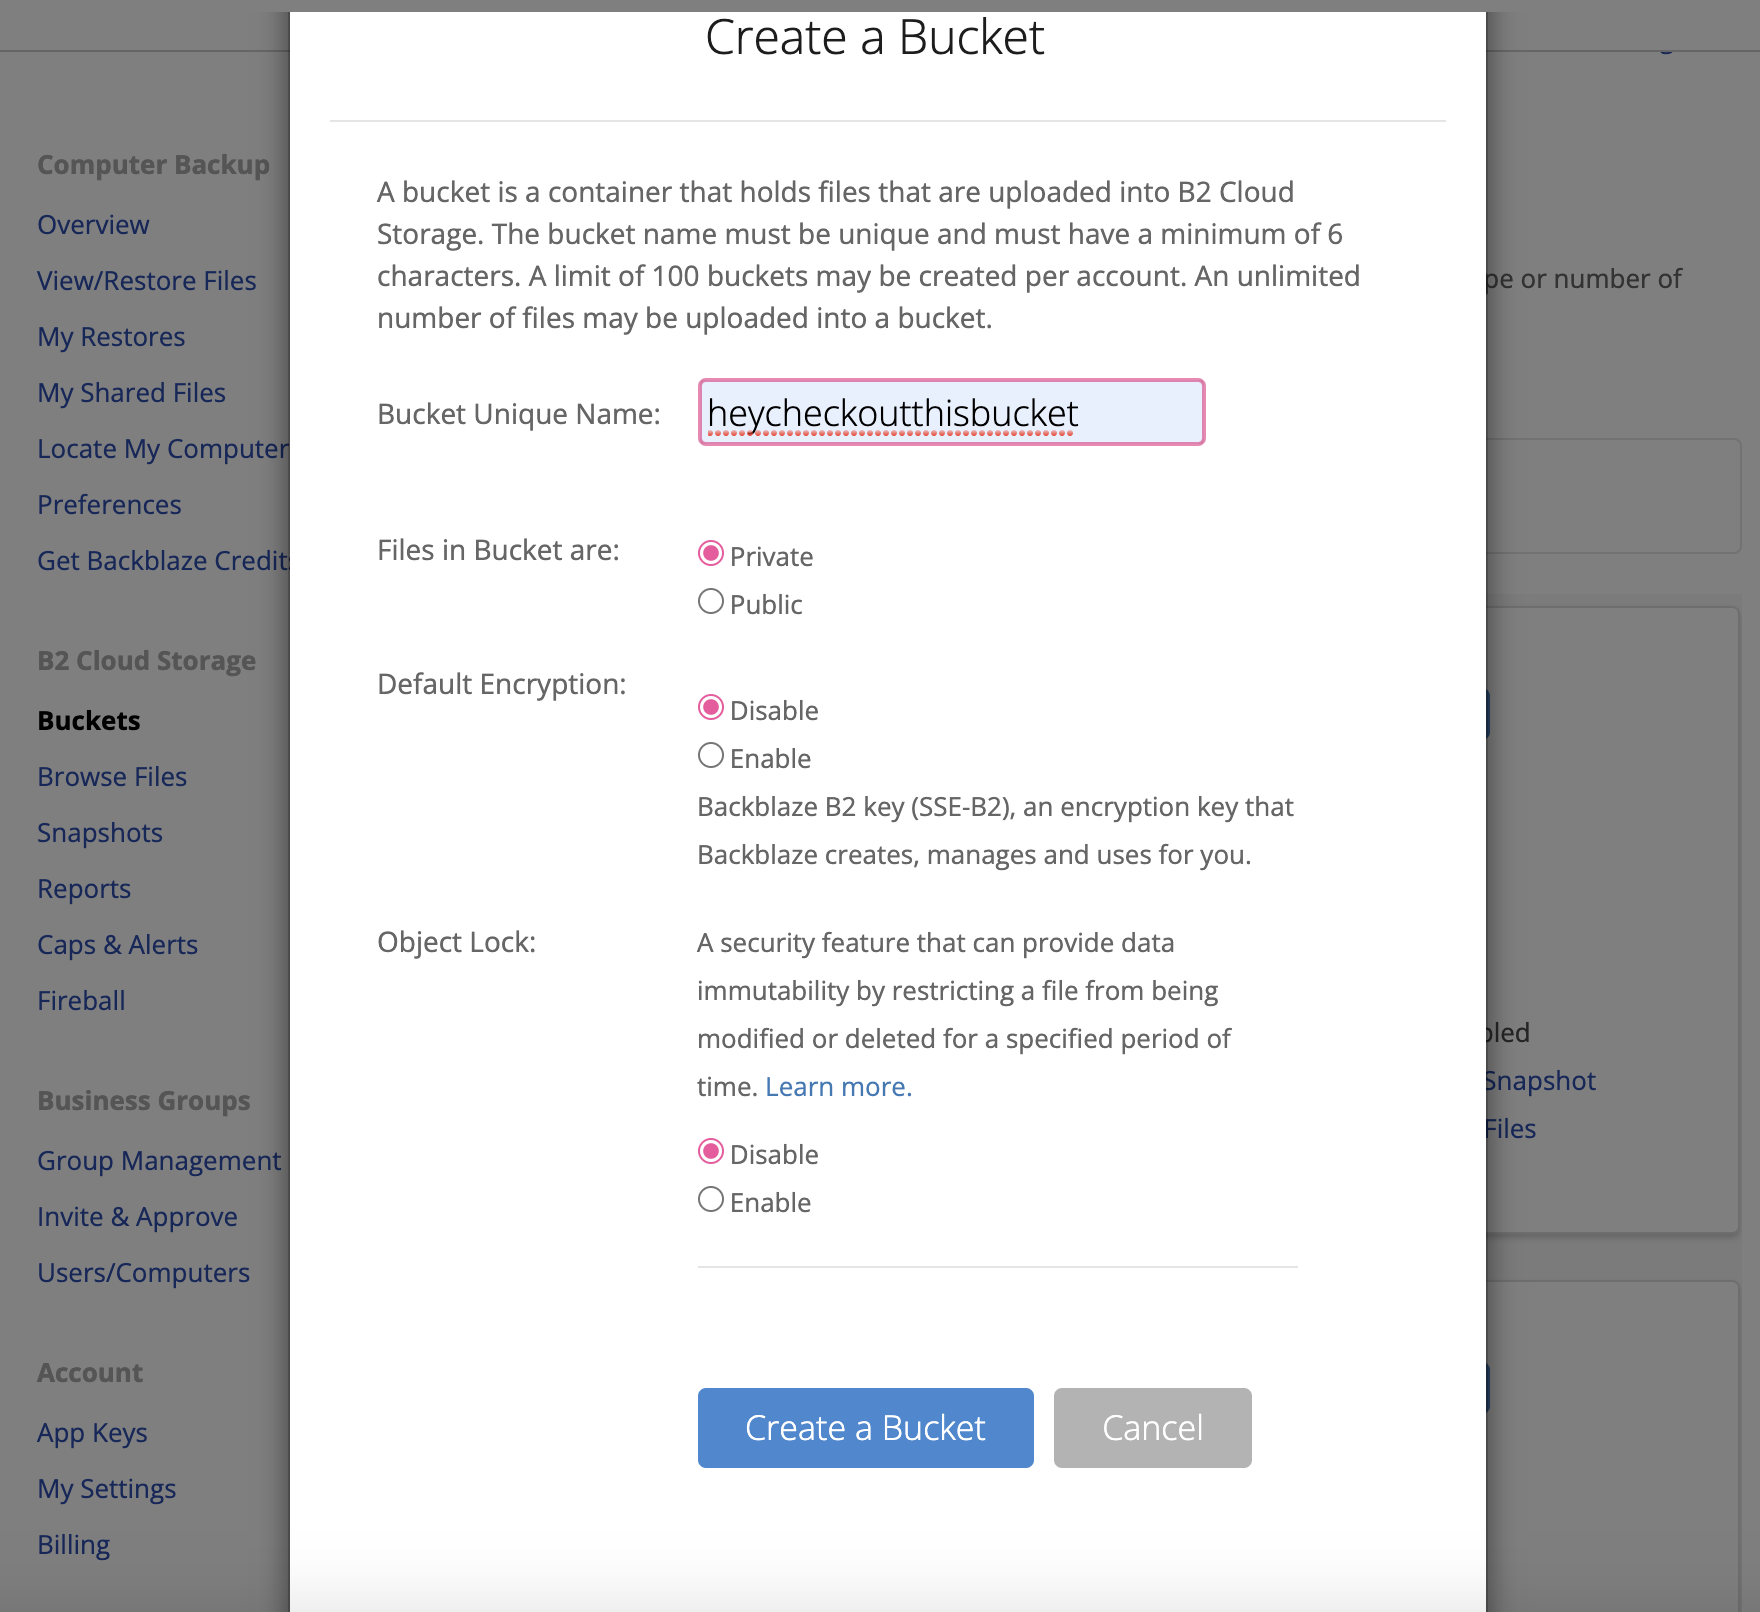
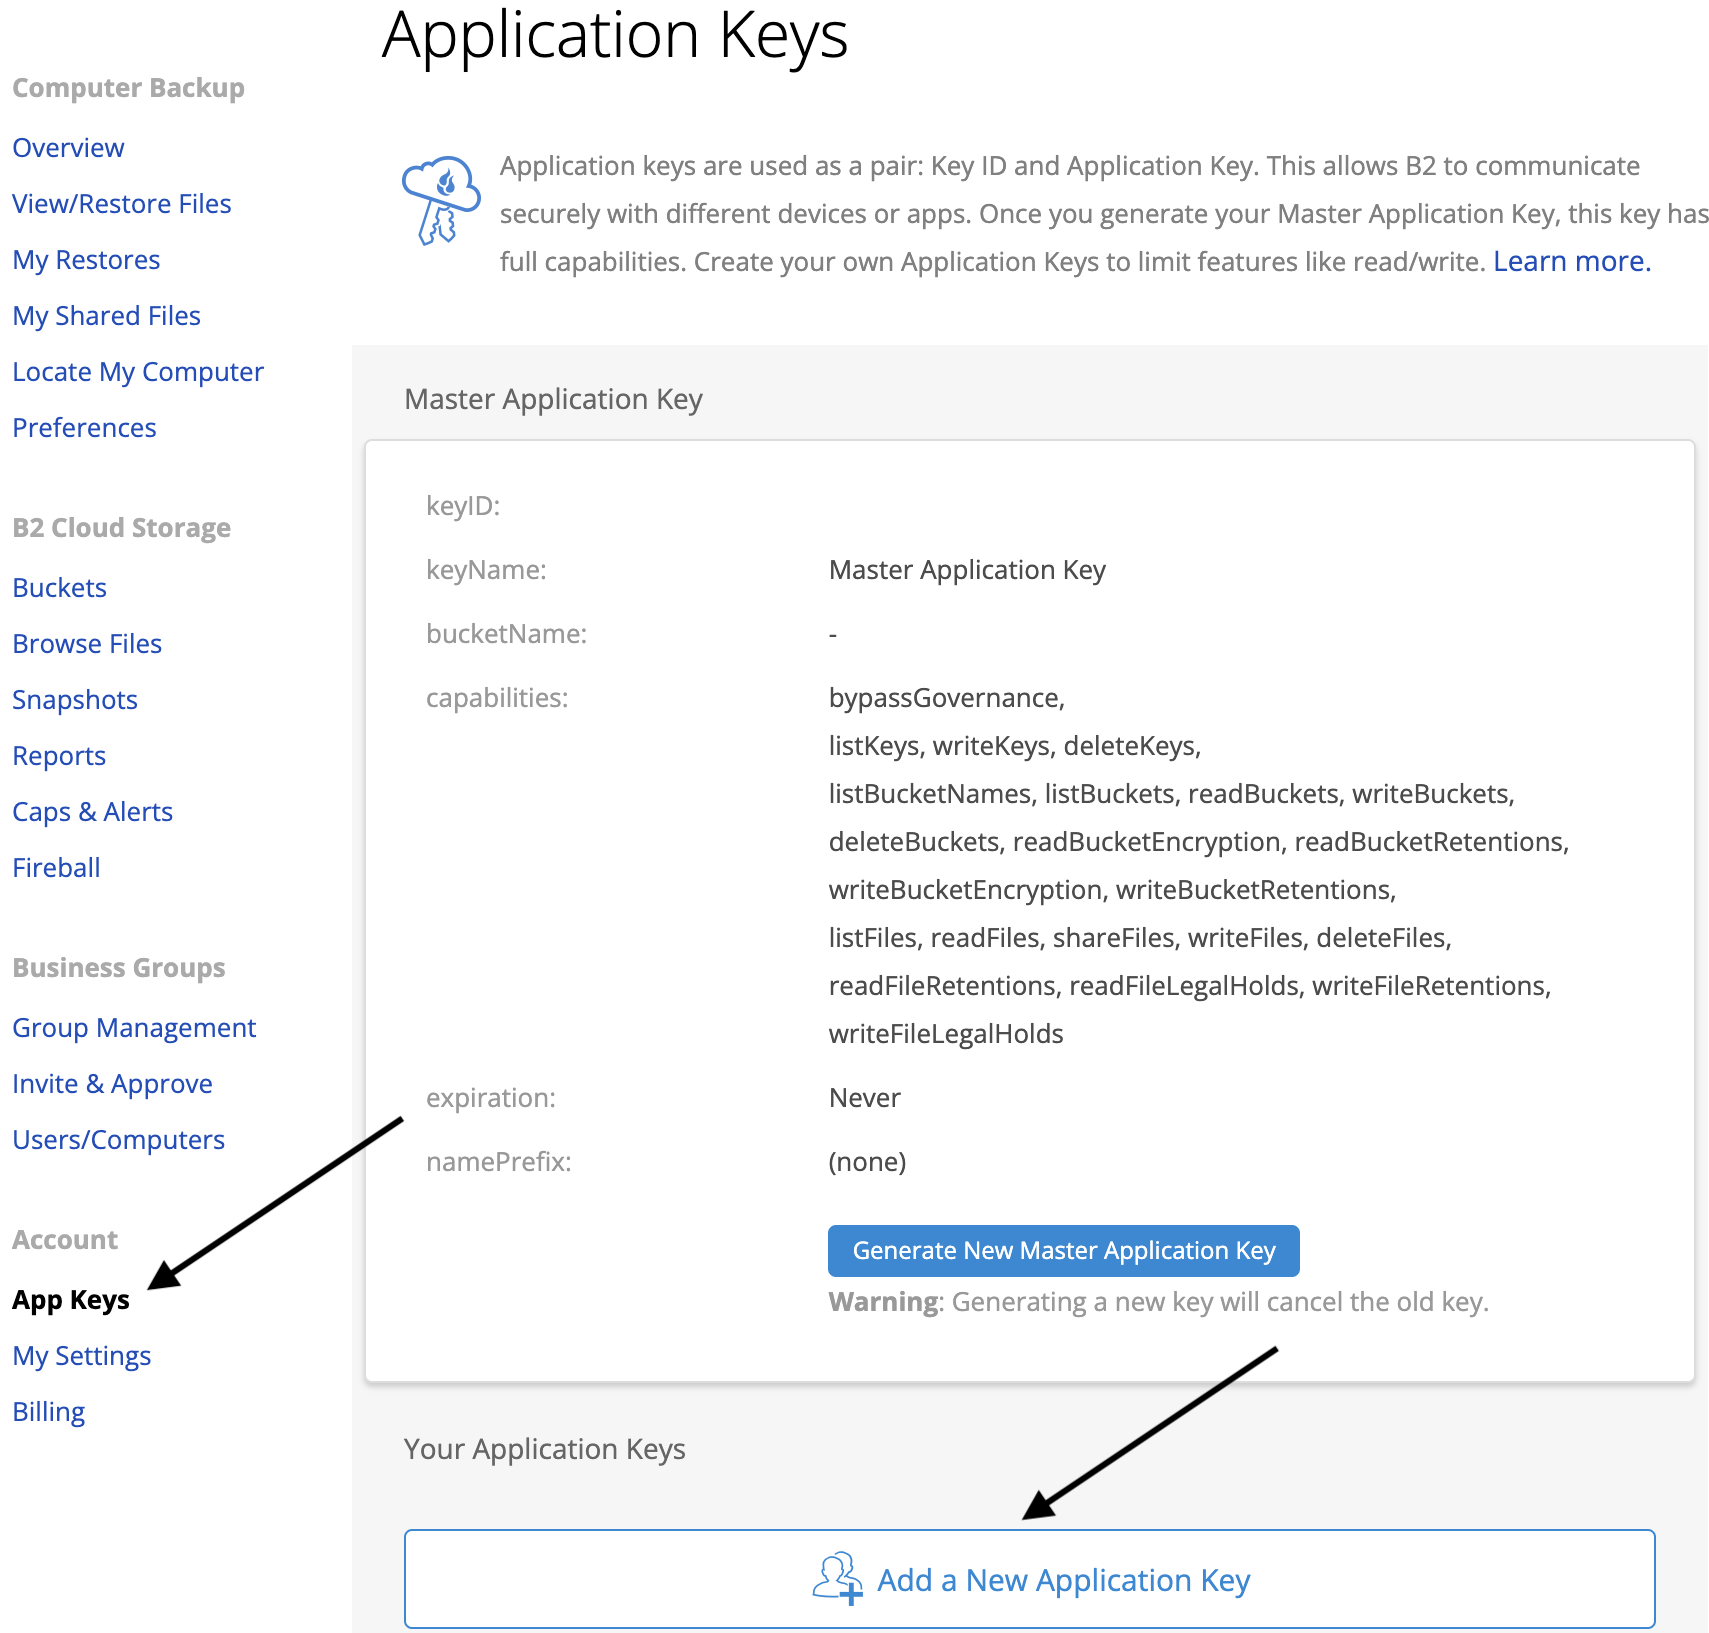
3. You can now retrieve your Application Key and Key ID. You will need these to setup B2 within JetStream. Click on App Keys and then click on the link that reads 'Add A New Application Key’.
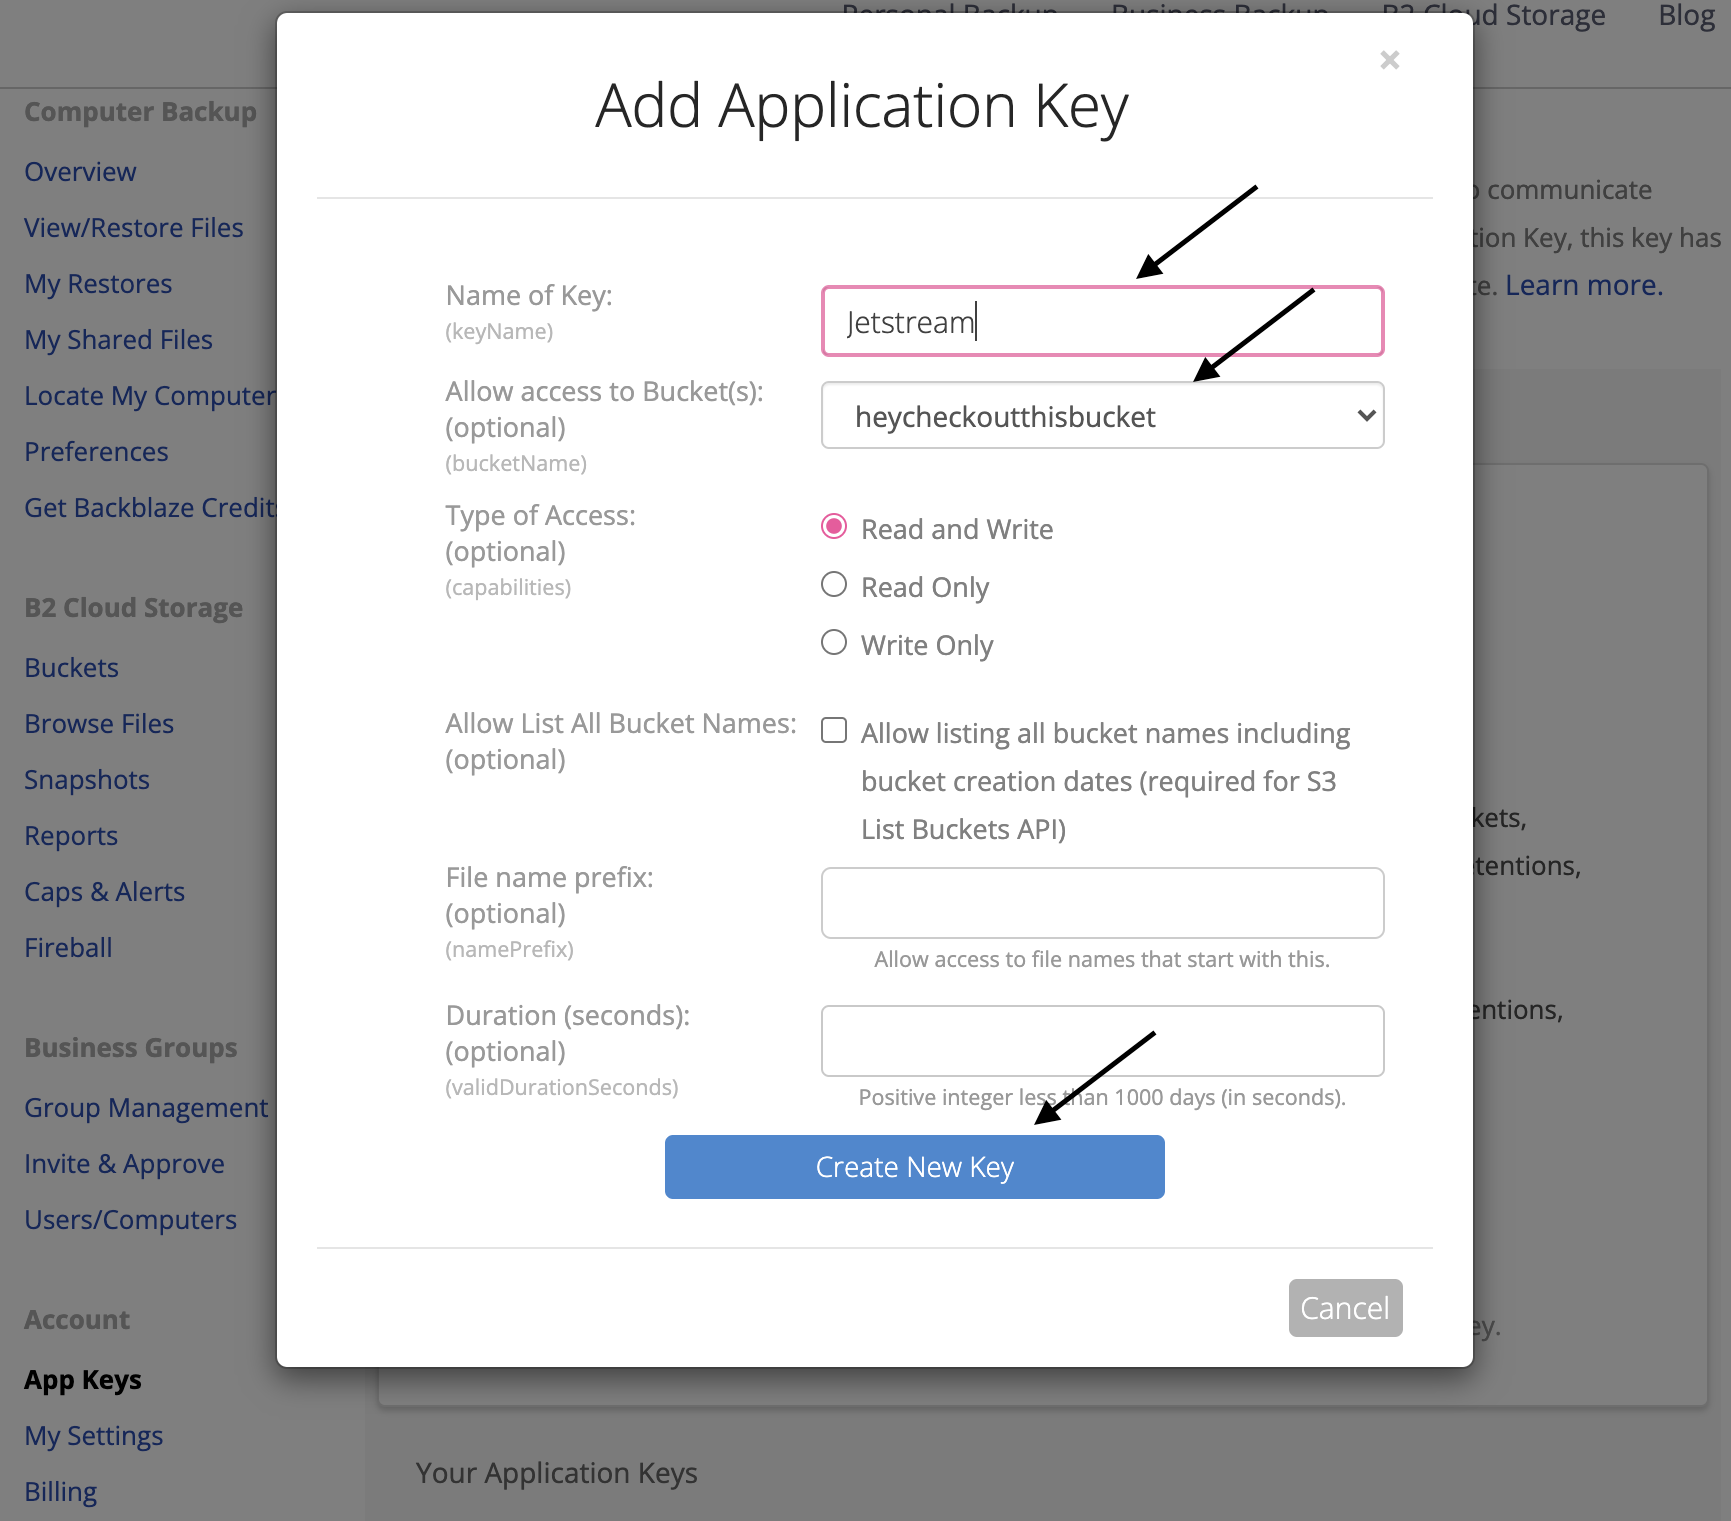
4. You can then enter a Name for the key and click on the button that says "Create New Key".
5. When you have the Key ID and the Application Key, be sure to copy them and keep both of these in a safe location. You will also need the S3 Endpoint as we are using an S3 connector within the JetStream application.
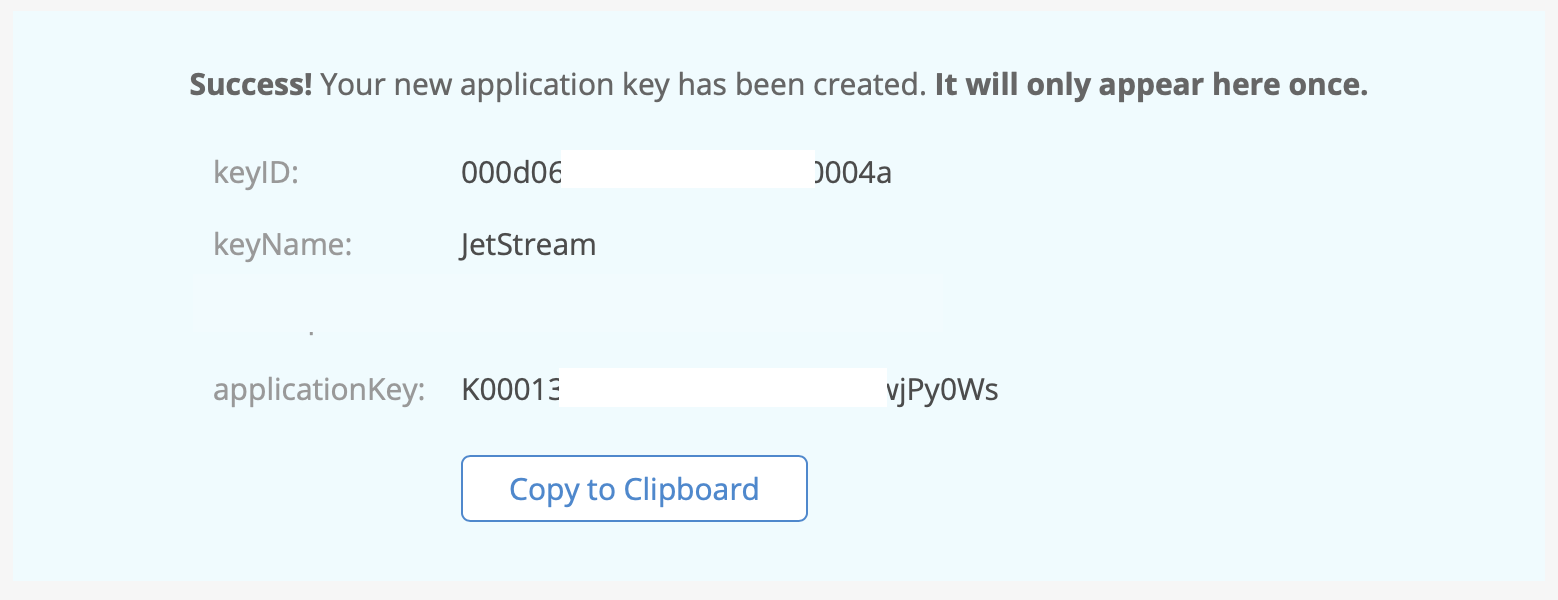
Once you close this window, the current Application Key will not display again and you will need both of these values to set up your JetStream application.
IMPORTANT: If you lose the App Keys, the values are not recoverable. You will need to set up a new App Keys for your client.
Your B2 bucket is now created and ready to be used with JetStream.
Setup Your JetStream Server
Before JetStream client applications can send data to your B2 bucket, you will first need to set up a JetStream server instance. You can think of this as a storage gateway for your users to then store content in your B2 bucket(s).
JetStream Server client supports Ubuntu, CentOS, MacOS and Windows installations. You can follow the guides located here to find detailed guides on the installation for each system.
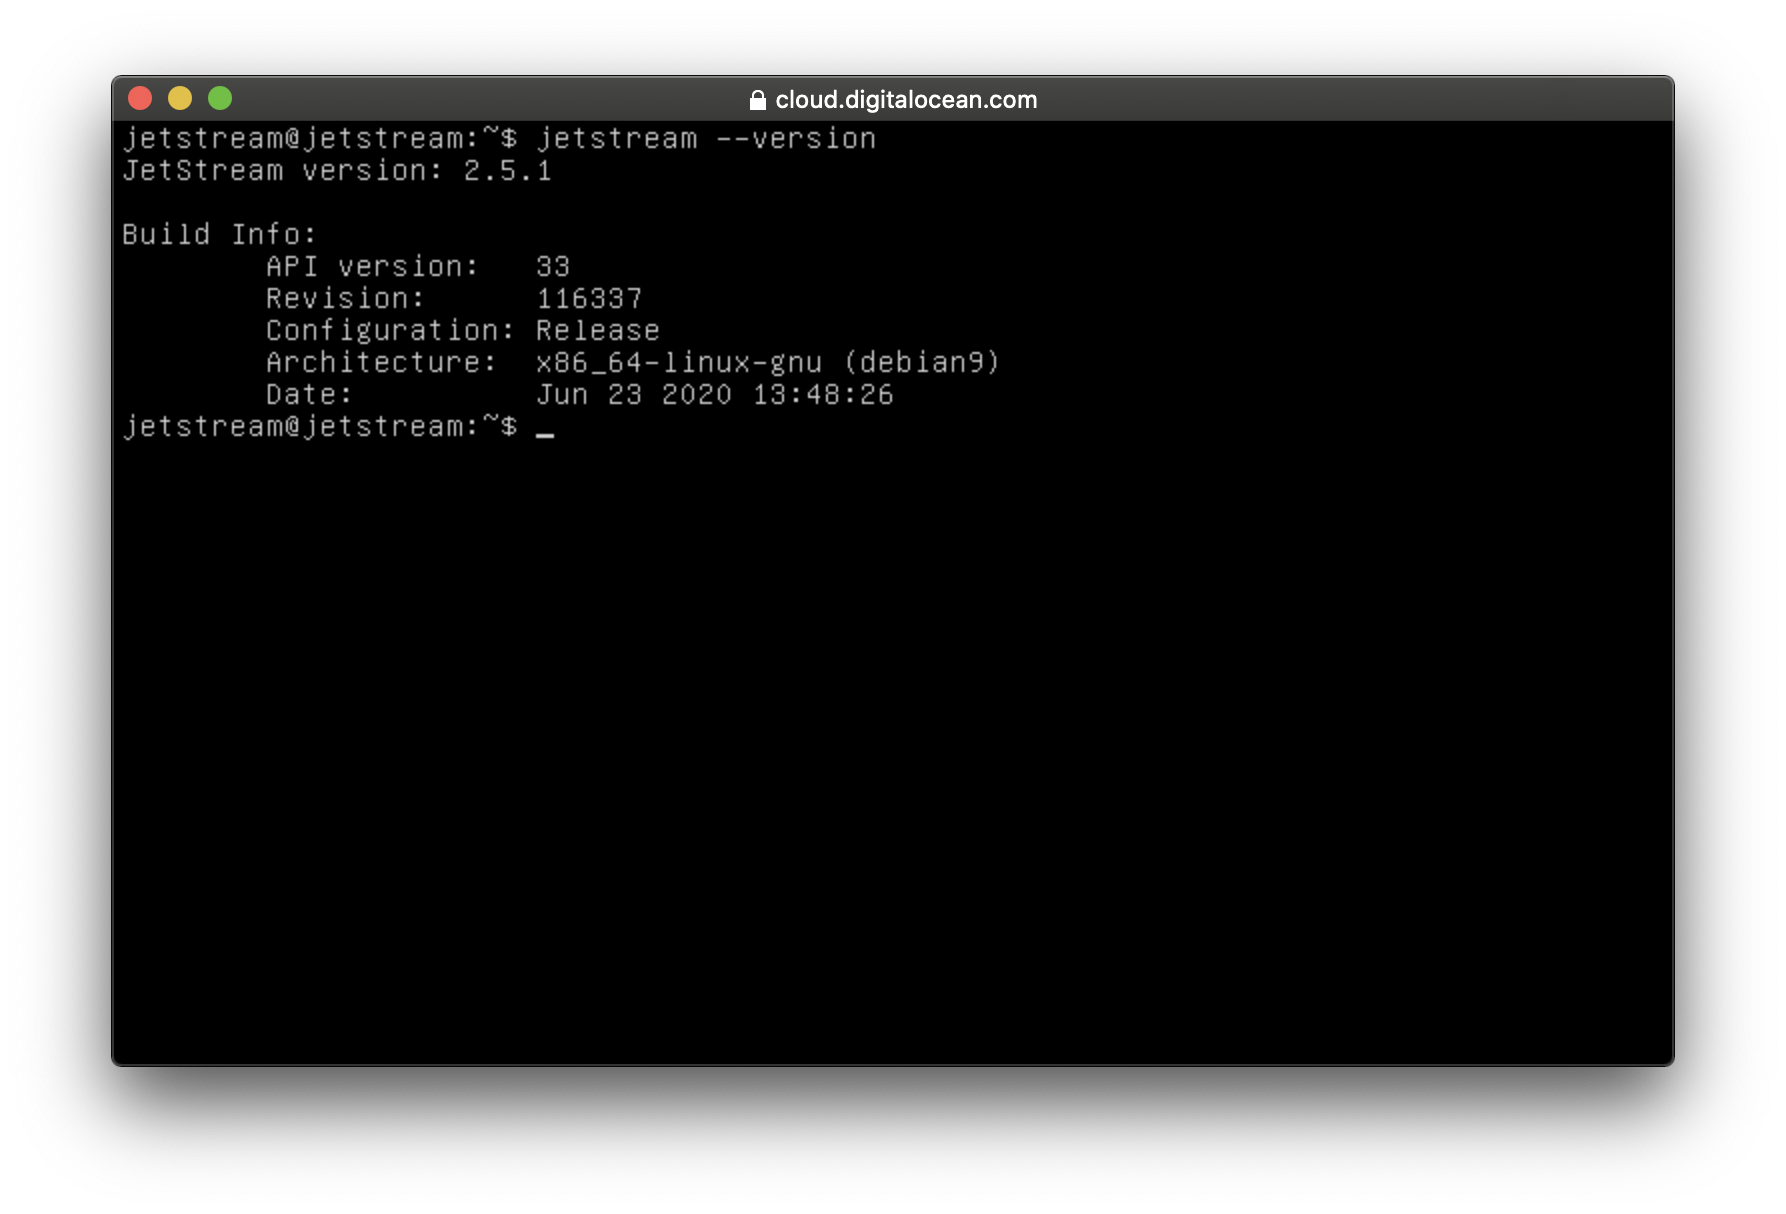
In this particular case, we have our JetStream server running on a Linux machine hosted by within our compute partner Digital Ocean.
Setup Your JetStream Client
After setting up your JetStream server we can now configure our Jetstream client apps to talk to it. We will need the following attributes before moving forward.
- Server IP
- Username for Client
- Password for User
- Server Port (Default: 8886)
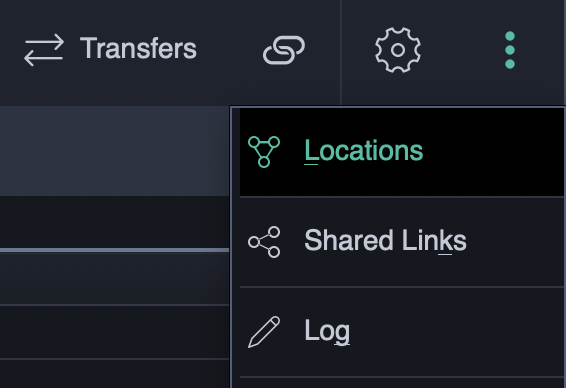
1. Within the JetStream client application select "Locations" in the menu located at the right corner of the application. This will open up your location manager, here you will be able to add your JetStream server location.
2. Press the button marked "New" towards the left side. This will open up a new location window where you can pass the attributes you collected earlier.
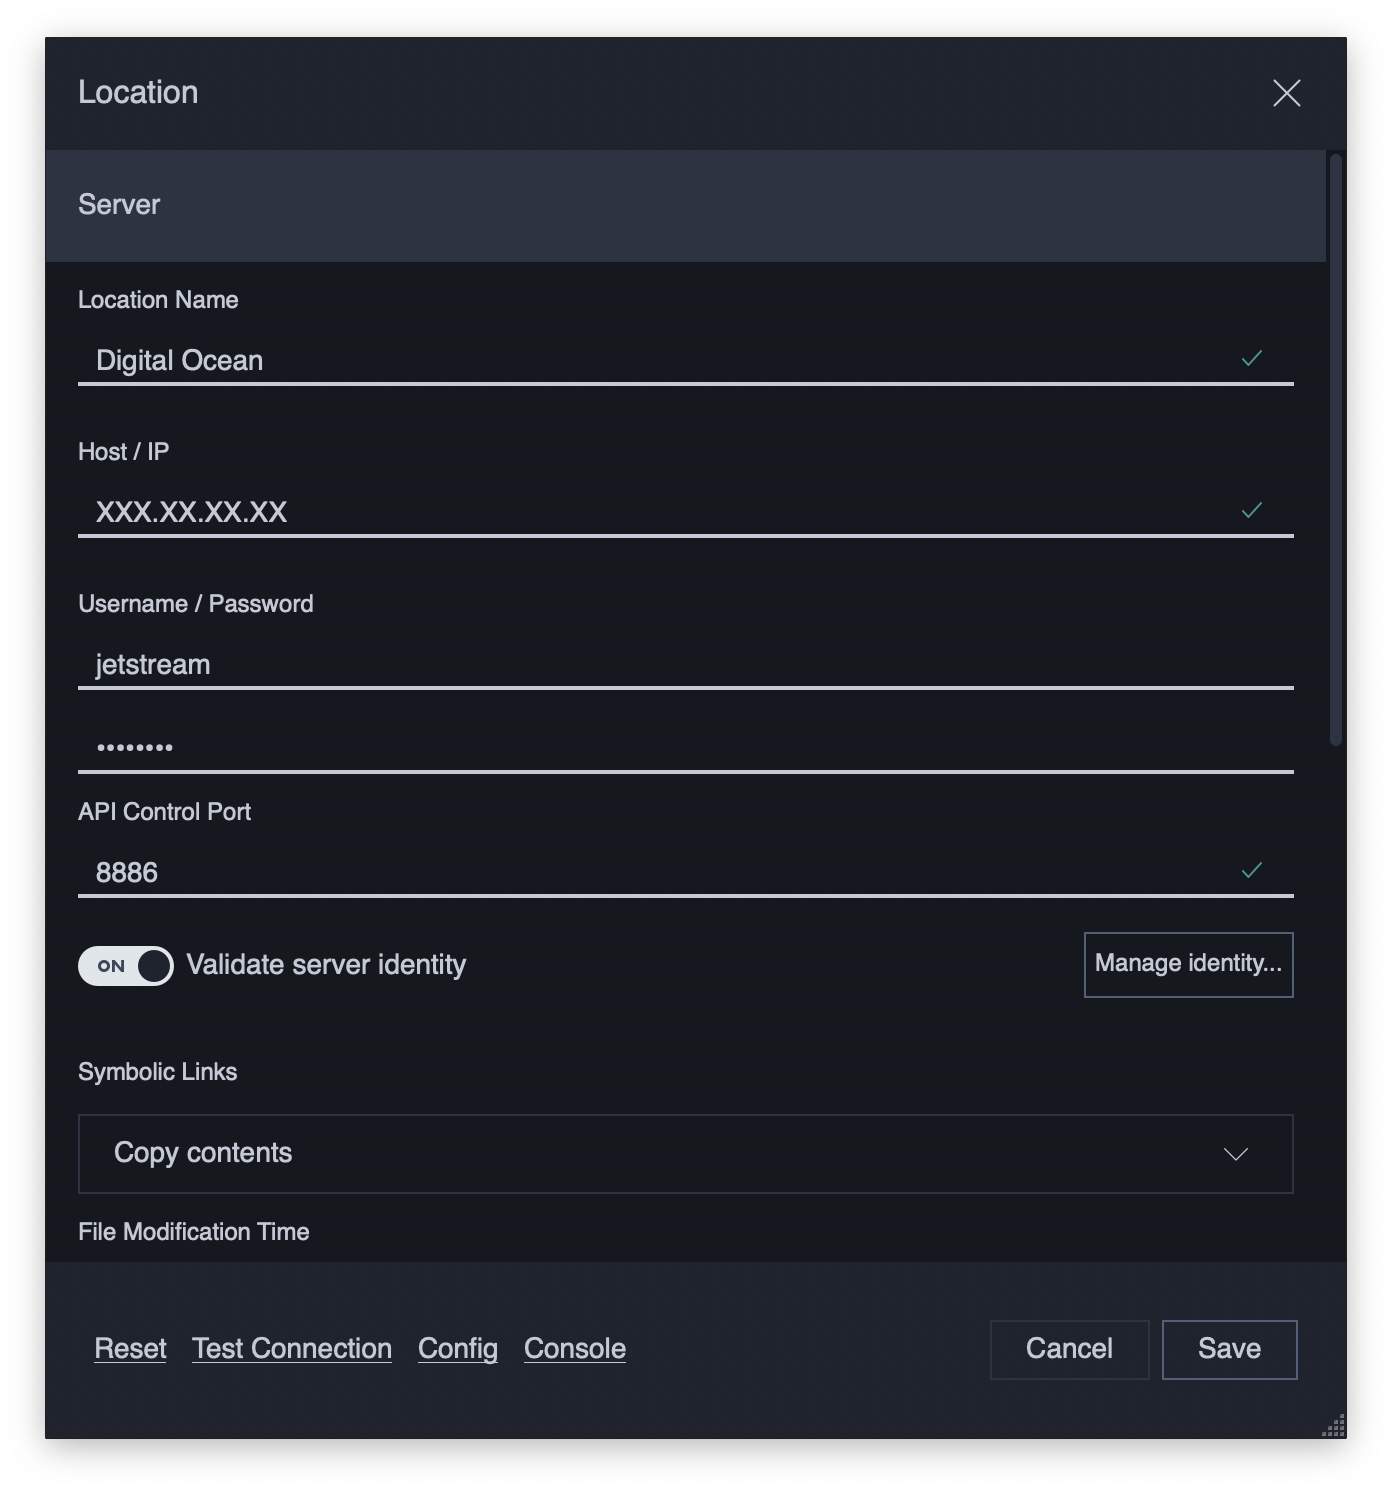
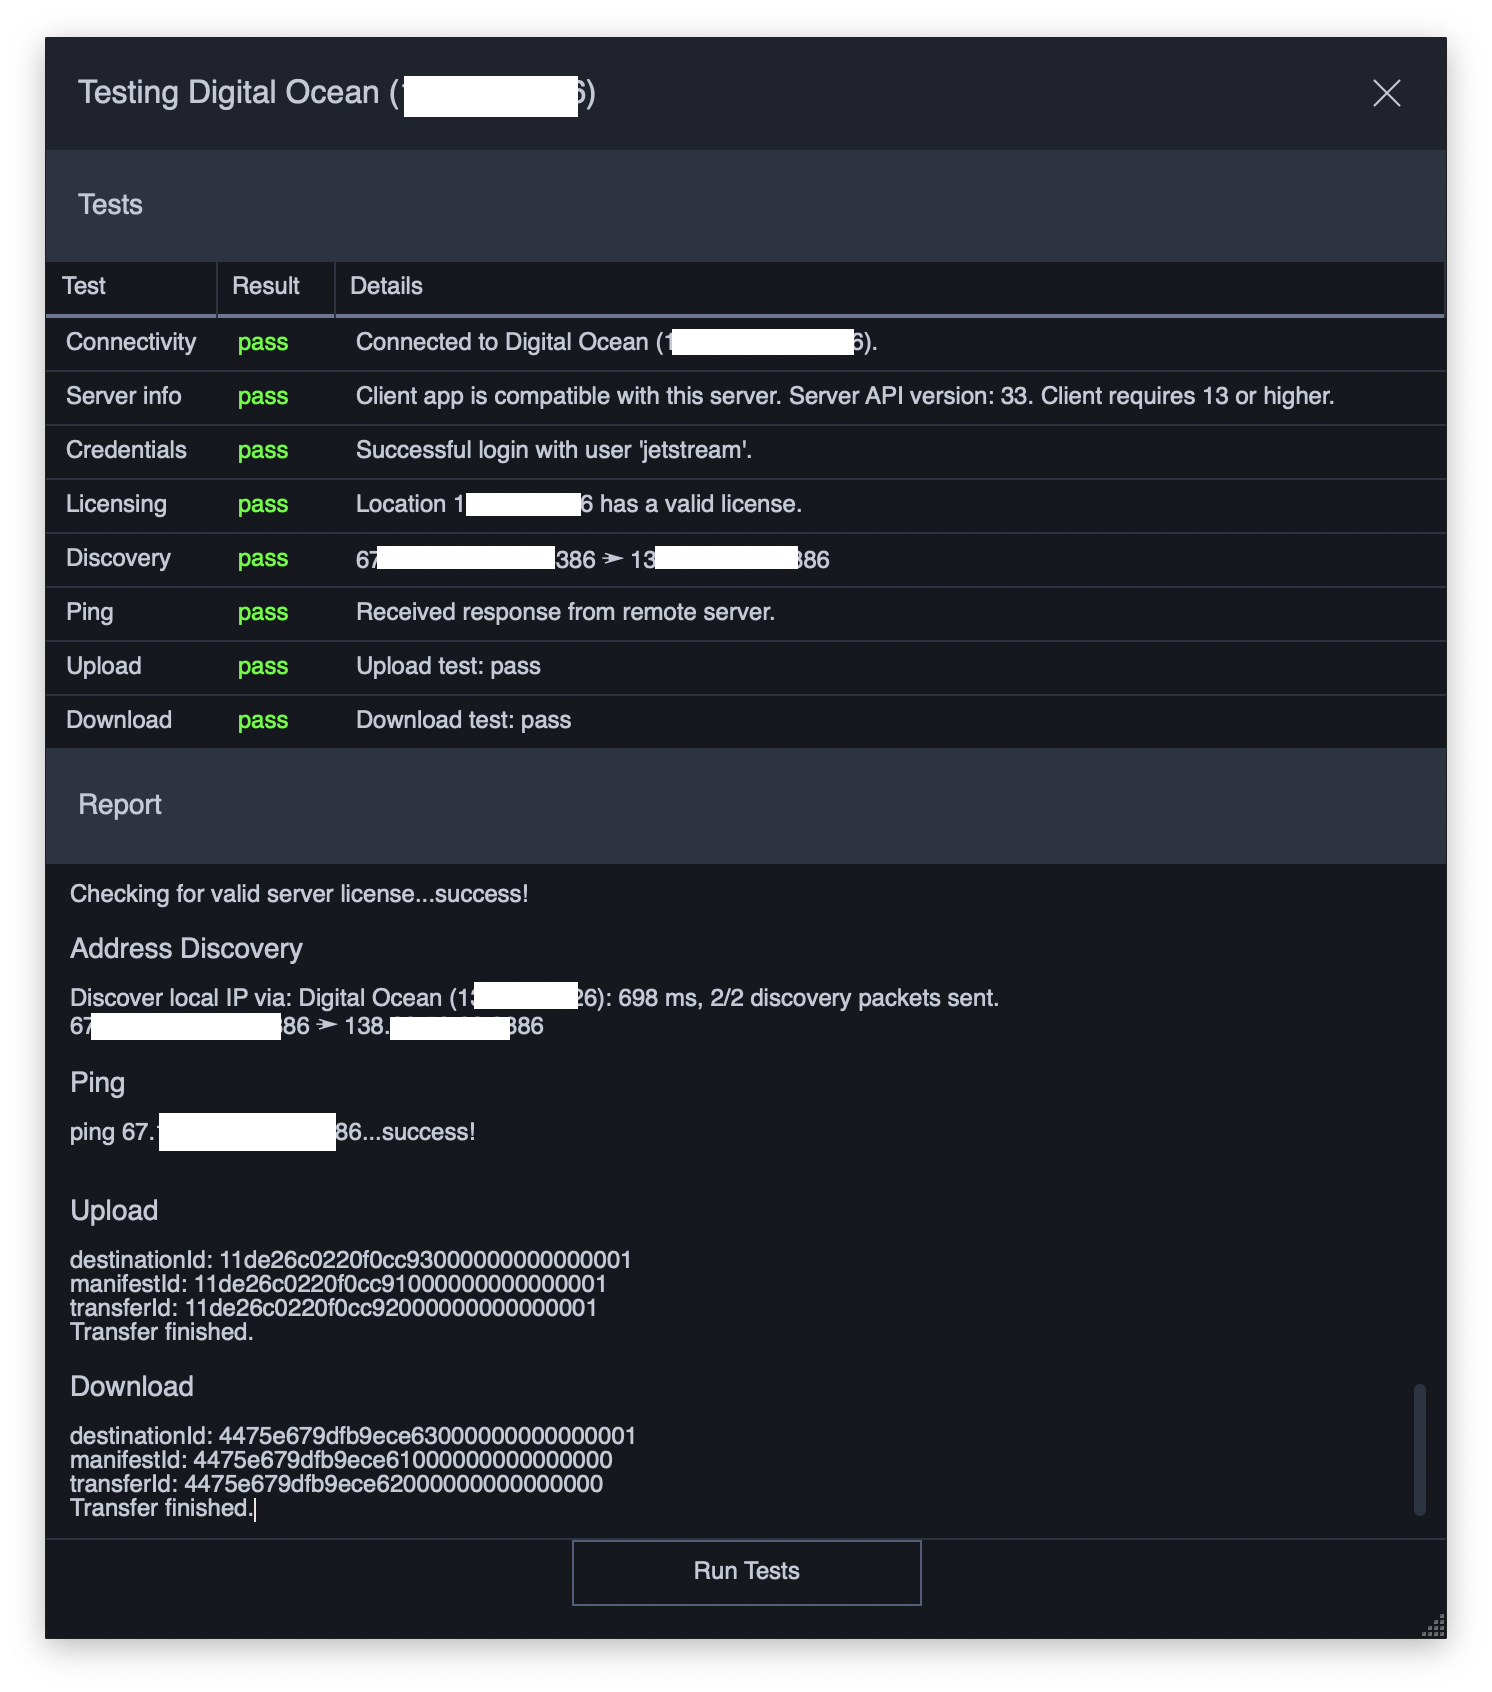
3. We can ensure validate the new connection to the server by pressing "Test Connection" at the bottom of the window.

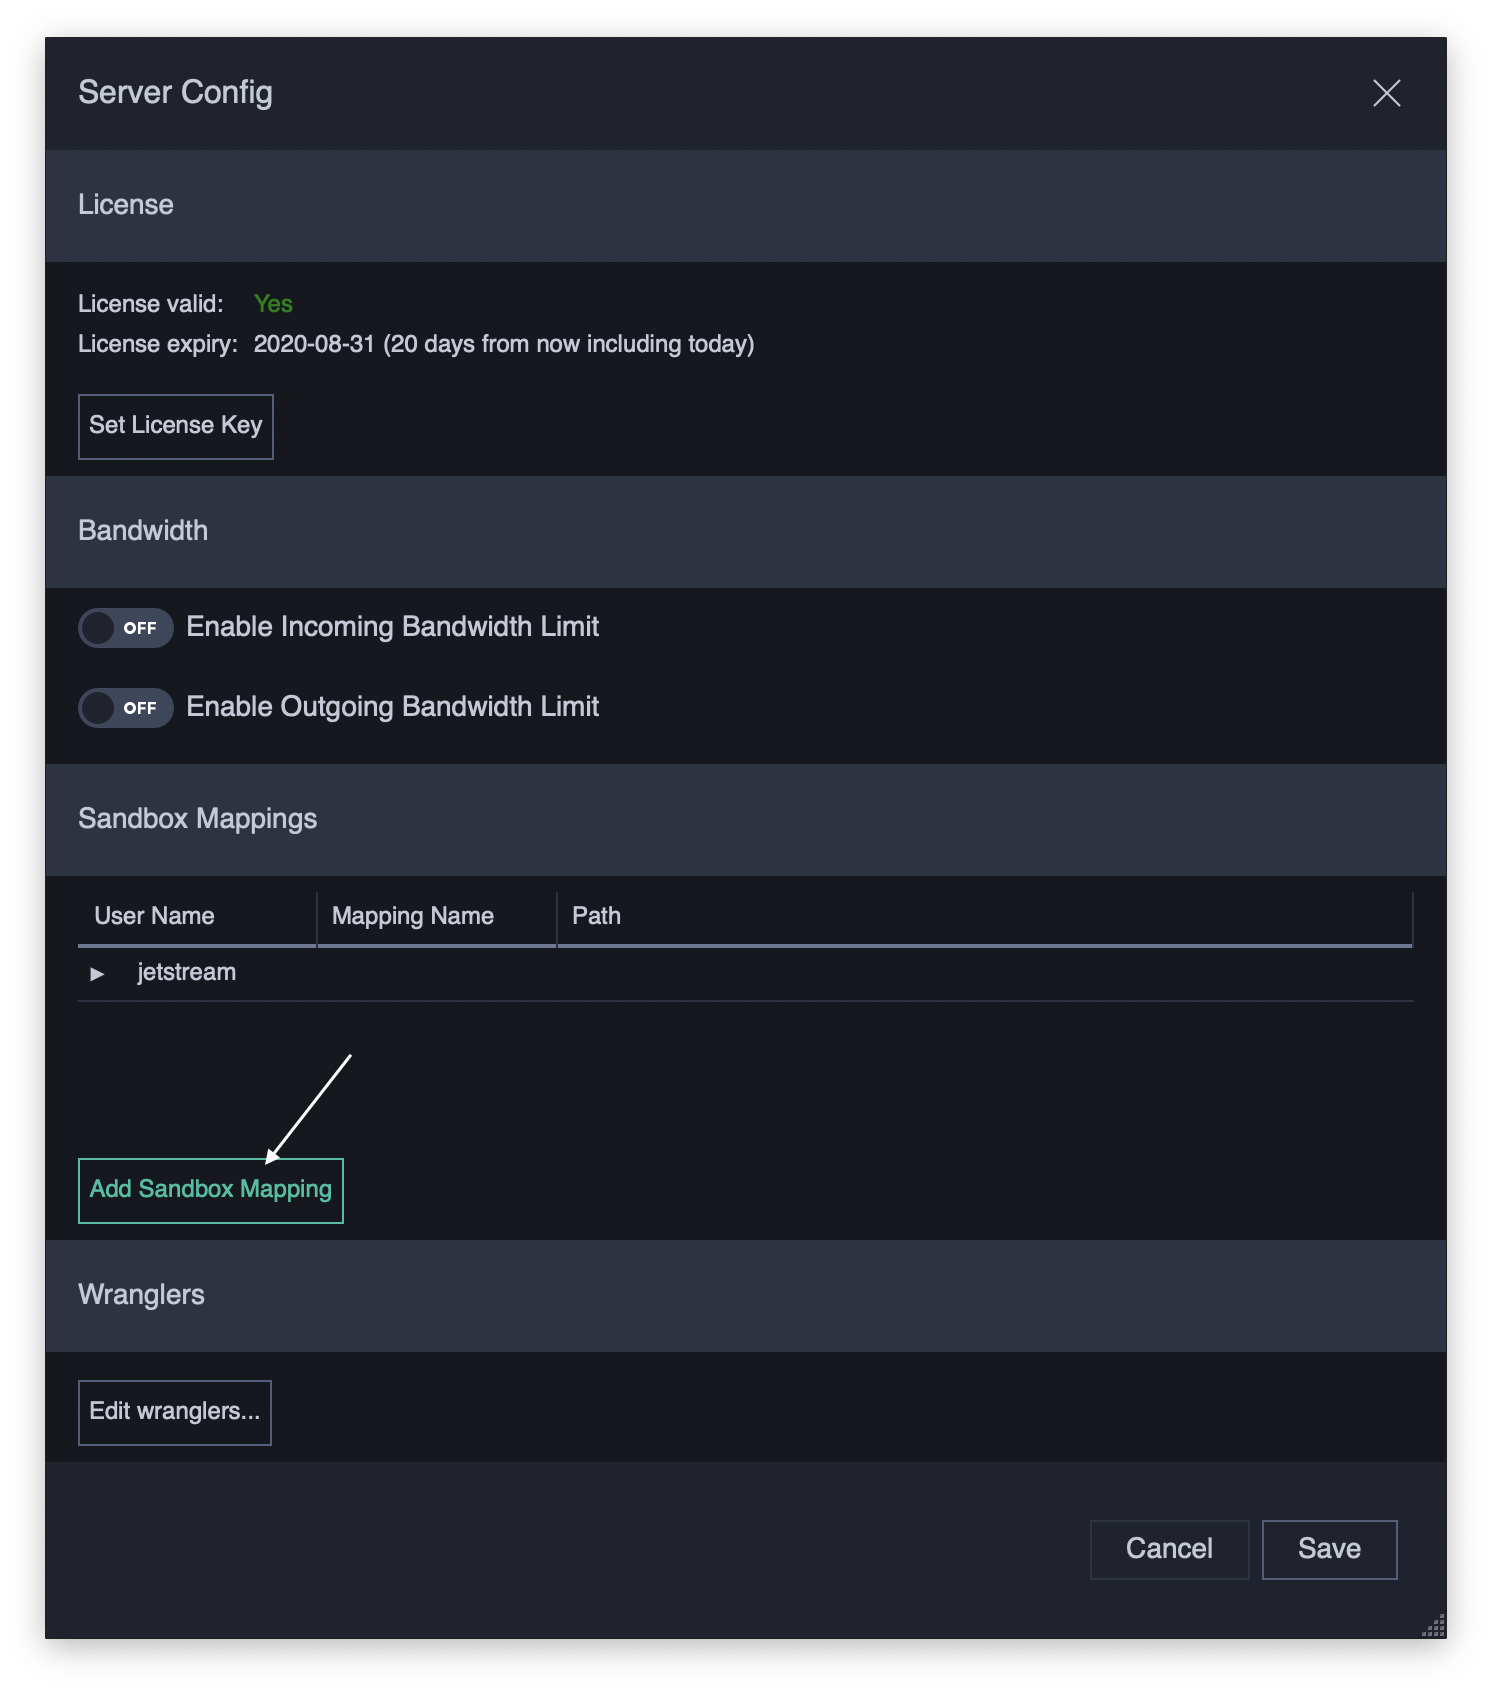
4. Now we can add our B2 storage target as a Sandbox on the server. We can do this by pressing the "Config" button next to the "Test Connection" you pressed earlier.

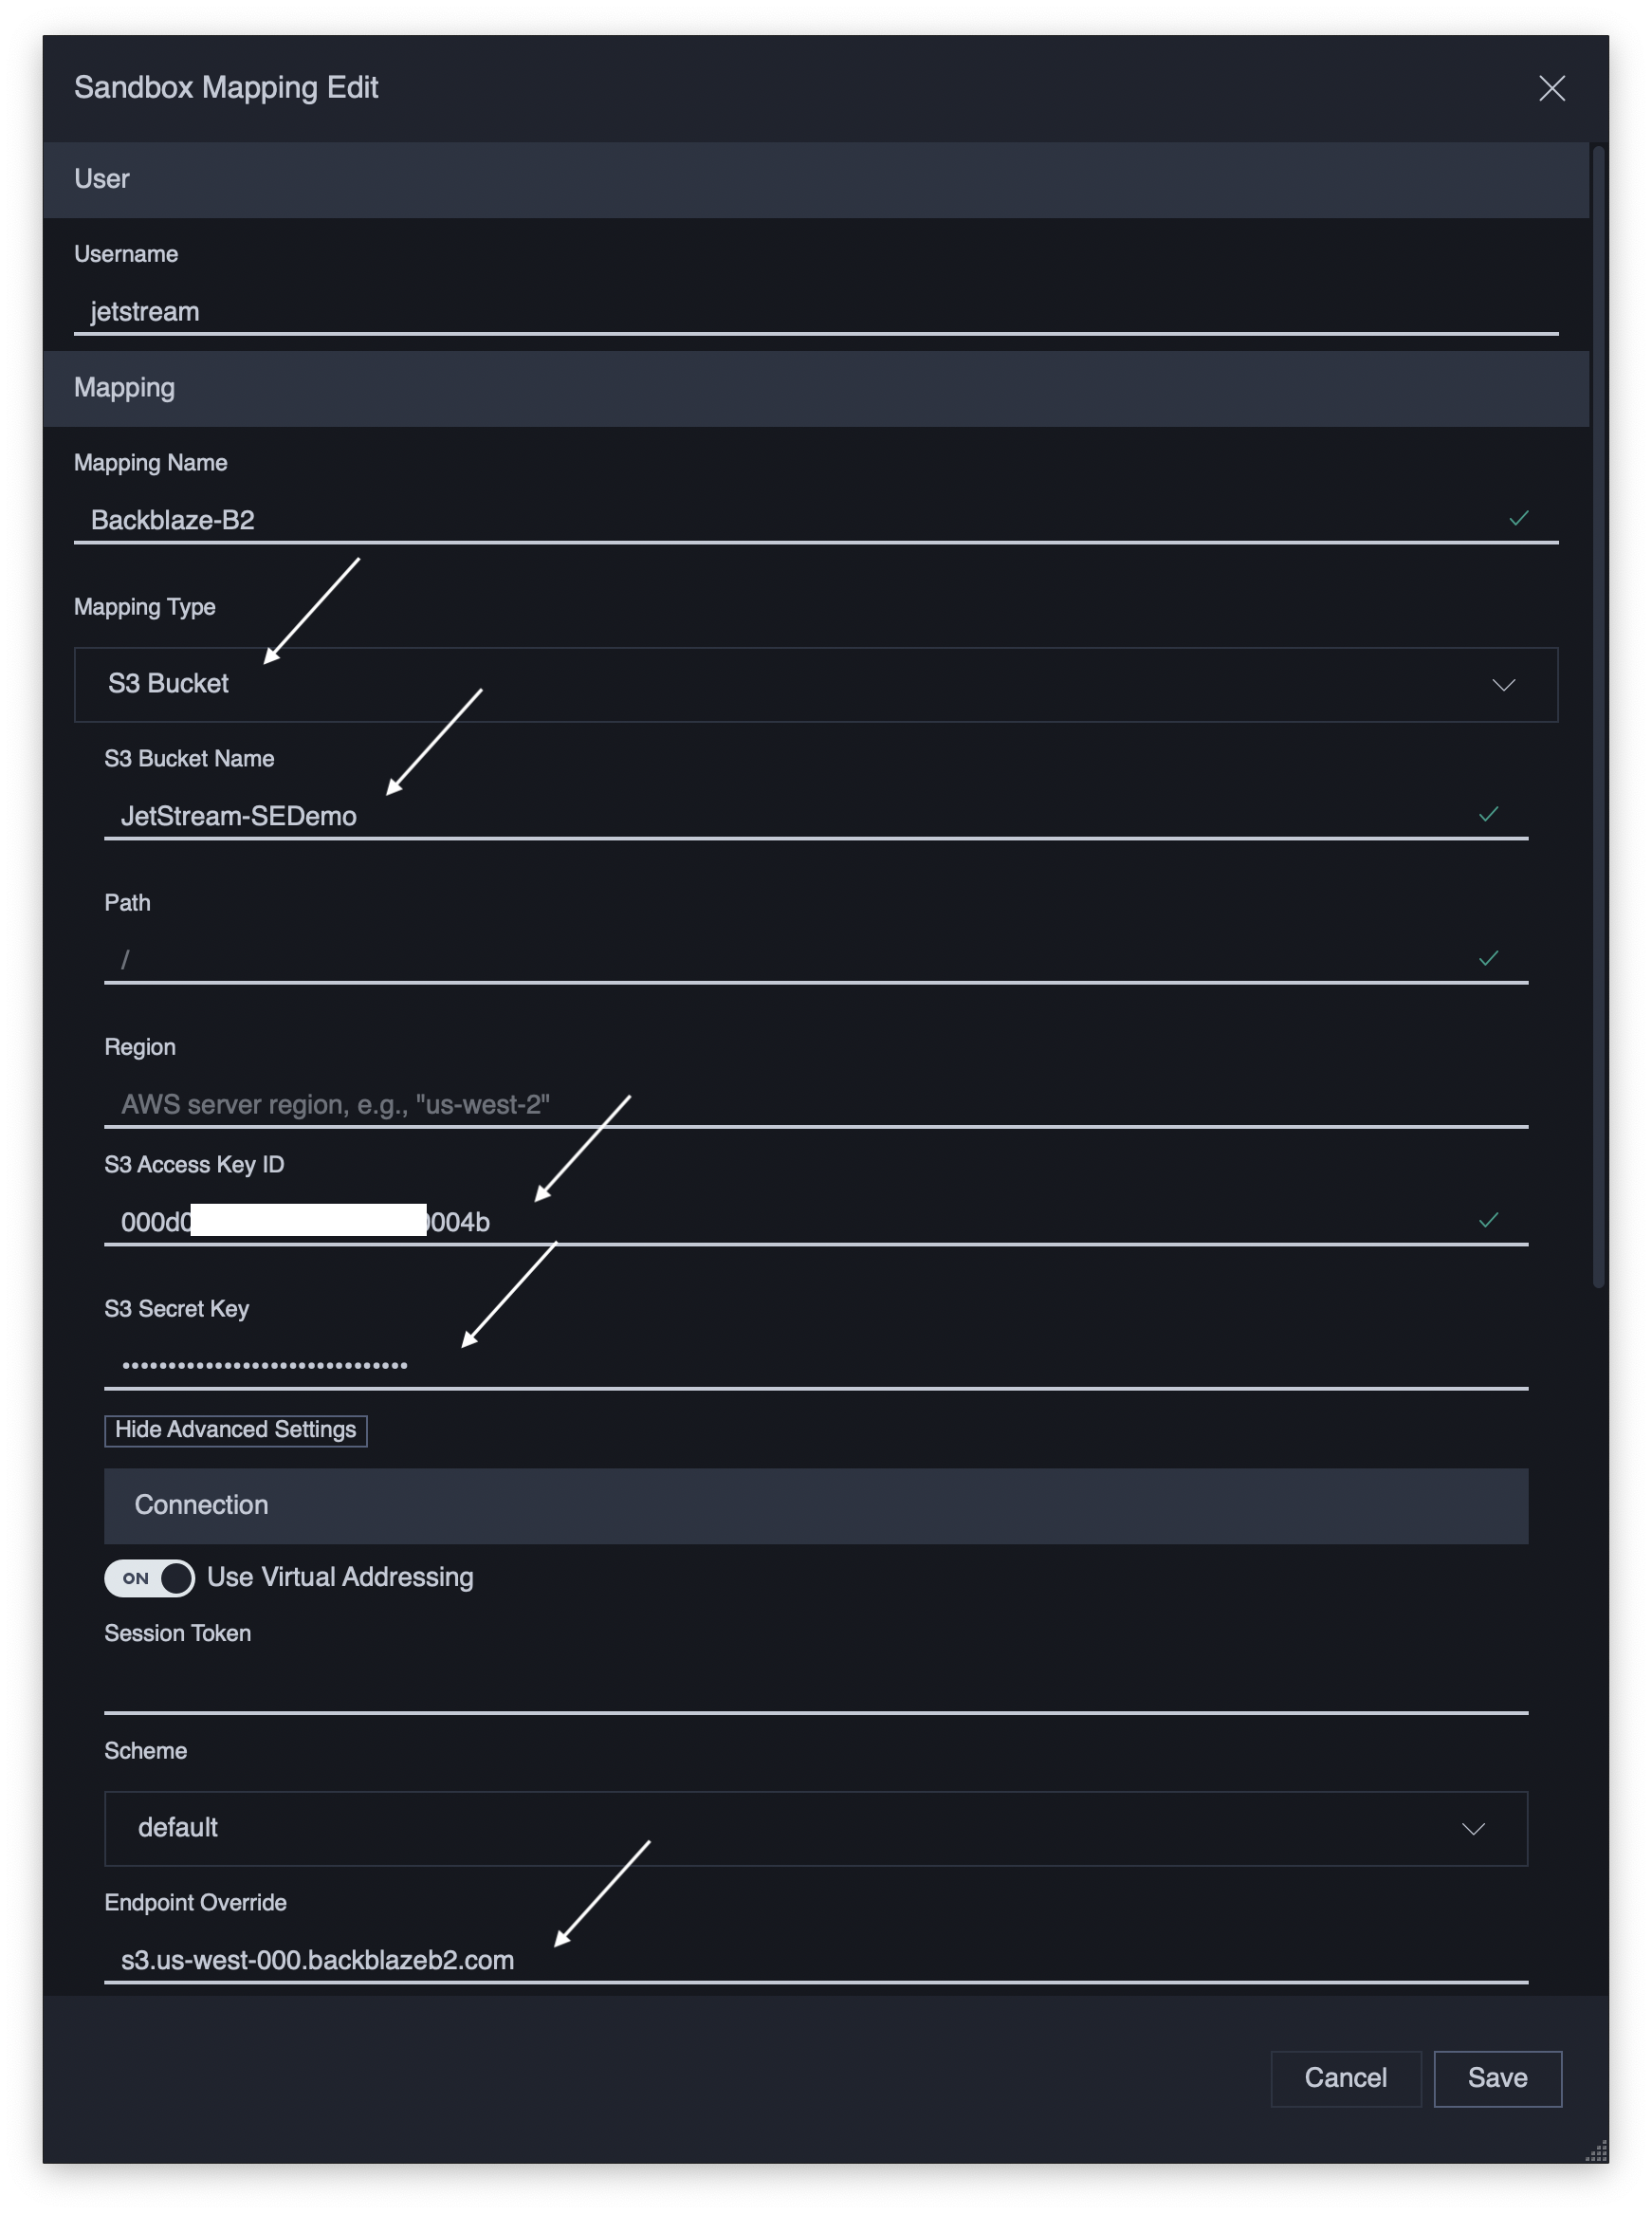
5. In the sandbox editor, we will need to pass the following attributes we collected earlier in this guide from your Backblaze account.
Set the "Mapping Type" drop-down menu to "S3 Bucket" and enable the Advanced settings.
These are the relevant fields and their corresponding values provided by Backblaze as follows.
- S3 Bucket Name = Bucket name
- S3 Access Key ID = KeyID
- S3 Secret Key = applicationKey
- Endpoint Override = S3 Endpoint (URL)
Press the save button. You have now successfully configured your B2 endpoint within Jetstream. You can start transferring files from your local storage!
Transfer Files
1. Press the "Send & Recieve" button in the top right of your client.
Select your jetstream server from the dropdown on the middle right. In this case, I have selected the Digital Ocean server I configured earlier.
Select the B2 sandbox configured earlier.
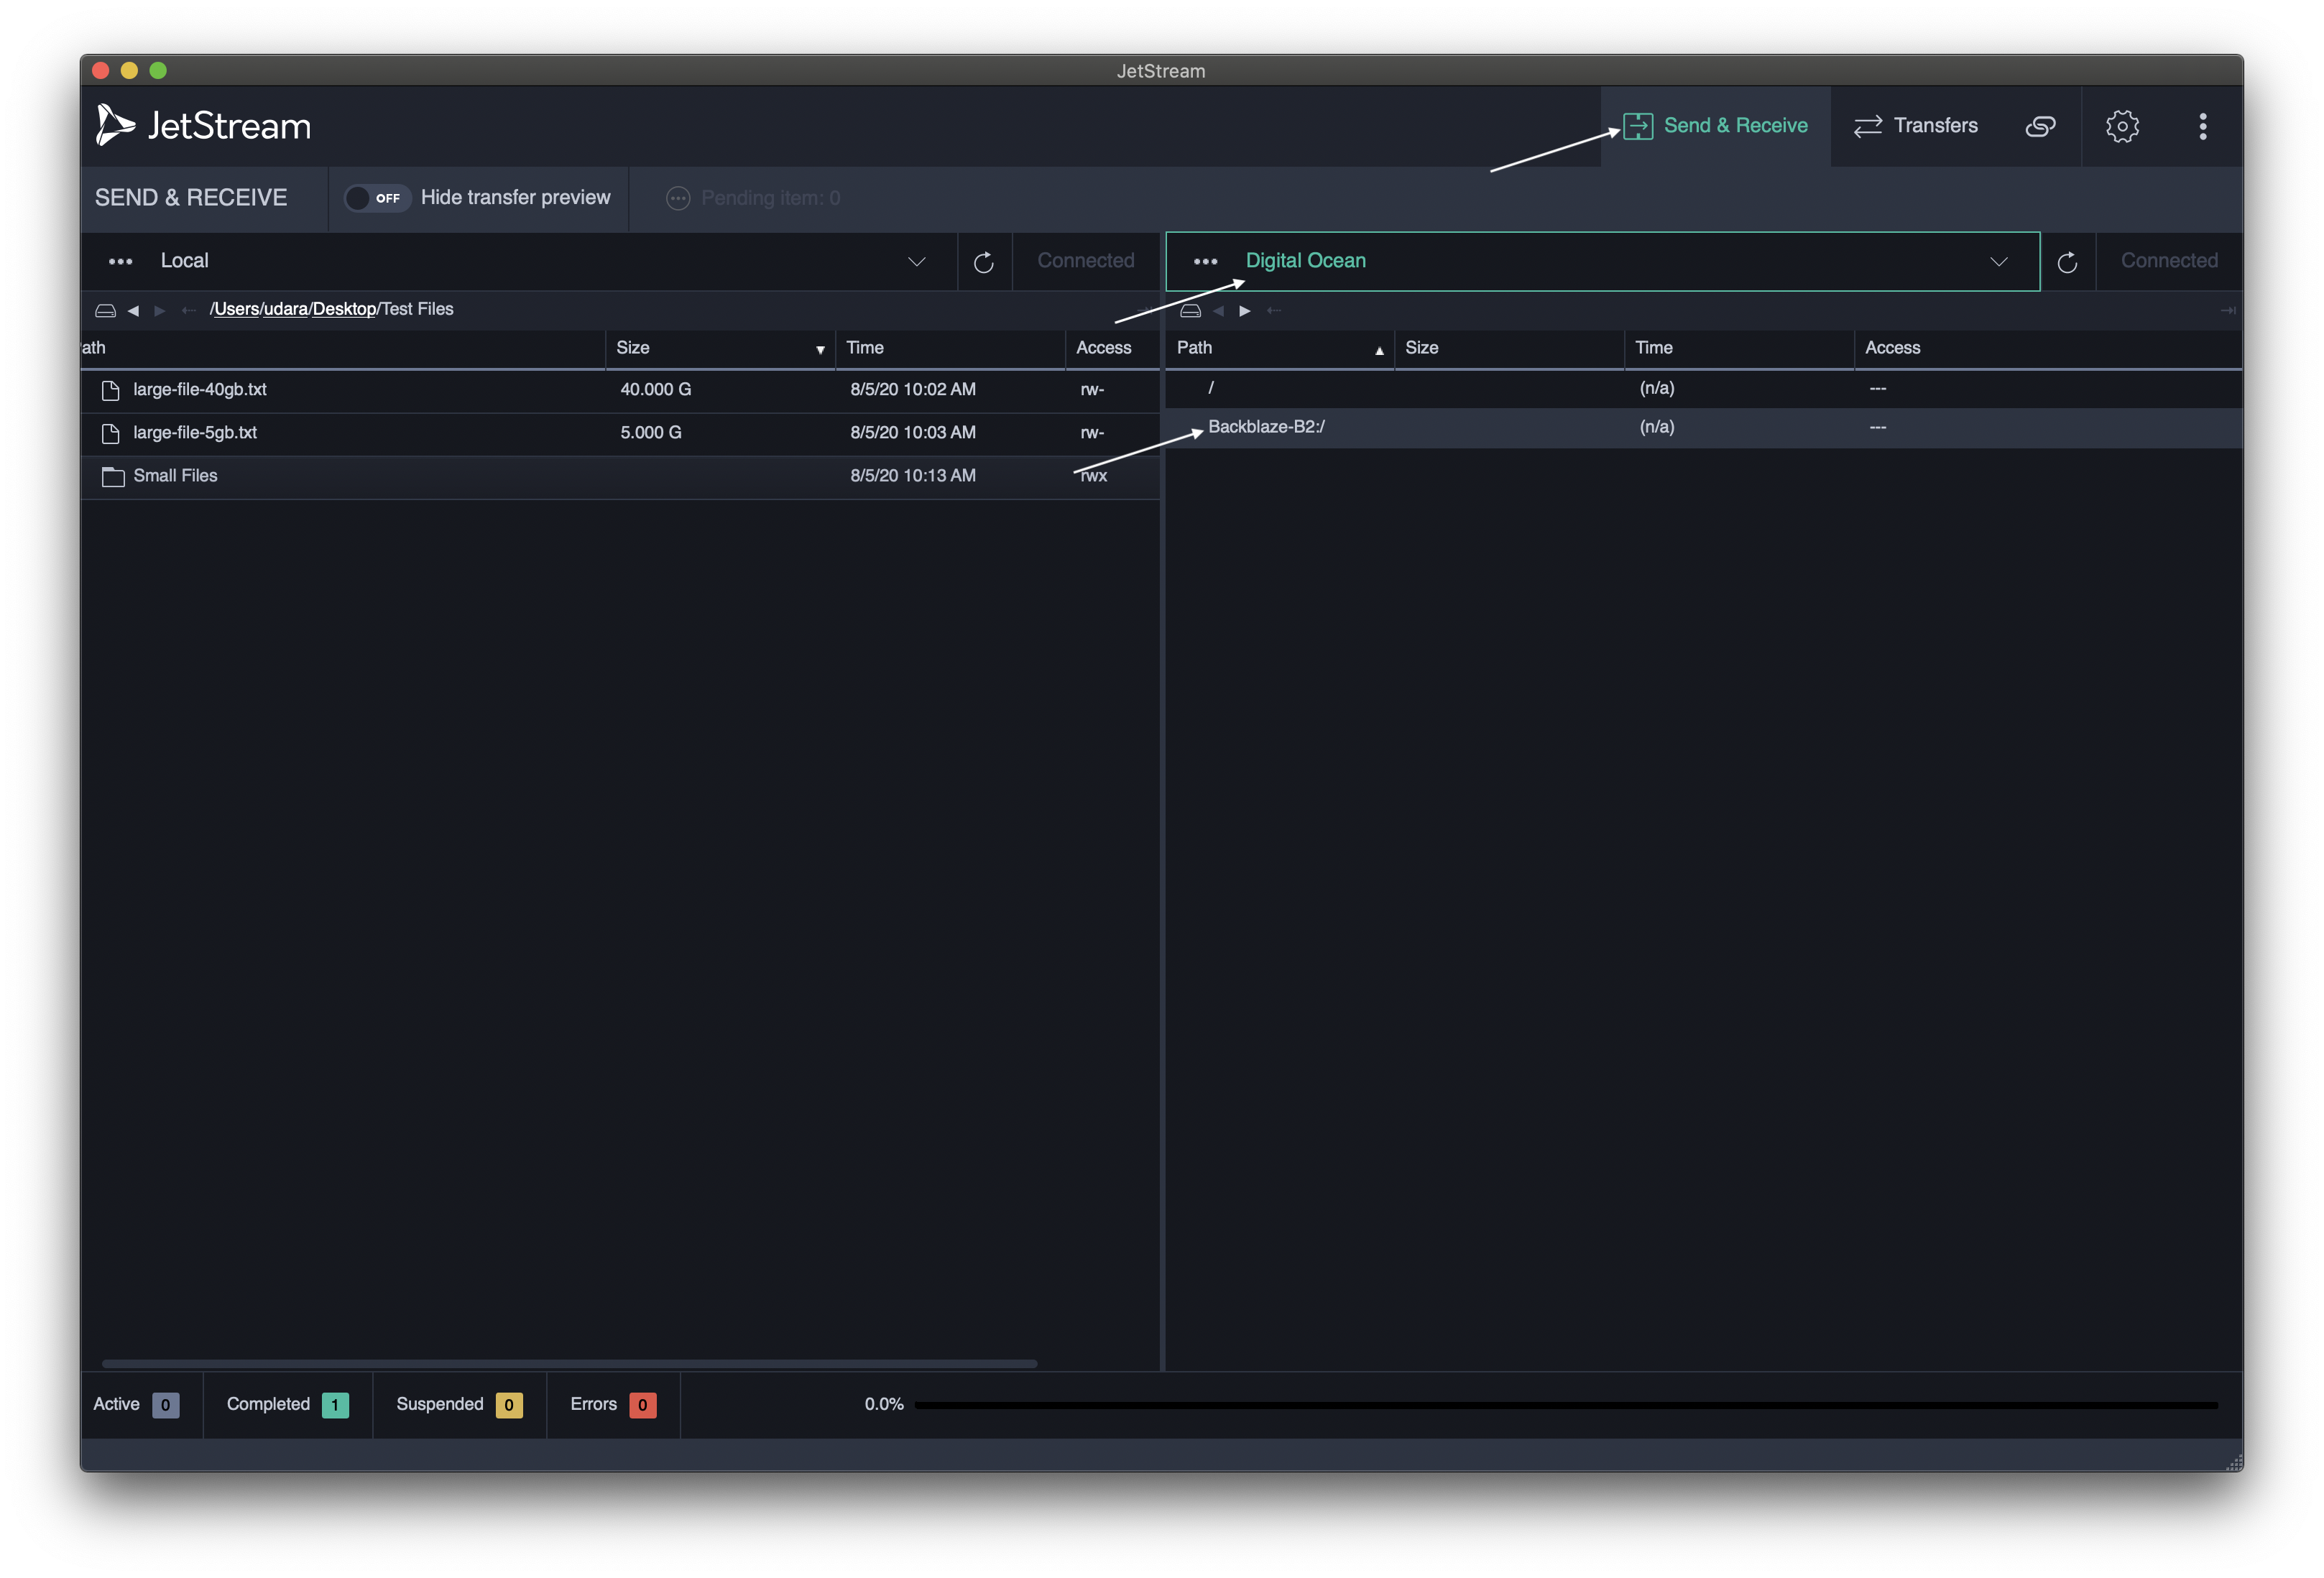
2. Drag and drop the files you'd like transferred from the left pane over into your sandbox located on the right pane. This will open a Transfer preview which will display an overview and allow you to change settings like copy modes.
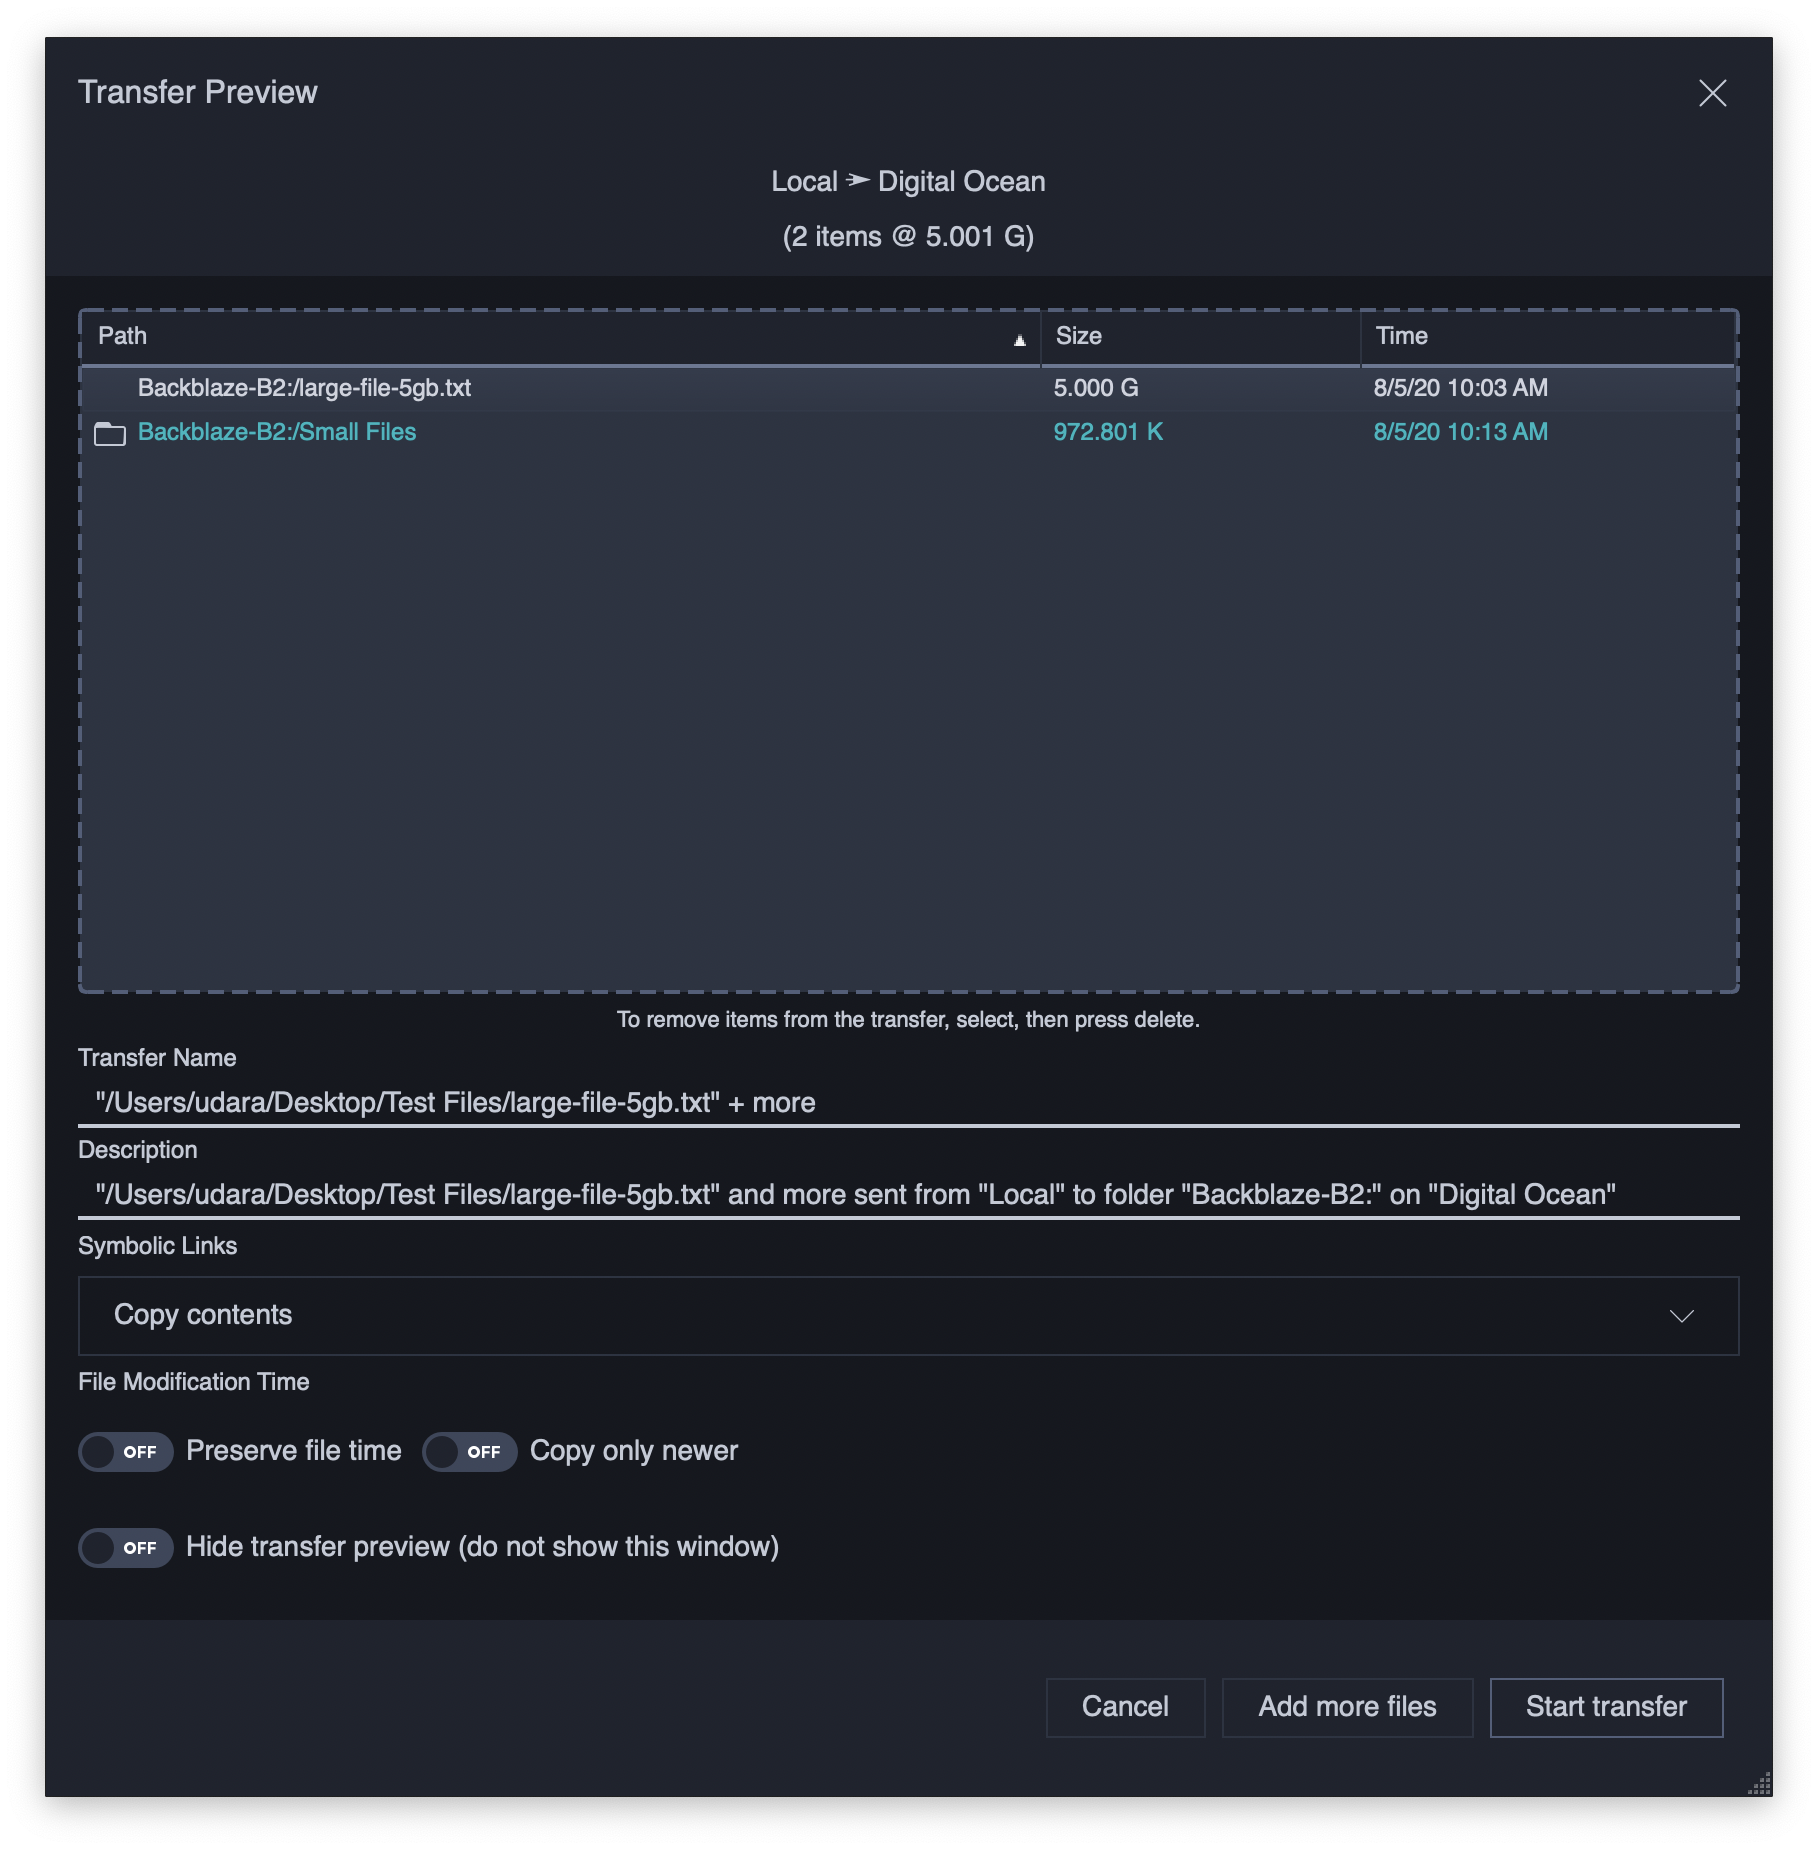
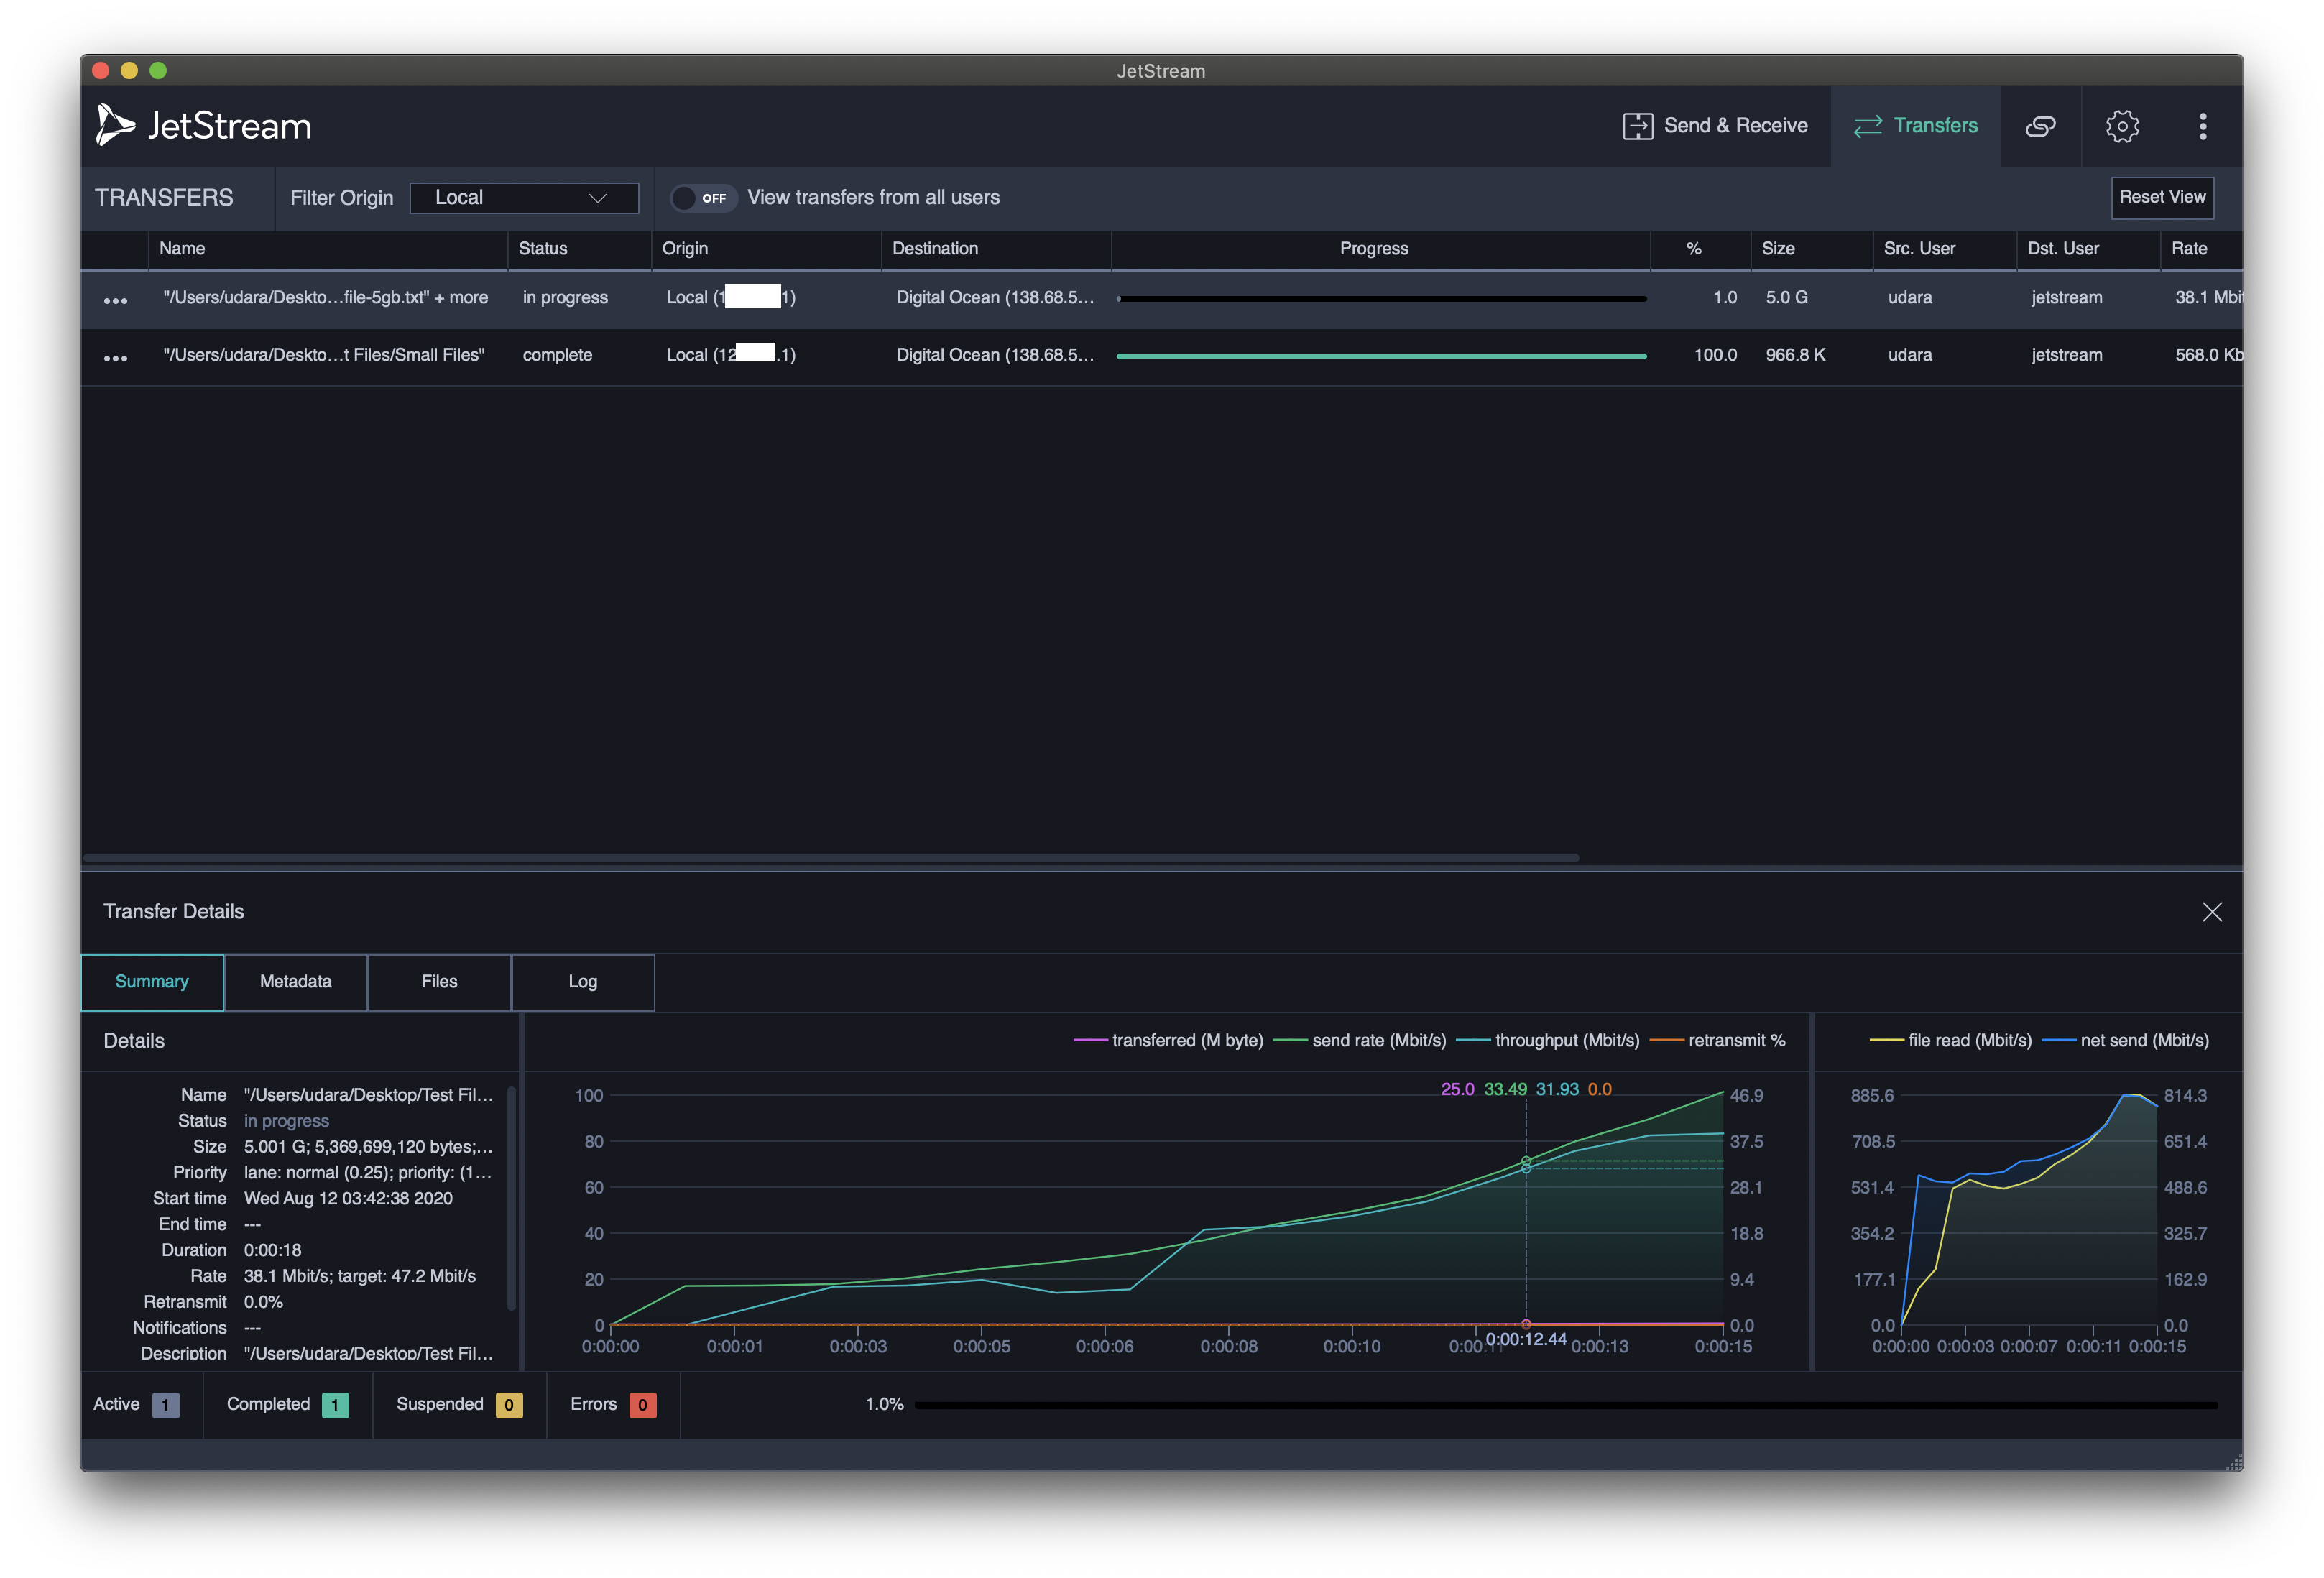
3. Press the "Start Transfer" button to begin! Congratulations you are now writing files directly to your B2 cloud storage. You can keep track of its progress by viewing the detailed analytics provided by JetStream.
Articles in this section
- Quickstart Guide for Veeam 12 Direct-to-Cloud Backups to Backblaze B2 with Immutability
- Quickstart Guide for Acronis CyberProtect and Backblaze B2 Cloud Storage
- Quickstart guide for SFTPCloud
- Quickstart Guide for Veritas NetBackup and Backblaze B2 Cloud Storage
- Quickstart Guide for Offshoot and Backblaze B2
- Quickstart Guide for Files.com and Backblaze B2 Cloud Storage
- Quickstart Guide for Encoding.com and Backblaze B2 Cloud Storage
- Quickstart Guide for Mountain Duck and B2 Cloud Storage
- Quickstart Guide for Microsoft 365 Backup with MSP360 and Backblaze B2 (Multiple Instances)
- Quickstart Guide for Microsoft 365 Backup with MSP360 and Backblaze B2 (Single Instance)