Introduction
LucidLink allows users to access the cloud into local storage, and stream data directly from the cloud without the need to download or synchronize.
LucidLink can be configured with B2 by following the steps below.
Note: The LucidLink client should be downloaded and installed prior to following these steps.
Guide
Step 1:
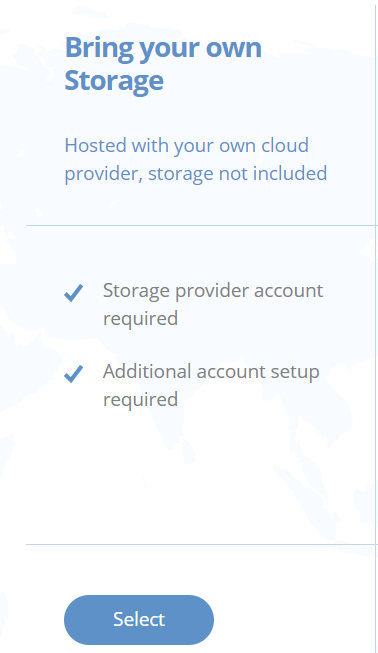
Login to your LucidLink account, and click on “Create a new filespace” and then select “Bring your own Storage”.

Step 2:
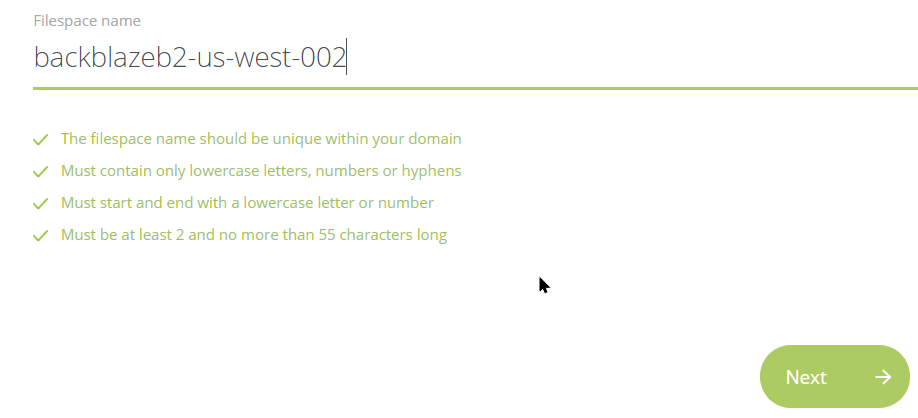
Enter a filespace name of your choice, then click Next.
Step 3 :
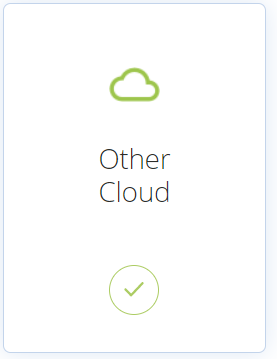
Click on Other Cloud.
Step 4:
Enter the S3 Endpoint and region, then click Next.

Step 5:
On the Summary page, click “Create”, and then click “Initialize”.
On the following page click “Launch the desktop client” to continue the configuration.
Note: If you haven’t installed your desktop client yet, please do that first.
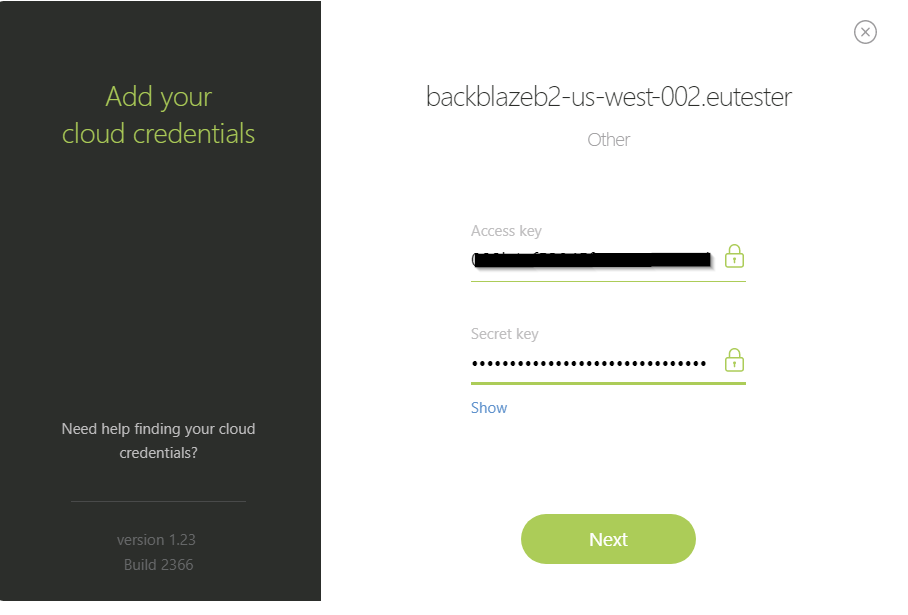
Step 6:
Type and enter the Key ID, and Application Key into the appropriate fields.
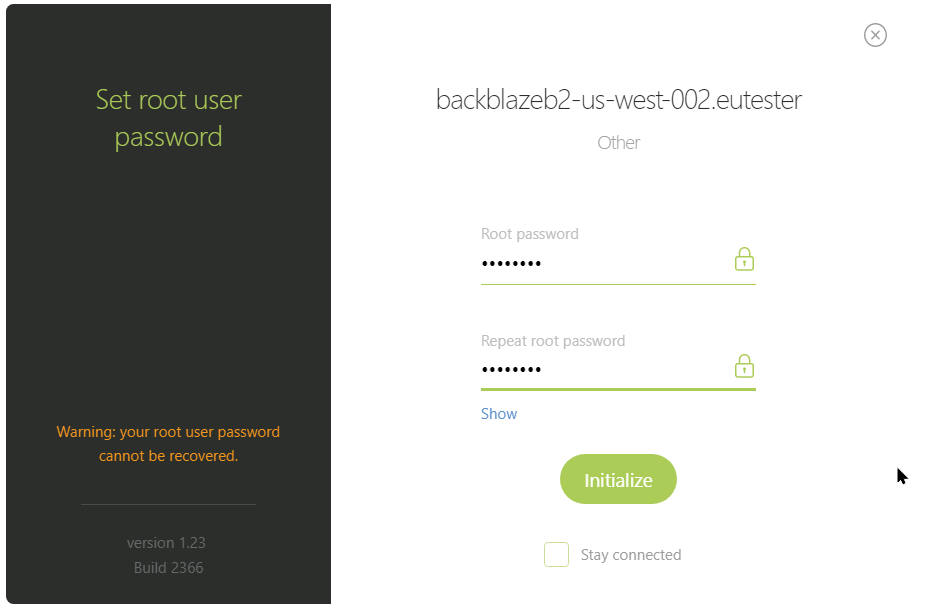
Step 7:
Enter the root password for this filespace, store it in your password vault, then click Initialize.
Note: The root password cannot be recovered.
The S3 Compatible API for Backblaze B2 Cloud Storage allows 1000’s of integrations to work with B2 natively. If you’re new to the S3 Compatible API, please see our Getting Started Guide. If you have any trouble using LucidLink with B2, please let us know by emailing us at b2feedback@backblaze.com.
Articles in this section
- Quickstart Guide for Veeam 12 Direct-to-Cloud Backups to Backblaze B2 with Immutability
- Quickstart Guide for Acronis CyberProtect and Backblaze B2 Cloud Storage
- Quickstart guide for SFTPCloud
- Quickstart Guide for Veritas NetBackup and Backblaze B2 Cloud Storage
- Quickstart Guide for Offshoot and Backblaze B2
- Quickstart Guide for Files.com and Backblaze B2 Cloud Storage
- Quickstart Guide for Encoding.com and Backblaze B2 Cloud Storage
- Quickstart Guide for Mountain Duck and B2 Cloud Storage
- Quickstart Guide for Microsoft 365 Backup with MSP360 and Backblaze B2 (Multiple Instances)
- Quickstart Guide for Microsoft 365 Backup with MSP360 and Backblaze B2 (Single Instance)