Installing SyncBackPro
Note: As of April 9th, 2021, SyncBackPro users will need to be on at least Version 9.5.10 to use Backblaze B2. This version is available here.
SyncBackPro is a third-party integration that supports B2 Cloud Storage and has been tested by Backblaze.
You can download SyncBackPro from their webpage here: https://www.2brightsparks.com/download-syncbackpro.html
Pick the 32-bit or 64-bit version and download the installer.

Once the download is finished, run the installer program to complete the installation.
Choosing B2 Buckets and Application Keys
You need to choose which B2 Bucket and Application Keys to use with SyncBackPro.
To create a new Bucket, login to your Backblaze account, https://www.backblaze.com.
Under the “B2 Cloud Storage Menu”, click “Buckets” and then select “Create a Bucket”.
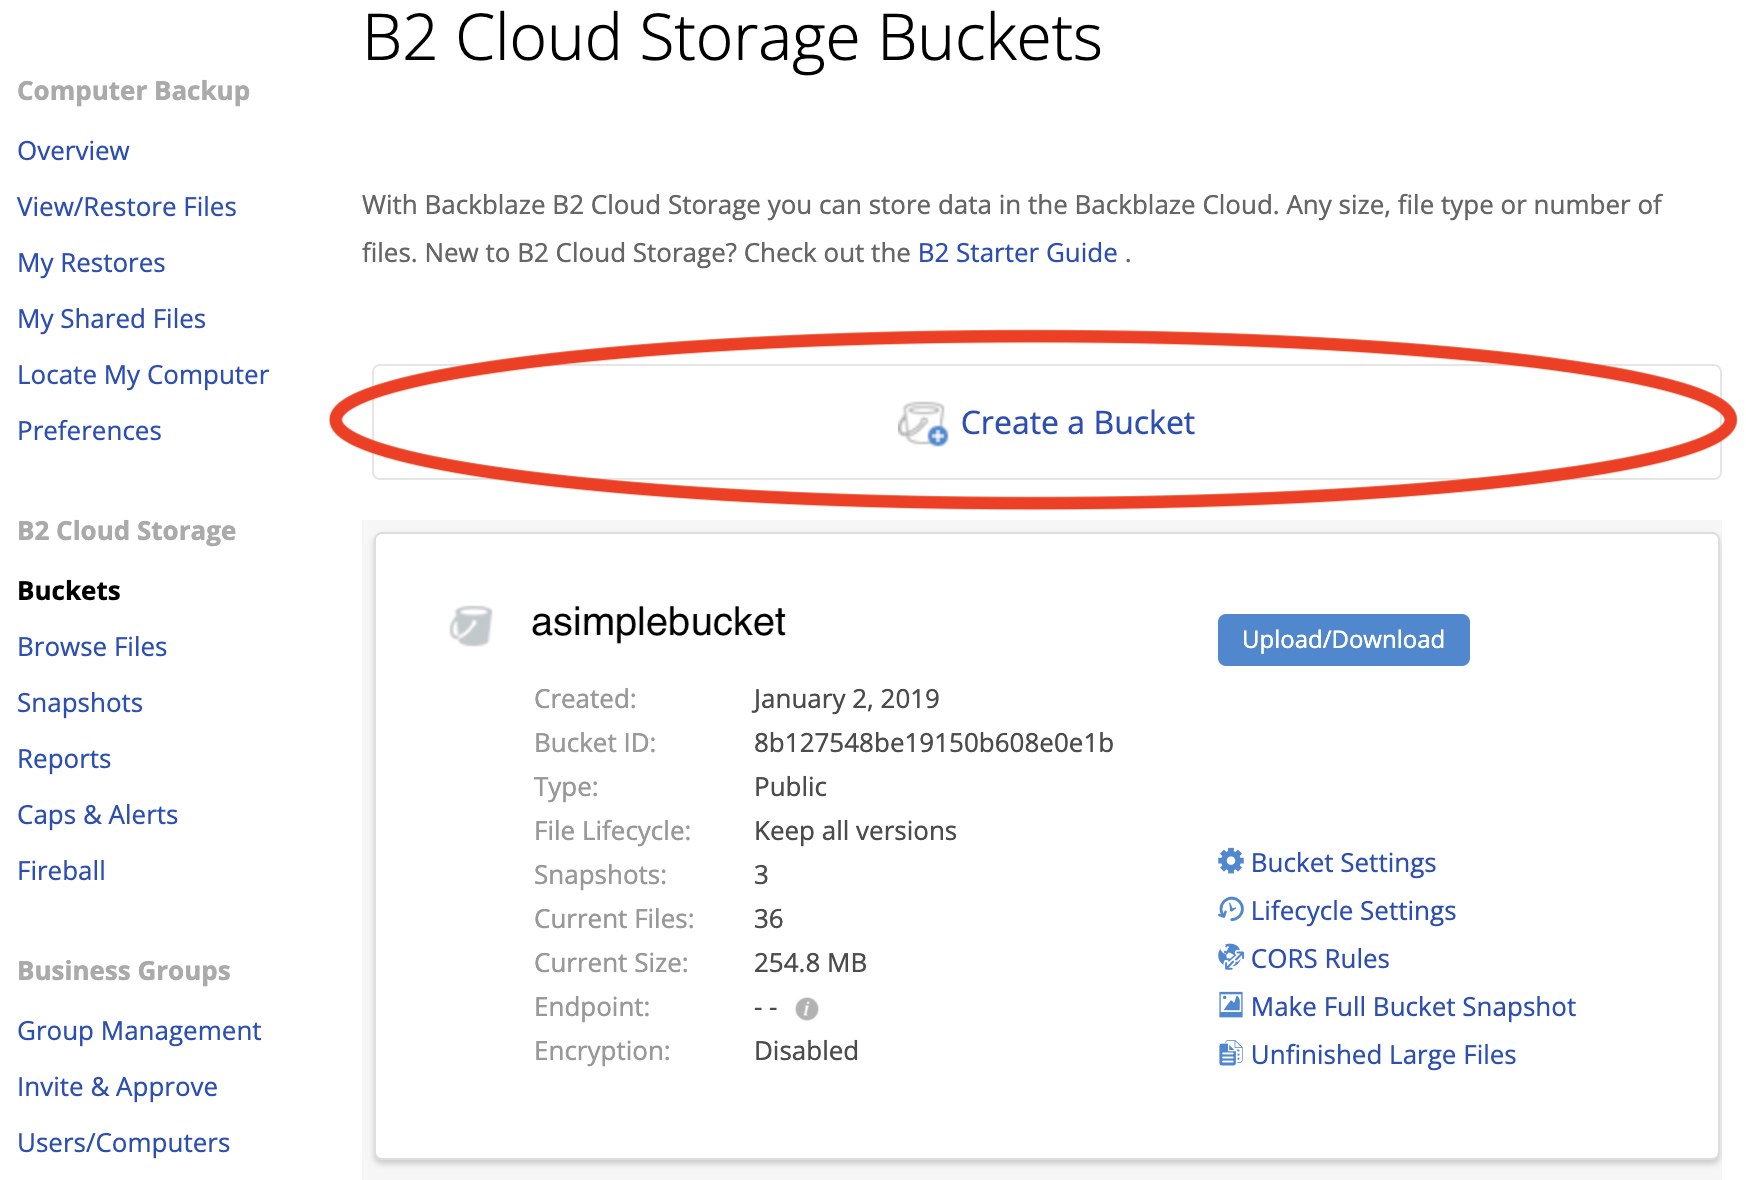
Give the bucket a name (ex. SyncBackPro021420) and click “Create a Bucket”. Remember the name of the Bucket must be globally unique, not just unique within your account.
.
 .
.
To create a new Application Key, click on App Keys under the B2 Cloud Storage menu and select “Add a New Application Key”.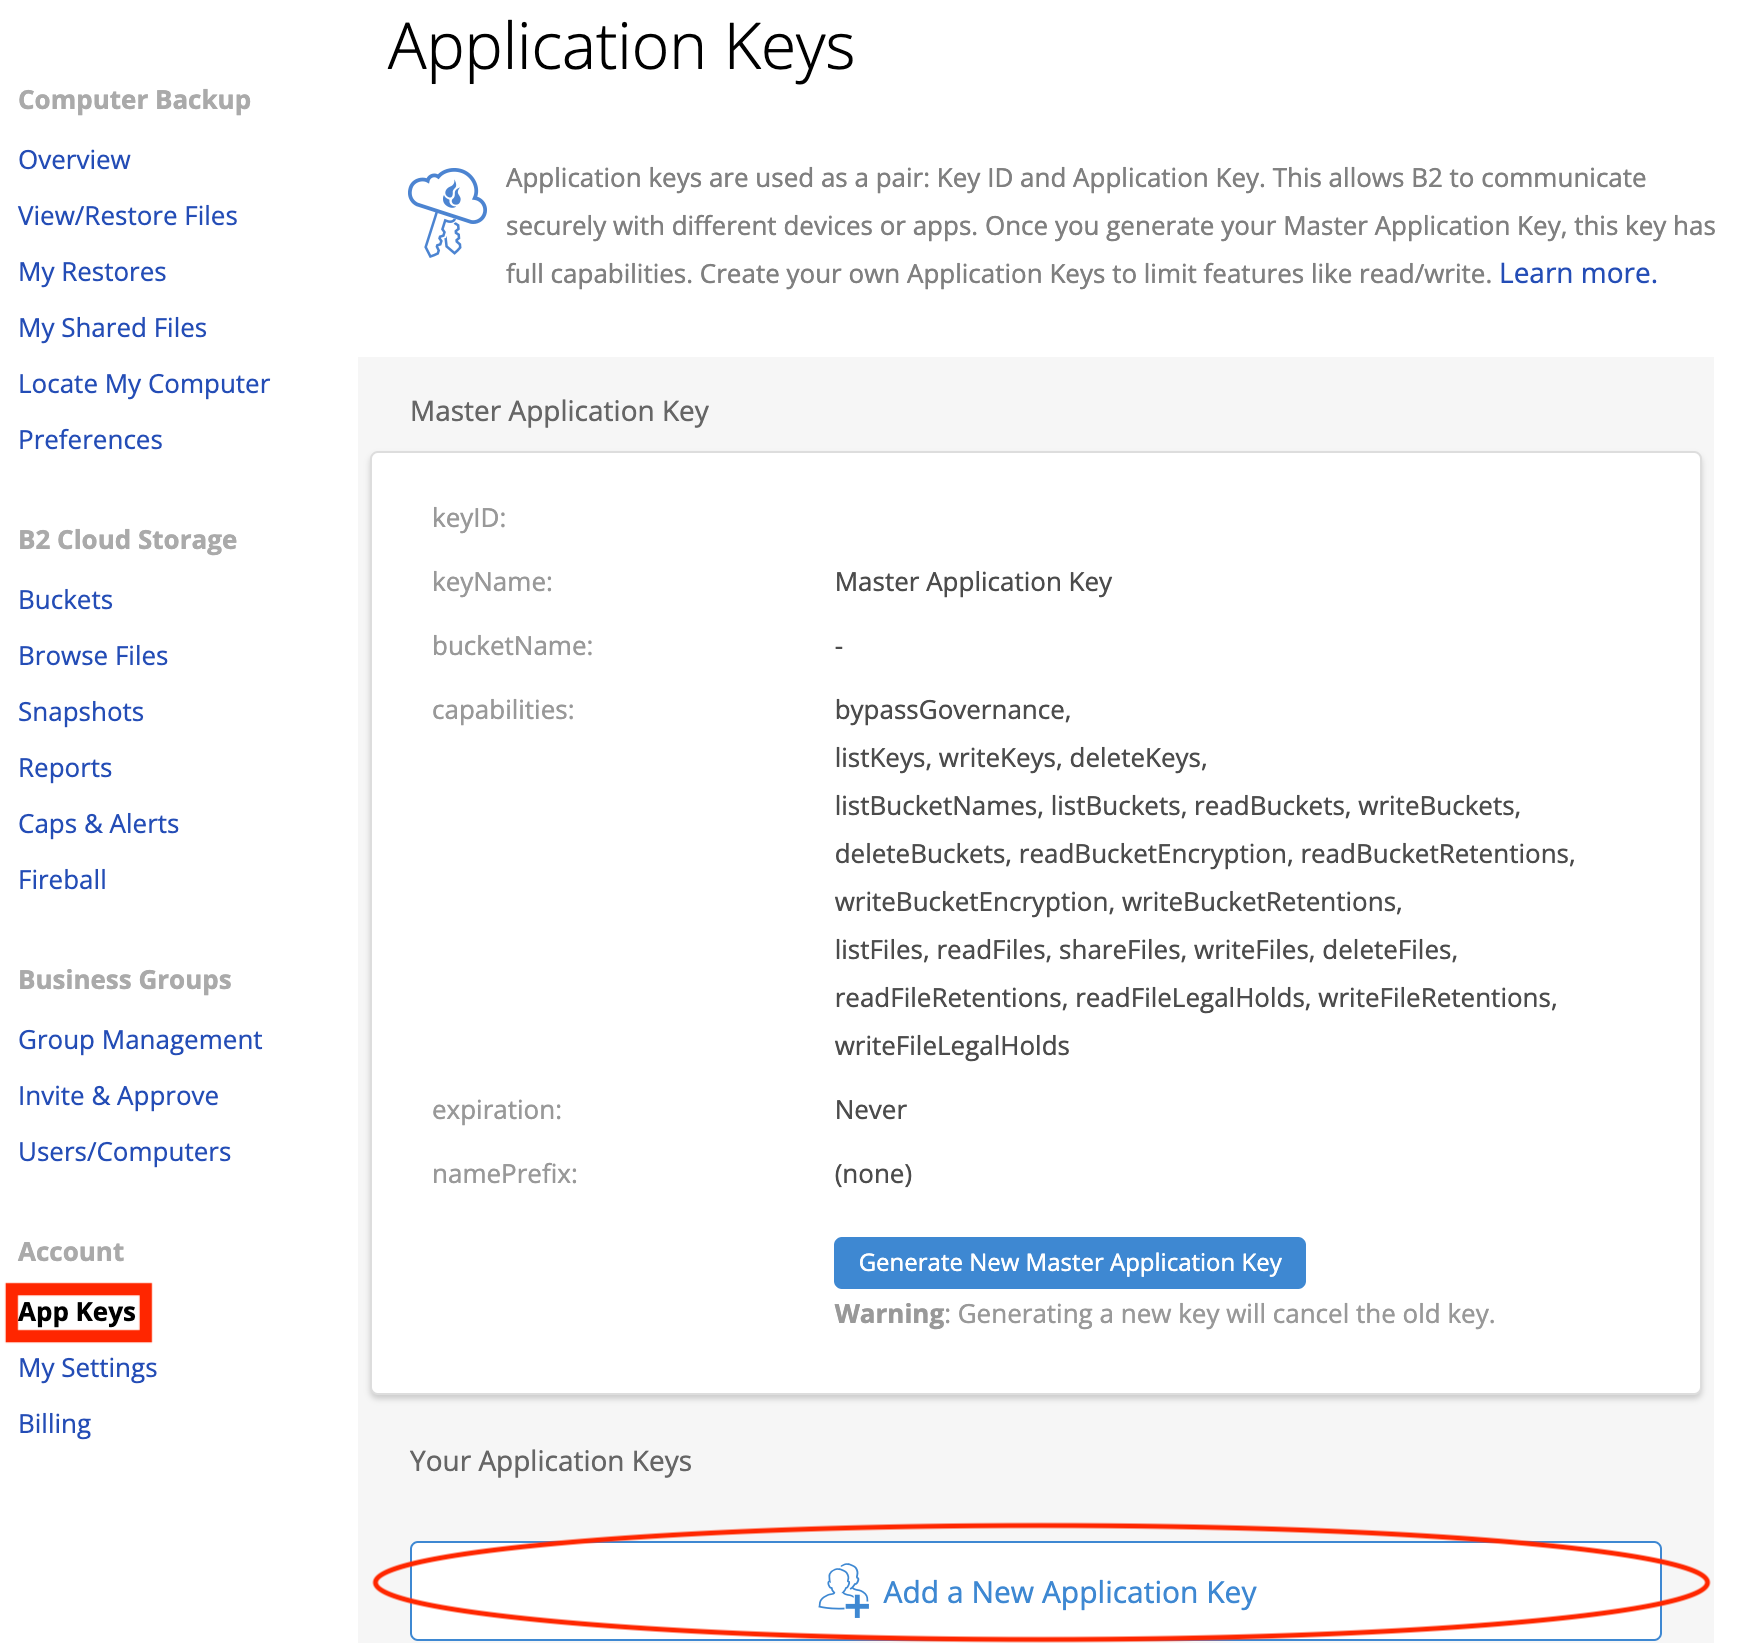
Enter the name of the key. Select if the key has access to all buckets, or only to the one you created, by selecting it from the drop-down list. Click “Create New Key”

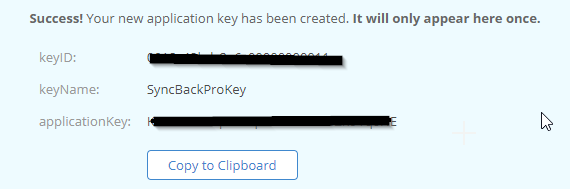
Your new KeyID and ApplicationKey will be shown only once, so make sure you copy it to a secure location.
Setup and Configure SyncBackPro to use B2 on Windows
Below are the steps for configuring and optimizing SyncBackPro
In the bottom right corner, click on New to create a new Profile

Enter a descriptive name for the profile, and then click Next.

Then select the type of profile this will be. In our example, we will pick Sync. Click Next.

On the left side, you pick the type of source files to Sycnchronize. Since we will be synchronizing local files to B2 in this example, we will leave at the default setting.
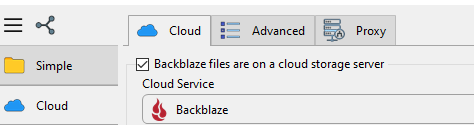
On the right side we select our destination, which will be Backblaze.

Enter the Application keys into SyncBackPro
Enter the KeyID and the ApplicationKey in the fields, and then click the Refresh button to see the list of available buckets.
Select the bucket you want your files to be synchronized to, and click Done.

Then click OK when prompted, and the new Profile you just created will open up in a new Window for final configuration before you start synchronizing your files.
Now we can fine tune the settings on this Profile

Next pick the source folder to back up from by clicking on the Left Folder option in the top menu, as seen here, and select the type of source folder to be used. It can be a local folder or another cloud location.

Under the Backblaze folder option, SyncBackPro will copy the source files to the root directory of the bucket. Since it is a new bucket, it doesn’t have any subfolders underneath it to select, so we will leave it at its default setting.
To start your Synchronization profile accepting the default settings, click OK
Next you will be prompted if you want to “Turn off automatic creation of base folders?”. Click OK to accept the recommended setting.
Then you will be asked if you want to do a Simulated Run. This will show you all the files in the source and destination folders, and the actions it will take during synchronization. For the first time running, the only action you should see listed is “Copy to Backblaze”. Review the summary and then click “Continue Simulation”.
Finally, you can run your new synchronization profile to start copying files to your B2 bucket.
Optional Settings for Increased Reliability and High Bandwidth Internet Connections
Click on the name of your profile to highlight it, and then click on the Modify button in the bottom toolbar. 
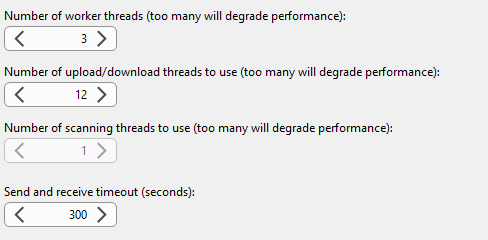
Then select “Cloud” in the left navigation bar, and then click on the Advanced tab.
Increasing upload/download threads will increase your transfer speed, and 8-12 is a good range to try, especially if you have high-speed disks. Increasing the timeout to 300 helps recovery from any momentary periods of high latency that can occur during transfers over the internet.
To automate the synchronization job, click on the “When” in the left-hand navigation bar.

You can configure the job to run automatically using a variety of options to meet your business requirements.

Articles in this section
- Quickstart Guide for Veeam 12 Direct-to-Cloud Backups to Backblaze B2 with Immutability
- Quickstart Guide for Acronis CyberProtect and Backblaze B2 Cloud Storage
- Quickstart guide for SFTPCloud
- Quickstart Guide for Veritas NetBackup and Backblaze B2 Cloud Storage
- Quickstart Guide for Offshoot and Backblaze B2
- Quickstart Guide for Files.com and Backblaze B2 Cloud Storage
- Quickstart Guide for Encoding.com and Backblaze B2 Cloud Storage
- Quickstart Guide for Mountain Duck and B2 Cloud Storage
- Quickstart Guide for Microsoft 365 Backup with MSP360 and Backblaze B2 (Multiple Instances)
- Quickstart Guide for Microsoft 365 Backup with MSP360 and Backblaze B2 (Single Instance)