
Introduction
Welcome to the Backblaze guide for qBackup! qBackup is a fast and lightweight backup application compatible with Mac, Windows, and Linux. With Backblaze B2 and qBackup, you can set up projects that allow you to run backups of your data in an effort to secure them offsite. The following guide explains how to set up qBackup on your computer.
Setup Your Backblaze B2 Account & Bucket
If you haven’t created your account with Backblaze already, create an account here
1. Select "Buckets" on the side menu listed under "B2 Cloud Storage"
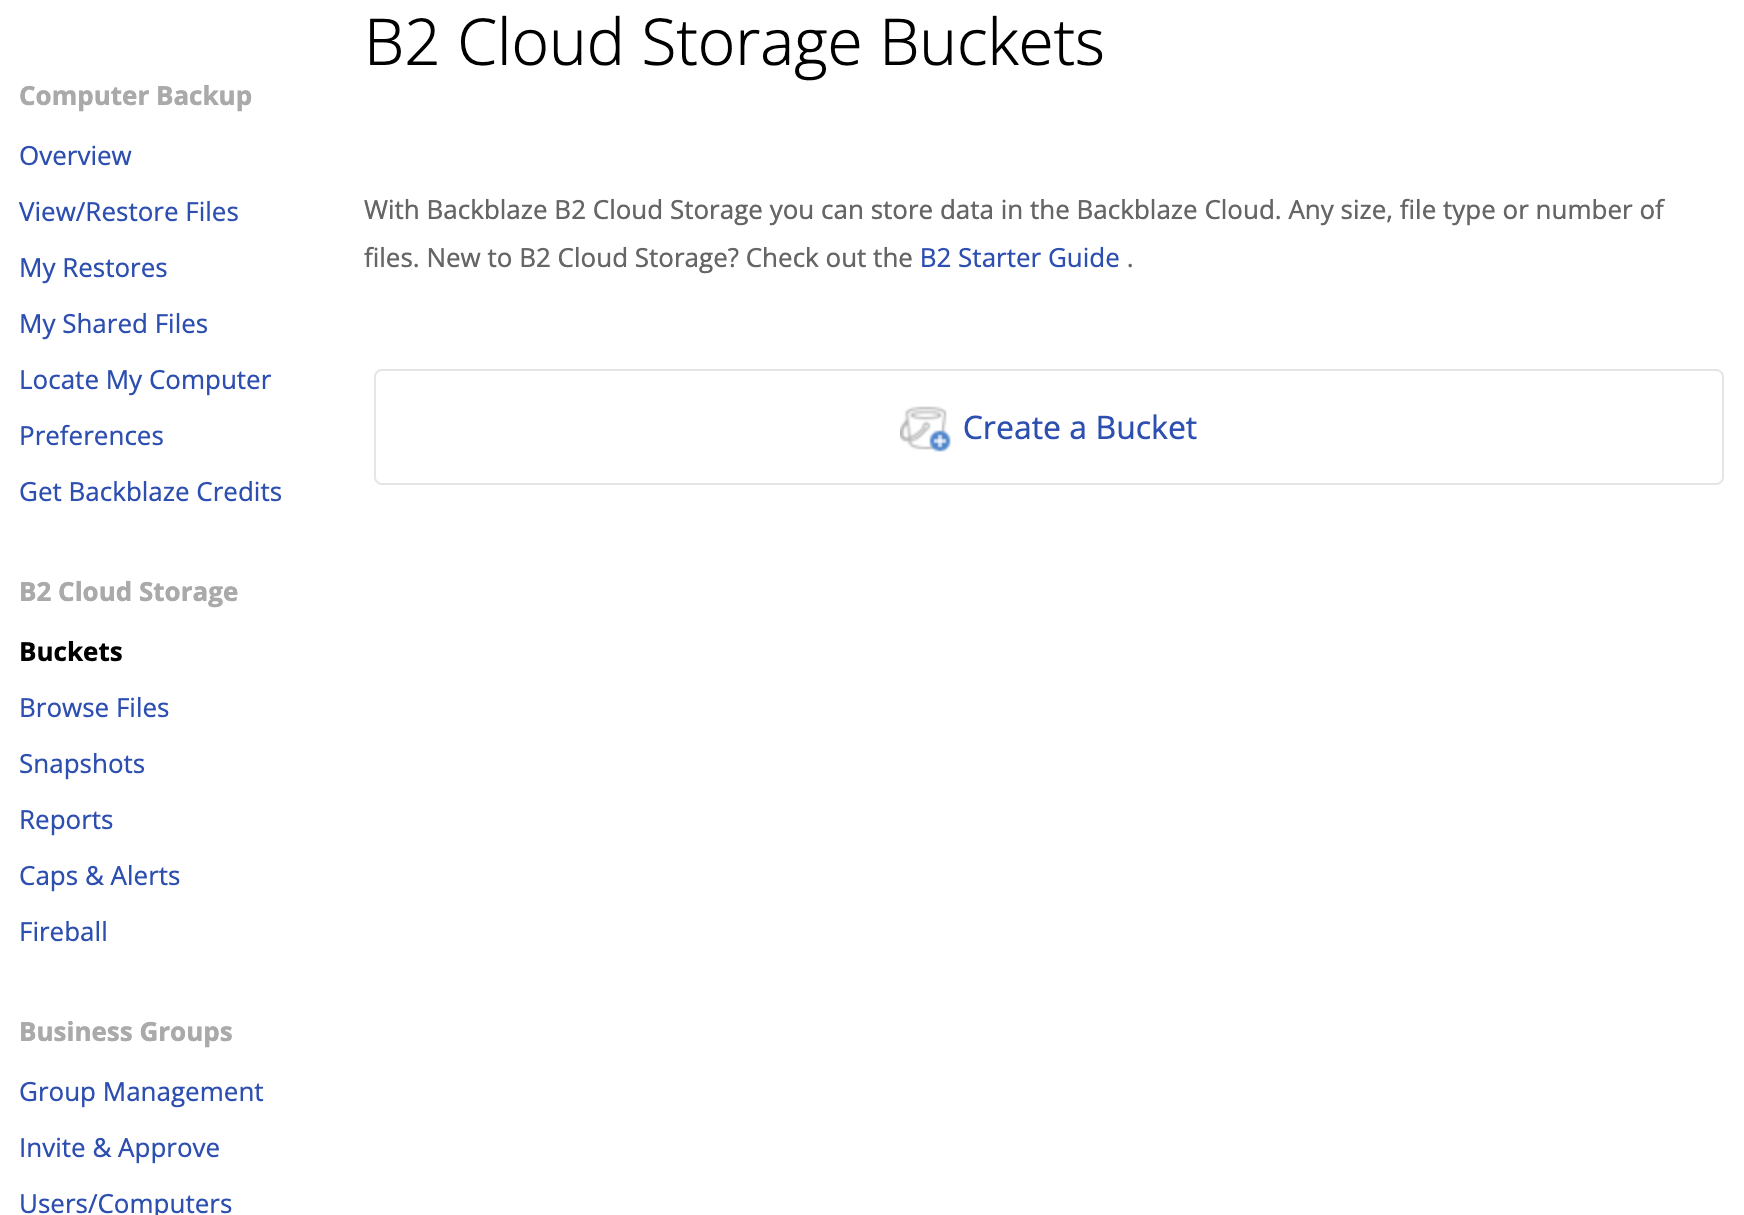
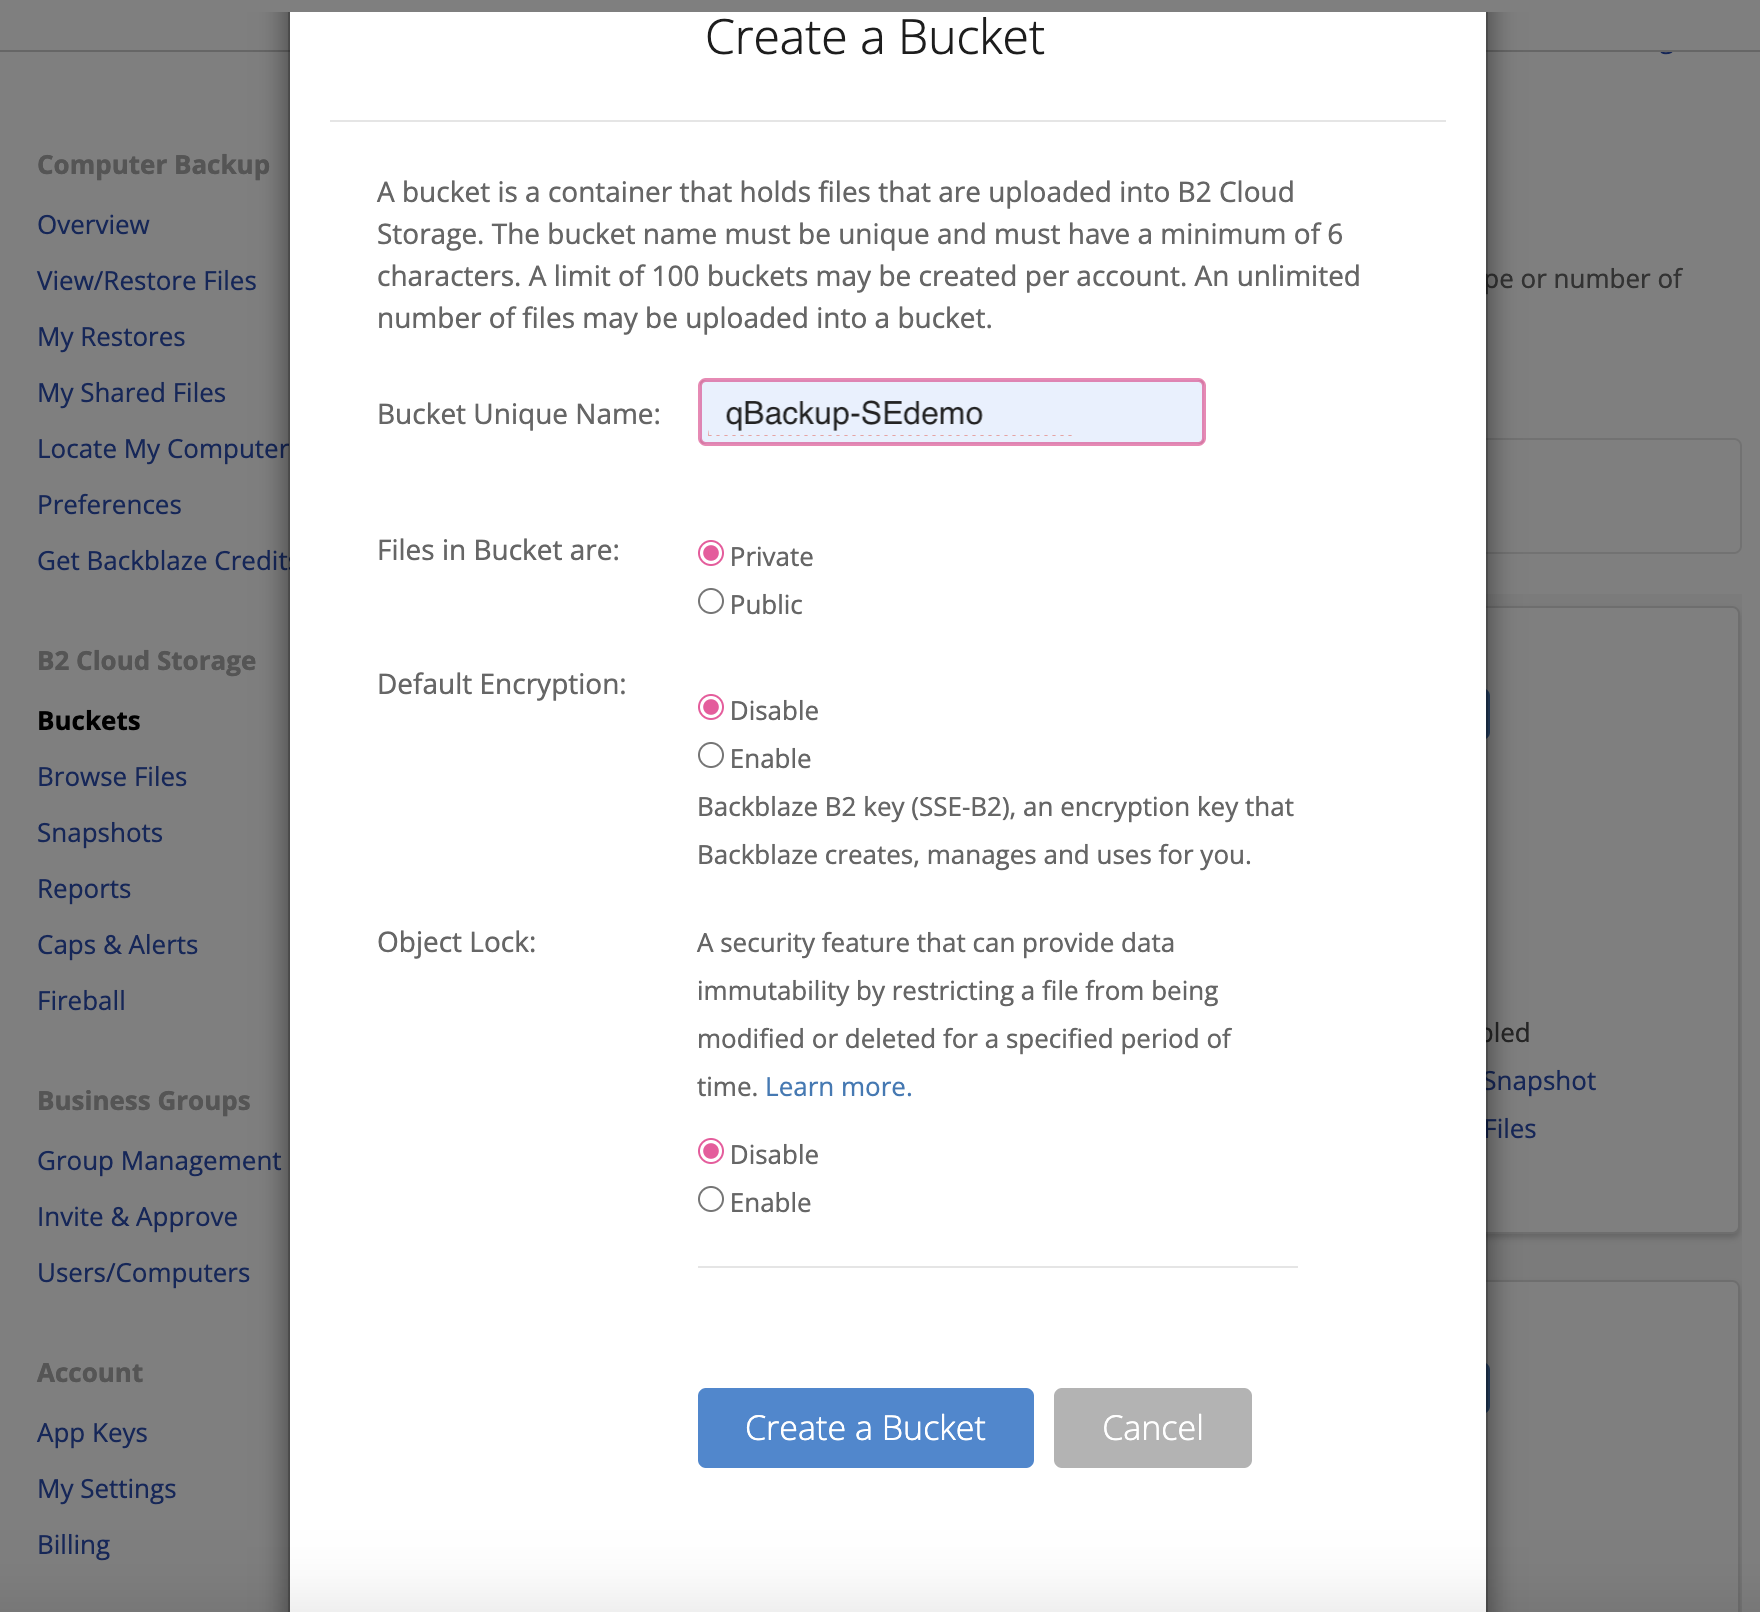
2. Create a Bucket for your qBackup backups.
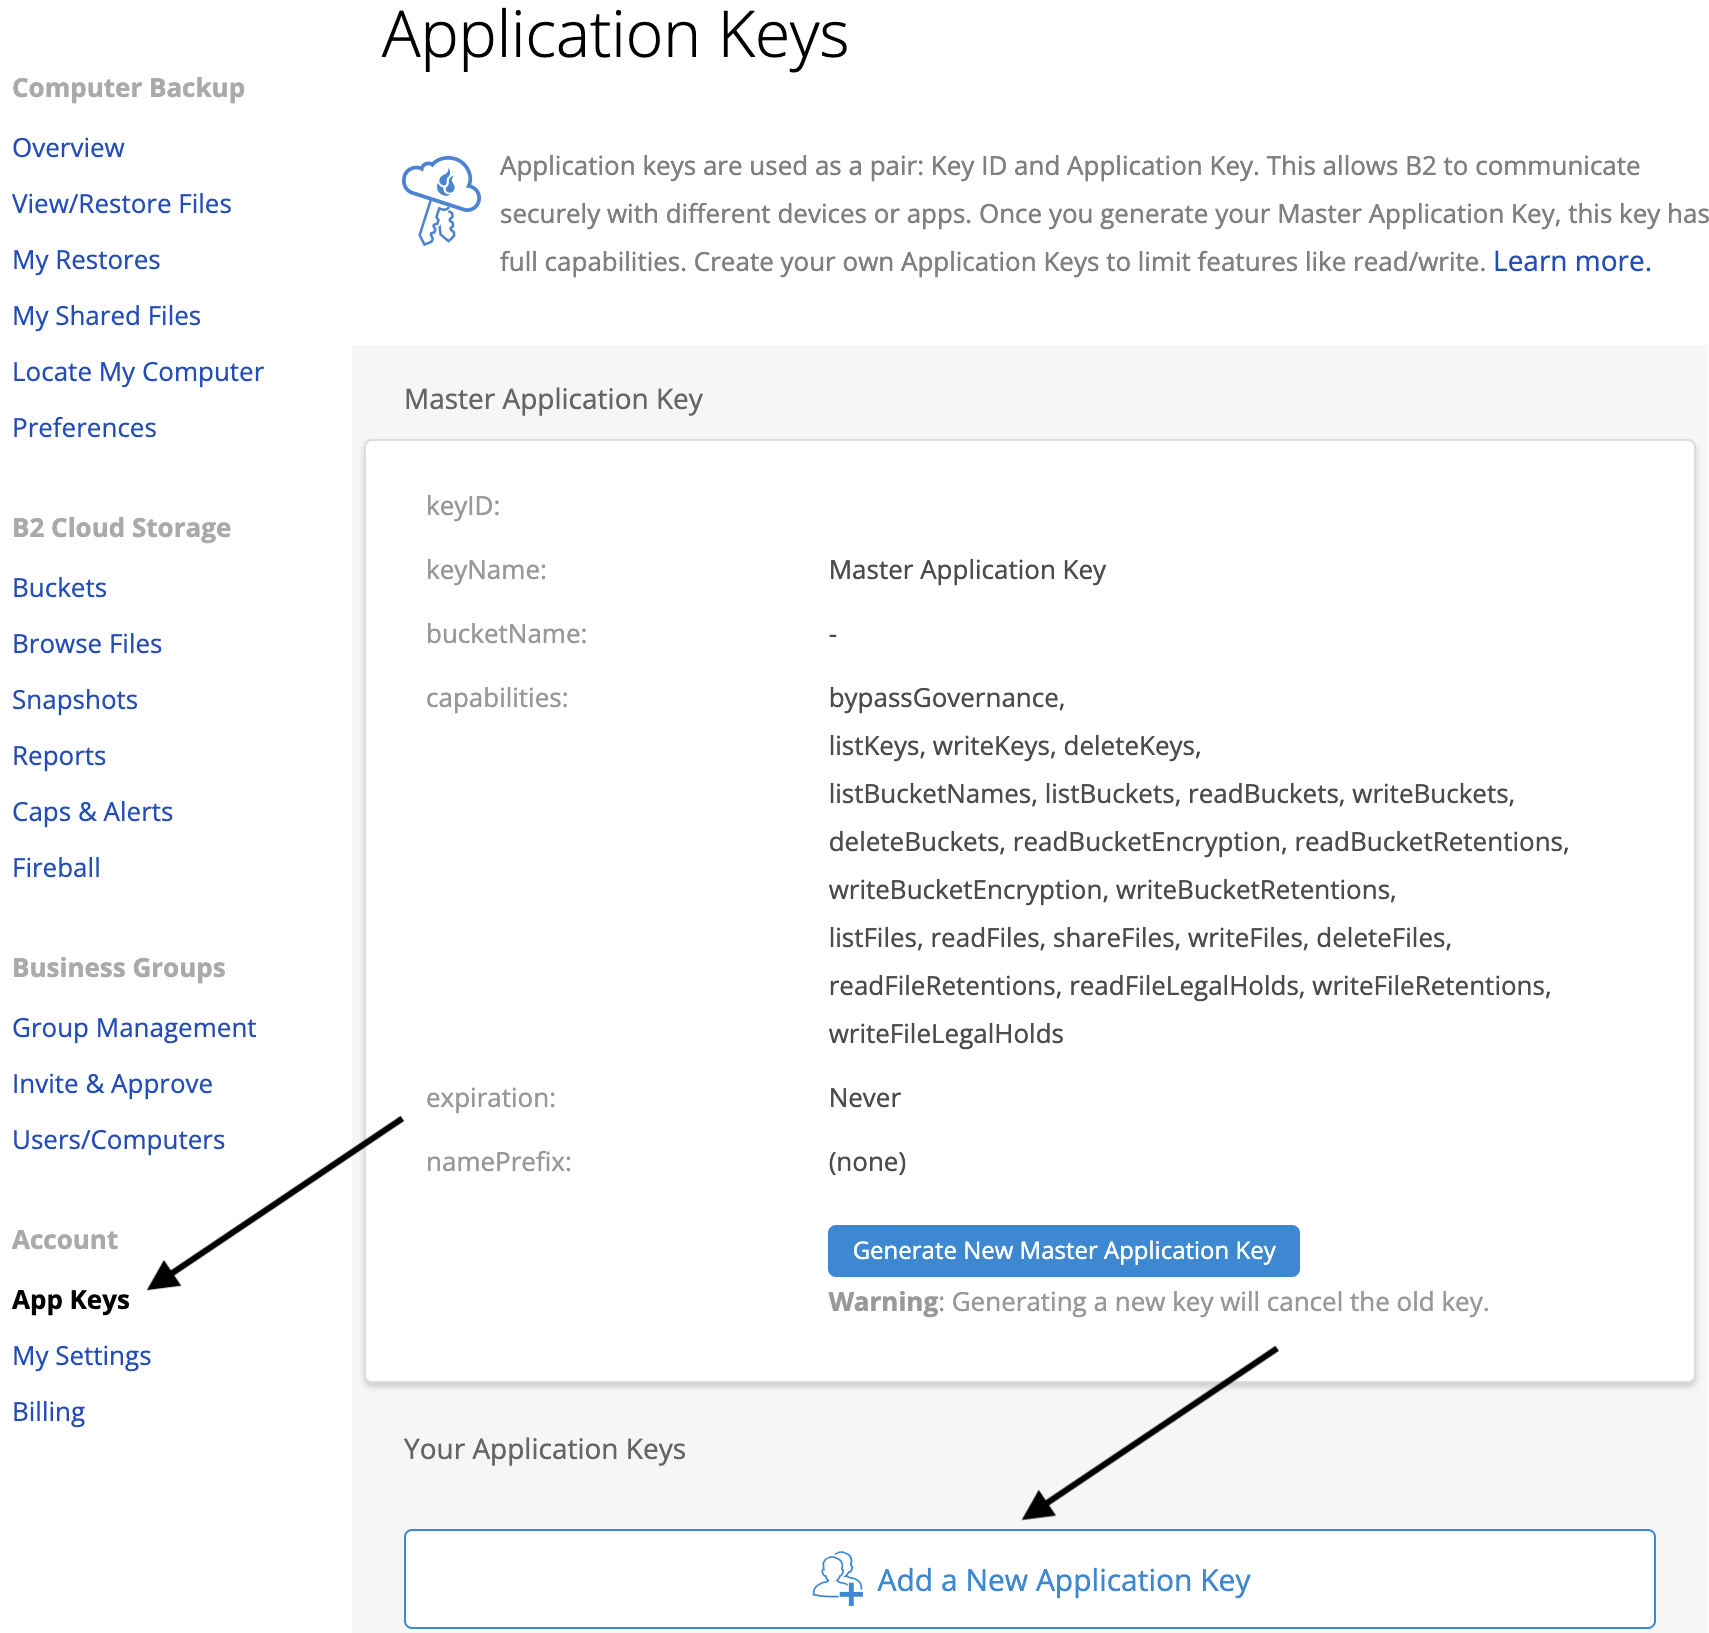
3. You can now retrieve your Application Key and Key ID. You will need these to setup B2 within qBackup. Click on App Keys and then click on the link that reads 'Add A New Application Key’.
4. You can then enter a Name for the key and click on the button that says "Create New Key".
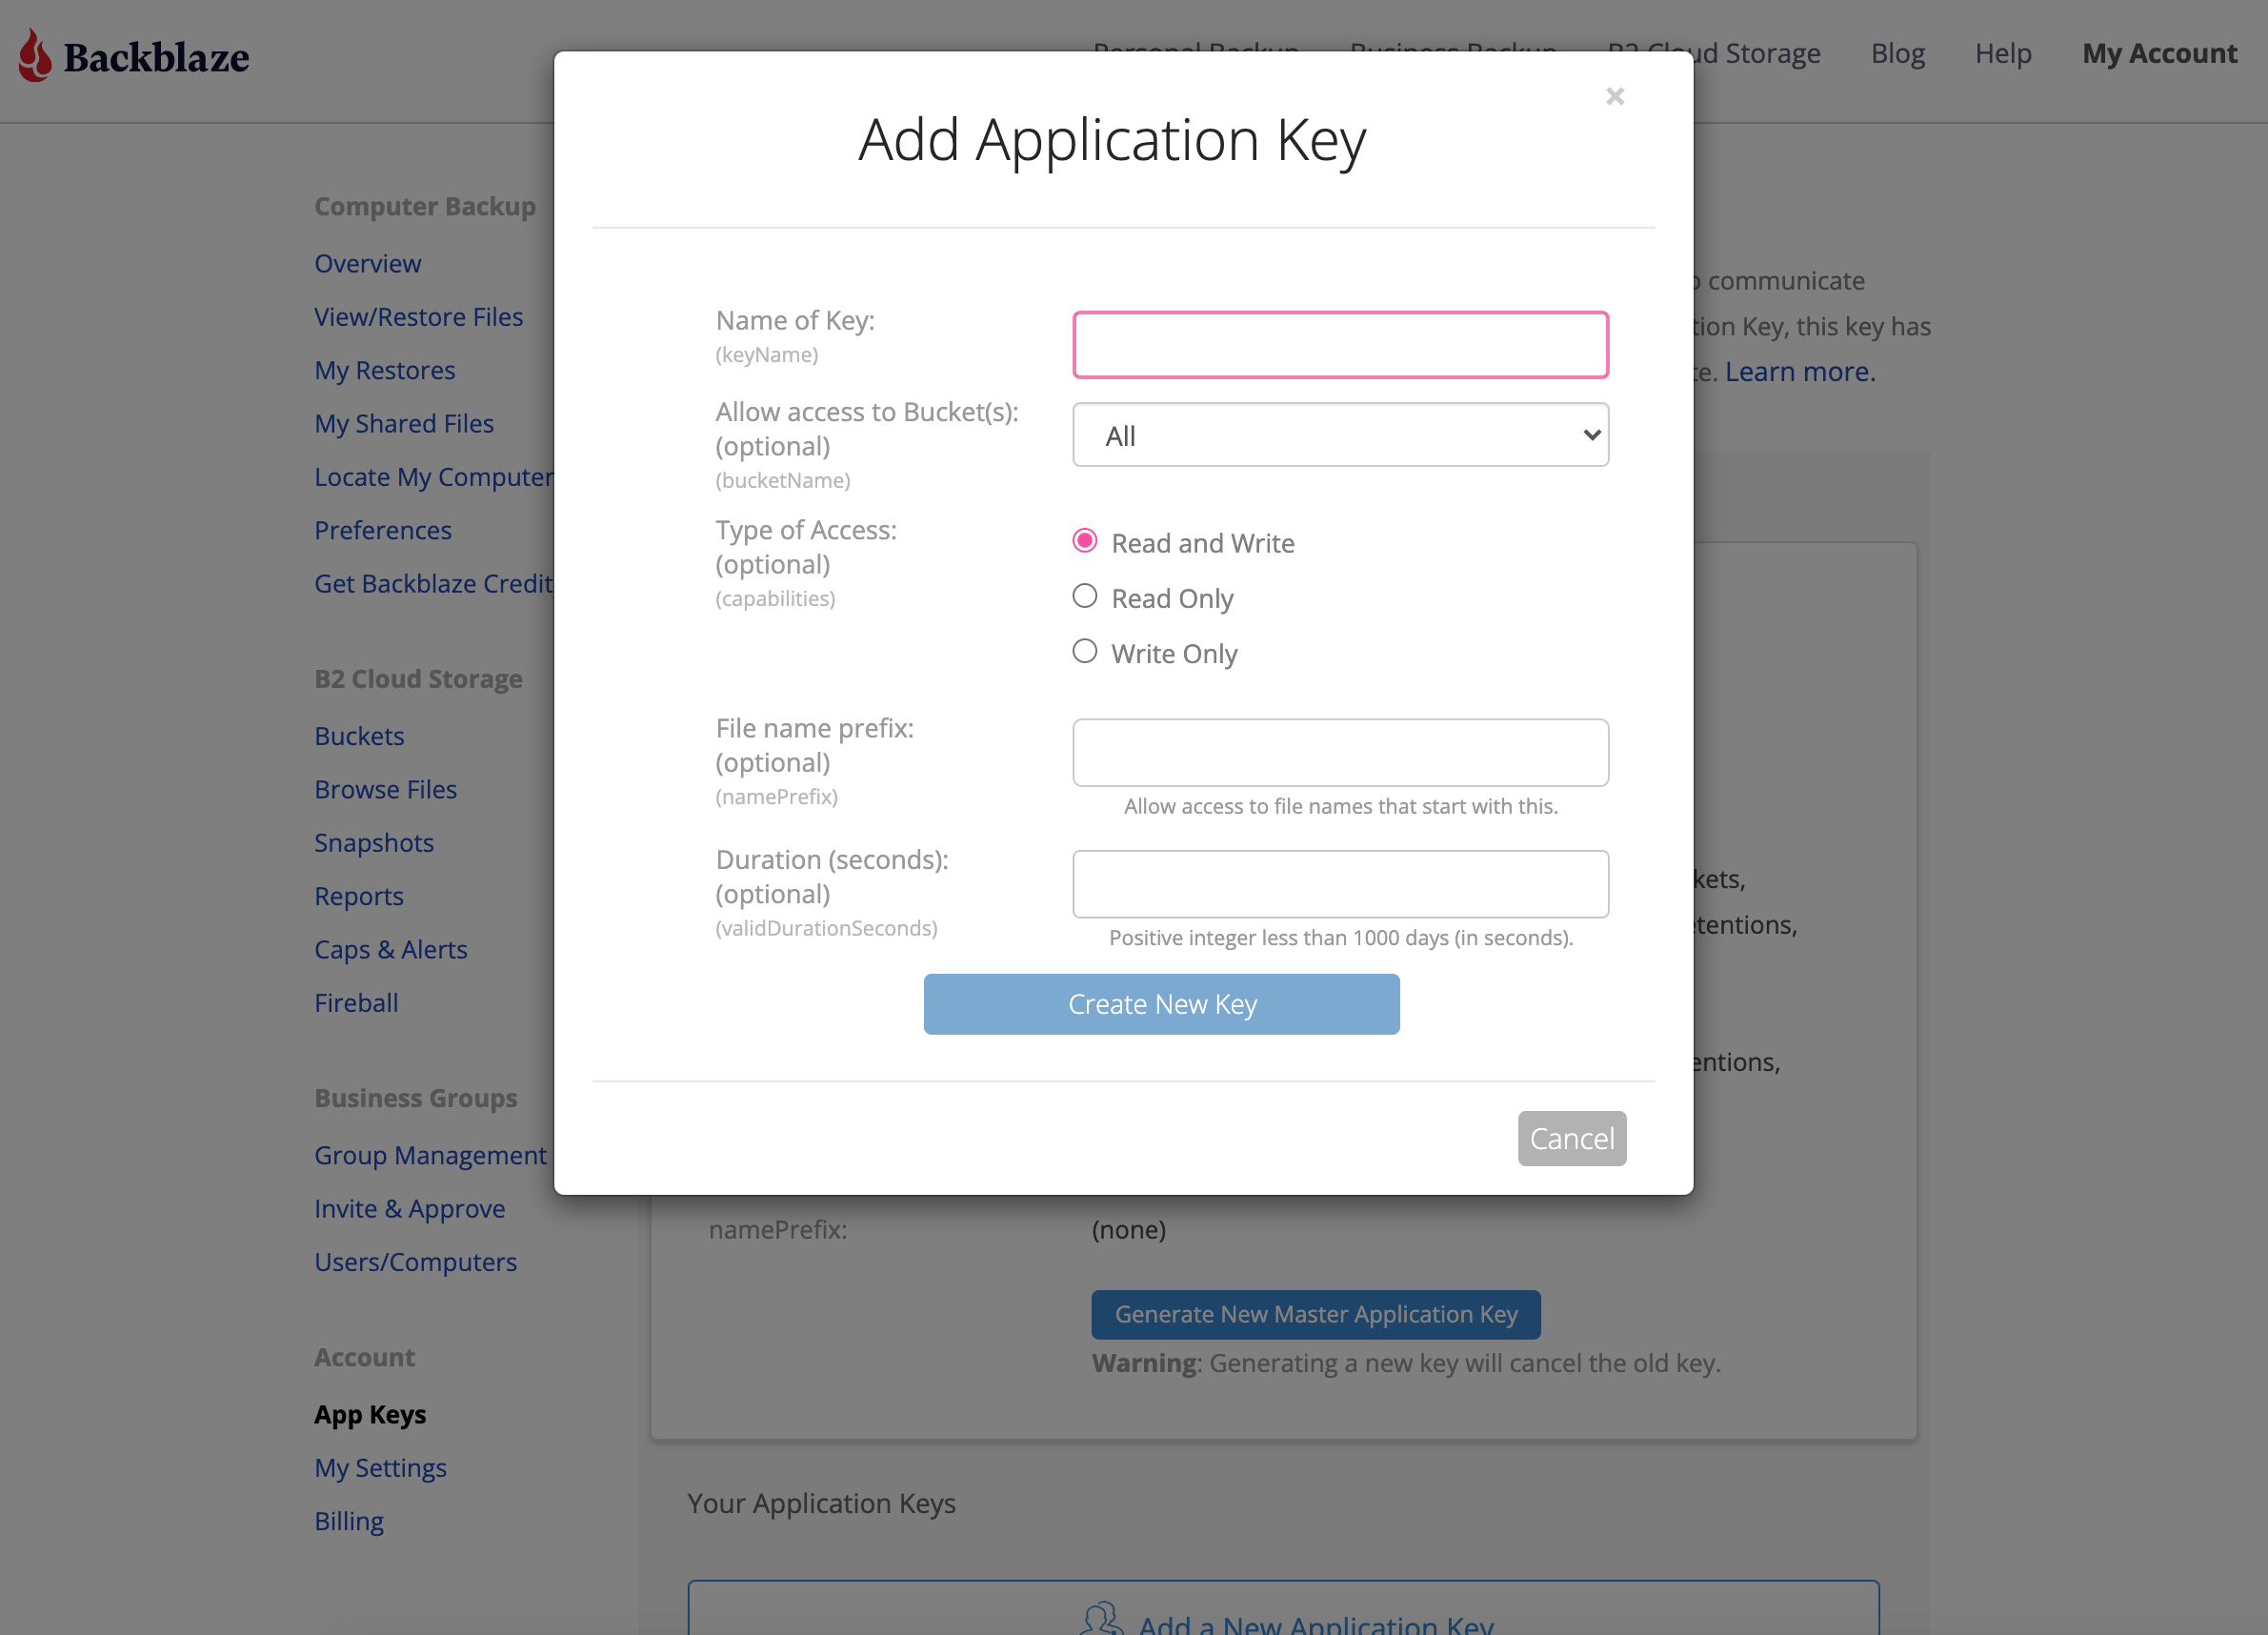
5. When you have the Key ID and the Application Key, be sure to copy them and keep both of these in a safe location.
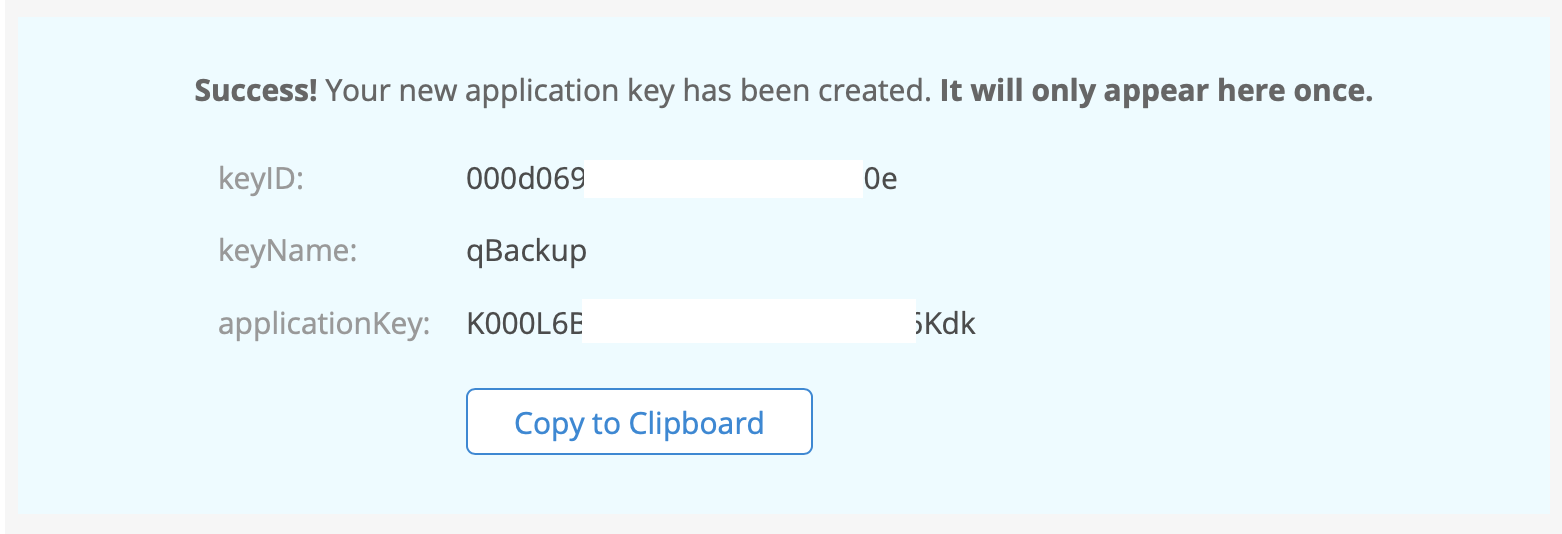
Once you close this window, the current Application Key will not display again and you will need both of these values to set up your qBackup application.
IMPORTANT: If you lose the App Keys, the values are not recoverable. You will need to set up a new App Keys for your client.
Your B2 bucket is now created and ready to be used with qBackup.
Setup Your B2 Bucket Within qBackup
Go ahead and download the qBackup client for your respective machine from its website.
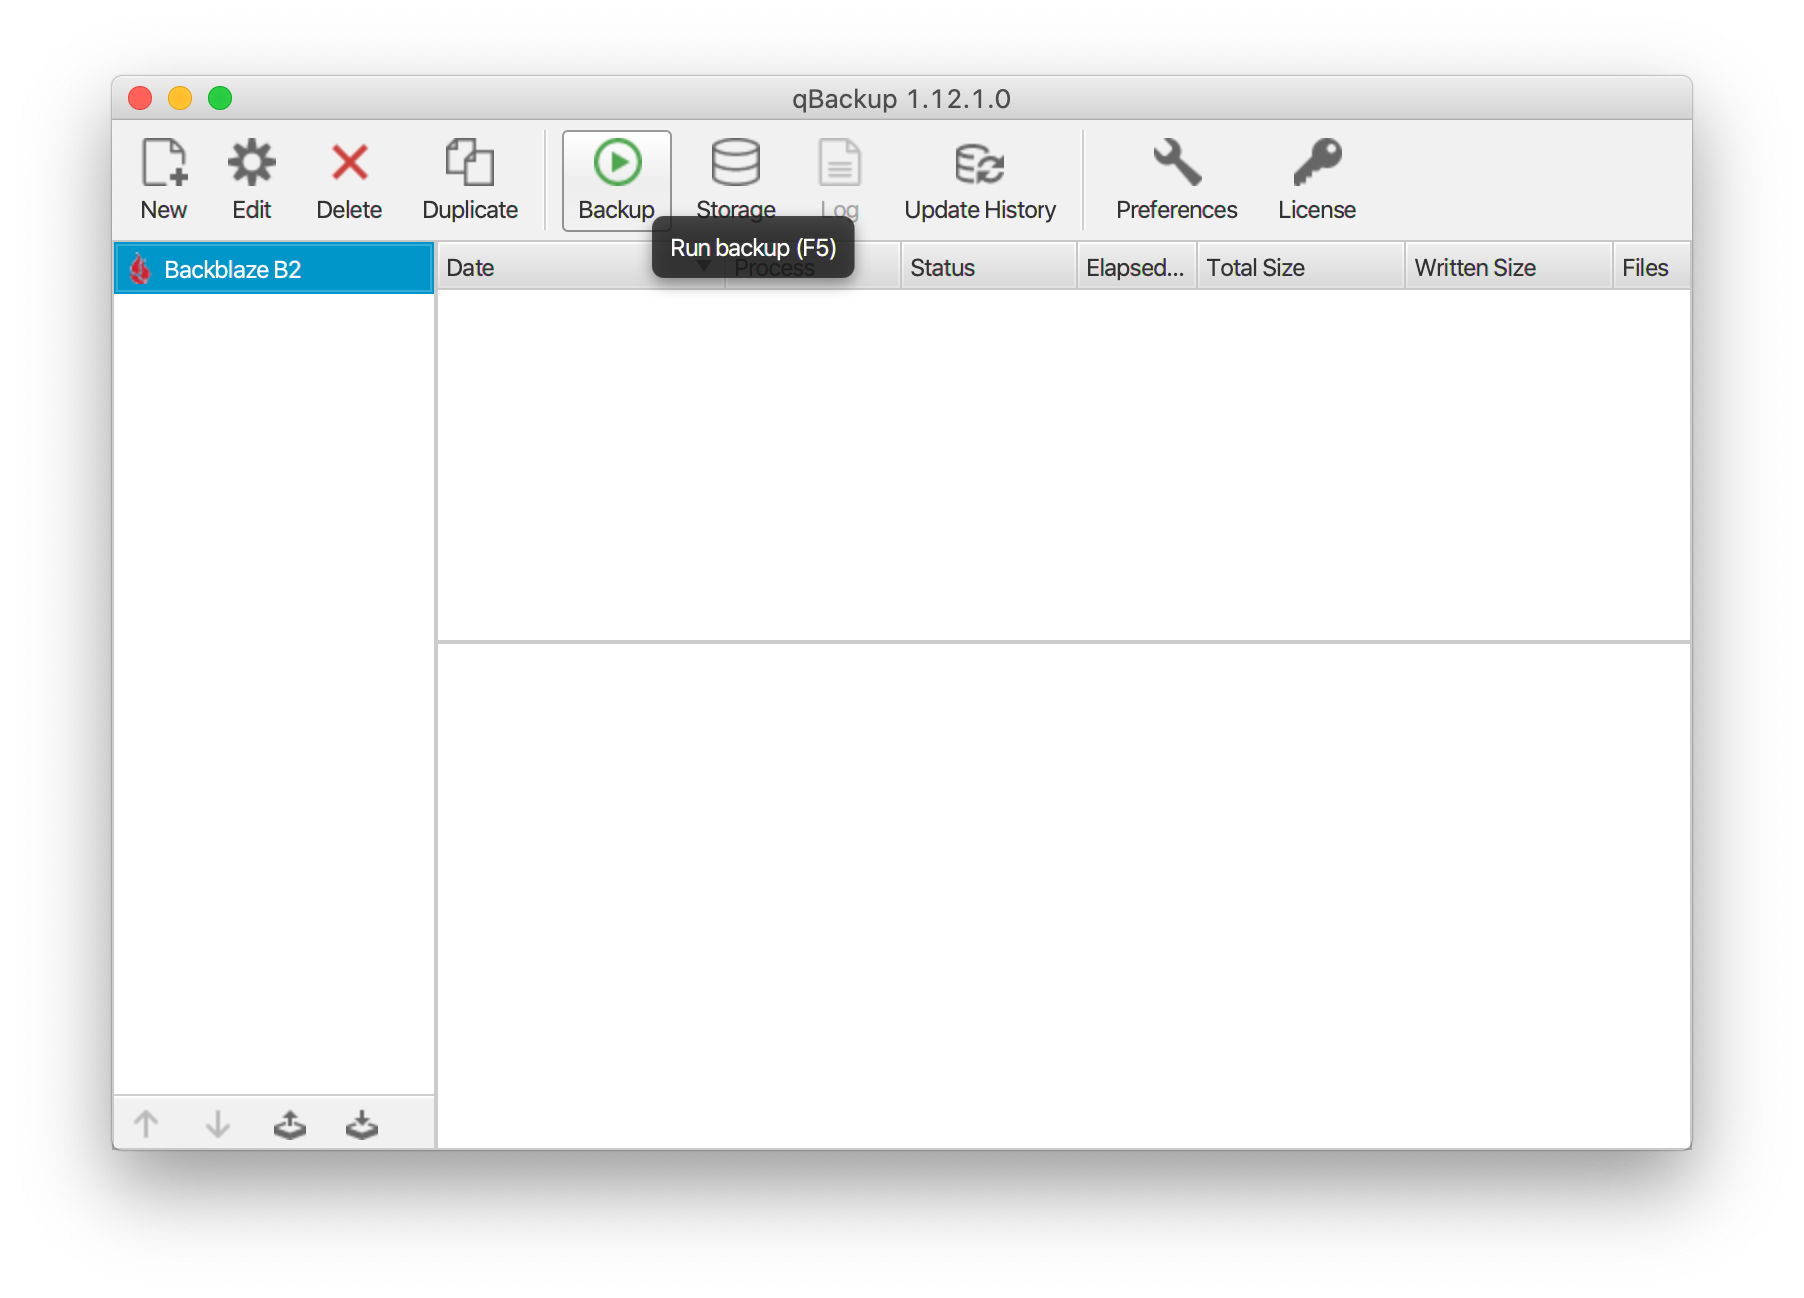
After installation and first launch, you will see an empty qBackup client ready for setup.
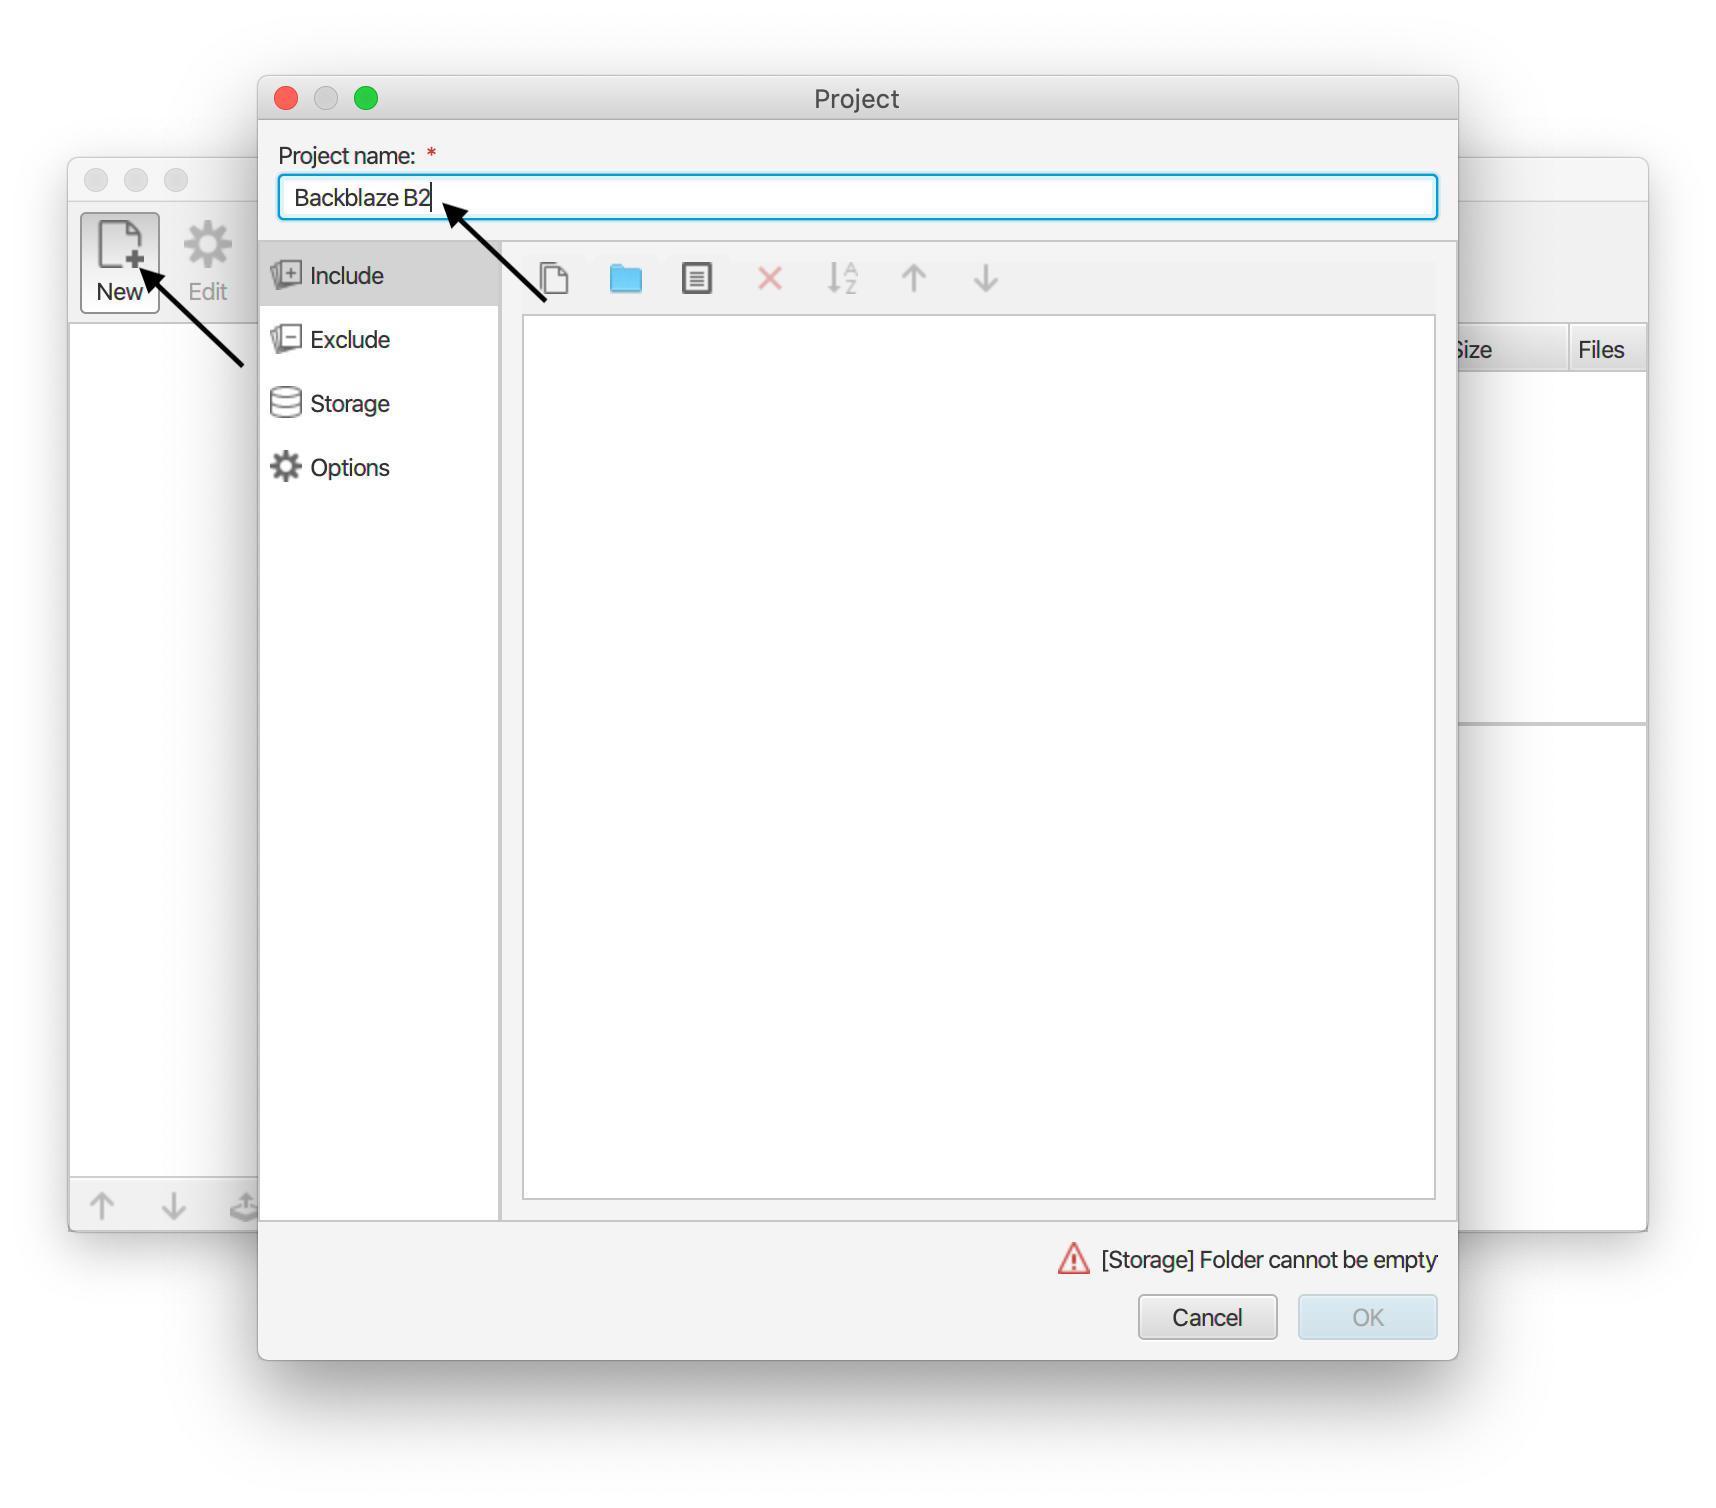
1. Press "New" at the top left of the application. From this menu, we will configure our backup "project". Give your project a name.
2. Now its time to add in folders, files, or directories we want to this project to backup.
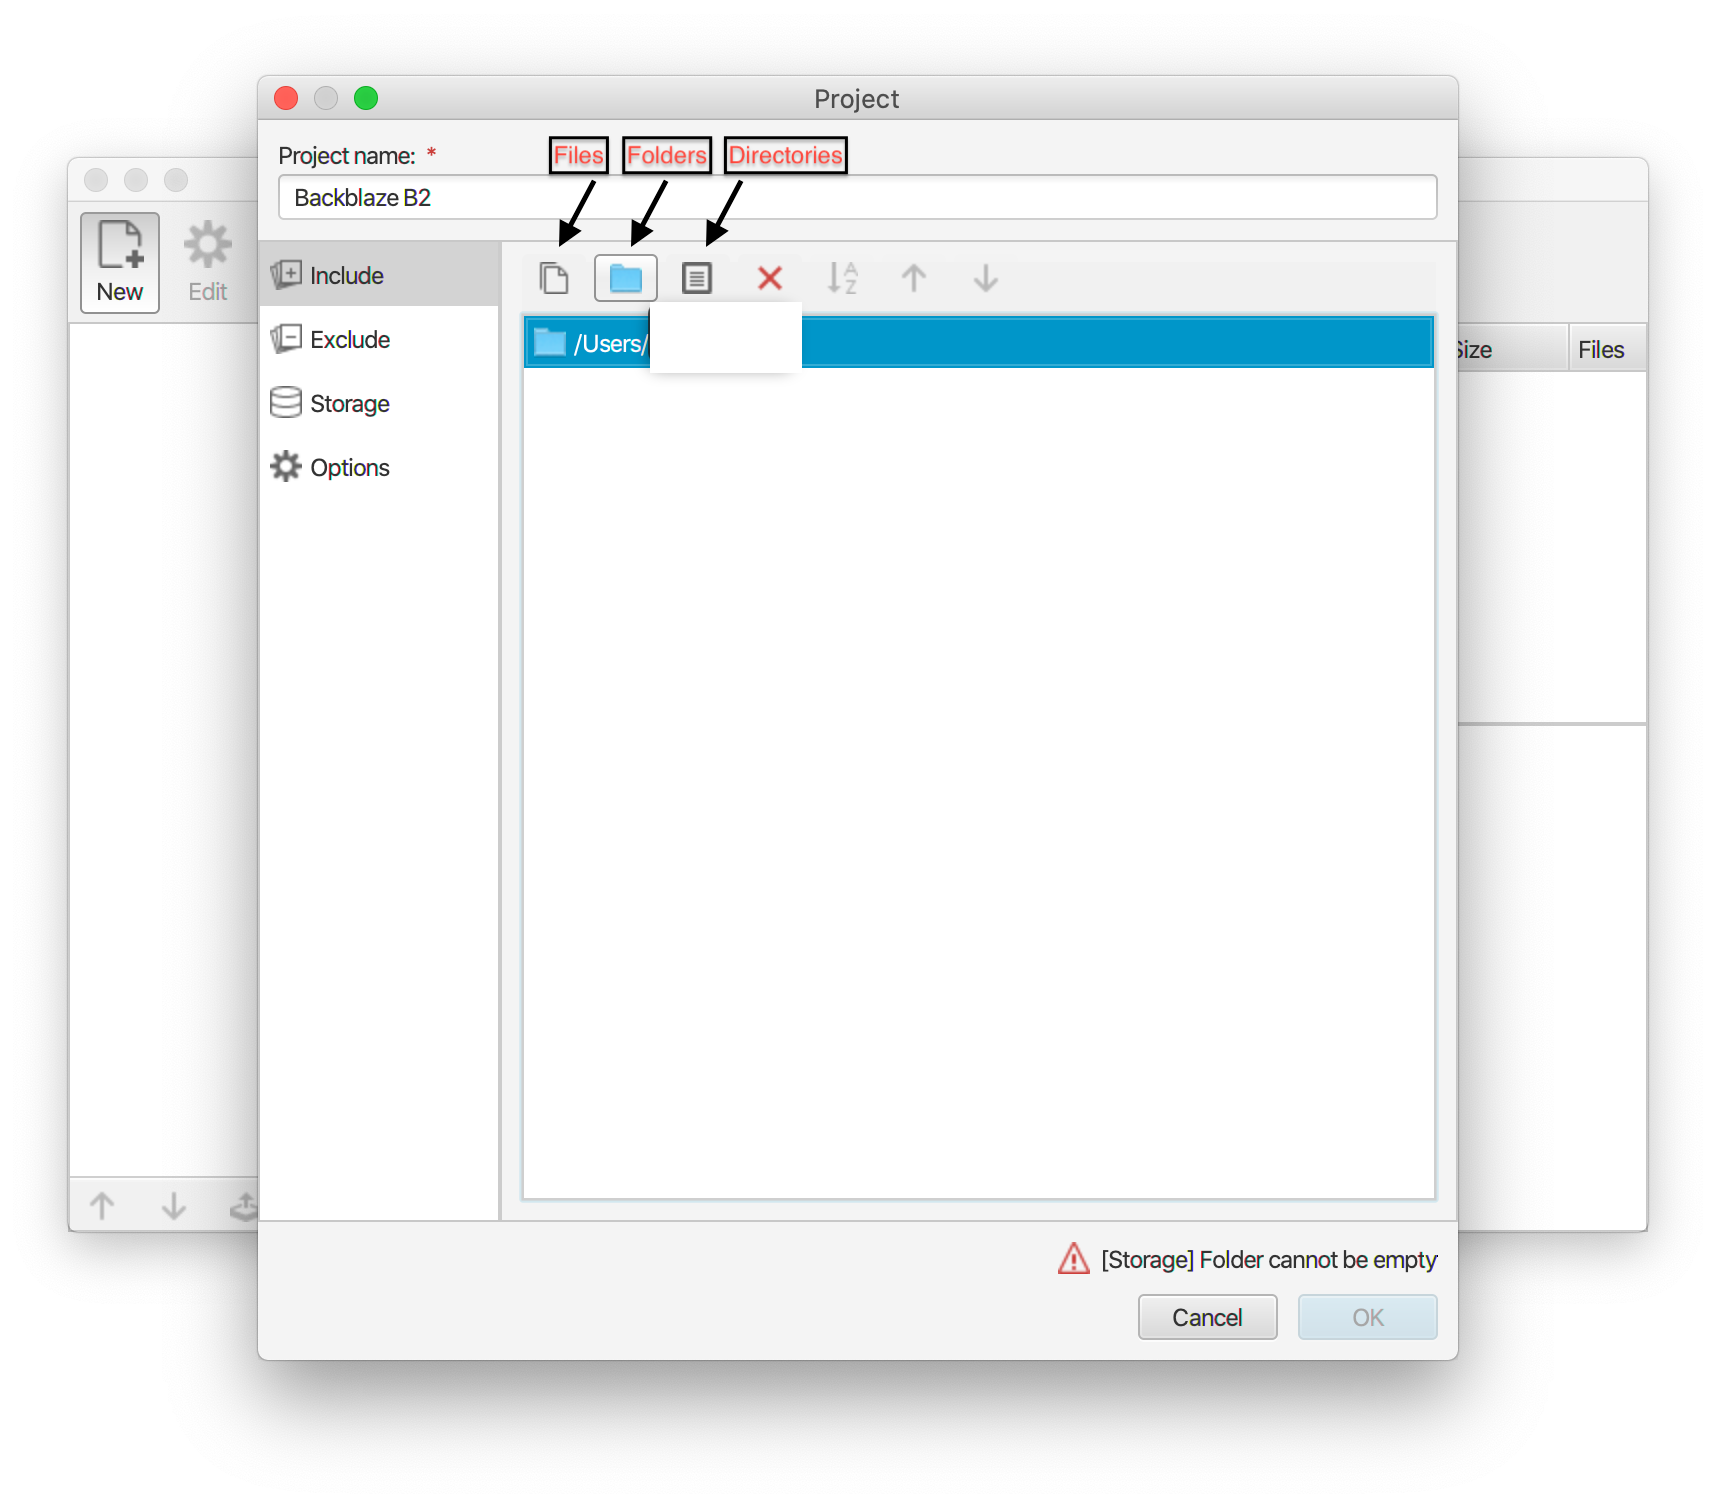
If you would like the backups to exclude specific types of files or folders within your selected directories you can do this by adding them in the "Exclude" menu
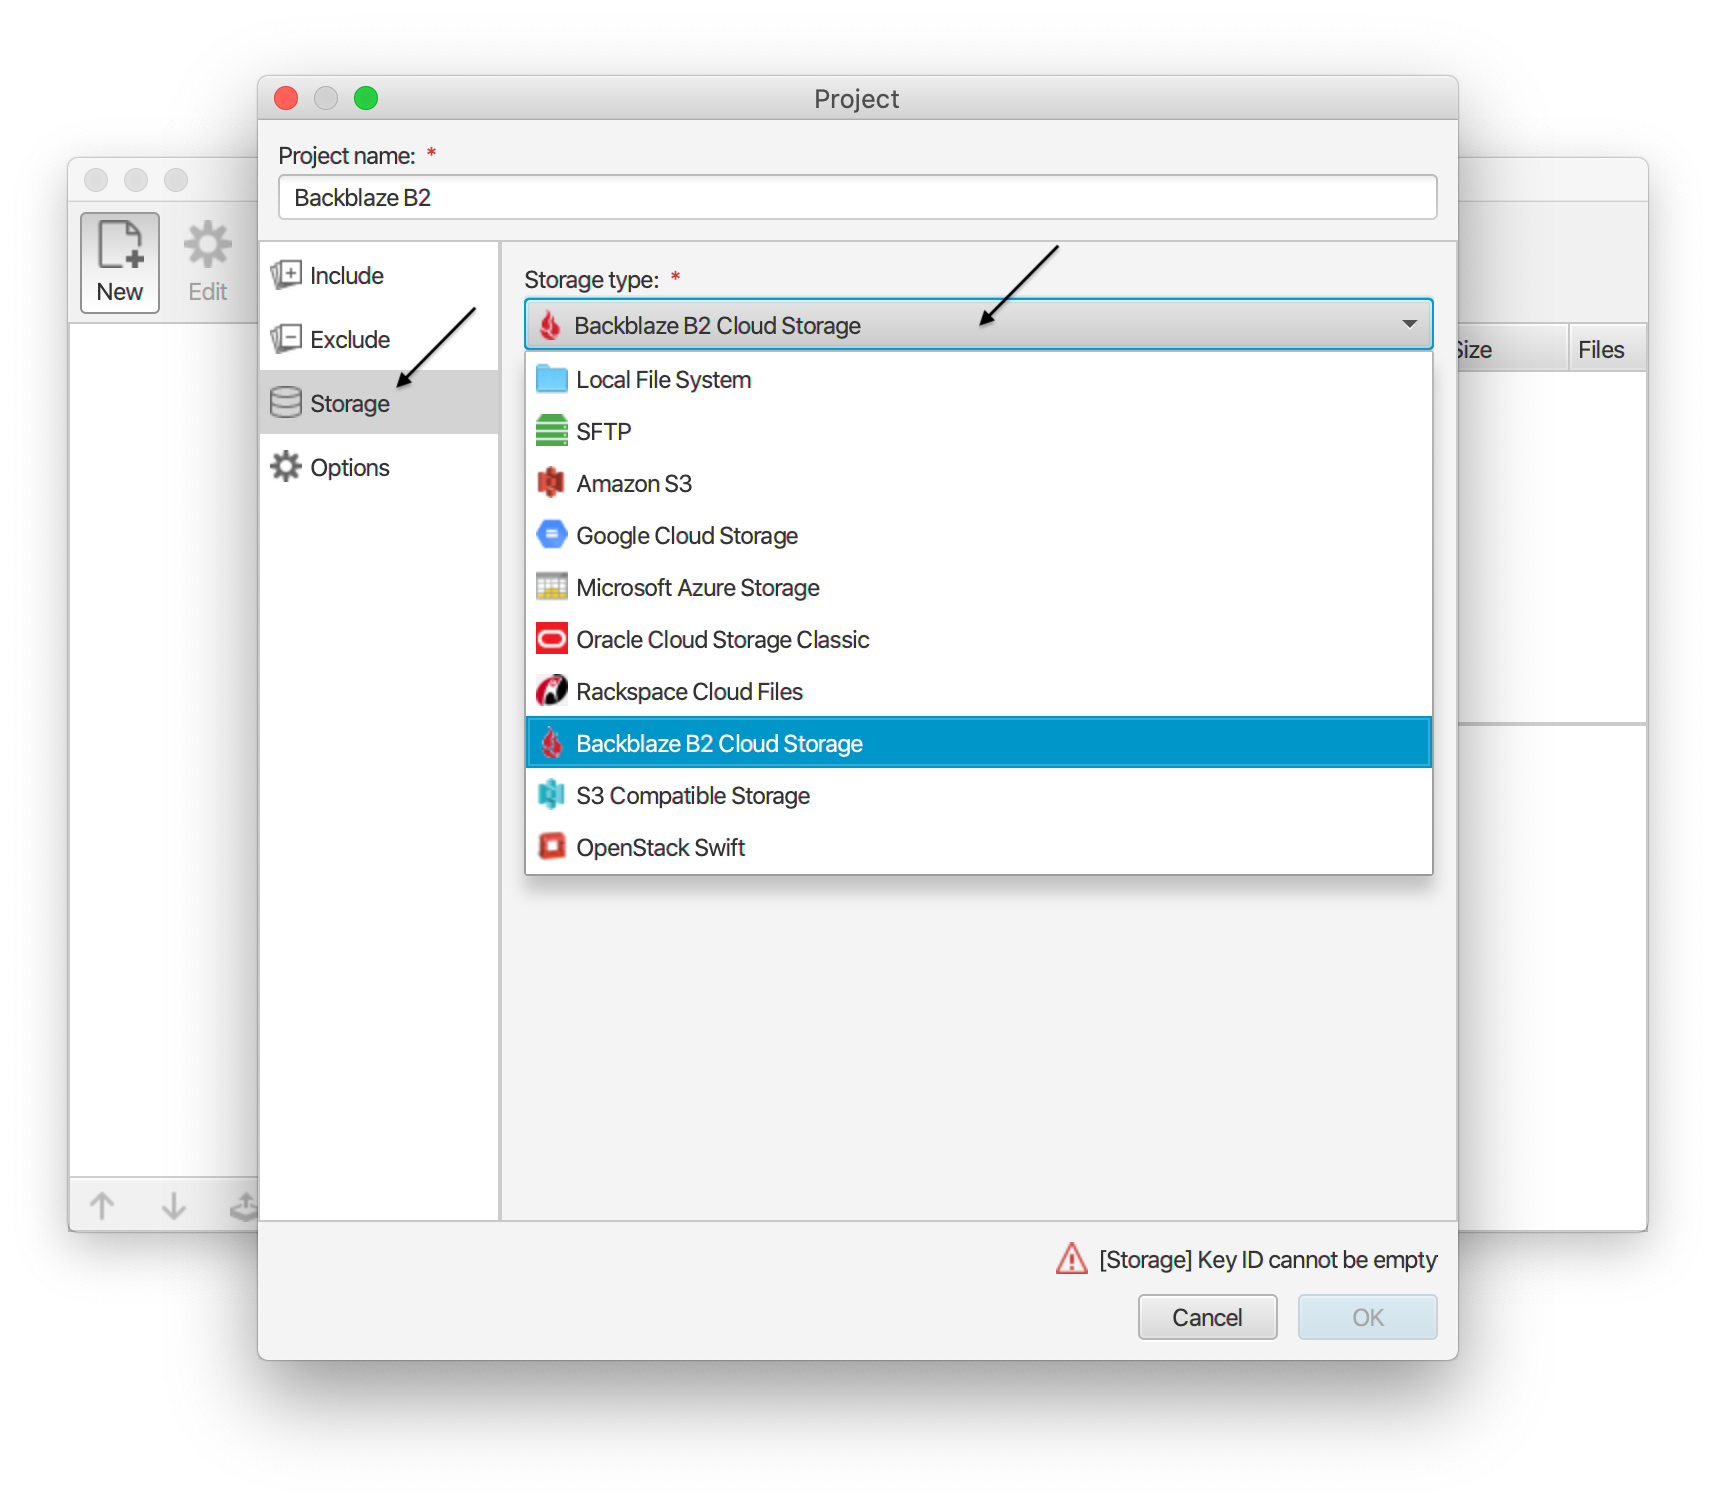
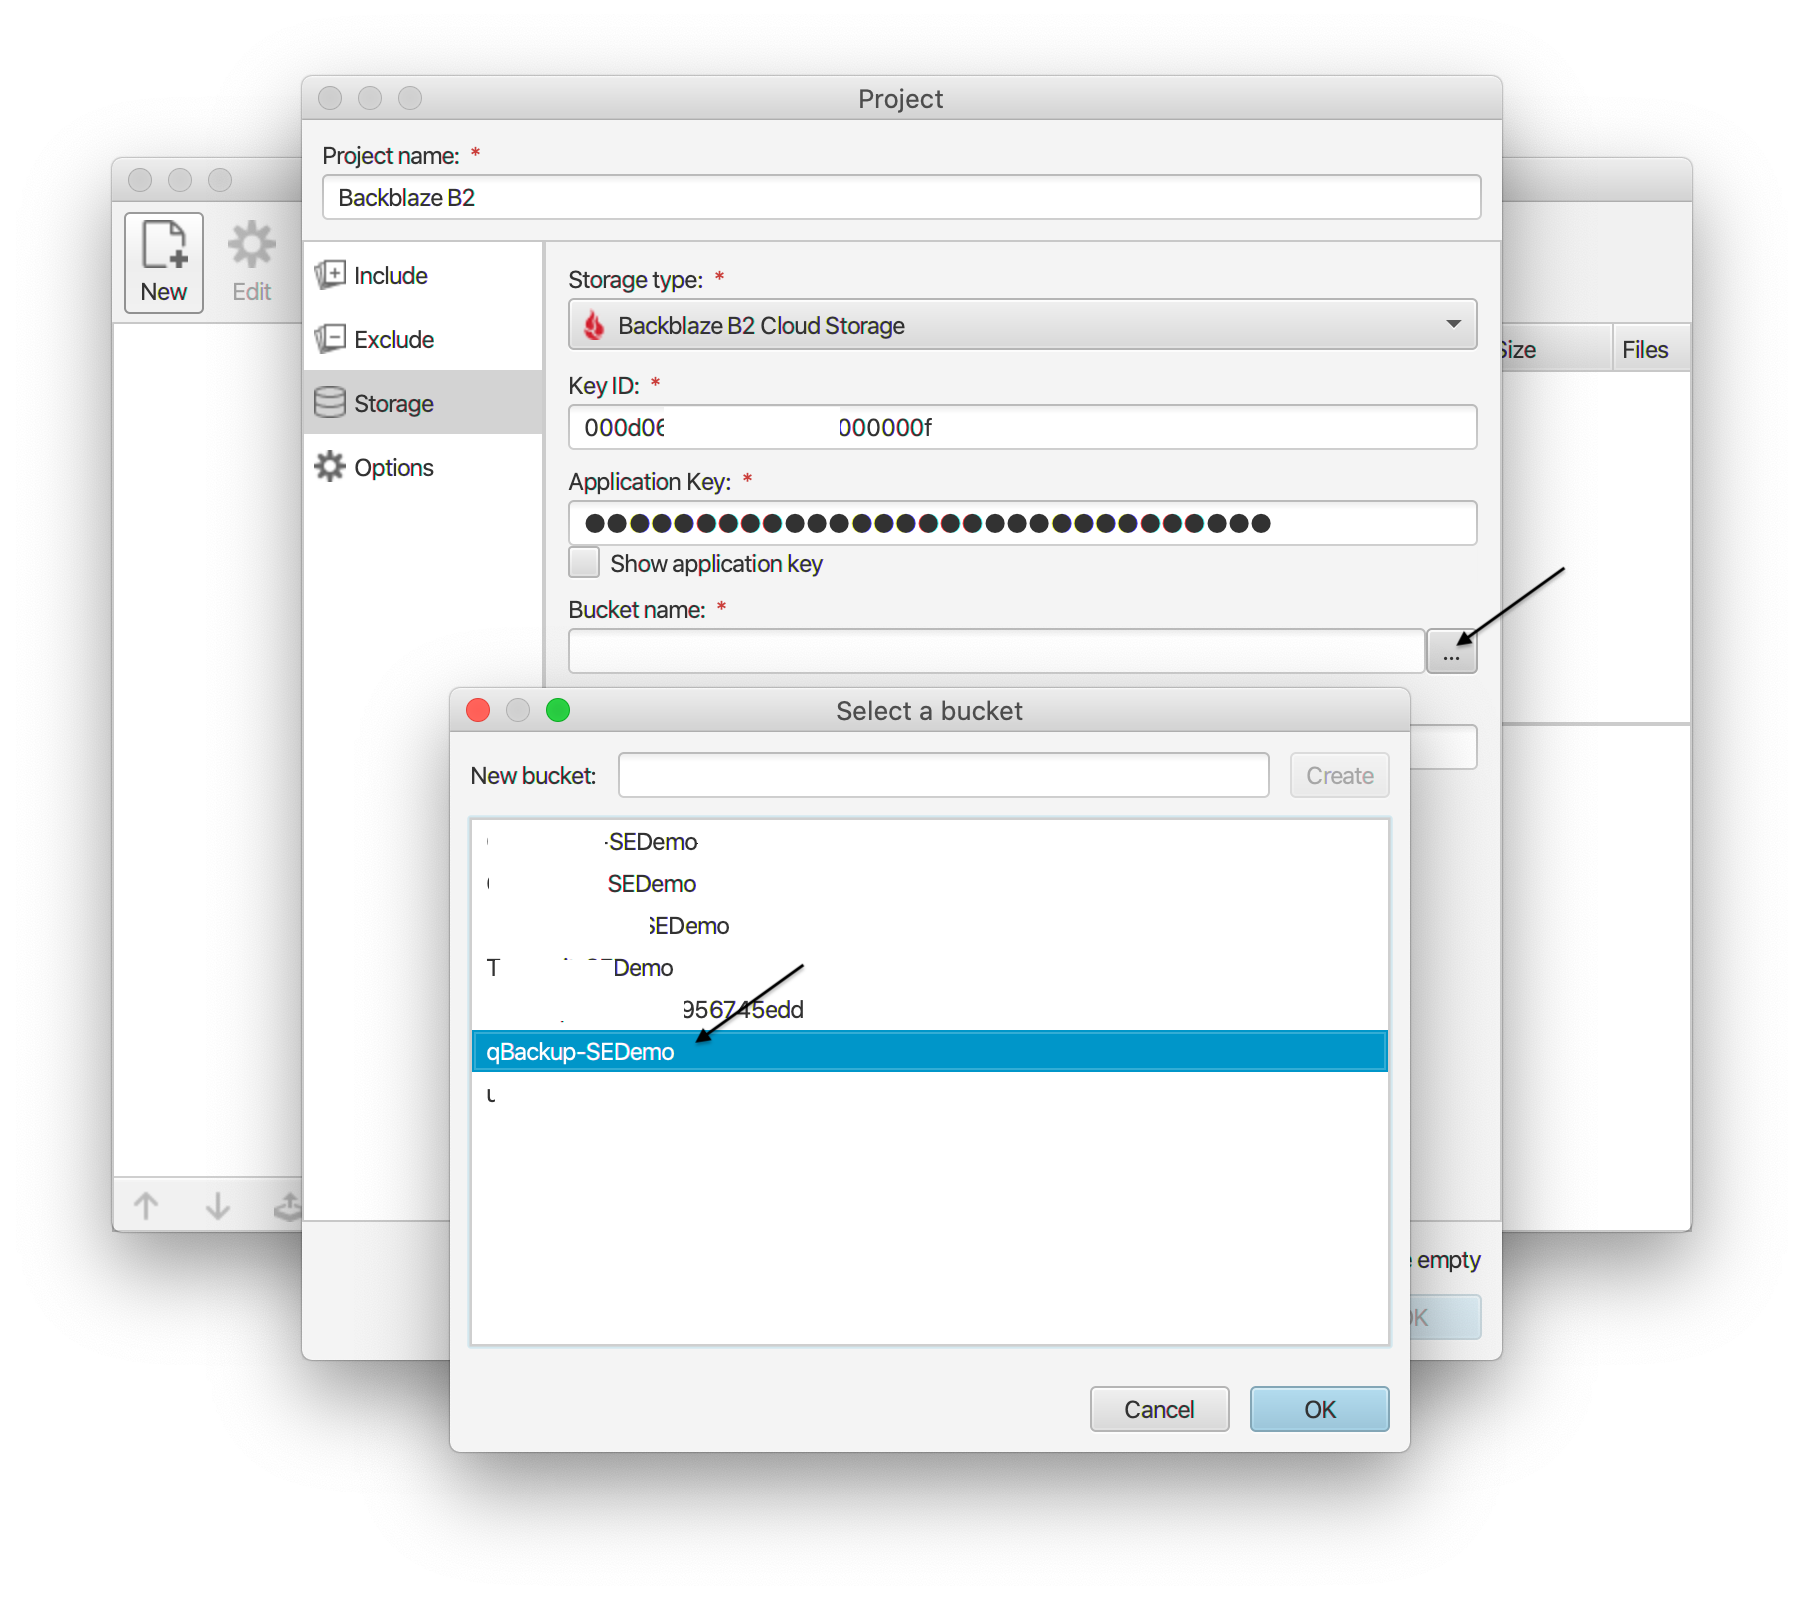
3. Now we can link our project to Backblaze B2. Go ahead and press storage on the left bar menu. Select "Backblaze B2 Cloud Storage" from the "Storage Type" dropdown.
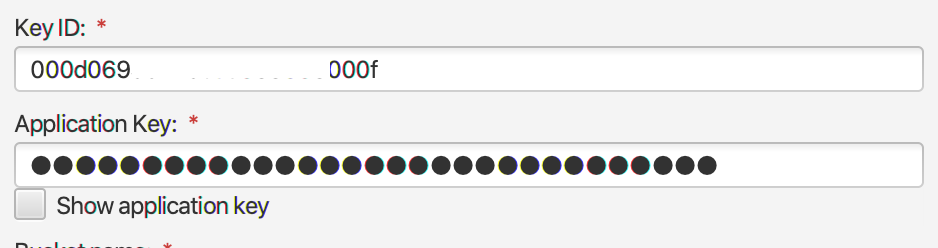
4. Let's add in the credentials that give us access to our B2 bucket(s). You will need the keyID and applicationKey.
5. Once your credentials are entered. qBackup will be able to fetch all buckets you have given it access to. Go ahead and select the bucket you would like the backup job to backup to.
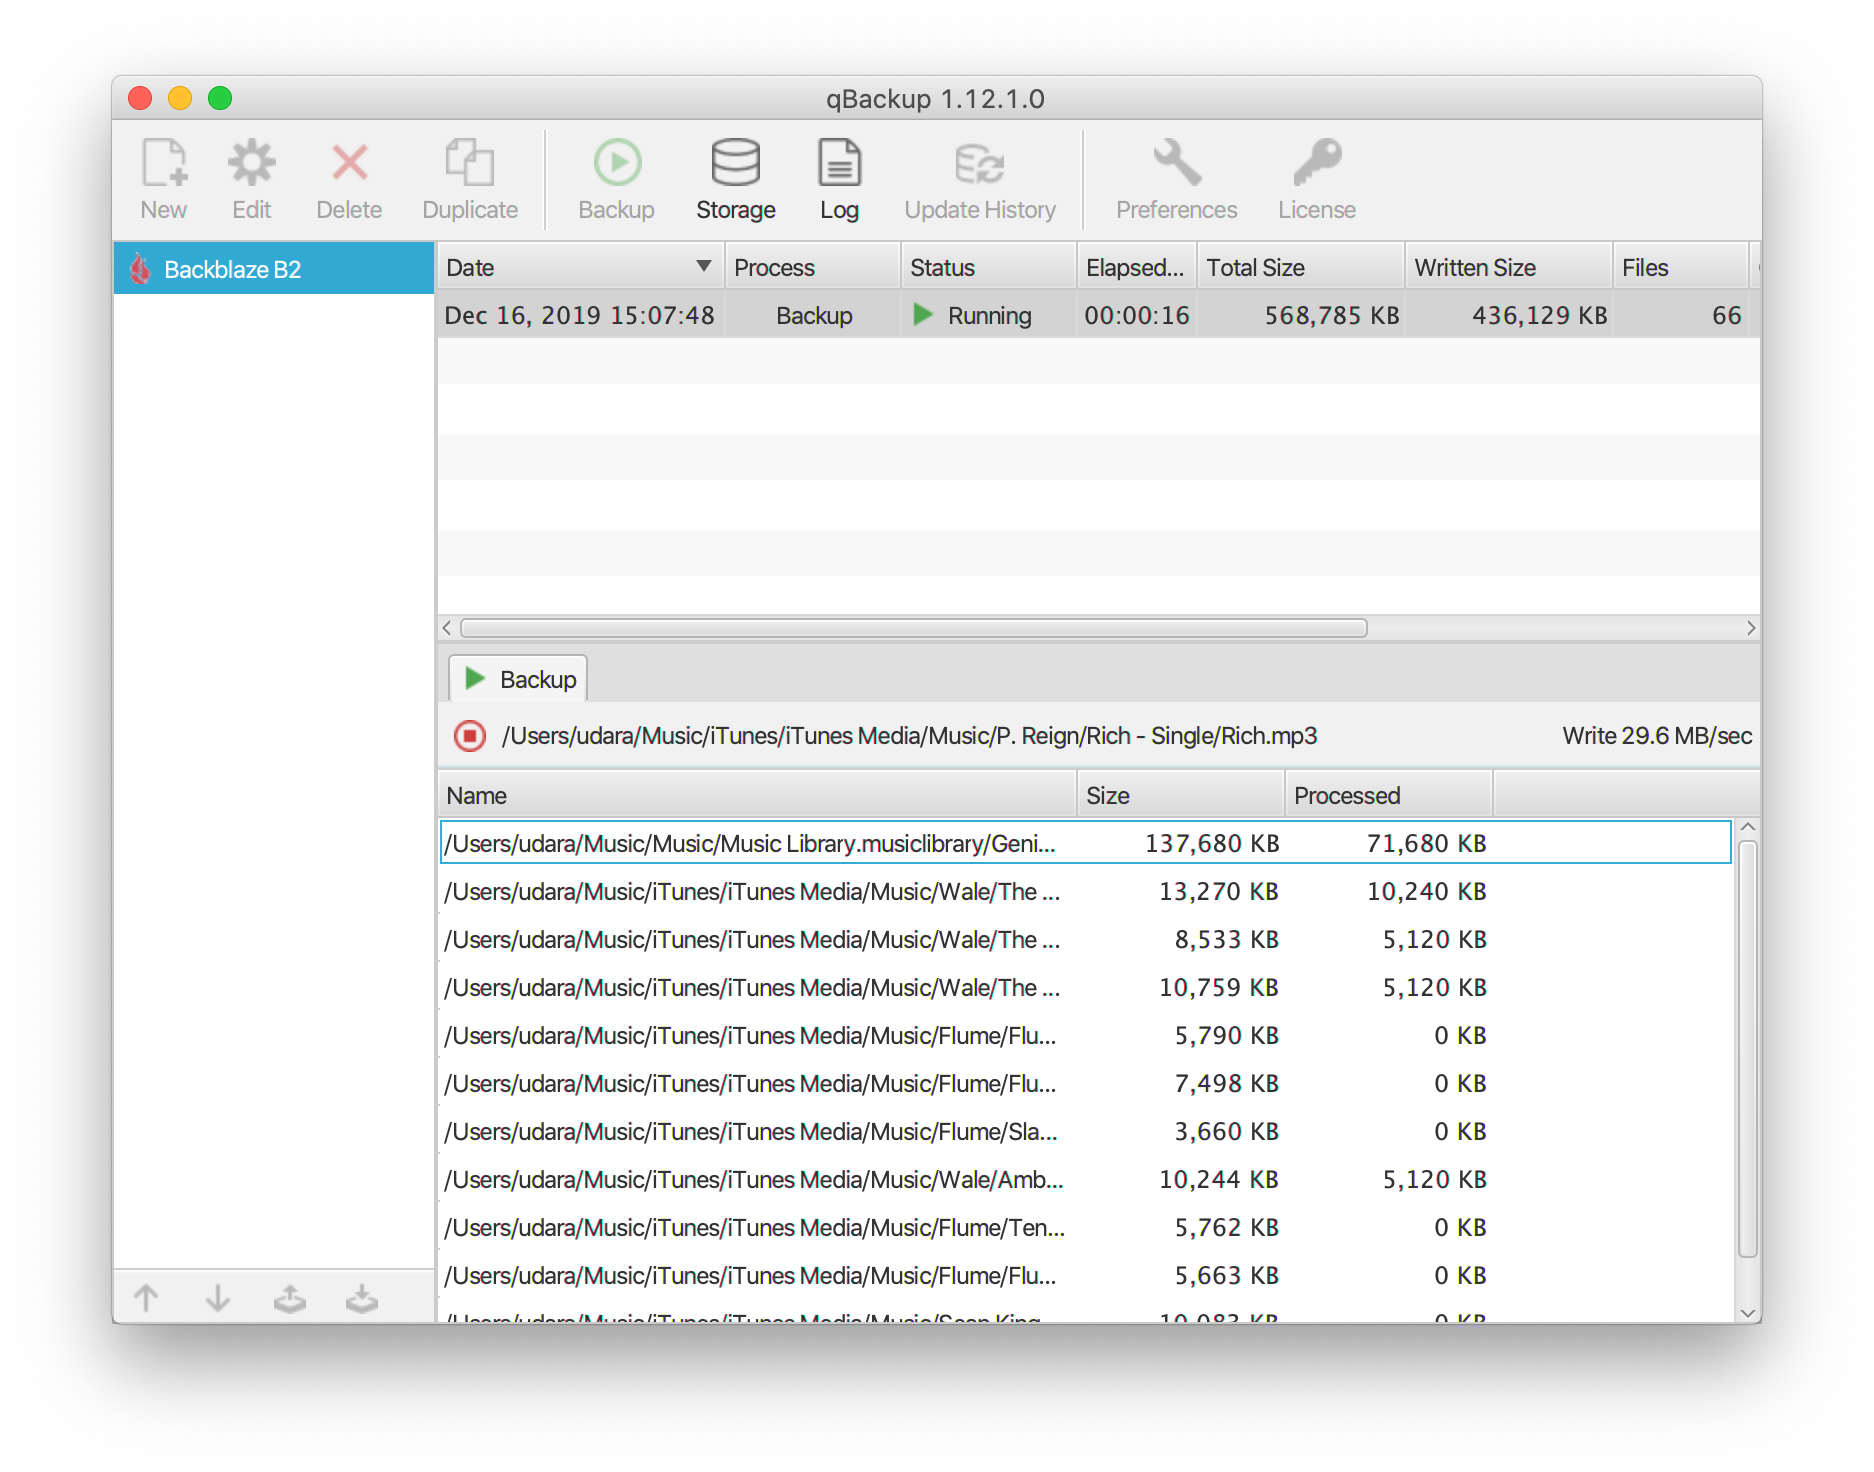
Your backup project is now all set up! You will see the project appear in the list on the left of the qBackup client. You can now run it at any time by selecting it and pressing the green play button labeled "Backup" in the top menubar.
Helpful Tips and Tricks
There are a few things of note if we would like to ensure an optimized backup process with qBackup. If you look at the above screenshot you will see the current write speed of the backup job on the middle right. If this value seems abnormally slow compared to your theoretical upload speeds (find your theoretical upload speeds here) we can play around with some advanced settings within the project.
With the project selected select the edit cog on the top menu bar which will open up the same configuration window, you interfaced with earlier in this guide. This time select the options cog on the left panel.
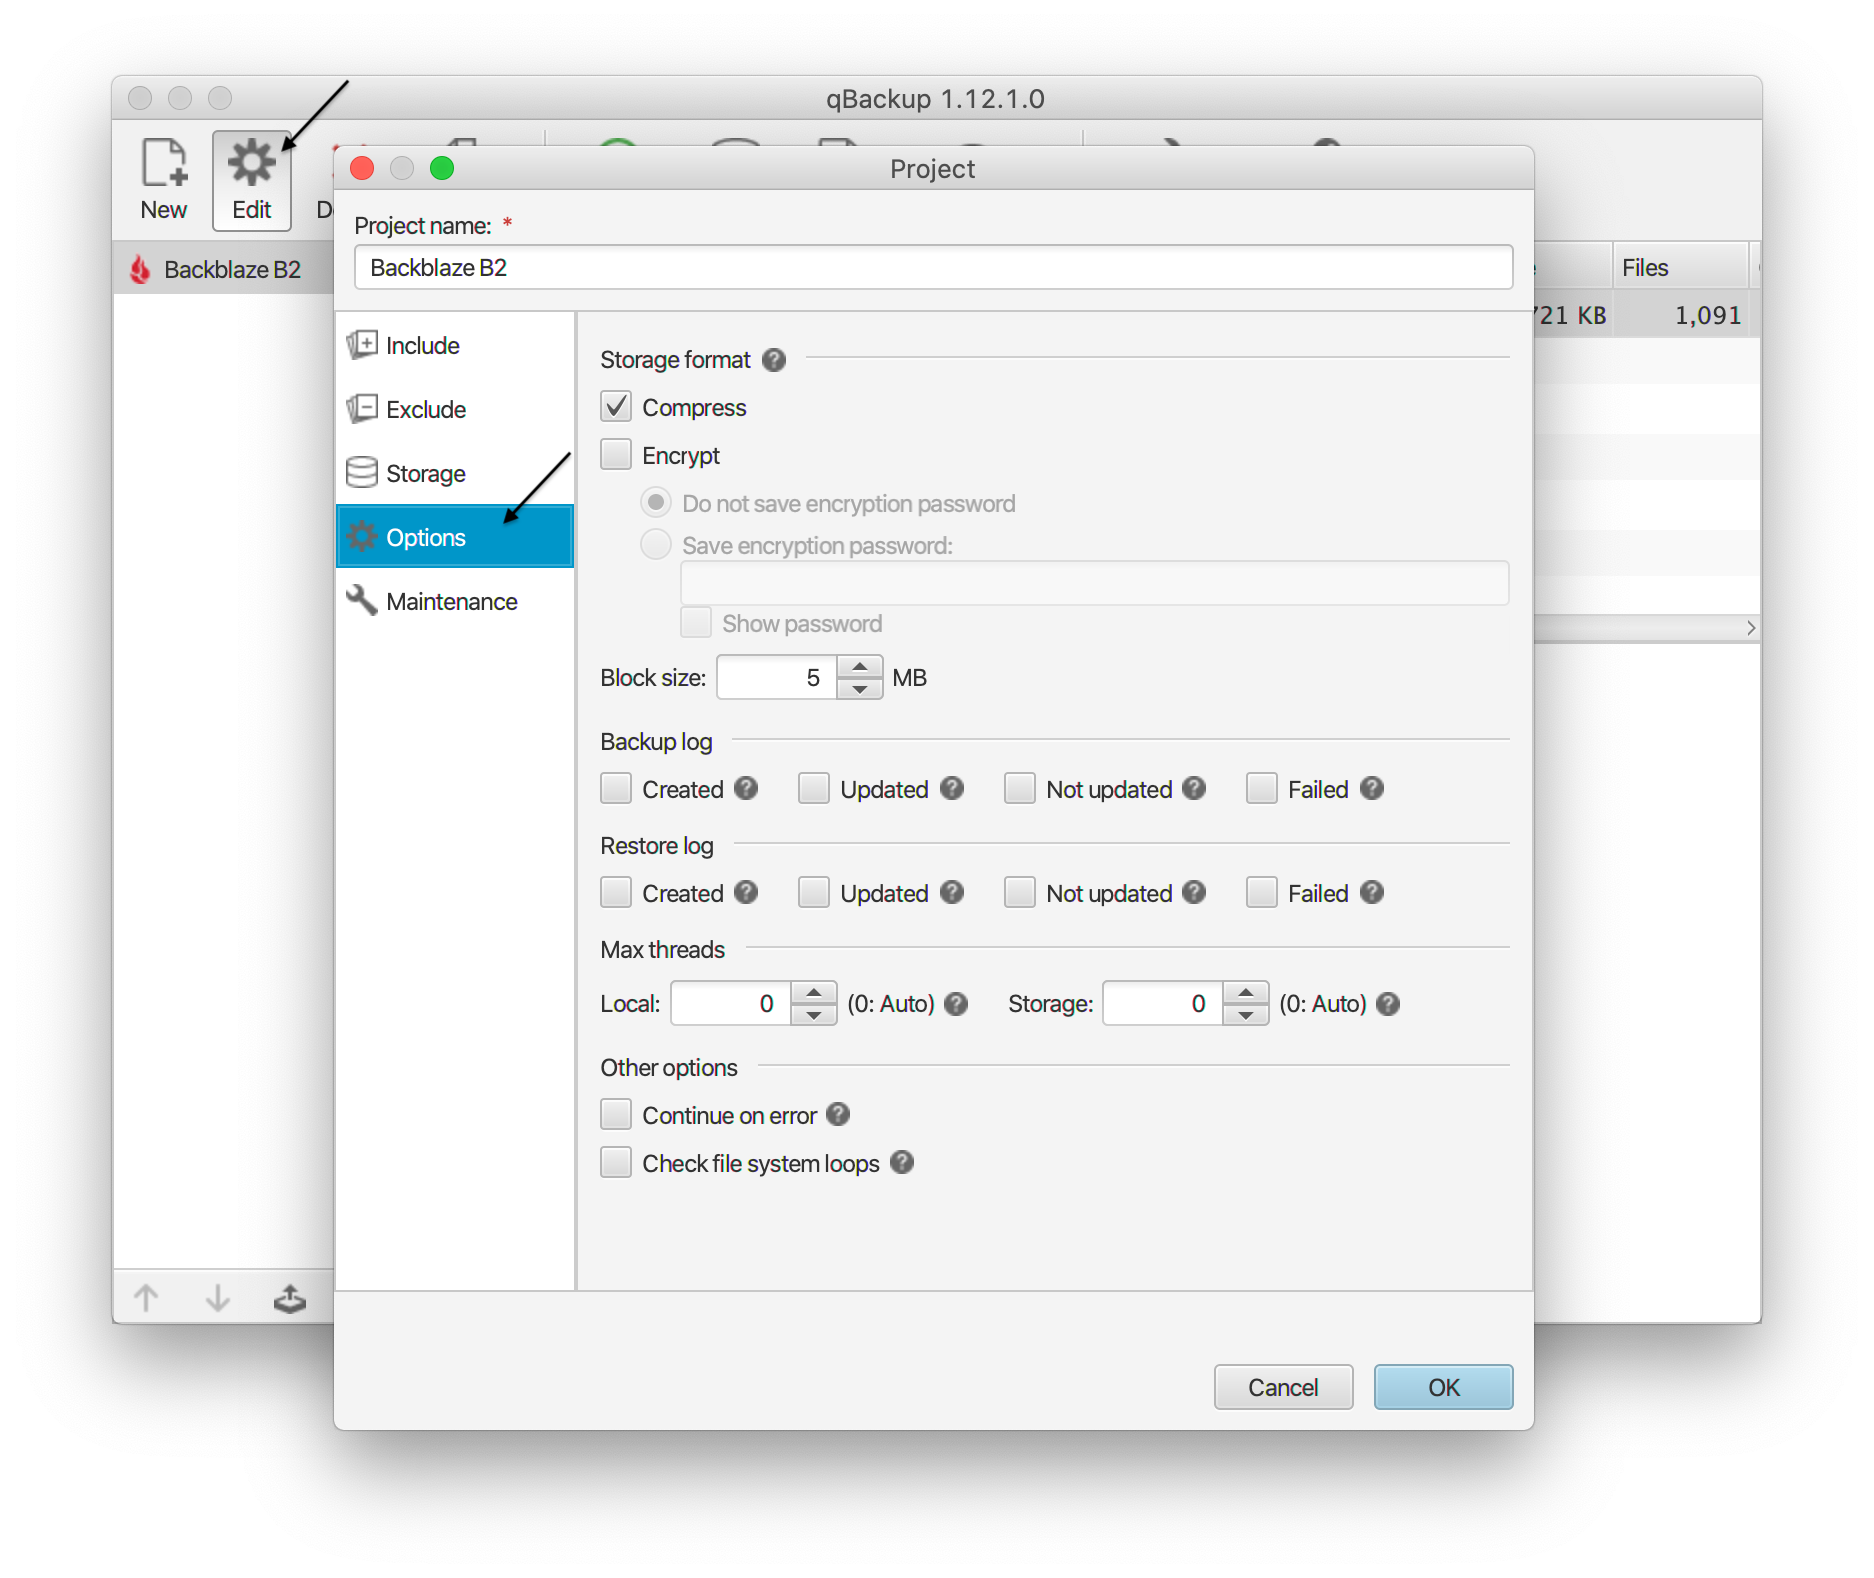
Here you will see a lot of the meat and potatoes of the backup that qBackup runs. Depending on the power of the CPU and amount of RAM in your machine you can manipulate these settings to fully take advantage of them and thus your upload bandwidth.
IMPORTANT: A lot of these settings will cause backups to prematurely fail if not set correctly, manipulating them to optimal settings will require trial and error.
Typically I would recommend leaving "Compress" enabled as it allows the upload to minimize the amount of data actually being sent. Files will reassemble into its full size when you decide to restore them from B2.
The "Encryption" setting allows you to enter a password that essentially scrambles your data, preventing third parties from descrambling it. In case you need an extra layer of security this would be a useful setting.
IMPORTANT: If you lose your encryption password there is no way to recover your data as it will stay permanently scrambled until the correct password is presented. I would recommend storing it somewhere safe so this won't be an issue.
The "Block Size" setting dictates the size of the chunks that the backup job will split the data up in for uploading. Typically increasing this size will benefit upload speeds of large files like videos and disk images.
IMPORTANT: While it might be tempting to bump this setting up to large values keep in mind the backup job will load this data into system memory (RAM). Keep your memory availability in mind as the backup will fail if qBackup runs out of it.
The last important setting is "Max Threads". This will dictate how many threads qBackup will be allowed to open up in an effort to write your chunk data to B2. "Local" indicates how many threads will run writes to local storage during a restore job. "Storage" indicates how many threads will run writes to remote storage (B2) during a backup job. Leaving these values at 0 will allow the application to approximate automatically for you what settings could work best. Keep in mind each time you increment this value qBackup is allowed to provision your chunk size to another thread. In theory, this would mean memory usage could be as high as [Chunck Size] x [Thread Count]. Typically increasing threads will allow more upload streams to work concurrently allowing you to saturate more of your bandwidth.
IMPORTANT: Threads will hit your CPU usage. I wouldn't throw these values up by more than 5 thread counts each time you test as pushing these values up too fast can cause system slowdowns and/or crashes.
Articles in this section
- Quickstart Guide for Veeam 12 Direct-to-Cloud Backups to Backblaze B2 with Immutability
- Quickstart Guide for Acronis CyberProtect and Backblaze B2 Cloud Storage
- Quickstart guide for SFTPCloud
- Quickstart Guide for Veritas NetBackup and Backblaze B2 Cloud Storage
- Quickstart Guide for Offshoot and Backblaze B2
- Quickstart Guide for Files.com and Backblaze B2 Cloud Storage
- Quickstart Guide for Encoding.com and Backblaze B2 Cloud Storage
- Quickstart Guide for Mountain Duck and B2 Cloud Storage
- Quickstart Guide for Microsoft 365 Backup with MSP360 and Backblaze B2 (Multiple Instances)
- Quickstart Guide for Microsoft 365 Backup with MSP360 and Backblaze B2 (Single Instance)