Starting in version 6.0, MSP360 supports our Fireball Rapid Ingest Service. This allows you to avoid uploading a large dataset over the internet and connect your MSP360 backup to files that have been uploaded with a Fireball without having to reupload them to your B2 bucket.
Initial Backup
The initial backup will need to be to the Fireball. The first thing you’ll need to do is mount the Fireball so that you can select it as a location to backup to. You can setup your Fireball and mount the DataForB2 folder by following steps 1-7 on our Guide.
After the Fireball has been mounted you will need to add it as the location for your Backup Plan in MSP360. You can find MSP360's guide on how to add Network Storage as a backup location here.
Once the backup completes successfully, please pack your Fireball back in its shipping container and send it back to Backblaze.
Syncing Your MSP360 Backup to B2
1) Adding B2 to MSP360
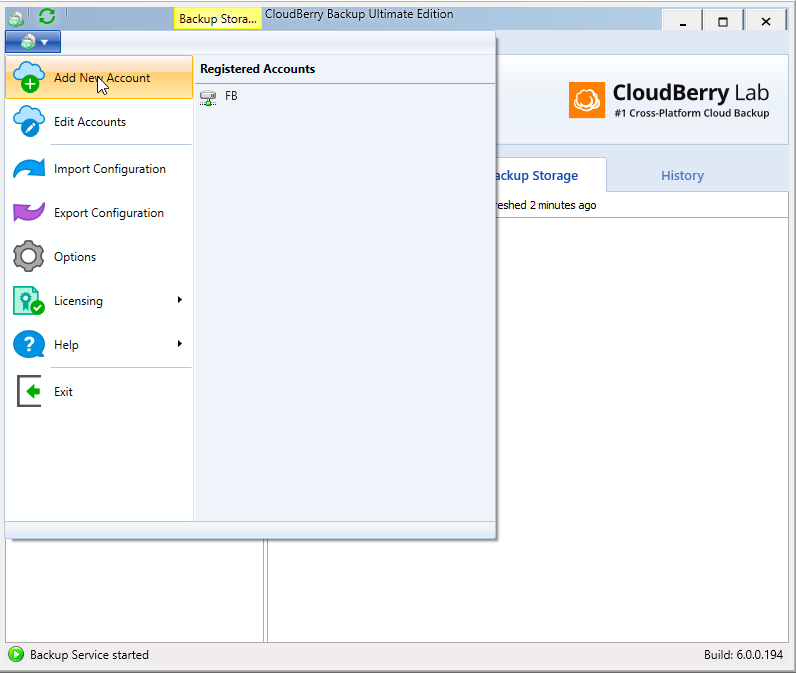
Once the upload from the Fireball is complete you’ll receive an email notification from Backblaze letting you know. At this point, you will need to change your Backup Storage from the Fireball to your bucket in B2. If you haven't done so already, you will need to add your B2 account in MSP360. To do so, click the icon in the top left corner and select Add New Account.
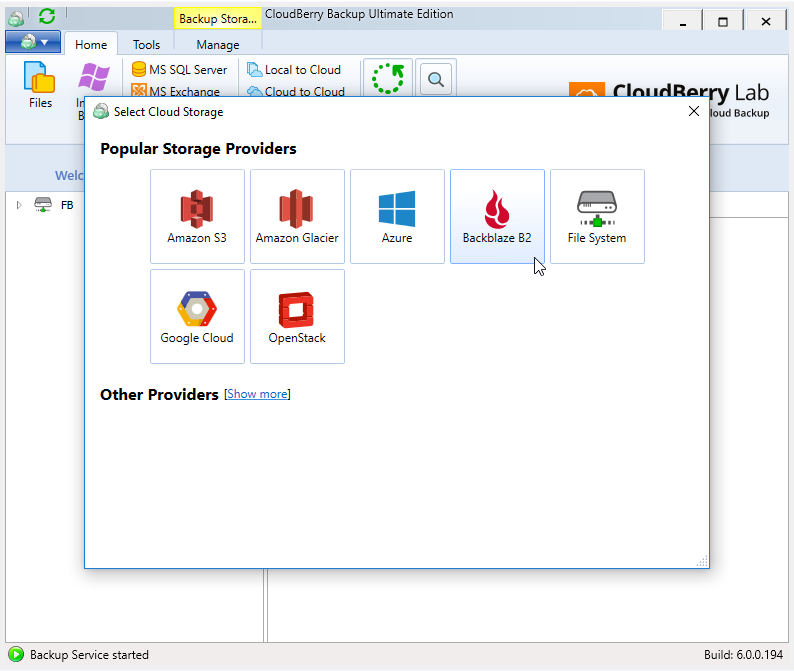
Then select Backblaze B2 as your storage provider.
In the next window, enter your Account ID (or Application Key ID) and Application Key (Note: If you are using your Master Application Key then you must use your Account ID. If you are using an Application Key you created then you must use that key’s Key ID. You can read more about Application Keys here). You can make the Display name whatever you like. Then choose the bucket you want to backup to, or Create New Bucket.
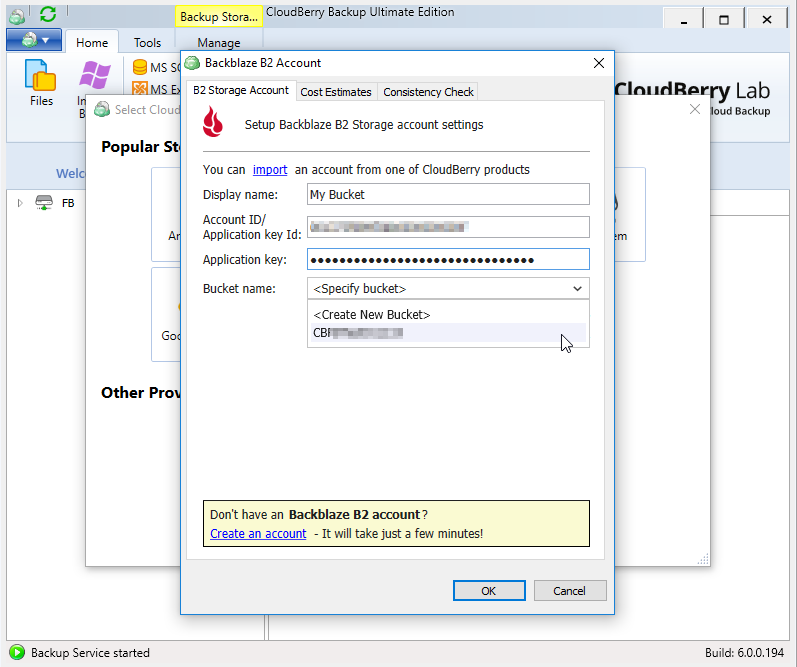
Then click OK and return to the main MSP360 window.
2) Selecting B2 as the Backup Storage
Now you will need to choose B2 as the Backup Storage for your backup plan under the Backup Plans tab. To do so, right-click your backup plan in MSP360 and select 'Edit'.
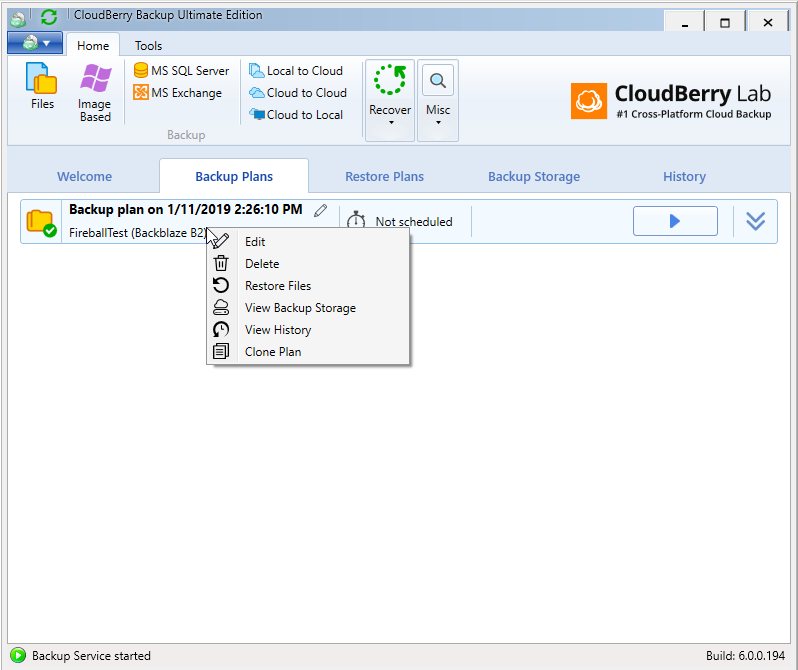
Click Next until you get to the Select Backup Storage screen and select Backblaze B2 as your Backup Storage.
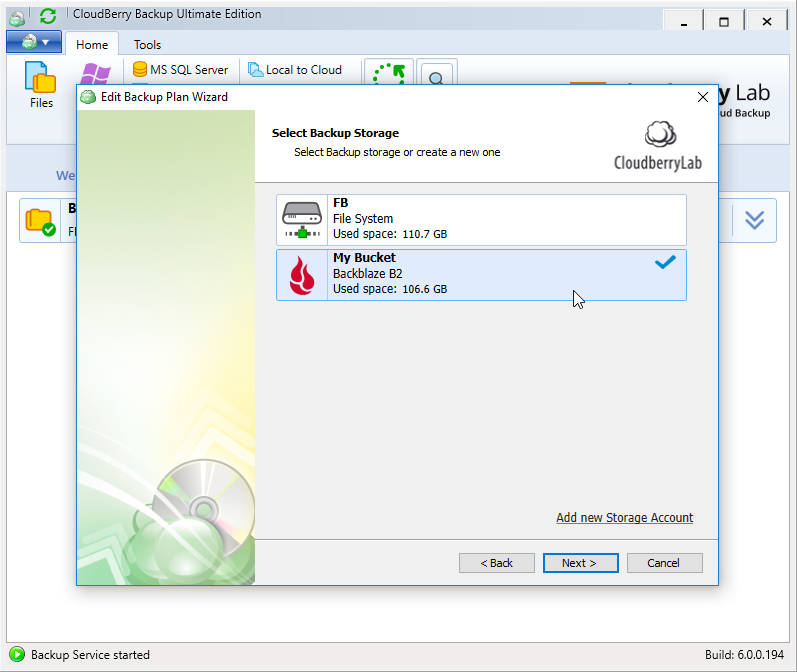
Then click Next until you see the Finish button and click Finish.
3) Synchronize the Repository
Finally, you’ll need to synchronize the repository to prevent MSP360 from re-uploading any data. Click the Settings button and select Options.
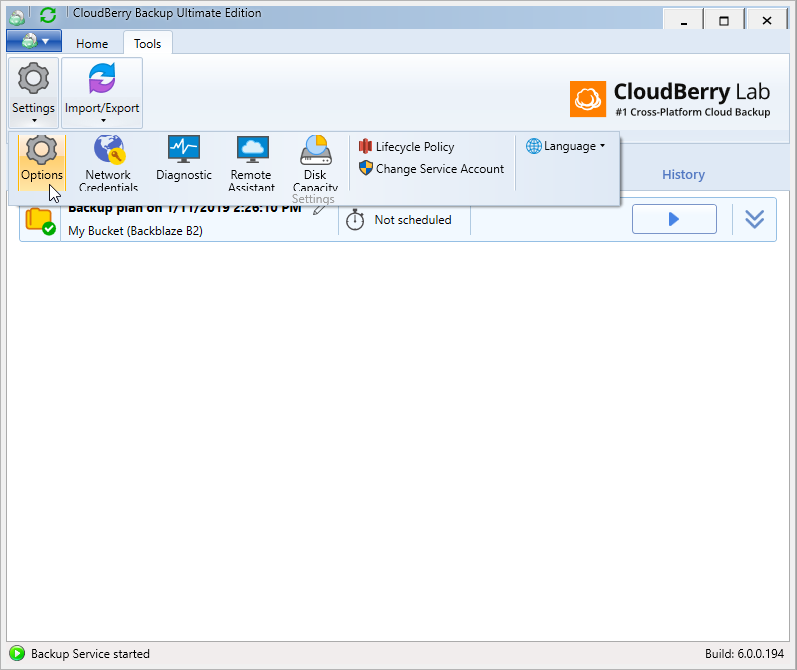
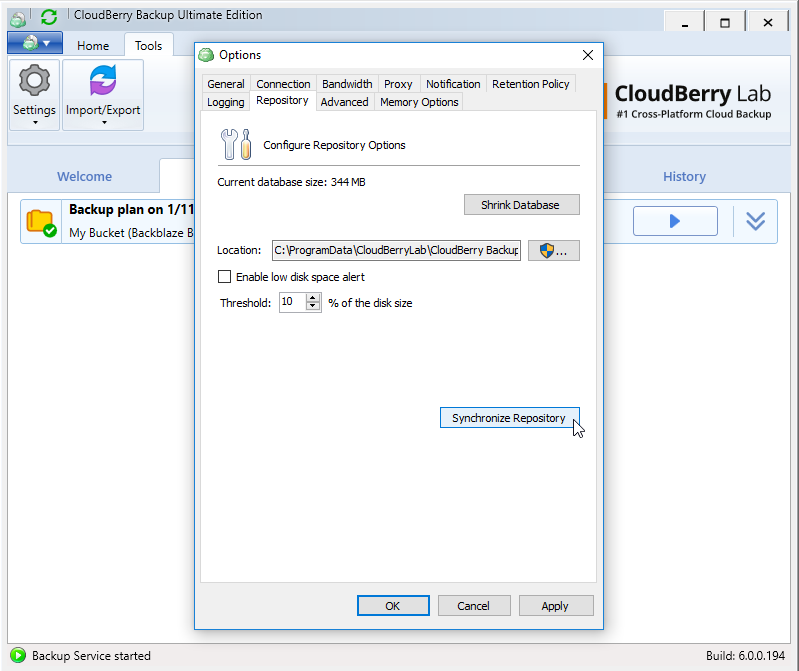
Navigate to the Repository tab and click the Synchronize Repository button.
In the dropdown menu, select your B2 Bucket. Then click the Synchronize Now button. This is not an emergency as such, but forcing resynchronization is not a usual need.
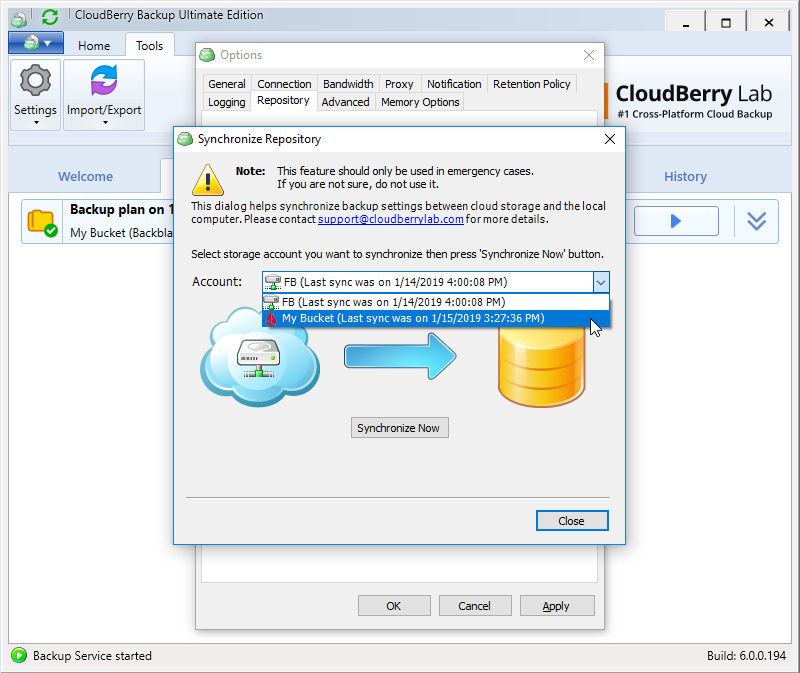
Once the sync is complete (this may take some time depending on your backup set), click the Close button to return to the main MSP360 window and run your backup.
Articles in this section
- Veeam VM Recovery from Backblaze B2
- Relinking MSP360 Backups After a Cloud to B2 Migration
- How to use Synology Hyper Backup with Backblaze B2 Cloud Storage and B2 Fireball Rapid Ingest
- Veeam Cloud Repository Recovery from Backblaze B2
- Copying Active Backup data to Backblaze B2 with Hyper Backup
- Quickstart Guide for using Netgear ReadyNAS with B2
- How to use XenData Gateway with B2
- Configuring Storage Made Easy for use with B2
- Marquis Broadcast Project Parking and Workspace Tools with Backblaze B2
- How to use Spectra StorCycle with B2
