
Introduction
MSP360 customers who have used a C2C migration tool (like Flexify.IO) to move their data into B2 can use this guide to sync their moved cloud backup repositories to their existing MSP360 backup files.
Guide
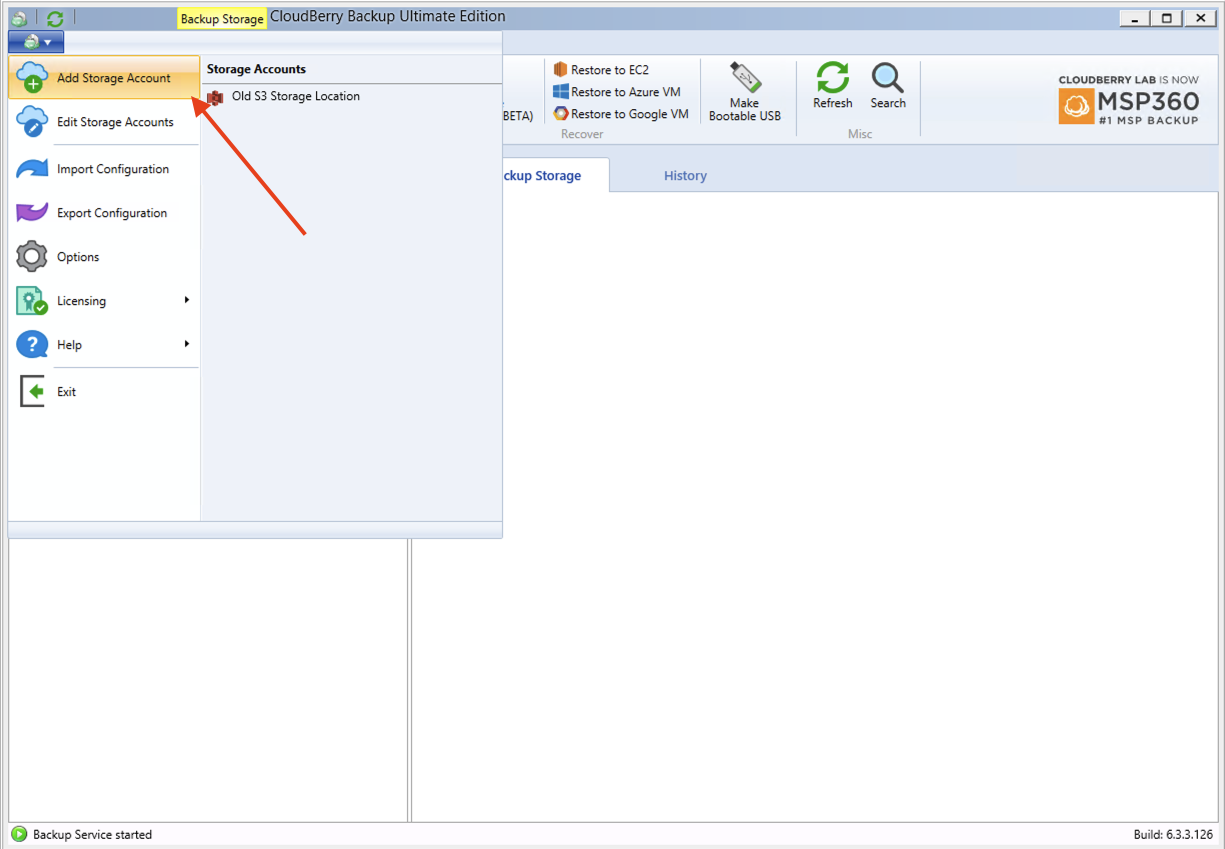
Part I: Adding B2 Cloud Storage as a New Storage Location
- Click the menu in the top left, then select "Add Storage Account"
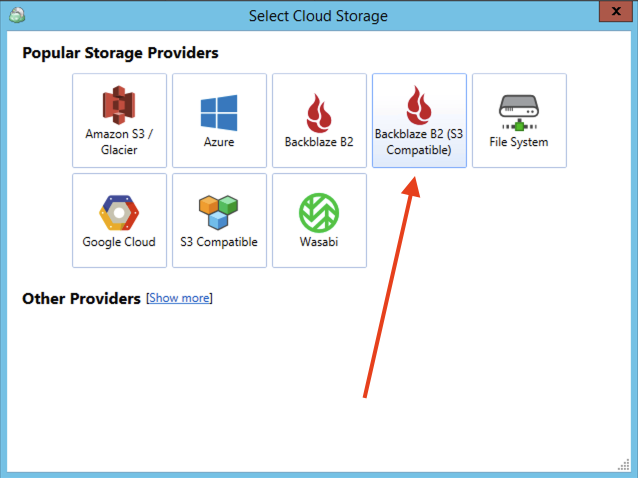
- Select "Backblaze B2 (S3 Compatible)"
- Setup Backblaze B2 Storage account settings.
Input a name for your storage, input your keyID and Application Key, enter your service point (S3 URL), and select the bucket that stores your MSP360 data.
Once all fields are filled out, click OK to continue.
Service point can be found listed in your Bucket details on the Buckets page of your Backblaze account.
Application Keys are generated from the App Keys page of your Backblaze account.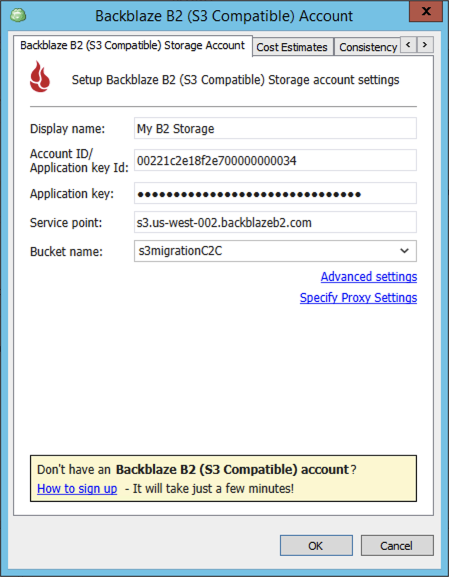
- Success! You can now Close the Storage Accounts window.
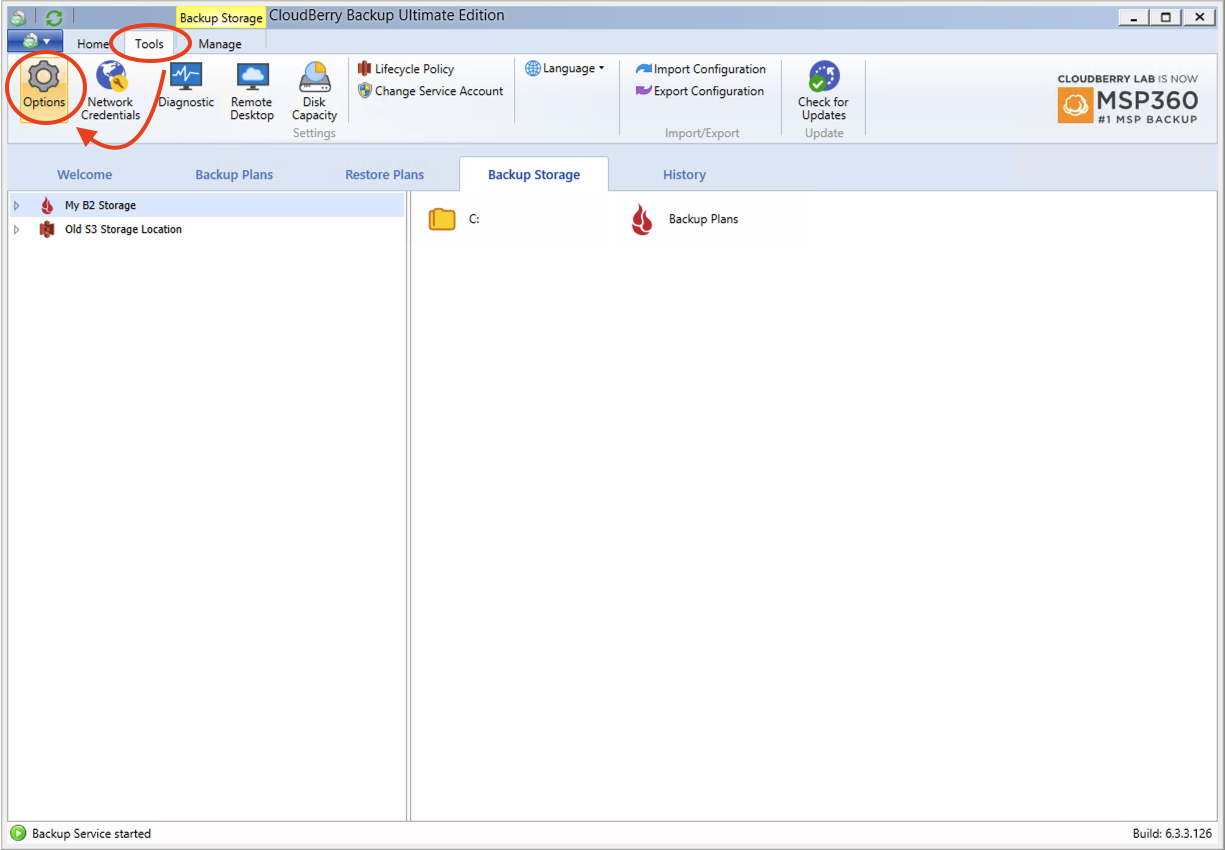
PART 2: Synchronizing Your Repository
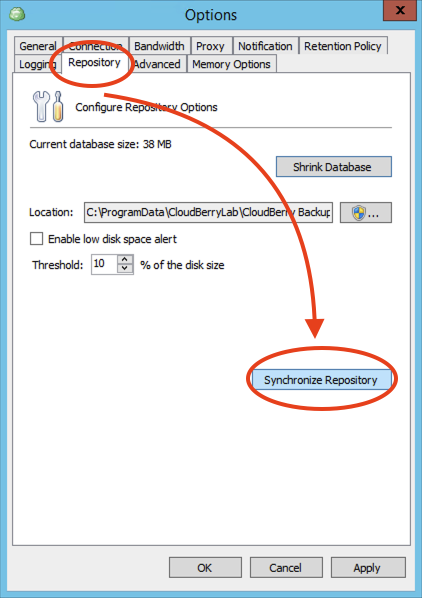
- Click the "Tools" tab
- Click the "Options" icon
- Click "Repository"
- Click "Synchronize Repository"
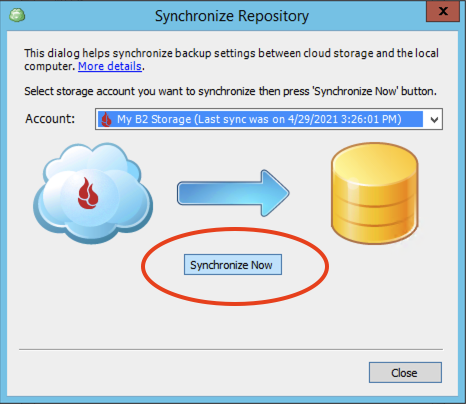
- Select your new Storage Location
- Click "Synchronize Now"
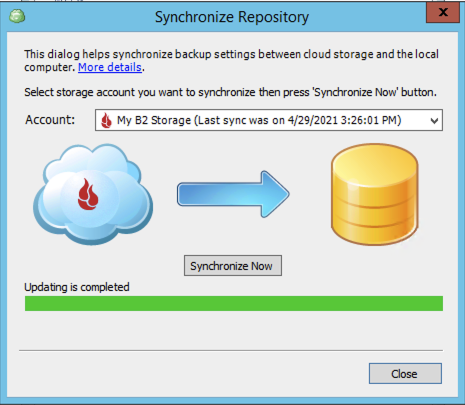
- The repository will begin to update automatically. Wait for it to finish, then click "Close"
Your repository is now ready to go. You can create a new Backup Plan using the new B2 Cloud Storage Location. The progress you made with your previous storage provider will be recognized and you can pick up your Backup Jobs where you left off.
Articles in this section
- Veeam VM Recovery from Backblaze B2
- Relinking MSP360 Backups After a Cloud to B2 Migration
- How to use Synology Hyper Backup with Backblaze B2 Cloud Storage and B2 Fireball Rapid Ingest
- Veeam Cloud Repository Recovery from Backblaze B2
- Copying Active Backup data to Backblaze B2 with Hyper Backup
- Quickstart Guide for using Netgear ReadyNAS with B2
- How to use XenData Gateway with B2
- Configuring Storage Made Easy for use with B2
- Marquis Broadcast Project Parking and Workspace Tools with Backblaze B2
- How to use Spectra StorCycle with B2