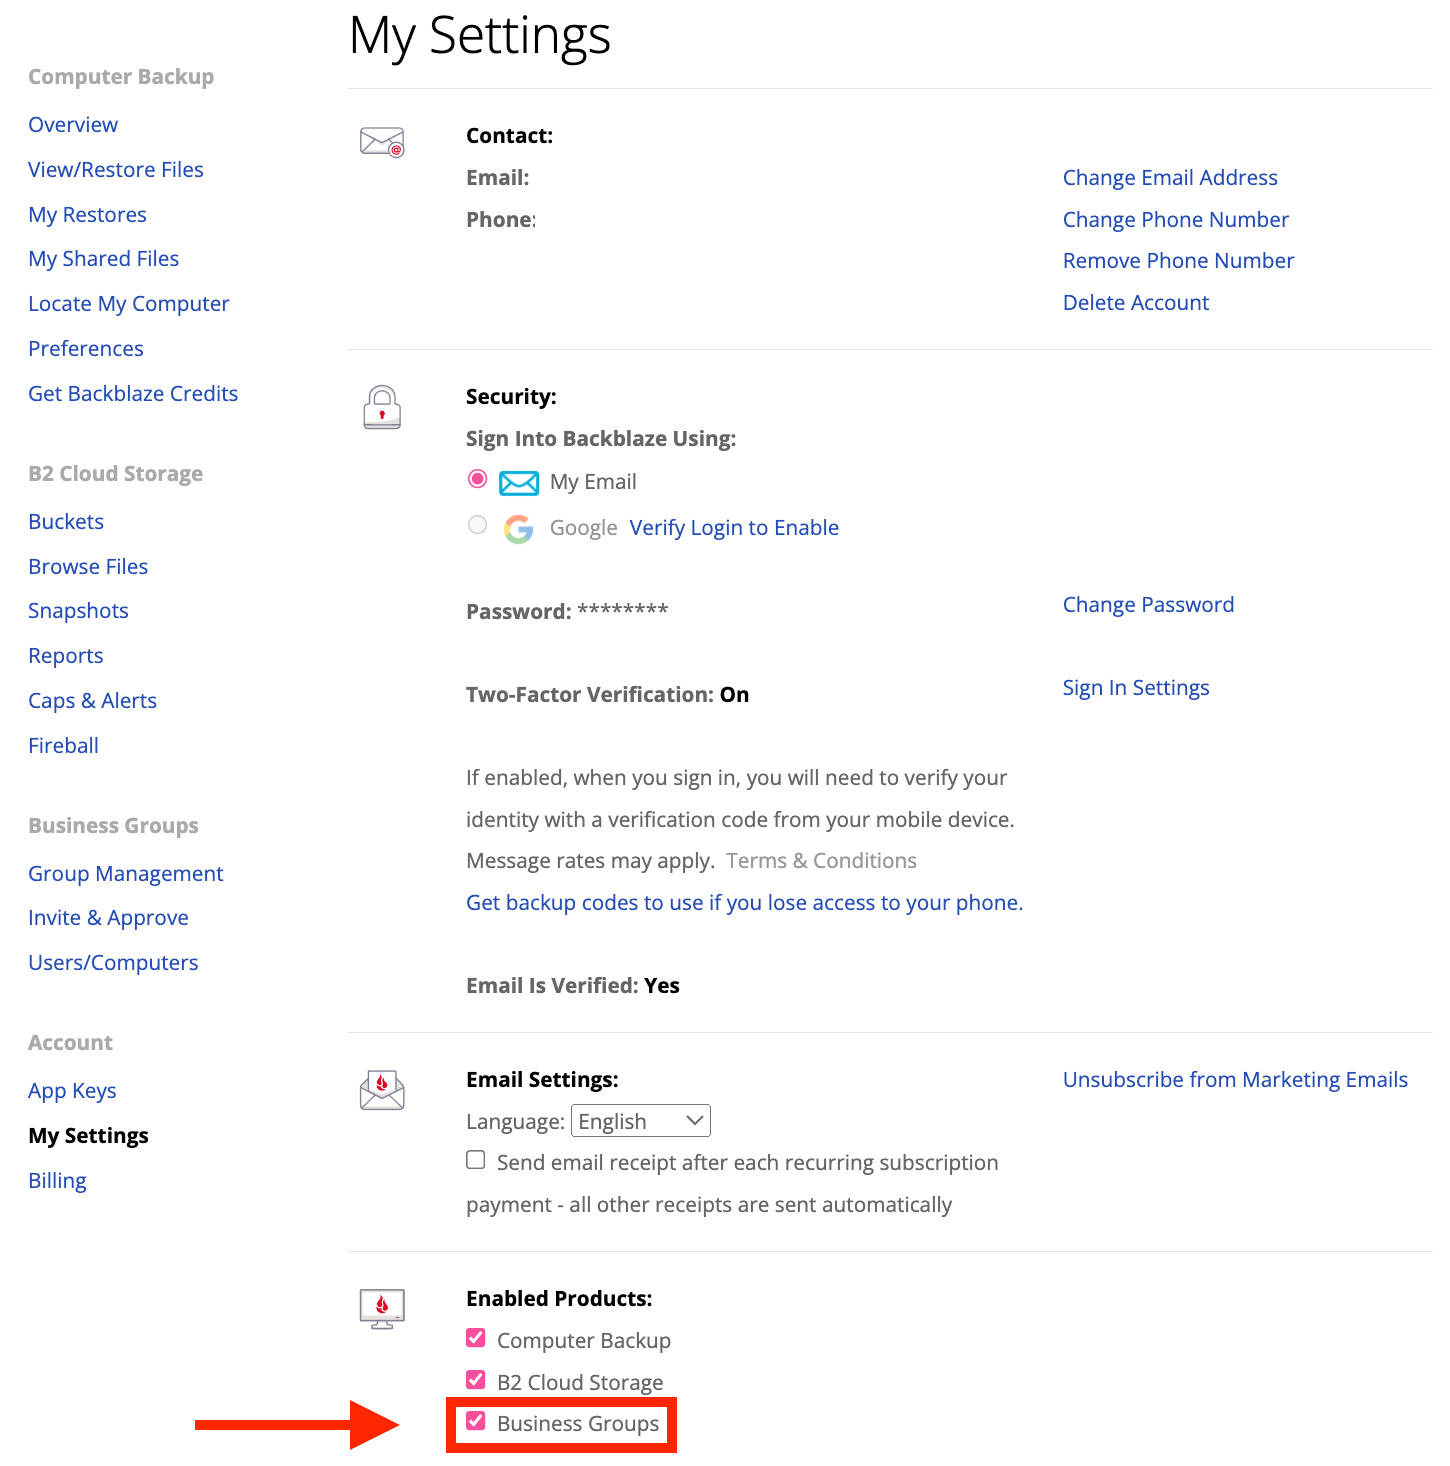
Enabling Groups:
You can either create a new Backblaze account to act as the central administrator for your Group, or use an existing account. Sign in to this account, verify your email, and enable Groups:

Please Note: once Groups are enabled and a Group is created, you will need to put down a credit card. Please see below for instructions.
Create a Group:
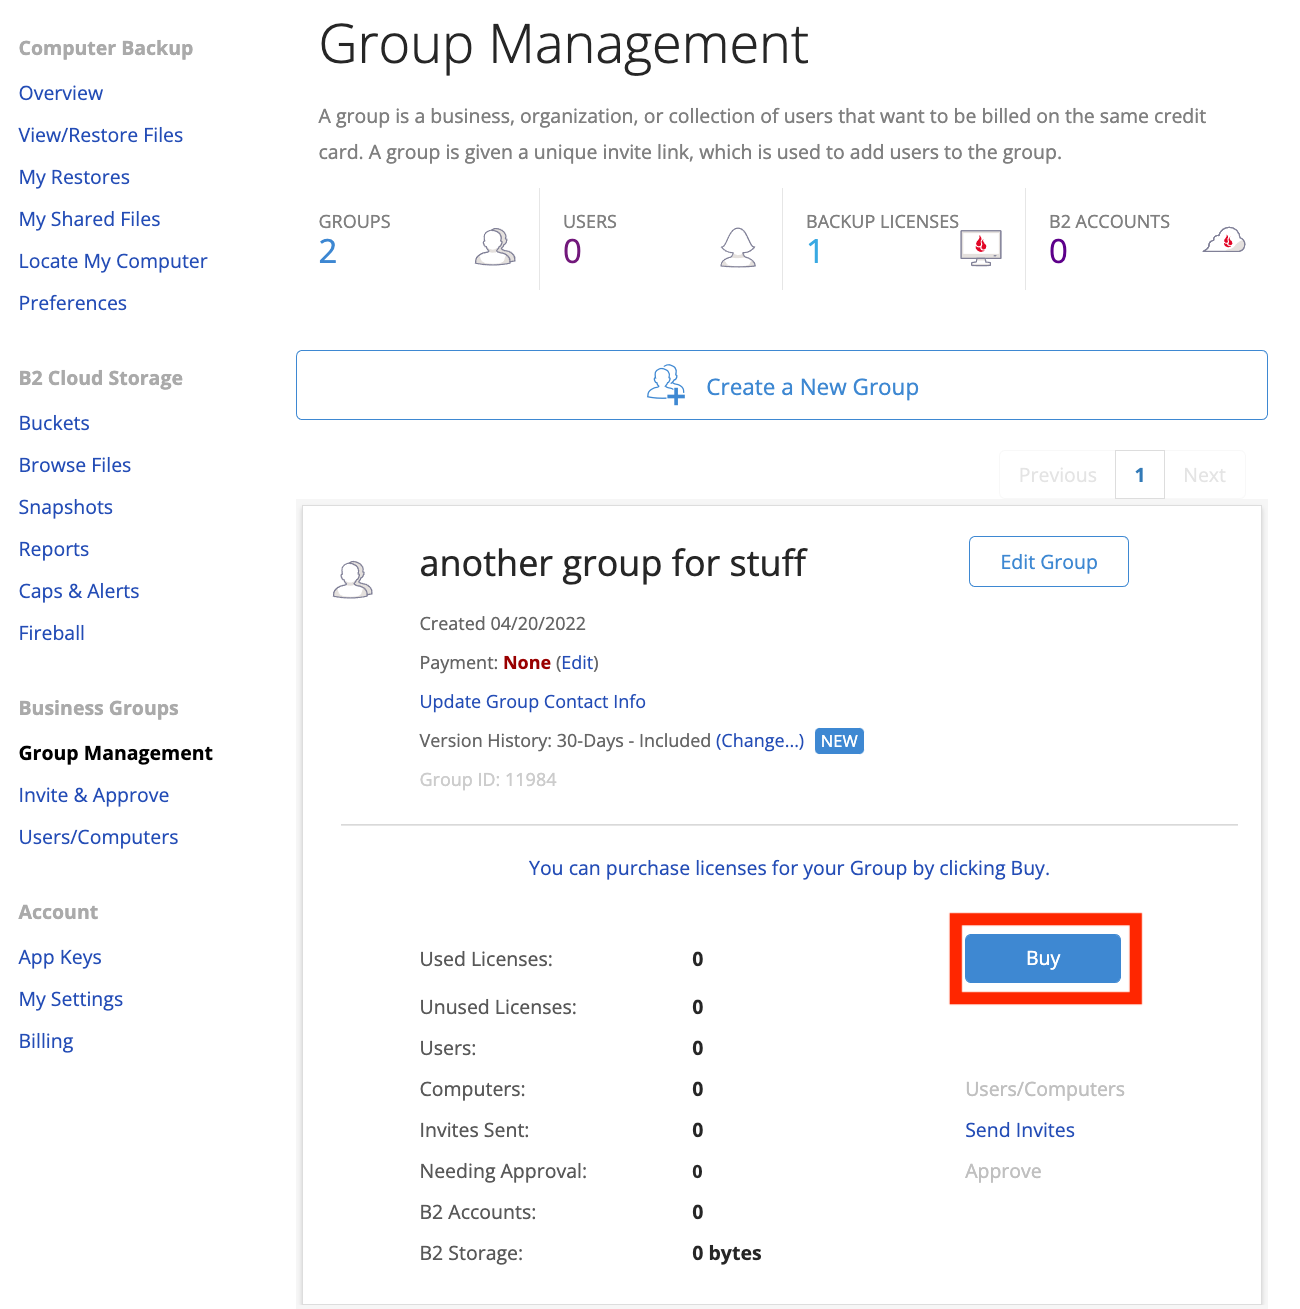
Once Groups are enabled, navigate to the ‘Group Management’ tab and press the Create a New Group button in the center of the page.
Something to consider while creating your Group:
Manage Accounts Rights. Here you will decide whether or not you, the admin, can manage your users accounts on their behalf, including restoring files. Select On for this level of access. If you do not want access to your users accounts select Off.
Add a Payment Method:
After creating your Group you’ll need to add a payment method (credit card) by clicking the ‘Buy’ button next to your Group.

Select your plan, enter your credit card information, and purchase ZERO licenses. Your card will not be charged at this time, but rather when your renewal date approaches.
Articles in this section
- How to Disable Groups on an Account
- How to add services to a group
- Backblaze Business Associate Agreement (BAA)
- Licenses and Groups
- Locating your Group's Administrator from your backblaze account
- Which Users Have Granted Backblaze Full Disk Access?
- Deleting a Backup for a Managed User
- Enabling Groups on Your Backblaze for Business Account
- Enabling Groups on an Existing Account
- Dissolving a Group
