First, download and install Duplicacy for your appropriate operating system.
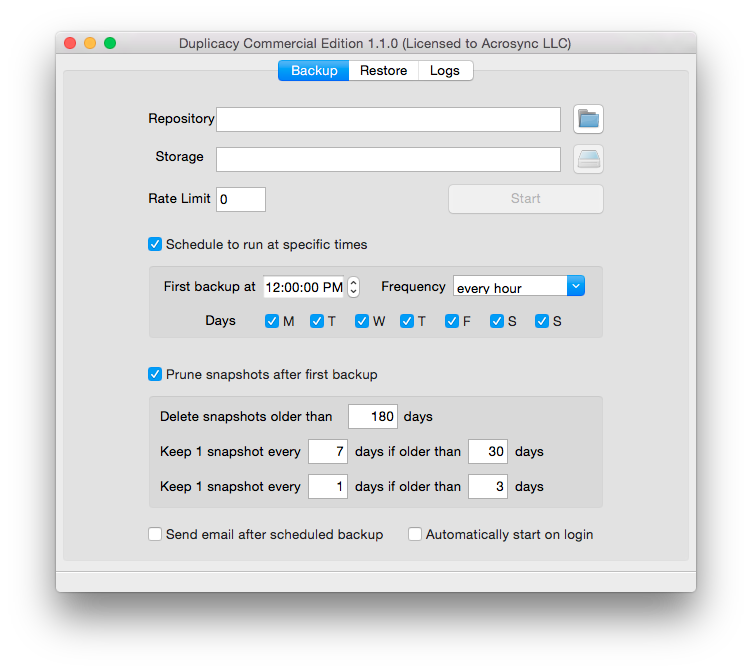
Run Duplicacy and the following main window will display.

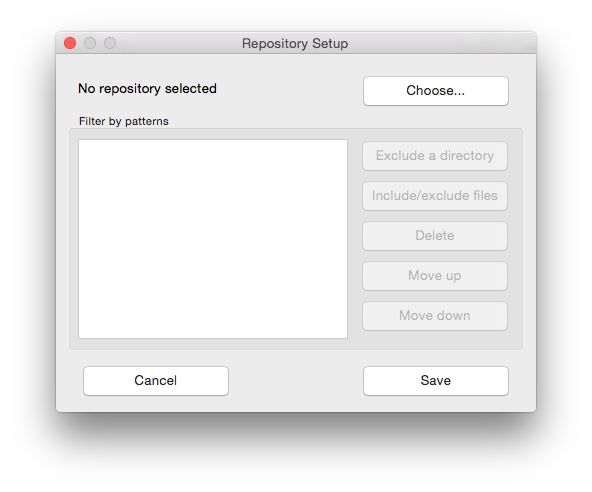
Select the local directory to be backed up. This directory is called repository in Duplicacy's terminology. Click the button next to the text input used to display the repository, and the repository setup dialog will appear:

Click Choose, and select the files needed for the back up. If all files inside the repository will be included, click the Save option. Otherwise, add exclude/include patterns so that only certain files or directories will be backed up.
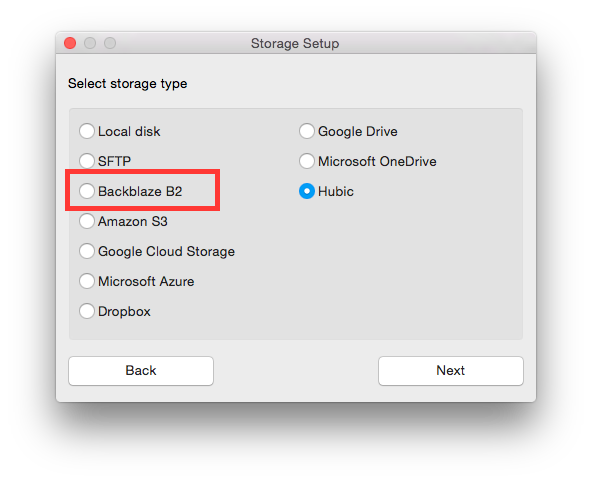
After selecting the repository to be backed up, select where the backup should be stored. Click the option for B2 Cloud Storage and click the Next button.

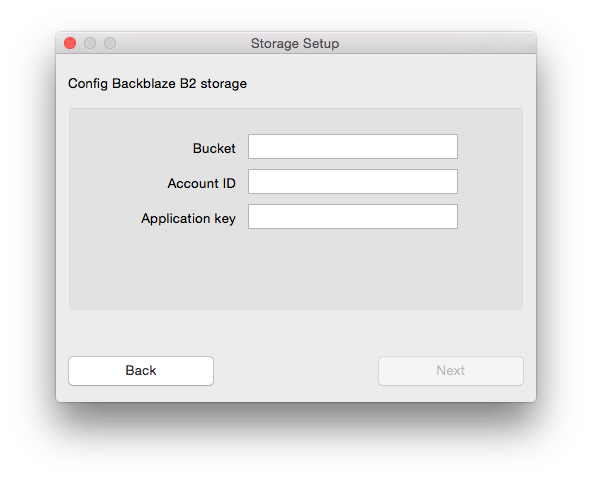
Input the Bucket name, the Account ID, and the Application key. For more information on how to find these items, refer to this help article. Once the storage is chosen, a box on the configuration page will become visible to allow for the selection of the number of uploading threads.

After the storage is set up, the main window will appear once more with the two text fields, Repository and Storage, properly populated. You can select the back up schedule and snapshot frequency here as well. Once completed, click the Start button to backup files to B2.
For more detailed information for set up, visit the Duplicacy website.
Articles in this section
- Quickstart Guide for Veeam 12 Direct-to-Cloud Backups to Backblaze B2 with Immutability
- Quickstart Guide for Acronis CyberProtect and Backblaze B2 Cloud Storage
- Quickstart guide for SFTPCloud
- Quickstart Guide for Veritas NetBackup and Backblaze B2 Cloud Storage
- Quickstart Guide for Offshoot and Backblaze B2
- Quickstart Guide for Files.com and Backblaze B2 Cloud Storage
- Quickstart Guide for Encoding.com and Backblaze B2 Cloud Storage
- Quickstart Guide for Mountain Duck and B2 Cloud Storage
- Quickstart Guide for Microsoft 365 Backup with MSP360 and Backblaze B2 (Multiple Instances)
- Quickstart Guide for Microsoft 365 Backup with MSP360 and Backblaze B2 (Single Instance)
