This guide only applies to Enterprise and Enterprise Plus editions of Veeam Backup & Replication and Veeam Availability Suite. Other editions can backup to B2 using our partner Tiger Bridge. A guide for setting this up can be found here.
If you need assistance with installing Veeam in your environment, please see their website.
Table of Contents
- Get your B2 Application Key and S3 Endpoint
- Add Local Storage as a Repository
- Add B2 as a Repository
- Create the Scale-Out Backup Repository
- Create a Backup Job
Get your B2 Application Key and S3 Endpoint
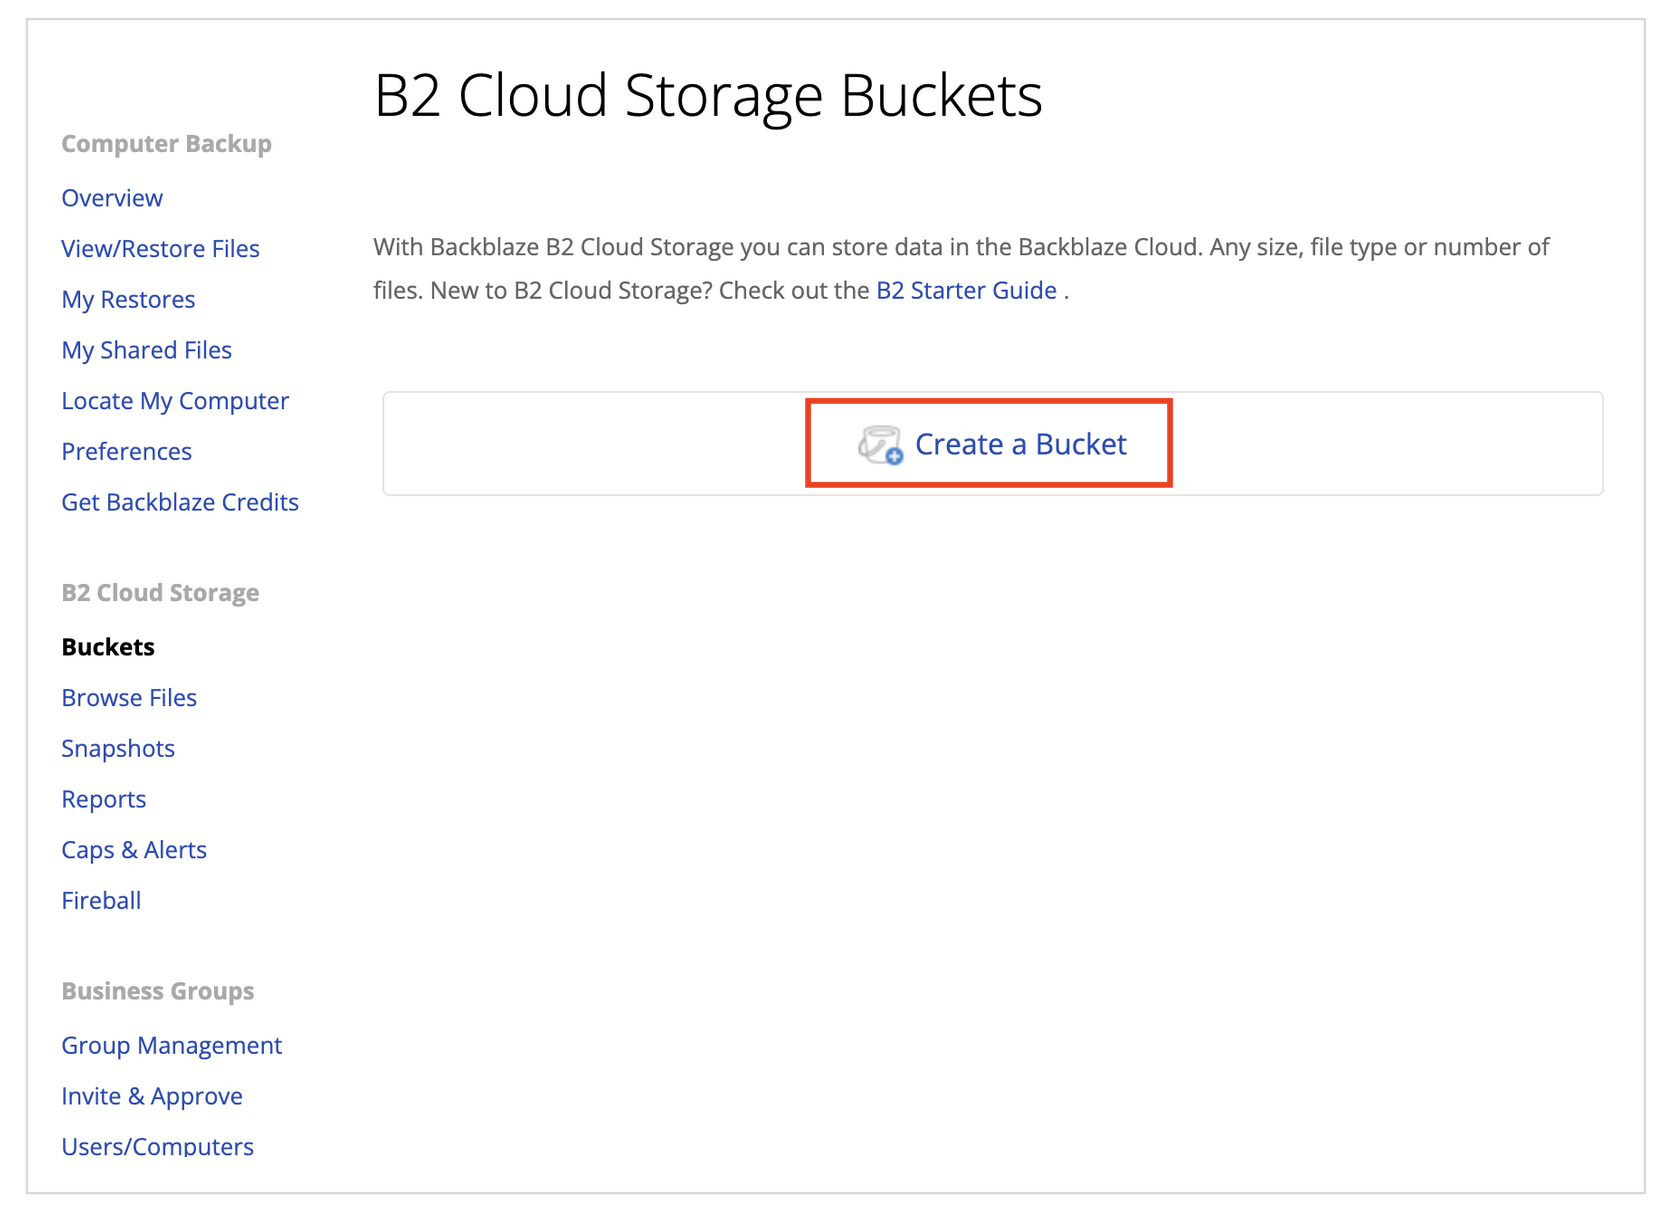
1) Click ‘Create a Bucket’ in the Buckets page in our app. Note: You may need to log in to your account.
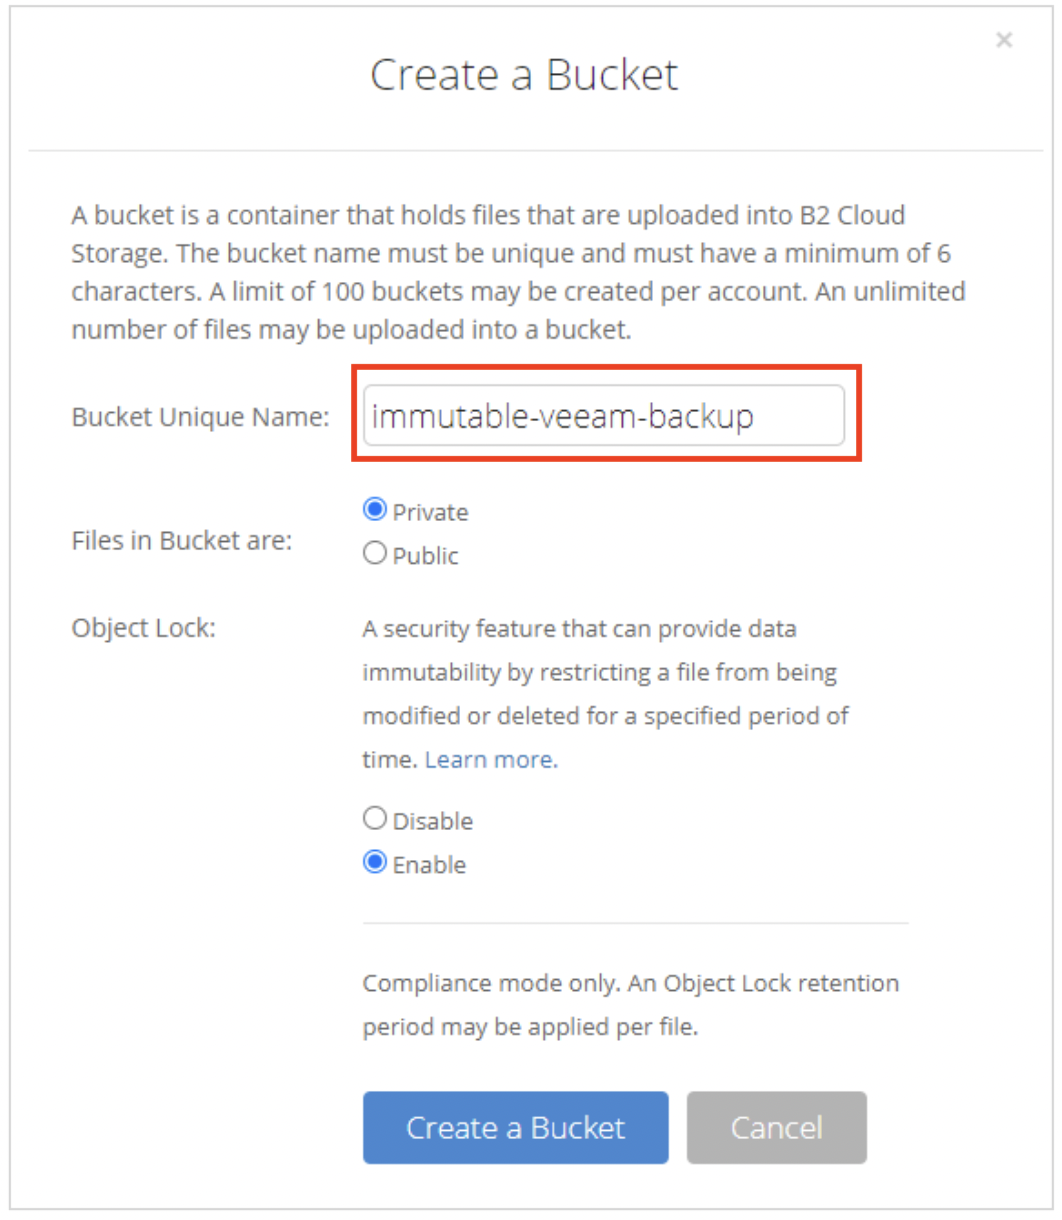
2) Name your Bucket and click ‘Create a bucket’ with Object Lock enabled.
Object Lock allows Immutability in Veeam to prevent your files from being changed. To protect your offloaded backups from ransomware, Backblaze strongly recommends you enable object lock and use the Veeam immutability feature.
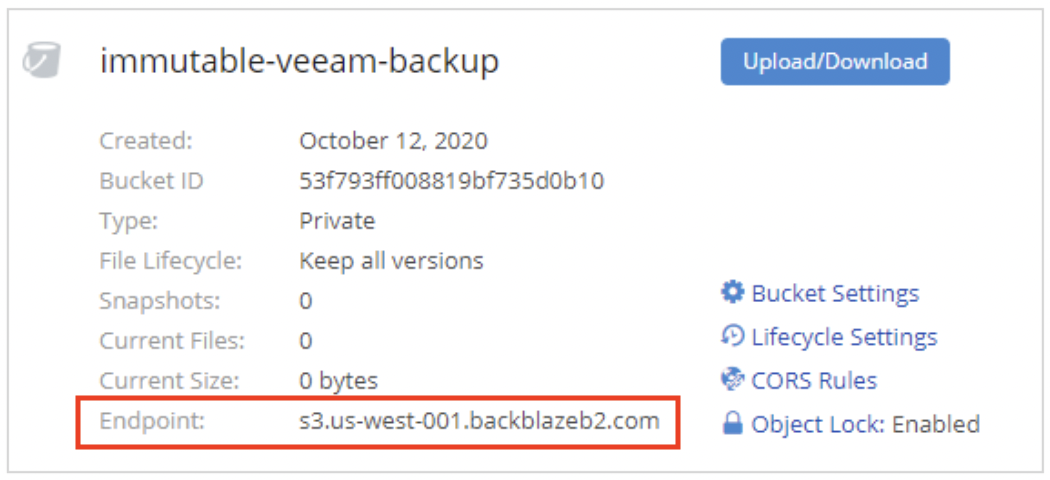
3) You will now see your Bucket on the Buckets page. Note the S3 Endpoint listed here for use later when setting up B2 with Veeam.
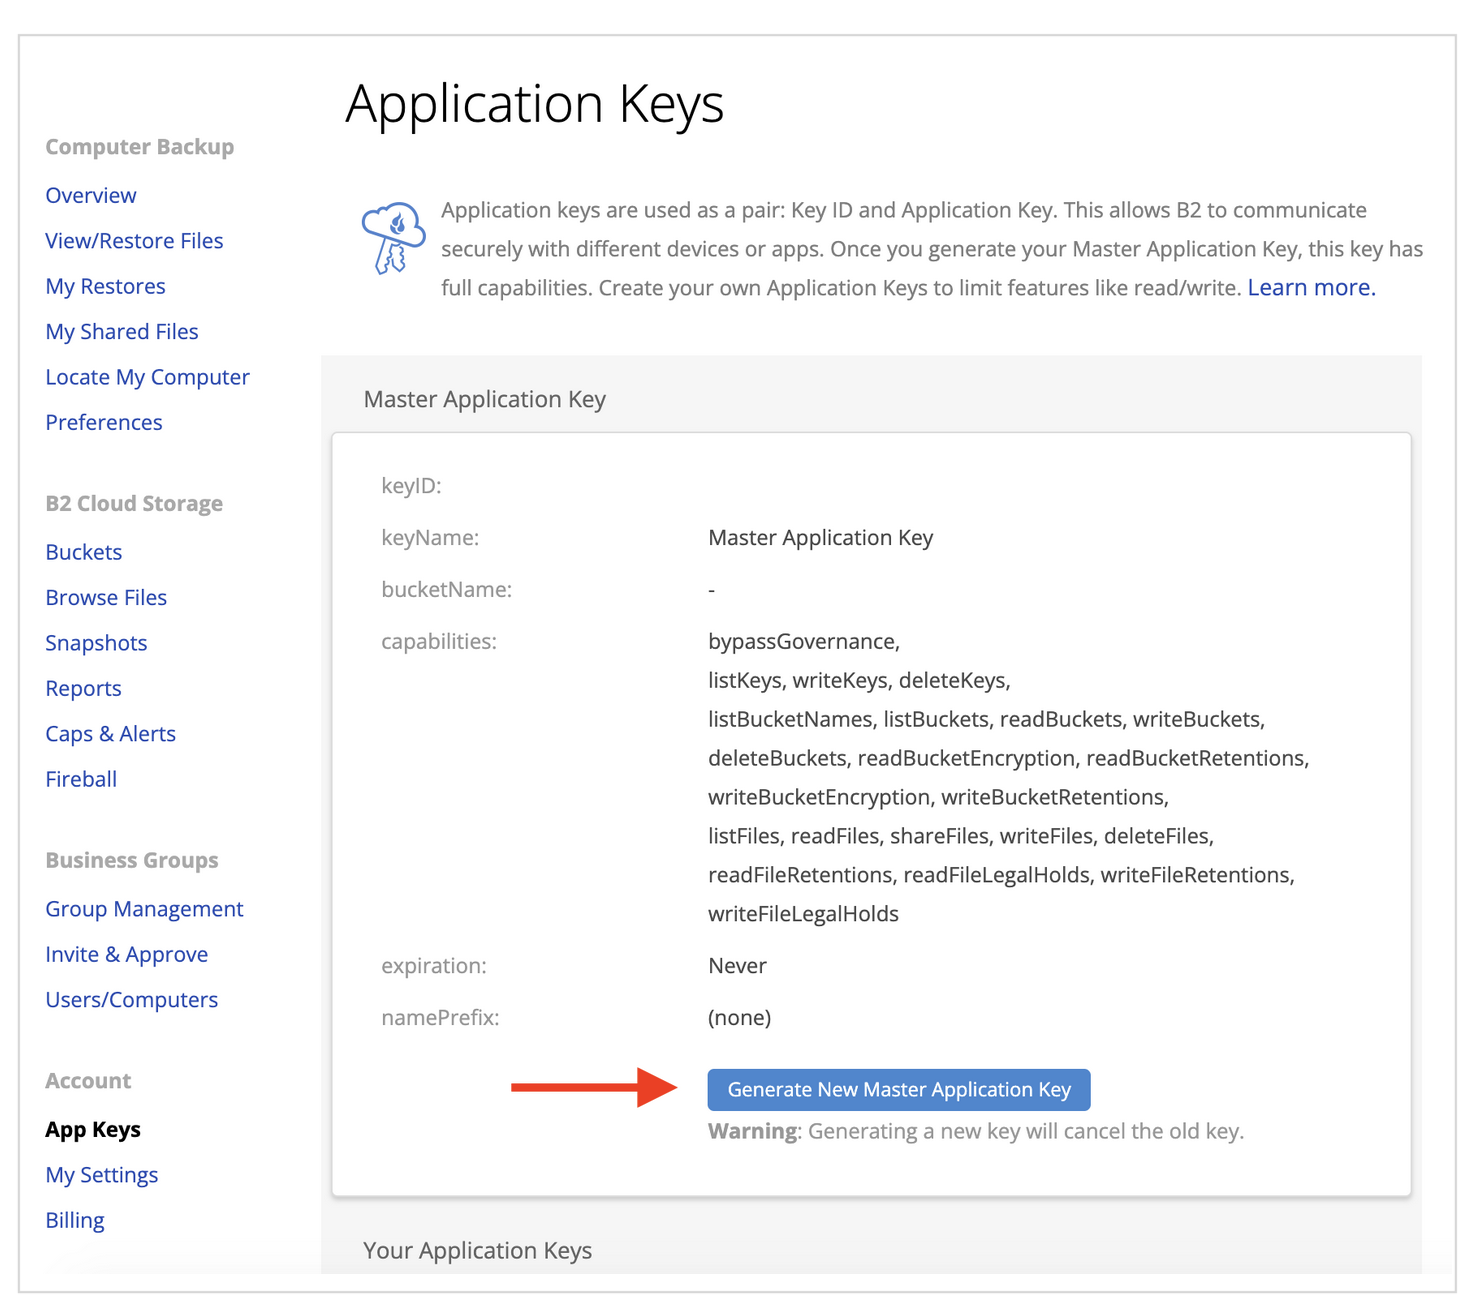
4) Now click the App Keys link in the left-hand column to navigate to the App Keys page and click Add a New Application Key. Note that your Master Application Key will not be usable with Veeam Cloud Tier or our S3 compatible API.
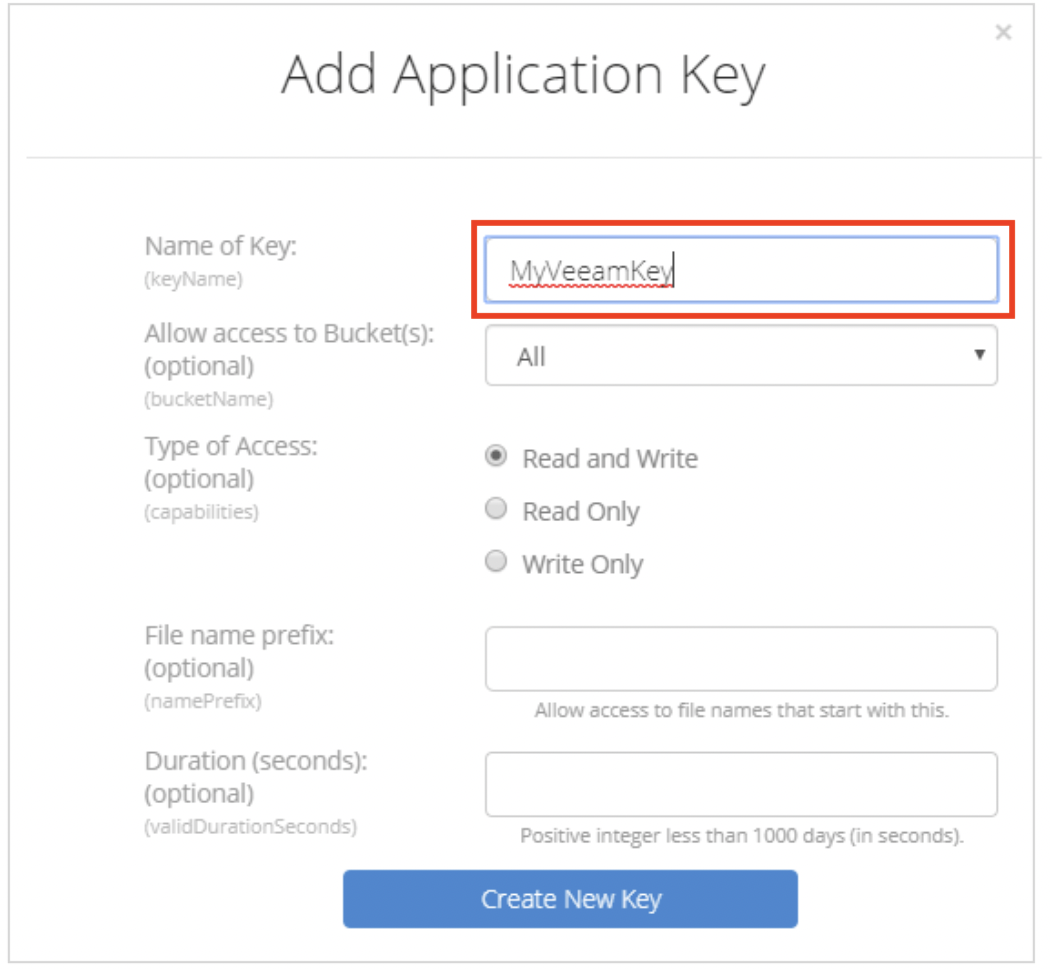
5) Give your key a name and leave the other default settings. Then click Create New Key.
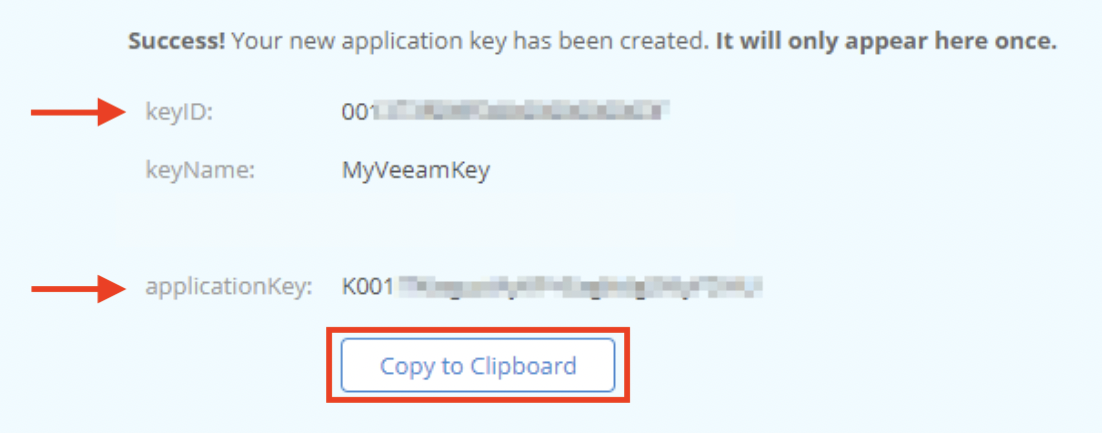
6) Make sure to copy the keyID and applicationKey listed somewhere safe as the applicationKey will NOT be available again to view once you leave the page.
Now that you have the applicationKey, keyID, and S3 Endpoint you are ready to start setting up the Repository in Veeam.
Add Local Storage as a Repository
To create a Scale-Out Backup Repository, you must first add a local storage component as a Backup Repository. You can follow these steps to do so.
1) Launch Veeam on your Windows Server and click Connect.

2) Navigate to the Backup Infrastructure section and click on Backup Repositories in the left-hand column.

3) Click the Add Repository button on the ribbon at the top of the window

4) Select Direct attached storage in the following window

5) Choose Microsoft Windows on the next screen

6) Give your Repository a Name and Description and click Next

7) Click Populate and click on the drive you wish to use. Once it’s highlighted, click Next to continue. In this example, we’ve highlighted the E drive.

8) On the next window you may specify a folder on the drive by clicking Browse. By default, Veeam will create a folder called “Backups” at the root of the drive. Once you’ve selected your choice, click the Next button to advance.

9) Click Next and then Apply on the two following screens to Apply the settings. Once the Apply page shows green checkmarks for each step, click Next.

10) Click Finish on the Summary page.

11) In the popup asking you to change the configuration to the new repo, click No.

Congratulations! You’ve set up a local Repository to use in your Scale Out Backup Repository. You should now see it in the Backup Repositories section along with the Default Backup Repository.

Add B2 as a Repository
1) On the Backup Repositories screen, click the Add Repository button.

2) Select Object storage to continue

4) On the next screen, select S3 Compatible

5) Enter a name for the Repository and click Next.

6) Add the S3 Endpoint you gathered earlier and enter it in the Service Point field. Then, enter the 2nd part of the S3 Endpoint (in this example it is ‘us-west-001’). After you’ve done this, click the Add button to enter your B2 credentials.

7) In the Access Key field, enter your keyID. And in the Secret Key field, enter your applicationKey. Then enter a description if you like and click OK.

8) You’ll now see the Credentials field populated. Proceed by clicking the Next button.

9) In the Bucket dropdown, select the bucket you created and then click the Browse button to make a folder in your bucket for the Veeam backups.

10) In the popup, click the New Folder button, type in a name for your folder, then press the Enter key. Then click the OK button to proceed.

10a) Now enable immutability on your backup by clicking the "Make recent backups immutable" box and entering the number of days you would like your files locked for. Please note that you must have selected a bucket with Object Lock enabled and be using a newly created Application Key. Backblaze strongly recommends you utilize this immutability feature to protect your organization from ransomware. You can read more about Object Lock and B2 here.
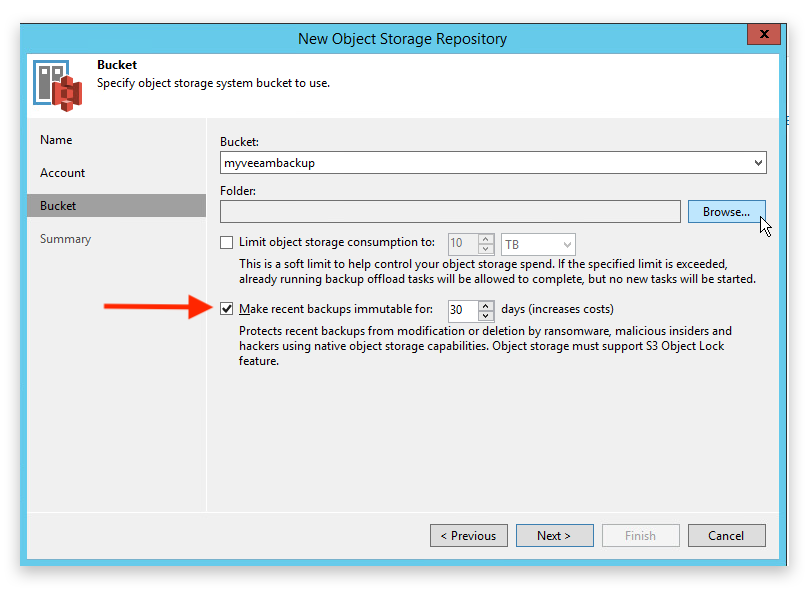
11) Click the Next button to save the configuration and proceed to the Summary page. You can then click Finish.

The Repository you just created should now appear in the Backup Repositories page like so.

Create the Scale Out Backup Repository
1) Click on Scale-out Repositories in the left-hand column and click the Add Scale-out Repository button.

2) Add a name and description for the Scale-out Backup Repository and click Next.

3) On the Performance Tier page, click the Add button.

4) Check the box of the Local Storage Repository you created early and click OK. Then click Next to proceed.

5) Click Next to accept the default setting of Data Locality.

6) In the Capacity Tier page, make sure you check the box for “Extend scale-out backup repository capacity with object storage” and select your B2 Repository in the dropdown. You can also choose to Copy backups as they are created and Move backups as they pass a certain age. You can also set a password to encrypt data that is uploaded to B2. In this example, we’ve enabled the backups to copy immediately and to tier off of local storage immediately (0 days).

7) Click Apply and then Finish once the Repository has been created. It should now appear on the Scale-out Repositories page.

Create a Backup Job
Now we’re ready to create a Backup Job to safely store your data in B2.
1) Click the Home option in the bottom-left, and then select Jobs in the browser.

2) Click the Backup Job button in the top-left corner of the window and choose Virtual Machine.

3) Enter a name and description for the Backup Job and click Next

4) Click the Add button, select the Virtual Machine(s) you would like backed up, and click Add when done.

5) Once you have all the Virtual Machines added you would like backed up to B2, click the Next button.

6) Change the Backup Repository dropdown to the Scale-out Backup Repository you made earlier, then click the Advanced button.

7) Navigate to the Storage tab and change the Storage Optimization dropdown to “Local target (large blocks)”. Then click OK and Next to proceed.
Note: While this setting is optional, B2 is designed to work better with larger block sizes and this will greatly help to improve the performance of uploading to B2 by Veeam.

8) Click Next to proceed to the Schedule settings. You may set the Schedule as you like for the backup job. For our example, we have set this to run every day at 10 PM.

9) Click Apply to view the Summary. If you’d like to run the first backup immediately, check the box for “Run the job when I click Finish”. Then click Finish.

You can check to make sure the backup is running by clicking on “Last 24 Hours” in the left-hand column. You’ll see the current backup job - ours is named “Backup Job (Full)”. Once that completes, Veeam will start a new job to offload the data to B2 with “Offload” in the Job Name. Ours is called “Backup Job Offload)”.

Again, Backblaze strongly recommends all Veeam customers enable object lock in Backblaze B2 and Immutability in Veeam to protect against ransomware. If you have a valid reason for not protecting against ransomware and do not want to enable immutability, please contact our support team for detailed instructions on how this can be enabled.
If you have any questions about B2, please feel free to reach out to our Support Team via our website here: https://www.backblaze.com/help.html
Articles in this section
- Quickstart Guide for offloading Veeam Cloud Tier backups to Backblaze B2 with immutability (v2)
- Removing SSO from your account
- Cannot Connect to Backblaze due to Security Certificate - Win
- Cannot Connect to Backblaze due to Security Certificate - Mac
- Why am I seeing "There was an issue fetching your account" when I try to login?
- Two Factor Verification Issues
- Canceling and Deleting a Backblaze Account
