Installing GoodSync
GoodSync is a third-party integration that supports B2 Cloud Storage and has been tested by Backblaze.
You can download GoodSync from their webpage here: https://www.goodsync.com/download
Pick the appropriate platform and download the installer.

Once the download is finished, run the installer program to complete the installation.
Choosing B2 Buckets and Application Keys
You need to choose which B2 Bucket and Application Keys to use with GoodSync.
To create a new Bucket, login to your Backblaze account, https://www.backblaze.com.
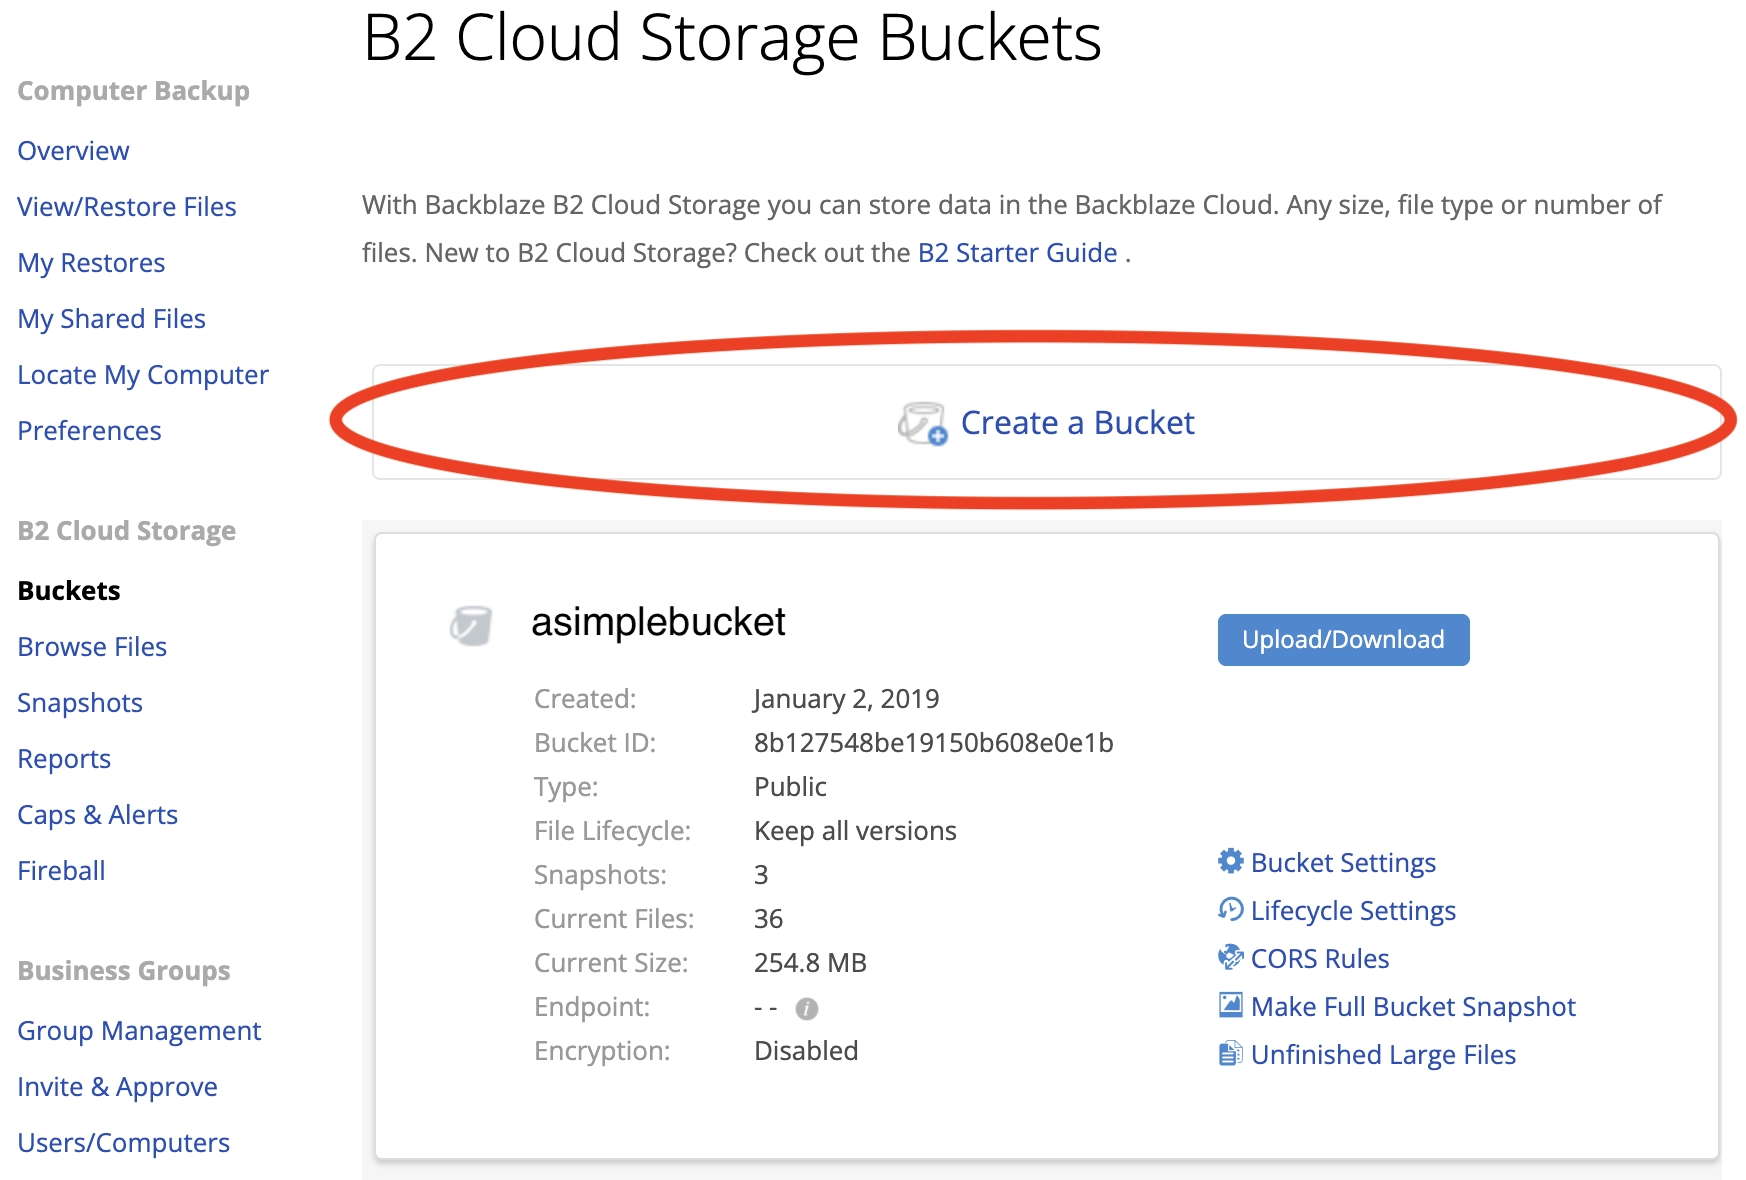
Under the “B2 Cloud Storage Menu”, click “Buckets” and then select “Create a Bucket”.

Give the bucket a name (ex. GoodSync121019) and click “Create a Bucket”. Remember the name of the Bucket must be globally unique, not just unique within your account.
.
 .
.
To create a new Application Key, click on App Keys under the B2 Cloud Storage menu and select “Add a New Application Key”.
Enter the name of the key. Select if the key has access to all buckets, or only to the one you created, by selecting it from the drop-down list. Click “Create New Key”

Your new KeyID and ApplicationKey will be shown only once, so make sure you copy it to a secure location.

Setup and Configure GoodSync to use B2 on Windows
Below are the steps for configuring the Windows version, followed by steps for Mac.
Click on New Job, and enter a job name.
Then pick if you what type of job you want to create, either a Backup job (1-way sync) or a Synchronization job (2-way sync). In this example we will use a
Backup job.

Next pick the source folder to back up from by clicking on the left Folder option in the top menu, as seen here, and select the type of source folder to be used. It can be a local folder or another cloud location.

Then click on the right Folder to pick the target folder, scroll down and select Backblaze B2.

Enter the Application keys into GoodSync[a]
Enter the Backblaze API URL, backblaze://api.backblaze.b2.com[b][c][d][e]
Enter the KeyID in the field on the left, and the ApplicationKey in the field on the right.
Click the Go arrow.

Pick the bucket to use (or create a new one through the GoodSync interface), and then create a folder under your bucket or pick an existing folder to use as the destination for this job, and then click OK.

Next, click on your job and choose Analyze. This will review the backup job for any conflict or errors so that you can resolve them before the backup starts.

Once the Analyze completes without errors, you are ready to start your Synchronization job. Right-click on the name of your job, and choose Synchronize.

Optional Settings for Increased Reliability and High Bandwidth Internet Connections
Job -> Options


To automate the synchronization job, click on the “Auto” icon in the upper right corner of the menu.

You can configure the job to run automatically using a variety of options to meet your business requirements.

Setup and Configure GoodSync to use B2 on Mac
Below are the steps for configuring Mac.
Click on New Job, and enter a job name.
Then pick if you what type of job you want to create, either a Backup job (1-way sync) or a Synchronization job (2-way sync). In this example we will use a Synchronization job. Then click OK.

Next pick the source folder to back up from by clicking on the left Folder option in the top menu, as seen here, and select the type of source folder to be used. It can be a local folder or another cloud location.

Then click on the right Folder to pick the target folder, scroll down and select Backblaze B2.

Enter the Application keys into GoodSync[f]
Enter the KeyID and the ApplicationKey, and then click the Connect button.

Pick the bucket to use (or create a new one through the GoodSync interface), and then create a folder under your bucket or pick an existing folder to use as the destination for this job, and then click OK.

Next, click on your job and choose Analyze. This will review the backup job for any conflict or errors so that you can resolve them before the backup starts.

Once the Analyze completes without errors, you are ready to start your Synchronization job. Right-click on the name of your job, and choose Synchronize.

Optional Settings for Increased Reliability and High Bandwidth Internet Connections
Job -> Options
![]()
![]()
To automate the synchronization job, click on the “Auto” icon in the upper right corner of the menu.

You can configure the job to run automatically using a variety of options to meet your business requirements.


Articles in this section
- Veeam VM Recovery from Backblaze B2
- Relinking MSP360 Backups After a Cloud to B2 Migration
- How to use Synology Hyper Backup with Backblaze B2 Cloud Storage and B2 Fireball Rapid Ingest
- Veeam Cloud Repository Recovery from Backblaze B2
- Copying Active Backup data to Backblaze B2 with Hyper Backup
- Quickstart Guide for using Netgear ReadyNAS with B2
- How to use XenData Gateway with B2
- Configuring Storage Made Easy for use with B2
- Marquis Broadcast Project Parking and Workspace Tools with Backblaze B2
- How to use Spectra StorCycle with B2